Author Archives: Amber

Monday, September 5, 2011

Vegan Banana Teff Pancakes (gluten, dairy free, nut free)

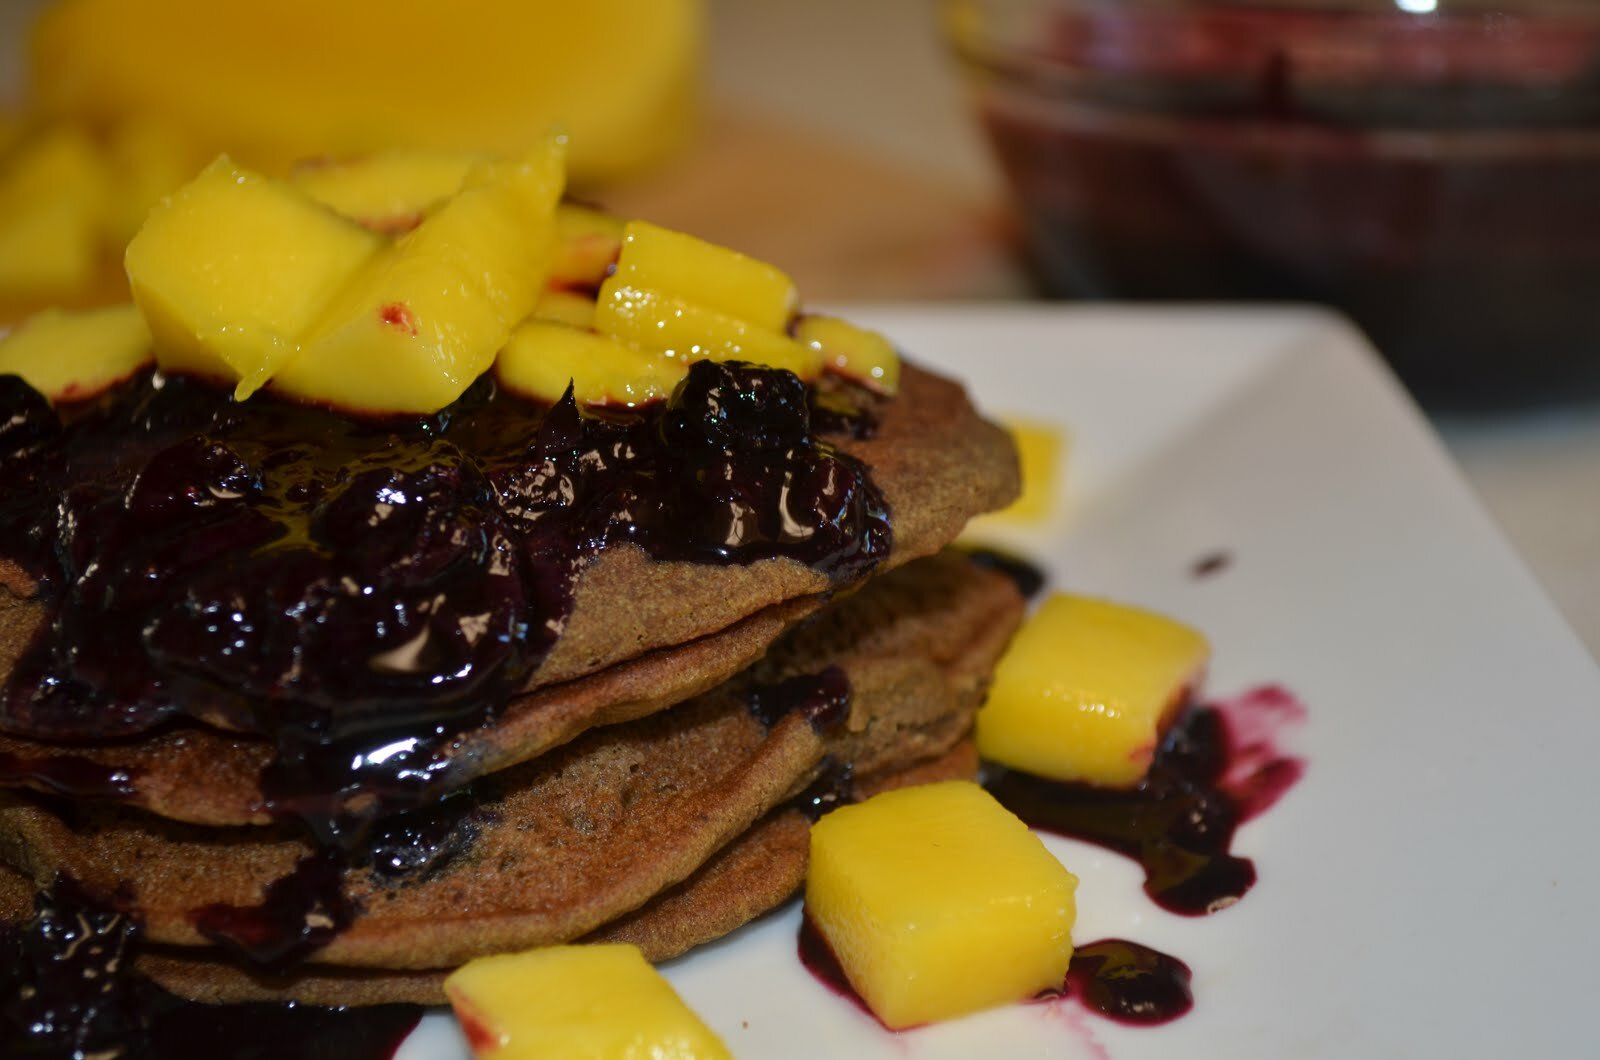
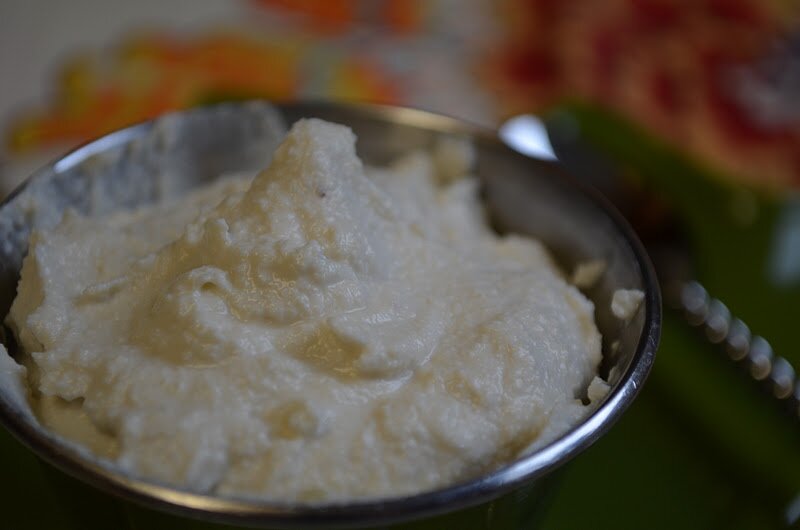
When it comes to pancakes we are all about the teff in this house.  I happen to adore the flavor of teff and these pancakes are truly cake-like.  We tried for years to find a suitable dairy free, gluten free pancake and when we came across a teff recipe for pancakes we quickly made it our own through experimentation.  Believe it or not this batter contains zero egg!  We also found the flavor was best by just using water.  It’s such a simple recipe, so perfect for those lazy weekend mornings, with so much wonderful flavor.  We generally make them plain, but once in a while add a banana for real knock-out flavor.  

Ingredients
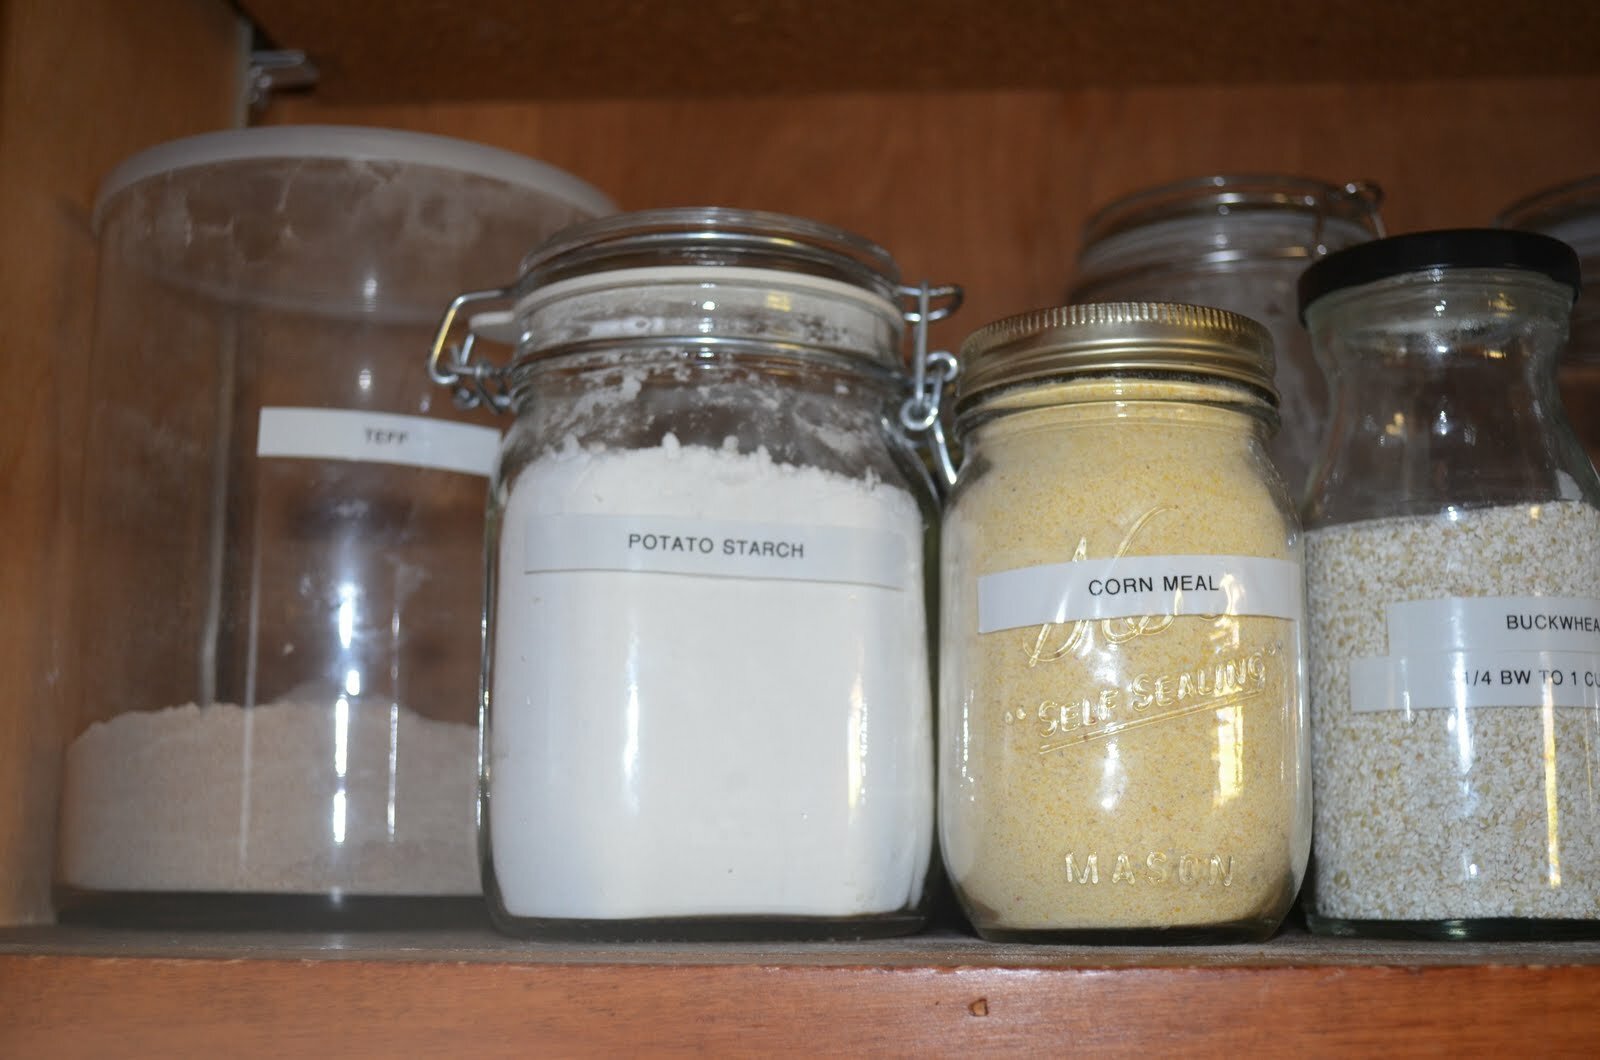
-1 1/2 cups teff flour (do not pack down flour…unless you want a really thick pancake)
-1 teaspoon baking soda
-1 teaspoon cream of tarter 
-1 1/2 cups filtered water 

-3 tablespoons olive oil or melted coconut oil 

-3 tablespoons honey (we tried every alternative sweetener and honey was the best for texture and taste)
-1 ripe banana – mashed up with a fork 

How To
1.  Mix together dry ingredients 
2.  Mix together wet ingredients

3.  Add wet to dry, incorporate 

4.  Add to griddle, flip, eat, enjoy!

Toppings
Teff flour is very flavorful, so we usually don’t add much, just jelly or syrup, but once in a while we get fancy.  A fruit compote is a favorite and easy to create by simmering frozen or fresh fruit (such as blueberries or strawberries).  We prefer to add a touch of honey and that’s it for a fresh fruit sauce.  
Posted by Amber at

Labels: breakfast, nut free, vegan.

One Comment

Leave a Reply

Your email address will not be published. Required fields are marked *

* Copy This Password *

* Type Or Paste Password Here *

You may use these HTML tags and attributes: <a href="" title=""> <abbr title=""> <acronym title=""> <b> <blockquote cite=""> <cite> <code> <del datetime=""> <em> <i> <q cite=""> <strike> <strong>

Saturday, September 3, 2011

Garden Summer Pasta (gluten free, diary free, vegan)

This dish was inspired by our summer garden harvest.  It’s a simple meal that takes very little time to prepare and little time to cook.  No fuss with minimal ingredients.  You’ll be back outside in no time running through the sprinklers with your kids!  Follow this meal with some refreshing strawberry coconut ice cream or fruit-full popsicles and it’s a summer meal to remember! 

Ingredients
-Brown rice pasta (I boil up to 1 1/2 pounds at a timeI love leftovers)
-5 yellow crookneck yellow squash*, chopped 
-2 green zucchini* chopped 
-1 yellow onion* chopped
-3 cloves garlic*
-2 cups cherry tomatoes* cut in half 
-1 tablespoon olive oil or coconut oil  
-2 tablespoons Apple cider vinegar (or to taste) 
-Salt & pepper to taste (start with 1/4 teaspoon) 
-Dash of red pepper flakes (I omit for my children)

How To
1.  Bring a gallon of filtered water to a rapid boil and add pasta with a bit of oil and a dash of salt.  Stir for a bit to prevent sticking 
While the pasta is cooking
2.  Saute onion with the olive oil for 2 minutes, then add garlic and saute for another minute  
3.  Add the squash and zucchini with a touch more oil and saute for a few more minutes
4.  Add tomatoes and stir to incorporate 
5.  Add apple cider vinegar, stir
6.  Add salt and pepper 
7.  Stir and covercook on low until veggies are soft and there is a nice liquidy sauce (taste and adjust seasonings as needed)
Back to the pasta
8.  When pasta is soft, drain and rinse with clean, cool water  
9.  Add pasta to large bowl and incorporate your sauce
10.  Add dried or fresh parsley, red pepper flakesand always adjust seasoning as needed

Notes:
*All these foods are super easy to grow in any garden!  
_______________________________________
 Shared on: Just Another Meatless Monday, Melt in your Mouth Mondays, Monday Mania, My Meatless Mondays, Mealtime Monday, Friday Food Fix, Potluck Party Friday 
Posted by Amber at

Labels: main dish, summer cuisine, vegan, vegetarian.

Leave a Reply

Your email address will not be published. Required fields are marked *

* Copy This Password *

* Type Or Paste Password Here *

You may use these HTML tags and attributes: <a href="" title=""> <abbr title=""> <acronym title=""> <b> <blockquote cite=""> <cite> <code> <del datetime=""> <em> <i> <q cite=""> <strike> <strong>

Friday, September 2, 2011

Cilantro Hummus

Over the years I have made many variations of hummus.  This delicious dip is a family favorite so we always have some in the fridge.  I’ve never thought about cilantro in hummus and I’m sorry I didn’t figure this out sooner! It’s delicious.  

Ingredients
-2 1/2 cups prepared garbanzo beans* (or two cans garbanzo beans) 
-1/4 cup tahini 
-3 tablespoons lemon juice (or more to taste)
-3/4 teaspoon garlic granules (or 1 clove) 
-1/2 teaspoon salt (or to taste) 
-1/2 cup of olive oil 
-3/4 cup fresh cilantro (or more to taste)
-1/4 teaspoon chili powder (or to taste)
-Filtered water (to bring the hummus to a preferred consistency)

How To
1. Add beans, tahini, garlic granules, salt, cilantro and optional chili powder to a food processor and blend.  
2.  With the food processor running, drizzle in oil.  
3.  Check for texture.  Too thick?  Add in 1 tablespoon of water at a time until you reach your desired texture. 

Notes
*Soak beans in filtered water for at least 8 hours, I soak mine for 24 hours and change the water 2x.  Boil in filtered water until tender and store in fresh water until ready to use. I soak & boil around 6 cups of beans at a time and freeze the leftovers for another day (they do great in the freezer!).
*A word about the beans:  I go back and forth between garbanzo beans and chana dal beans.  Chana dal yields a nice smooth hummus but with a much milder flavor so you really need to increase your ingredients.  Garbanzos are rich and flavorful with a thicker consistency.  I love them both but lately I’ve been using garbanzo beans for that full hummus flavor.  
____________________________________________
Posted by Amber at

Labels: dips and spreads, snacks, vegan, vegetarian.

One Comment

Leave a Reply

Your email address will not be published. Required fields are marked *

* Copy This Password *

* Type Or Paste Password Here *

You may use these HTML tags and attributes: <a href="" title=""> <abbr title=""> <acronym title=""> <b> <blockquote cite=""> <cite> <code> <del datetime=""> <em> <i> <q cite=""> <strike> <strong>

Wednesday, August 31, 2011

Raw Dairy Free Cashew Sour Cream (SCD/Paleo/GAPS)

When I came across a recipe for cashew sour cream in one of my favorite cookbooks from Cafe Gratitude I thought, “Yeah, we’ll see.” There’s like 3 ingredientshow is this going to turn out.  I haven’t had real sour cream in years and I so miss this addition to our taqueria night.  I am opposed to soy sour cream and so what’s a dairy-free girl to do?  Can I tell you I nearly fell off my chair when I bit into my burrito.  DELICIOUS.  I couldn’t believe it.  My kids loved it too, and of course my husband was very impressed.  Please try this and be dazzled by delicious simplicity.


Ingredients
-1 1/2 cups soaked cashews (4-8 hours)
-1/2 teaspoon salt
-2+ tablespoons lemon juice 
-Approximately 3/4 cup filtered water 

How To
1.  Place soaked cashews into blender, preferably a high-speed
2.  Add salt, lemon juice and half the water
3.  Blend slowly and add more water until a desired consistency in achieved 
4.  Add more lemon or saltthis is how to turn this creation into a sour cream.  

Note
*You can change the flavor or color of this cheese very easily by adding one or more of the following: cumin powder, turmeric powder, parsley, cilantro or bell pepper   
*Be creative and have fun with your food

Shared on: Allergy-Free Wednesdays, Wellness Weekend 

Posted by Amber at

Labels: dips and spreads, GAPS, Paleo, raw, SCD, vegan, vegetarian.

8 Comments

Leave a Reply

Your email address will not be published. Required fields are marked *

* Copy This Password *

* Type Or Paste Password Here *

You may use these HTML tags and attributes: <a href="" title=""> <abbr title=""> <acronym title=""> <b> <blockquote cite=""> <cite> <code> <del datetime=""> <em> <i> <q cite=""> <strike> <strong>

Saturday, August 27, 2011

For the love of jars

I find that as an alternative cook I have an enormous amount of ingredients.  What’s a girl to do? Dig out the ole’ label maker of course!  I have a love affair with my label maker.  I go on label making tangents in my house and label everything I can from the kid’s toys to items in my closet.  Regretfully, it’s not the most environmentally friendly system, but oh how I love those neat pretty little labels!

To organize my kitchen, and more specificity, flours and baking ingredients, I find glass jars anywhere I can.  Our local Coop has a fantastic bulk section…I’m talking bulk gf pasta, gf cereal, gf flours, teas, binders, thickeners, honey, almond butter…you name it and they probably have it – so great!  So I don’t use plastic for many reasons and feel really good about storing food in glass.  I have had great success at finding glass jars and storage at discount stores such as Ross and Marshall’s, and Ikea has by far my favorite glass containers.  For smaller food quantities like those few little left over hemp seeds, I reuse jelly and applesauce jars.  

An organized kitchen is indeed a happy place to create tasty eats!

Flours and and like in cupboard
Jelly and applesauce jars for powders, seeds, beans, etc.
Glass jars for everyday staples like gluten free oats, cereal and rice
Don’t throw away those plastic bins!
Use them to store your baking and cooking essentials  
Glass jars and containers are perfect for storing nuts in the fridge!
Posted by Amber at

Labels: green living tips organization.

6 Comments

Leave a Reply

Your email address will not be published. Required fields are marked *

* Copy This Password *

* Type Or Paste Password Here *

You may use these HTML tags and attributes: <a href="" title=""> <abbr title=""> <acronym title=""> <b> <blockquote cite=""> <cite> <code> <del datetime=""> <em> <i> <q cite=""> <strike> <strong>

Wednesday, August 24, 2011

Raw Vegan Walnut Pesto (SCD/Paleo/GAPS)


 I have to sayI’m very pleased with vegan pesto.  I don’t miss the the cheese at all.  And I use walnuts instead of pine nuts.  I guess there is a global pine nut shortage which prompted my local coop to put the pine nuts they did have in these ittty-bitty tiny plastic bags.  I laughed so hard and thought, I can’t make pesto with 5 pine nuts!!  Thus, the walnuts made their debut and the outcomesooo tasty!


Ingredients
-2 ounces of fresh basil (sort of hard to measure in cups, probably 4 cups)
-1 cup raw organic walnuts (you could also toast the walnuts, but do not if making raw)
-3 to 4 tablespoons fresh lemon (to taste)
-1/2 cup olive oil (or preferred oil)
-1/2 teaspoon garlic granules (or one clove of fresh garlic – or to taste)
-1/2 teaspoon salt


How To
1.  Place toasted walnuts in food processor and pulse a few times.   
2. Add basil, garlic granules, salt and pulse.
3. Turn on food processor, add in lemon juice and drizzle in oil.  Scrape down sides now and then.
4.  Test for seasoning.  


**********
Daddy and Ethan gathering basil from the garden. 

Shared on: Just Another Meatless Monday  Melt in your Mouth Mondays, Monday Mania, My Meatless Mondays, Mealtime MondayMade From Scratch Monday, Allergy-Free Wednesdays, Allergy-Friendly St. Pattie’s Day,  Fat Tuesday,Slightly Indulgent Tuesdays, Traditional Tuesdays, Whole Food Wednesdays, Real Food Wednesdays, Gluten Free Wednesdays, Potluck Party Friday, Wellness Weekend, 

Posted by Amber at

Labels: dips and spreads, GAPS, Paleo, raw, SCD, snacks, vegan, vegetarian.

3 Comments

Leave a Reply

Your email address will not be published. Required fields are marked *

* Copy This Password *

* Type Or Paste Password Here *

You may use these HTML tags and attributes: <a href="" title=""> <abbr title=""> <acronym title=""> <b> <blockquote cite=""> <cite> <code> <del datetime=""> <em> <i> <q cite=""> <strike> <strong>

Wednesday, August 17, 2011

Raw Vegan Banana Fudgesicles (dairy free, cane-sugar free)


Hello and welcome to The Tasty Alternative!  My name is Amber and this blog is a combination of alternative cuisine, organization, green living and holistic healing.  You can read more about me and this blog from the links above.  I’m just thrilled to create my first post today.  I thought it would be fun to kick things off on a sweet note and make one of my daughter’s (and son’s) favorite desserts, and of course she is helping me out today.  Please let me know how you like this delicious and healthy spin on one of my favorite childhood treats.

Ingredients:
-1 large ripe banana
-1 can of full fat this or this
-3 tablespoons of grade B maple syrup (also sub: honey, coconut sugar or coconut nectar)
-2 teaspoons vanilla
-2 tablespoons raw carob power (or raw cacao power)
*I am using carob powder here because chocolate aggravates eczema (my son suffers from this skin condition) and overall, chocolate is far too stimulating for my little ones. 

How To:
1.  Blend ingredients in any blender
2.  Pour into popsicle molds and freeze 4-5 hours
3.  Eat
4.  Enjoy
Yum, yum…tasty!

**********
Into the freezer

Shared on: Just Another Meatless Monday Melt in your Mouth Mondays, Monday Mania, My Meatless Mondays, Mealtime Monday, Made From Scratch Monday, Wellness Weekend, Slightly Indulgent Tuesdays, Whole Food Wednesdays, Real Food Wednesdays, Gluten Free Wednesdays,, Raw Foods Thursdays 

Posted by Amber at

Labels: allergy-friendly, dessert, raw, summer treats.

5 Comments

Leave a Reply

Your email address will not be published. Required fields are marked *

* Copy This Password *

* Type Or Paste Password Here *

You may use these HTML tags and attributes: <a href="" title=""> <abbr title=""> <acronym title=""> <b> <blockquote cite=""> <cite> <code> <del datetime=""> <em> <i> <q cite=""> <strike> <strong>