Category Archives: homemade remedies

Monday, November 30, 2015

Anti-Inflammatory Turmeric Tincture

coverHello friends.  I am not a doctor, or holistic expert, or certified in any alternative healing practice.  But I am a person who lives with a chronic inflammatory disease…Crohn’s disease.  I have been on a loooong healing journey and this journey has lead me down many roads of diets, herbs, oils, teas, and whatever else you could possibly think of, I’ve tried over these last 12 years.  Most recently I’ve made a breakthrough connection between my Crohn’s flares and stress that has provided me with an enormous amount of power and control over my health…and I hope to share this with you very soon.  But for now, I want to share a little bit about turmeric and how I’ve been using it in my healing regimen.  A few months ago my sweet beautiful friend Julia showed me a turmeric tincture she made and was raving about.  I told her I have turmeric capsules that I use once in a while for inflammation, but didn’t feel a big difference.  I tried her tincture and loved it.  So I made myself a batch.  I have to say, I feel the difference and the tincture feels more powerful than the capsules (for some reason).  I don’t know, maybe it’s just placebo, but I can tell it decreases intestinal inflammation..and decreases pain.  Here is an excellent article about turmeric with research to back up health claims.  But please also read about turmeric’s side effects here.   Continue reading

Posted by Amber at

Labels: Anti-Inflammatory, better digestion tips, Holistic healing, homemade remedies, IBD Remedies.

10 Comments

Leave a Reply

Your email address will not be published. Required fields are marked *

Rate this recipe:  

Monday, September 14, 2015

Two Ingredient Homemade Facial Scrub

facial scrub

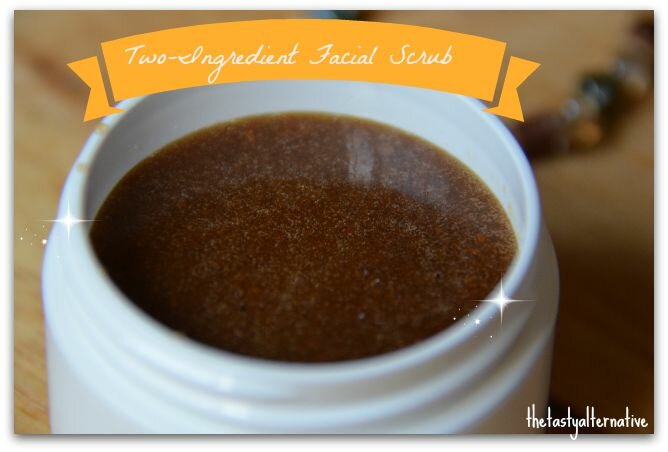
Ever have one of those weekend (or week) days where you feel sort of blaaah and have a ton of stuff to do (in my case work) and stay in bed all day working and sleeping on and off and then at around 9:00 pm you start to feel really crusty and oily and want to just scrub your skin off?  I had one of those days over the weekend.  It was so hot here last week friends (108 degrees if you can believe it), and fires everywhere!  Poor drought ridden California.  It can get pretty nasty here in the summer with bad air quality…and the fires!  Gasp.  It’s really sad.  I think all that gets to my immune system and just zaps me.  So I got a lot accomplished on my crusty lazy day, and then wanted to do something to enhance my mood, you know, get out of the funk.  I like to pamper myself and do some self-care when I’m not feeling well.  A good face and body scrub was in order.  I’ve been using a simple two ingredient facial scrub that works like magic at sloughing off dead skin and creates a lovely glow.  It closes my pores, tightens my skin, and evens out my skin tone.  I have experimented with different ingredients such as lemon, oatmeal, salt, and oils. I just go with what yields the best results, and the sugar scrub is the best I’ve used so far.  If you give it a try, let me know what you think.  And friends, take a little you time for self-care.  A fresh coat of nail polish, a relaxing shower, a face and body scrub down, a massage…whatever, it really does wonders for the mind and body.   Continue reading

Posted by Amber at

Labels: beauty, homemade beauty products, homemade remedies, how to.

3 Comments

Leave a Reply

Your email address will not be published. Required fields are marked *

Rate this recipe:  

Monday, July 27, 2015

Shea & Mango Butter Lotion (with video)

DSC_0075text2top

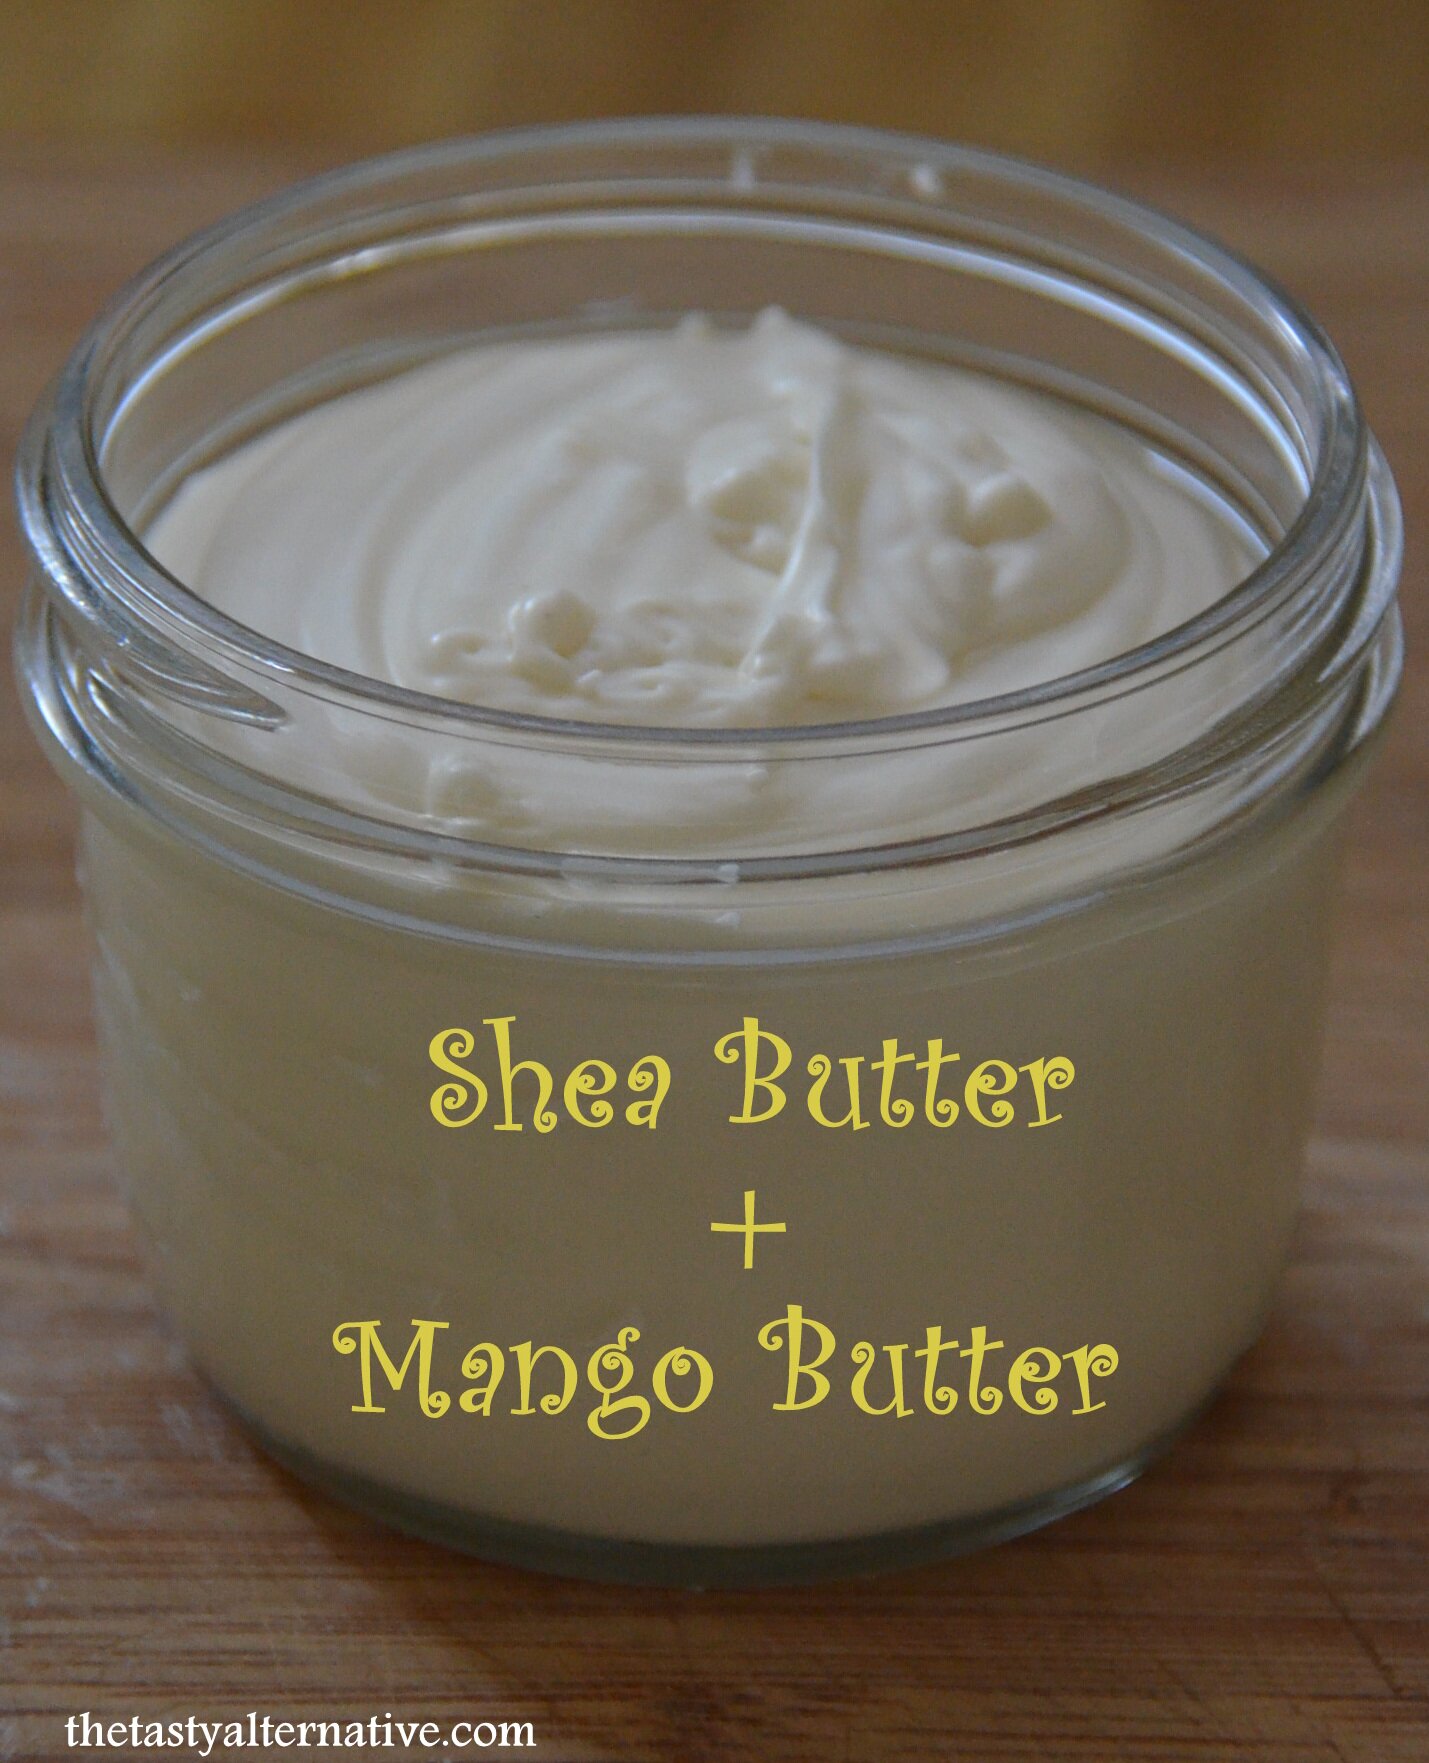
Hello friends.  I’m super excited to share an amazing new lotion ingredient with you: mango butter!  I am in love.  Mango butter is a soft, non-greasy butter extracted from the mango kernel (not the meat) and it has a soft earthy scent.  Here are just some of mango butter’s benefits:  (1) it is rich in powerful antioxidants, vitamins (A, C, & E) and minerals that help reduce degeneration of skins cells (aka, fights wrinkles), improves elasticity of the skin, and offers protection again the sun’s UV radiation, (2) powerful anti-inflammatory agent, good for bug bites, rashes, wounds, scars, and poison ivy/oak, (3) beneficial for the scalp and hair, and (4) excellent for eczema, dry skin, and other skin conditions.   Continue reading

Posted by Amber at

Labels: Holistic healing, homemade beauty products, homemade remedies, how to.

7 Comments

Leave a Reply

Your email address will not be published. Required fields are marked *

Rate this recipe:  

Wednesday, April 16, 2014

Homemade Alcohol-Free Hand & Surface Sanitizer

DSC_0006

When I first became a mommy I was a total spaz about germs.  It was like a pharmacy in my obnoxiously oversized mom bag (which was filled with things that could last me through a natural disaster).  I had like 15 different hand sanitizers, sprays, gels, soaps, wipes…you name it, I had it, and it didn’t matter the cost. I bought the best organic, non-toxic products money could buy, because of course, nothing was too good for my new baby. Okay, fast forward 8 years and I am MUCH more relaxed (and knowledgeable) about germs. In fact, I welcome and encourage them.  After reading the many research articles about how we are making our bodies ‘too clean’ and thus ‘too sick’ I changed my tune. I get it, I get how being too clean can damage our microbiome and in turn damage our immune system.  So I backed off – big time.  For me, a step in this more evolved direction was being okay with my kids getting sick, because getting sick equals exposure to germs.  I used to think my job was to protect my children from germs so they wouldn’t get sick.  I remember when my daughter, Skylar (my first child), came down with a cold for the first time at 18 months…I was so sad – I felt like I failed her. How did you get germs in your mouth with all my anti-germ armor!  Now I’m like, hum, my kid’s haven’t been sick in a few months…what’s going on?  I appreciate how important it is to expose the body to germs, and how important it is to build anti-bodies.   Continue reading

Posted by Amber at

Labels: homemade remedies, Uncategorized.

6 Comments

Leave a Reply

Your email address will not be published. Required fields are marked *

Rate this recipe:  

Friday, November 22, 2013

Chemical-Free Homemade Deodorant

I have but a few words to describe this homemade deodorant, quite simply: it works (for me at leastand my husband).  I didn’t run a marathon with this deodorant so I can’t speak to it’s long-term/heavy duty performance, consider this deodorant for regular day to day use.  For years I’ve put off making my own deodorant (because if you know me in real life I am one of the most skeptical people you will ever meet) and I honestly didn’t think homemade deodorant worked (like, at all).  Okay, let me explain that I am a gal who NEEDS to wear deodorant.  I don’t get super funky, but I honestly need to wear something.  I tried to go o’natural once and it did not go well (for my nostrils anyway).  I personally know people who don’t need deodorant, so there is certainly a spectrum of body odor from nearly non-existent to musky to downright offensive.  Over the years I’ve tried every “natural and chemical free” deodorant out there and still nothing worked the way I wanted it to (no thank you to smelling like a perfume factoryyou might know by now I have a severe chemical sensitivity).  I love proving myself wrong.  This homemade deodorant works BETTER than any store bought brand and I’m thrilled I can add another homemade beauty product to my ever growing list.  For a while now I’ve been on a mission to decrease my exposure to chemicals and have been quite successful thus far.  Curious about the toxicity to any particular ingredient or chemical? Visit the Skin Deep Cosmetic Database.  I’ve been using this site for years to check ingredients and I would be lost without it.  
 
Okay, here is a challenge for you. 
 
 Go grab your shampoo bottle (or for the purpose of this post, your deodorant) and enter the ingredients in the database.  You will receive instant answers.  Be forewarned, you might feel a little panicky about the ingredients, but don’t worry.  Start today, start now.  Empty those bottles, then recycle those bottles, and find chemical-free alternatives.  They do exist, and no, they do not cost a thousand dollars.  Check out my Pinterest board dedicated to all things natural and homemade.  
Chemical-Free Homemade Deodorant 
 
Ingredients:
-4 tablespoons coconut oil here or here 
-2 1/2 teaspoons baking soda* 
-1 teaspoon vegetable glycerin (optional)
-Essential oils of choice (optional) 
 
Buy the 4 ounce glass amber jars HERE
 
HERE is my recipe for homemade body spray (nice to make along with the homemade deodorant)
 
How To:
1.  In a 4 ounce jar add in coconut oil and baking soda and mix until incorporated.  Then add in the vegetable glycerin and mix well.  At this point you can add in some essential oils.  They won’t smell very strong however.  
2.  For a stronger essential oil smell, omit the essential oils from the above recipe.  Rub some of the deodorant on your armpits then add three squirts of homemade body spray directly to each armpit.  The essential oils will be much more potent if you spray on.  
 
Notes:
*The coconut oil is soothing on the skin.  The vegetable glycerin is added for additional moisture, but is an optional ingredient.  The baking soda controls the odor and is not uncomfortable or too gritty, add more if you feel like you need more odor control (another teaspoon or two).  
*I keep this at room temperature.  My husband also uses this deodorant, so this batch is adequate for two adults.
*Read HERE about some of the harmful ingredients in deodorant.  Remember, you put deodorant on your body everyday (often more than once) for your entire adult life.  The toxins do build up and often never leave the body. 
*In the summer your coconut oil might be liquid (like mine), so you can try a different oil that holds up better in warm weather, like shea butter or cocoa butter.  Or just use coconut oil and store in the fridge.  
*My friend Emily from Recipes to Nourish suggests using lemons as a deodorant.  
Here is a list of other homemade beauty products from The Tasty Alternative 
 
Other


Colloidal Oatmeal for eczema and itchy skin
_________________________________________________
Shared onWhole Food Fridays, Fat Tuesdays
Posted by Amber at

Labels: beauty, homemade beauty products, homemade remedies.

9 Comments

Leave a Reply

Your email address will not be published. Required fields are marked *

Wednesday, August 7, 2013

All Natural Homemade Facial Toner Recipes

Facial toner may not be a part of your beauty regimen.  But I have to say, it’s an important part of mine.  I use facial toner at night before bed and after my morning shower.  I use different toner recipes for different skin issues.  For example, my Tea Tree Tingle comes in really handy for those monthly breakouts.  The Witch Hazel with Rose Oil is great for chapped and lightly burned skin, an excellent anti-inflammatory, and also used to reduce the appearance of pores.  The Apple Cinder Vinegar toner is excellent for returning an even pH balance to the skin (also great for breakouts).  The tea-based recipes shared below are great for everyday and all skin types.  I don’t have complicated skinit’s pretty average – if anything it runs slightly dry which is why I include vegetable glycerine in all my facial toners.  It’s such a great moisturizer, and I usually don’t need to apply additional moisturizer after I use toner with the added glycerine (but I do always add moisturizer under and around my eyes).  I’ve been using my latest lotion as facial moisturizer for wrinkle prone areas and it has markedly reduced fine lines on my face.  I’m feeling pretty great about my facial routine these days.  I wanted to share these all-natural recipes that are so easy to make at home!  Remember that healthy living is not only about what you put on the inside, but also what you put on the outside.  Make it a safe, natural choice
All Natural Homemade Facial Toners 

Tea Tree Tingle Facial Toner 
-1/2 cup filtered water
-2 teaspoons vegetable glycerine 
-15 drops pure tea tree oil

Witch Hazel Facial Toner with Rose Oil
-1/4 cup alcohol free witch hazel 
-1/4 cup filtered water 
-10 drop pure rose oil

Apple Cider Vinegar (ACV) Toner with Sweet Orange Oil 
-1/4 cup unfiltered apple cider vinegar 
-1/3 cup filtered water 
-8 drops orange oil (or oil of choice, the oil is optional and used mostly for scent)

Tea-Based Facial Toner Recipes 
(from The Tasty Alternative) 

Green Tea Facial Toner
-6 ounces fresh brewed room temperature green tea 
(2 T loose green tea leaves + 6 oz water, steep & strain)
-2 tablespoons alcohol free witch hazel 
-2 teaspoons vegetable glycerine

Chamomile Lemon Facial Toner
-6 ounces fresh brewed room temperature chamomile tea
(2 T loose dried chamomile flowers + 6 oz boiling water, steep & strain) 
-2 tablespoons fresh squeezed lemon juice 
-2 teaspoons vegetable glycerine 

Fresh Mint Facial Toner 
-6 ounces fresh brewed room temperature mint tea
(2 T loose dried or fresh mint leaves + 6 oz water, steep & strain)
-2 tablespoons alcohol free witch hazel 
-2 teaspoons vegetable glycerine 

Notes:
*Benefits of: Tea Tree, Witch Hazel, Vegetable Glycerin, ACV
*Always shake toner before using.
*Personally, I would refrigerate the tea-based toners and use within 4 to 5 days.
*The other toners can be left at room temperature for weeks (a bottle lasts me 10 days to 2 weeks).
*If you have very sensitive skin, decrease acid based recipes to 1 tablespoon of lemon and dilute the ACV to a 1:3 ratio. 

Here are my other favorite homemade recipes:

Lotions 

Other 

_______________________________________________
Shared on: Wellness Weekend, Whole Food Fridays, Healthy Vegan Fridays
Posted by Amber at

Labels: homemade gifts, homemade remedies.

24 Comments

Leave a Reply

Your email address will not be published. Required fields are marked *

Thursday, June 6, 2013

Shea Cocoa Avocado Oil Body Butter (with an Anti-Itch Recipe)

It gets mighty hot here where I live in Northern California.  In fact, the forecast calls for 108 degrees on Saturday.  But it’s all good.  I grew up in this weather.  I lived in the desert as a child for 7 years (near Death Valley) and other super hot locations in Cali.  Luckily, my skin does not react to the hot weather (it DOES react to the cold dry weather, however).  My husband has super sensitive skin and thus gets terrible eczema on his hands.  And my sweet-pea son, Ethan, well, you can read about his journey with eczema here.  It’s essential that my guys stay lathered up with lotion during the hot summer months, so a big ole’ batch of homemade body butter was on my to-do list this week.  And I made more than enough for the entire summer.  This lotion contains four simple (and edible) ingredients: shea butter, cocoa butter, avocado oil, and vegetable glycerin.  And this lotion is great for so much more than a moisturizer for eczema/dry skin (good for scars, scratches/cuts, sunburns, nails, under eyes, wrinkles, massage, lips, rashes, etc).  

I want to take a moment to share why I use these particular ingredients and their benefits.

What is Shea Butter?
Why I love it: 
*Natural sunblocking properties 
*Joint pain relief 
*Anti-inflammatory 
*Excellent moisturizer 
*Long self life 

What is Cocoa Butter? 

Why I love it: 
*Natural antioxidant 
*Excellent moisturizer 
*Great for scars
*Protects from environmental pollutants
*Long self life 

What is Avocado Oil?

Why I love it: 
*High in sterolin 
*Contains vitamin A, D & E
*Anti-bacterial 
*Anti-inflammatory 

What is Vegetable Glycerin?

Why I love it:
*Anti-bacterial 
*Draws oxygen into the blood
*Can be used in place of alcohol 
*Excellent moisturizer
Shea + Cocoa + Avocado Oil Body Butter 
(with Anti-Itch Recipe)

Ingredients
-16 ounces raw organic shea butter, cubed 
-4 ounces raw organic cocoa butter, shaved* 
-1/4 cup avocado oil (hexane-free)
-2 tablespoons vegetable glycerin 

How to:
1.  In a food processor add 16 ounces shea butter.  Pulse a few times to break it down.  With the food processor running, add in the vegetable glycerin and avocado oil.  
2.  Add 4 ounces cocoa butter to a glass pyrex and set into a pot of heated water.  Do not let the cocoa butter rise above 118 degrees (if you want this to be a raw lotion).  Remove from heat once things are looking good and melted and continue to stir around.  The heat will melt any little remaining chunks.
3.  Drizzle the cocoa butter into the food processor.  Mix until well incorporated.* 
4.  Scoop out lotion into glass jars and lather up!

Anti-Itch Recipe:
Mix together 1/2 cup homemade lotion and 2 teaspoons gluten free colloidal oatmeal.  Use on persistent itchy skin.  Add more oatmeal to lotion as needed.  

Notes:
*Yes, this recipe is oily but it does eventually absorb into the skin. 
*Initially, the lotion is super thin in texture.  It’s suppose to be.  It will firm up as it cools.  Additionally, the lotion will slightly change texture with the weather (hotter days will soften the lotion, cold winter days will harden it).    
*This lotion will keep for months at room temperature. You can store it in the fridge though too.
*I usually just shave the cocoa butter and run it in the food processor with the other ingredients until it gets warms and melts.  But this time I melted it for a smooth, creamy finish.  To keep the cocoa butter raw, keep the heat under 120 degrees.  
*I purchase all the ingredients locally, except for the shea butter (I do order that on-line). 

Here is the shea butter
I weigh all my ingredients 
Here is the cocoa butter 
Here is the mixture with the shea, 
vegetable glycerin, and avocado oil 
This is how I melt the cocoa butter.  
Be sure to shave it before you heat it, it will melt faster and more evenly. 
Pouring cocoa butter into mixture 
Look at how velvety! 
Here is the oatmeal in the coffee grinder 
Add it to the lotion and mix 
Initially, the mixture will be very thin from the warm cocoa butter, but it firms up quite a bit as it sets.  See the pictures here below for texture.  
  
Other homemade lotions/body butters from The Tasty Alternative 


3. Cocoa and Shea Body Butter with Jojoba and Vanilla

_____________________________________
Shared on: Raw Foods Thursday, Wellness Weekend, Whole Food Fridays, Healthy Vegan Fridays, Allergy-Free Wednesdays
Posted by Amber at

Labels: Holistic healing, homemade remedies, l.

31 Comments

Leave a Reply

Your email address will not be published. Required fields are marked *

Friday, April 6, 2012

Cocoa and Shea Body Butter for Dry Skin and Eczema

I’m so excited to share this lotion with all of you!  It’s incredible in terms of healing.  I’ve been using it on Ethan’s skin for about 5 days and his dry eczema patches have nearly disappeared, and the rest of his skin feels like velvet.  My poor son has awful seasonal allergies and this exacerbates his eczema.  So during this time of the year I keep his immune system strong and keep him lubed up with healing lotion.  I am also using this lotion on my legs and back (where I tend to get dry this time of year).  I’m just really impressed with cocoa butter…and it’s fun to smell like chocolate. Oh, and I’m also using it as lip balm.  So fun!  If you’re searching for a healing lotion for your dry, itchy skin, this one might be for you!  I’ve included links below if you’re interested in making it.  I can’t stress how easy it is to make your own lotion.  I’m saving so much money; comes out to about $2.50 per jar (I was paying $10 – $15) for similar store bought lotions.
 Cocoa and Shea Body Butter 

Ingredients: 
-2.5 ounces Raw organic cocoa butter 
-3.5 ounces Raw organic unrefined shea butter 
-3 tablespoons organic apricot oil
-1 teaspoon teaspoon vanilla extract (optional, adds scent) 
-1/2 teaspoon vegetable glycerine 

How To:
1.  Weigh out the butters.
2.  Shave the cocoa butter and add it to a glass Pyrex submerged in water and bring the water to a boil. This will melt the cocoa butter while keeping it raw.  This step is optional, you could also just shave it and add it to the food processor.  The heat from blending will melt it pretty well.  
3.  Add the shea butter to food processor, pulse few times to loosen up and warm the butter – it will become very smooth.
4.  Slowly drizzle in the coco butter, apricot oil vanilla, and vegetable glycerin.
5.  Blend until velvety and creamy.
6.  Transfer lotion mixture to glass jars.  The lotion will be soft and will harden as it cools.  It will last for MONTHS at room temp.  Yields about 12 ounces.

Raw cocoa butter
Mmmmm, looks good and smells outrageous!
I make two jars at a time. 
One for our room and one for Ethan’s.  
The small jar holds 4 ounces  
The large jar holds 8 ounces 
Click HERE for additional homemade lotions from The Tasty Alternative
Posted by Amber at

Labels: beauty, eczema, Holistic healing, homemade remedies.

29 Comments

Leave a Reply

Your email address will not be published. Required fields are marked *

Sunday, February 19, 2012

Homemade Coconut Shea Butter Lotion: for dry sky and eczema

After I made my first batch of lotion, I’ve been experimenting with different ingredients for different aliments.  For example, using colloidal oatmeal as an anti-itch relief.  It’s super fun and easy to make your own lotion.  It takes just a few minutes to mix the ingredients together and there you have it.  Today I’m sharing another variation for the dry/eczema prone skin.  I keep everything raw when making lotion.  I never heat the ingredients, which I feel is very important.  This batch includes shea butter as the base, with coconut oil, calendula oil, jojoba oil and a dash of eucalyptus (for its healing properties and fragrance).  Raw shea butter has a very interesting smell, almost smokey, and in the many batches I’ve purchased (on amazon) they have all varied in color and smell.  This is to be expected.  So have fun and experiment with essential oils!
Ingredients
-4.5 ounces organic, raw, unrefined shea butter
-1/4 cup raw, organic coconut oil
-3 tablespoons jojoba oil
-1 tablespoon calendula oil
-3/4 teaspoon eucalyptus oil*
How To
1.  Mix ingredients in bowl, initially by hand, then with electric mixer.
2.  Fill small glass jars and use within 2 months.
3.  Final product can be stored at room temperature during use, as it has great self life!  Store remaining unused shea butter in the refrigerator, or you could also store leftover lotion in the fridge if you won’t be using it right away (it will keep for months in the fridge).  This stuff is resilient and you’re good either way, no matter where you keep it.
Notes
*Eucalyptus
Eucalyptus is a powerful anti-bacterial and anti-inflammatory essential oil that can help control eczema flare-ups.  Eucalyptus oil works by stimulating blood circulation and has a calming and cooling effect on irritated skin.  And like echinacea, eucalyptus also stimulates your immune function.  Before applying eucalyptus oil (or any essential oil) to the skin, the oil should be diluted in a carrier oil (i.e. sweet almond oil, olive oil, jojoba oil, etc.) to avoid further irritation and burning.  Eucalyptus can be applied throughout the day as needed for itch relief.  Eucalyptus is also great for treating a baby eczema rash.
*
Use hand mixer OR food processor.  Both work well.  I tend to use a hand mixer with soft ingredients.  When I make lotion with cocoa butter, I always use a food processor.  It’s difficult to incorporate cocoa butter with a hand mixer.  Something else that’s important to consider is that the heat from the friction (from running the food processor a while) will help melt the small chunks of cocoa butter and incorporate all the ingredients nicely.
Additional Homemade Lotions from The Tasty Alternative
*
Shared on: Healthy Second Wednesday 
Posted by Amber at

Labels: beauty, eczema, Holistic healing, homemade remedies, how to.

33 Comments

Leave a Reply

Your email address will not be published. Required fields are marked *

Monday, December 5, 2011

What is Colloidal Oatmeal? And How Does it Help Eczema?

Please read my disclaimer before you continue reading.  
Thank you!

Simply speaking, colloidal oatmeal is very finely ground oatmeal.  Pretty easy explanation right!  

So what in the world is this stuff used for? 

First let me tell you that I ran across colloidal oatmeal from reading the ingredients off a bottle of Eucerin.  I’ve never purchased Eucerin, but I was curious why it is so popular and why so many people recommend it for my son’s eczema and dry skin.  First, check out the ingredients in Eucerin.  I’ve linked research and information to some of the concerning ingredients from The Skin Deep Database

Glycerin, Cetyl Palmitate, Mineral Oil, Caprylic/Capric Triglyceride, Octyldodecanol, Cetyl Alcohol, Glyceryl Stearate, Colloidal Oatmeal, Dimethicone, PEG – 40 Stearate, Carbomer, Sodium Hydroxide, Phexoxyethanol, DMDM Hydantion, Iodopropynyl, Butylcarbarmate.

I was very curious about this oatmeal so I did some research.

I ran across this great site dedicated to colloidal oatmeal.  I recommend checking it out, but I will also share information from this site here.  All quotes are from site link.

So back to the original question: 
What in the world is this stuff used for?

The popular use for colloidal oatmeal is in the bath.  
I have used this with my son.  I grind 2 cups of oatmeal in a coffee grinder and add it to his bath water.  Works great.  Please use oatmeal with caution if you have issues with gluten (or even if you aren’t sure).  It’s best to purchase certified gluten-free oats to avoid any averse reactions.  Please discuss the use of oatmeal as a means for holistic healing with a medical professional or holistic practitioner before using.     

Colloidal oatmeal has properties that comfort itching, so it is a good choice for relieving the pains of eczema. Simply run your bath with lukewarm water, and while the tub is filling, add a packet (two to three cups) of colloidal oatmeal under the faucet to help disperse the oatmeal. Soak in the bath for ten to fifteen minutes. When you are ready to get out of the bath, Be Careful. The bathtub will be slick from the oatmeal. When drying, don’t rub your skin since this can irritate the sore areas. Instead, pat yourself dry with a clean towel. This treatment can be taken up to three times daily to help ease the dry, itchy skin of eczema”


What a great holistic remedy for children and babies suffering from eczema (or adults for that matter).  My son’s skin looks awful in the bath (like burns all over his legs) and so this is a great addition to bath time.  Wish I had this information when he was 6 months old with weepy eczema patches all over his body.  

How does it work?
“Colloidal oatmeal is simply oats ground into an extremely fine powder. When added to bathwater, it creates a milky dispersion that prevents the oatmeal from settling rapidly. So the oatmeal stays in the water and doesn’t just sink to the bottom of the bath. When you get into the tub, the colloidal oatmeal feels silky, as it coats, moisturizes, softens, and protects your skin.”

How do I use it?
“Run your bath with lukewarm water, and while the tub is filling, add a packet (two to three cups) of colloidal oatmeal under the faucet to help disperse the oatmeal. You may have the urge to take a hot bath, but this will only irritate the skin and remove moisture from your body, so a warm bath is preferable. Soak in the bath for ten to fifteen minutes. When you are ready to get out of the bath, BE CAREFUL. The bathtub will be slick from the oatmeal. When drying, don’t rub your skin since this can irritate the sore areas. Instead, pat yourself dry with a clean towel.”

I added colloidal oatmeal to my latest homemade eczema lotion (recipe coming soon) as a dry-skin remedy this winter.  

Check this out if you are interested in making large amounts of colloidal oatmeal.  But a coffee grinder or other blender will suffice.  

Colloidal oatmeal is also used for:
Poison Ivy
Chickenpox
Diaper Rash
Pets
Insect Bites

picture credit
Shared on: Homestead Barn Hop & Traditional Tuesdays
Posted by Amber at

Labels: eczema, Holistic healing, homemade remedies.

18 Comments

Leave a Reply

Your email address will not be published. Required fields are marked *