Category Archives: how to

Monday, December 7, 2015

Easy Homemade Candles

cover

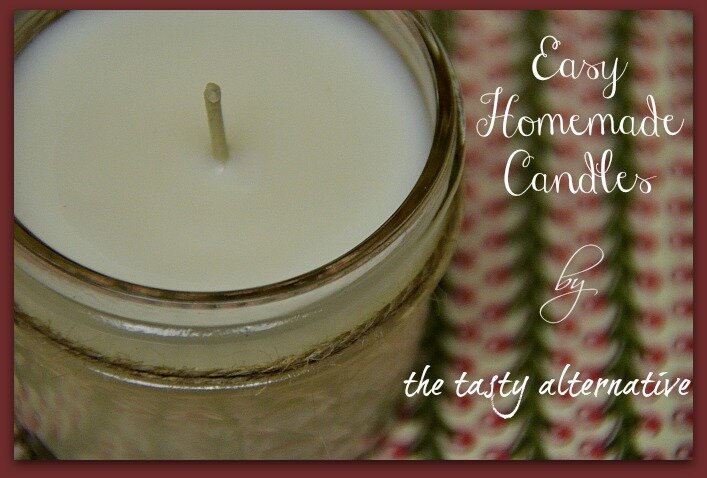
Hello Friends.  The Holiday season is upon us…are you feeling the stress yet (ha ha).  Personally, the process of purchasing gifts totally stresses me out.  So to simplify life and decrease that pesky stress, I like to do homemade gifts for family and friends.  Hands down, it’s always so appreciated and well received.  I start by making a list of family, friends, and “other” (school teachers, co-workers, piano teacher, childcare, etc) and then decide on what I am going to make.  This year I am doing a gift bag with a homemade candle, jar of homemade spiced nuts, tea, mandarins, and small jar of honey.  I might also add my favorite Raw Pepperminty Nutty-Roons  – we will see how motivated I feel.  The last two years I made my popular homemade granola which you should definitely try.  It’s soooo good!!  This year I making something new…candles!  I have wanted to make candles for years.  Last year I bought a bunch of supplies but never got around to testing them out.  And you know what, it’s ridiculously easy.  I have both beeswax and soy and started with the soy (it’s so pretty and white).  The process is easy as well as fun and not to mention fast.  I’m super excited about adding a sweet little homemade candle to my gift bags this year.  Yay!  xo, -Amber Continue reading

Posted by Amber at

Labels: holidays, homemade gifts, how to.

10 Comments

Leave a Reply

Your email address will not be published. Required fields are marked *

Rate this recipe:  

Monday, September 14, 2015

Two Ingredient Homemade Facial Scrub

facial scrub

Ever have one of those weekend (or week) days where you feel sort of blaaah and have a ton of stuff to do (in my case work) and stay in bed all day working and sleeping on and off and then at around 9:00 pm you start to feel really crusty and oily and want to just scrub your skin off?  I had one of those days over the weekend.  It was so hot here last week friends (108 degrees if you can believe it), and fires everywhere!  Poor drought ridden California.  It can get pretty nasty here in the summer with bad air quality…and the fires!  Gasp.  It’s really sad.  I think all that gets to my immune system and just zaps me.  So I got a lot accomplished on my crusty lazy day, and then wanted to do something to enhance my mood, you know, get out of the funk.  I like to pamper myself and do some self-care when I’m not feeling well.  A good face and body scrub was in order.  I’ve been using a simple two ingredient facial scrub that works like magic at sloughing off dead skin and creates a lovely glow.  It closes my pores, tightens my skin, and evens out my skin tone.  I have experimented with different ingredients such as lemon, oatmeal, salt, and oils. I just go with what yields the best results, and the sugar scrub is the best I’ve used so far.  If you give it a try, let me know what you think.  And friends, take a little you time for self-care.  A fresh coat of nail polish, a relaxing shower, a face and body scrub down, a massage…whatever, it really does wonders for the mind and body.   Continue reading

Posted by Amber at

Labels: beauty, homemade beauty products, homemade remedies, how to.

3 Comments

Leave a Reply

Your email address will not be published. Required fields are marked *

Rate this recipe:  

Monday, September 7, 2015

Homemade Non-Dairy Milks: 101

Non Dairy Milks

If you’re a vegan, or allergic to dairy, or just downright dislike cow milk…this post is for you.  It’s all about homemade nondairy milks.  I’ve been making homemade nut milks for close to 10 years! I started making them in my Magic Bullet and then graduated to a high speed blender.  I’ve tried many different nut and seed milks.  My ALL TIME favorite is walnut milk and I have created a video (end of post) sharing how I make walnut milk and also demonstrate the use of both and high speed blender and standard blender in the quality of the walnut milk.  In this post I share with you some of the basics to making your own non dairy milk, with several recipes to get you started.  And I hope you find it inspiring…as well as delicious.  

Okay, let’s get started… Continue reading

Posted by Amber at

Labels: dairy free, drinks, how to, non-dairy milk, seed milk.

2 Comments

Leave a Reply

Your email address will not be published. Required fields are marked *

Monday, July 27, 2015

Shea & Mango Butter Lotion (with video)

DSC_0075text2top

Hello friends.  I’m super excited to share an amazing new lotion ingredient with you: mango butter!  I am in love.  Mango butter is a soft, non-greasy butter extracted from the mango kernel (not the meat) and it has a soft earthy scent.  Here are just some of mango butter’s benefits:  (1) it is rich in powerful antioxidants, vitamins (A, C, & E) and minerals that help reduce degeneration of skins cells (aka, fights wrinkles), improves elasticity of the skin, and offers protection again the sun’s UV radiation, (2) powerful anti-inflammatory agent, good for bug bites, rashes, wounds, scars, and poison ivy/oak, (3) beneficial for the scalp and hair, and (4) excellent for eczema, dry skin, and other skin conditions.   Continue reading

Posted by Amber at

Labels: Holistic healing, homemade beauty products, homemade remedies, how to.

7 Comments

Leave a Reply

Your email address will not be published. Required fields are marked *

Rate this recipe:  

Thursday, July 9, 2015

Winter Garden & How to Build a Basic Planter Box

DSC_0011

I was so excited about our winter garden this year and wanted to share it with you! A while ago we made some new planter boxes (a super basic and easy design – see video below).  I love doing a winter garden every year, as I have great success with peas, carrots, and lettuce. But this year I finally grew beets!  And broccoli! And cabbage!  and *sort of* onions/leeks.  I garden in a fairly small space but still we have such fun and the kids LOVE it.  I live in Northern California where we have mild winters and blazing hot summers.  In fact, summer gardens around here go until early/mid November, then I switch over to the winter crops.  But really, it’s never too late to start a garden…with a little research, you can find any crop to grow anytime of the year. Winter gardens are just so fun!  Mother nature provides the rain and those delicious root veggies grow and grow in the frosty cold weather – lettuce thrives and the peas go crazy.  And I love seeing all the green leaves popping up during those cold winter months.  I’ve included some pictures for you of my gorgeous beets (first time growing!) and a few other winter crops.  I’ve also included my video on how to build the simple planter boxes we use.  Enjoy and let me know what you like to plant during the winter…or anytime.  xo, Amber.  

Continue reading

Posted by Amber at

Labels: gardening, how to.

4 Comments

Leave a Reply

Your email address will not be published. Required fields are marked *

Monday, July 22, 2013

Homemade Organic Roasted Almond Butter w/ Raw Option (never buy the expensive store brands again)

Almond butter came into my life in 2004 when I was doing my first candida cleanse.  And I kid you not, at the time it was pure indulgence.  Not much was allowed on the cleanse, but small doses of almond butter was okay, so I pretty much fell in love.  After the cleanse and through the years I ate almond butter regularly.  I’m deathly allergic to peanuts, so how fun to make my own version of PB&J with almond butter.  As much as I love almond butter, about a year ago I discovered that it irritates my digestion to no end.  So although I don’t eat almonds or almond butter much anymore, it’s beloved by my husband and children.  So I make it for them.  Making at home is also motivated by the insanely high price of store bought organic almond butters (common to see $15 for a jar…I’ve seen it as high as $24!!).  If you love roasted almond butter and want to save a little money, then this recipe is for you.  I also make a raw version with soaked and dehydrated almonds and included directions for this at the end of the post.

Homemade Organic Roasted Almond Butter
 
Author:
Ingredients
  • 3 cups raw organic almonds
  • Pinch of salt
Instructions
  1. Preheat oven to 350 degrees
  2. Arrange the almonds on a baking sheet in a single layer
  3. Roast for 10 minutes
  4. Remove from oven and allow the almonds to cool completely
  5. When the almonds are cool, add to a food processor
  6. Turn it on and let it whirl. After about a minute the almonds will form a stiff, dry ball. This is okay. Take off the lid and break the ball apart with a fork. Turn the machine back on and keep it blending. If it stops up again, do the same with the fork
  7. After about 3 minutes the oils in the almonds will release and the mixture will become thin. Continue blending until the almonds are creamy and smooth. It takes about 9 minutes in my food processor. Add in your pinch of salt toward the end of the process. Please note, I do NOT have a fancy, high tech food processor. It is the most basic model
  8. Store in glass container in the fridge
 _
 _
Homemade Almond Butter w/ Soaked Almonds
 
Author:
Ingredients
  • 3 cups raw organic almonds
  • Walnut oil (or olive oil)
  • Pinch of salt
Instructions
  1. In a large bowl, add the almonds and fill with filtered water (with about two inches over top of almonds). Soak for 12 - 24 hours. I soak mine for 24 and change the water once
  2. Drain and rinse the almonds
  3. Lay them out on a towel and pat off the excess water
  4. Add almonds to a food dehydrator and dehydrate on 105 degrees for about 30 hours
  5. The almonds will be properly dehydrated when they are crisp and crunch to the taste and you an visually see the meat of the almond is dry. You can tell when there is moisture left, you can see it and feel it
  6. Place the dehydrated almonds in a food processor and blend. You need to stay close to the food processor and give it many breaks, as the almonds get very hot and you don't want the temp to rise over 118 degrees. So if you are keeping this raw, blend and check the temperature throughout the process
  7. After the almonds look well blended, you can add in a little oil to help the moisture factor. It's up to you how much to add, so start with a teaspoon and go from there. At this point you can also add in the pinch of salt
  8. Raw almond butter made with this method smells and tastes different than roasted almond butter, but still delicious (and much easier to digest!)
Shared on: Fat Tuesday, Slightly Indulgent Tuesdays, Allergy-Free Fridays, Wellness Weekend, Healthy Vegan Friday 
Posted by Amber at

Labels: dips and spreads, GAPS, how to, Paleo, SCD, snacks.

5 Comments

Leave a Reply

Your email address will not be published. Required fields are marked *

Rate this recipe:  

Friday, July 13, 2012

Soaking Seeds and Nuts = Better Digestion (let this post inspire you to get soaking)

Why is it that the simple things seem more difficult.  I have a theory.  I think it’s because they are so obviously easy we tell ourselves we’ll get to it soon, after the more “difficult stuff.”  We tend to tackle the big projects with gusto because we have to.  But when something is easy, well, it just gets shuffled back on the to-do list.  Changing and/or introducing new behavior is challenging.  I knew that once I started soaking and dehydrating, I would have to make it a permanent behavior change.  I learned about soaking and dehydrating nuts/seeds LONG before I started.  I am completely unable to digest raw nuts and seeds.  It tears up my digestion.  I’m sure most of you with IBD can relate.  So one day I had an honest conversation with myself, and I was ready to make this a new part of my life and I was excited about it.  If you’re still on the fence about soaking, want to start, but just haven’t got around to it.  Please let this post be your inspiration to get going.  Your body will thank you for it.  Below I’ve included two links about soaking that I find interesting.  They are quick, informative reads.  Okay, good luck friends.  Happy soaking.
_______________________________________
Step 1: Soak
Soak nuts in clean, filtered water (twice as much water to nuts) and sea salt (1 tablespoon for every 8 cups of water). 
Below I have walnuts, almonds and hazelnuts. I soak mine for at least 12 hours.  In the evening, after dinner start the soak (7:00 pm).  They are ready to drain and rinse the next morning around breakfast (7:00 am).  

Why you should soak:  it removes enzyme inhibitors and makes them easier to digest.

Step 2: drain and rinse (well)

Step 3: Dehydrate.
Remove excess water with a towel (sort of pat dry method), but they do not have to be completely dry before going into the dehydrator). If you have one single layer, they will dry faster.  I tend to overcrowd, so I dehydrate longer and move them around a little halfway through. 
Note: You CAN use your oven, the seeds/nuts just won’t be “raw.”  Dehydrate in the oven on the lowest setting until crispy.  Not sure how long.  You will have to watch them and check every few hours.  

Dehydrating Times and Temps I use:
Walnuts: 12 – 14 hours (130 degrees)
Hazelnuts: 12 -14 hours (130 degrees)
Almonds: closer to 18 hours (130 degrees)
Pumpkin seeds:  4 – 6 hours (110 degrees)
 Sunflower seed: 4 – 6 hours (110 degrees)
*I will add to this list as I go
Here are some pumpkin seeds and sunflower seeds

Recommended reads before you get going:
1.  How to Soak, Sprout and Dehydrate Nuts and Seeds  

2.  Benefits of Soaking Nuts and Seeds 
____________________________________________________
Shared on: Fat Tuesday , Pennywise Platter Thursdays, Simple Lives Thursdays, Frugal Food Thursdays, Allergy-Free Wednesdays, 
Posted by Amber at

Labels: better digestion tips, how to.

10 Comments

Leave a Reply

Your email address will not be published. Required fields are marked *

Wednesday, June 27, 2012

Homemade Macadamia Nut Milk (dairy free, SCD)

You may notice a few things about my nut milks.  First, I use a lot of water.  Why you ask?  Well, I guess the obvious reason is it saves money but I also like the way it tastes, so why not.  Another thing I do is scoop off the foam that forms from blending.  I do this because I don’t like straining the foam through the nut milk bag.  And lastly, I generally add just a teaspoon of vanilla for a little favor and a little sweet.  I keep things pretty simple.  I happen to love my nut milks, but I suggest you experiment with different water ratios and sweeteners.  Macadamia nut milk is another family favorite.  I used to buy store bought nut milks, then started making them in my Ninja blender years ago before I purchased my Vitamix.  Making nut milk is so easy, and so satisfying.  There are so many additives found in store bought.  For example, many brands add what’s called carrageenan.  Studies reveal that carrageenan can exacerbate IBD symptoms and flares.  And I found this thread discussing the issue.  So to make nut milks, you don’t NEED a high speed blender.  I used my Ninja for years and it worked fine.  Check out my other nut (and seed) milks that you can make in any regular blender (high speed just works the best at crushing and blending the nuts/seeds):
Almond, Walnut, Hazelnut, & Hemp.     

Ingredients 
-1 cup raw, organic macadamia nuts 
-7 cups filtered water 
-1 teaspoon vanilla  

How To
1.  Soak macadamia nuts in filtered water for 5 hours.   
2.  Drain and rinse nuts with filtered water
3.  To your high speed blender add nuts, 7 cups water and vanilla*
4.  Blend on high for 90 seconds 
5.  Here’s a step in the process that might be different from most:  

*After blending I let the milk sit in the blender for about 10 minutes.  This gives the milk time to settle and the foam to gather on the top.  After the 10 minutes I scoop off all the foam.  After removing the foam my original 7 cups remain.  I dislike straining foamy milk through the nut milk bag.  
6.  After you scoop off the foam (and discard into the sink), strain the milk through nut milk bag.  I strain the milk into an 8 cup glass Pyrex

7. Transfer to glass pitcher with lid and store in the fridge for up to four days

Notes:  
*If using a “regular” blender (not high-speed), start with 4 or 5 cups of water and blend on high for up to 2 minutes.  Add more water in future batches if you’d like.

What to do with that macadamia nut pulp?  How about make a raw hummus dip!

Shared on: Fat Tuesday, Slightly Indulgent Tuesday, Allergy Free Wednesdays Whole Food Wednesdays, Gluten Free Wednesdays, Real Food Wednesdays, Fresh Food Wednesday, Tastetastic Thursdays, Pennywise Platter Thursdays, Simple Lives Thursdays, Frugal Food Thursdays, Wellness Weekend, Fresh Bites Friday, Fight Back Friday, Friday Food, Show Off Friday, Potluck Party Friday, Healthy Vegan Fridays 
Posted by Amber at

Labels: dairy free, how to, non-dairy milk, SCD.

20 Comments

Leave a Reply

Your email address will not be published. Required fields are marked *

Monday, May 21, 2012

Homemade Hazelnut Milk (SCD Friendly)

Hazelnut milk is another popular nut milk you’ll find at the store.  It’s quite easy to make, and you’ll discover the very nutty and unique flavor of this milk when you make it at home.  In all honesty, this isn’t my favorite nut milk (my fave is walnut), but I have to say, there is something about the hazelnuts that make this a great option for smoothies and shakes (such as chocolate).  I usually make a batch of hazelnut milk and then freeze in my old homemade baby food containers and use in shakes or smoothies.  I don’t like to sweeten my nut milks (I add only a touch of vanilla), but you could certainly sweeten it up.  See below in the notes for some ideas.  Have you made any nut milks yet?  I have a few more to share with you: pecan and macadamia.    

Ingredients 

-1 cup raw, organic hazelnuts  
-7 cups filtered water 
-1 teaspoon vanilla  

How To
1.  Soak hazelnuts in filtered water for 8 -10 hours.   
2.  When the hazelnuts have been properly soaked, drain and rinse with filtered water
3.  To your blender add hazelnuts, 7 cups water and vanilla
4.  Blend on high for 90 seconds.  I use a Vitamix.  If you don’t have a high speed blender, you can use a regular blender, but blend longer (about 120 seconds) and start with 5 cups water.  If you like the flavor, then add more water in your next batch.  
5.  Here’s a step in the process that might be different from most (this may just apply to a high speed blender):  

After blending I let the milk sit in the blender for 5 -10 minutes.  This gives the milk time to settle and the foam to gather on the top.  After the 5 minutes I scoop off all the foam and discard into the sink.  After removing the foam my original 7 cups remain.  I dislike straining foam through the nut milk bag.  See here for foam scooping process.


6.  After you scoop off the foam, strain the milk through nut milk bag.  I strain the milk into an 8 cup glass Pyrex
Then transfer to glass pitcher with lid and store in the fridge for up to 5 days

Notes:  
*If using a “regular” blender (not high-speed), start with 5 cups water and blend on high for up to 2 minutes.  Add more water in future batches if you like the consistency and taste with 5 cups.
*To sweeten hazelnut milk, you can add any individual or combination of the following: 3 soaked dates, 2 tablespoons maple syrup, honey, coconut nectar, coconut sugar, brow rice syrup, yacon syrup, or drops of stevia to taste.  A common method is to add strained nut milk back into blender then add sweetener and blend.   

Check out this  great site on: what to do with your nut pulp.  There’s like a zillion recipes So awesome!! 
More homemade nut milks from The Tasty Alternative
Walnut Milk
_________________________________________
Shared on: Just Another Meatless Monday, Melt in your Mouth Mondays, Monday Mania, Ruth’s Real Food 101 (Mondays), Slightly Indulgent Tuesdays, Traditional Tuesdays, Fat Tuesdays,  Real Food WednesdaysAllergy-Free WednesdaysGluten Free Wednesdays, Whole Food Wednesdays, Pennywise Platter, Simple Lives Thursday, It’s a Keeper Thursday, Wellness Weekend, Fresh Bites FridayFreaky FridayFight Back Friday,  Friday Food, Lunchbox Love Friday, Potluck Party Friday, Super Food Sundays, 
Posted by Amber at

Labels: dairy free, drinks, how to, non-dairy milk, SCD.

11 Comments

Leave a Reply

Your email address will not be published. Required fields are marked *

Friday, May 11, 2012

Alert – Foodgasm Ahead!! Chocolate Covered Strawberries (with homemade dark and white chocolate – vegan and sugar free)

We went strawberry picking a few weekends ago and we’ve been eating strawberries every day and I’ve had fun incorporating these red beauties in everything from ice cream to salads.  You just can’t go wrong with strawberries, right!  Don’t these look wonderful drenched in chocolate (um, yes, foodgasm – the perfect mix of sweet and tartswoon)!  What a thoughtful Mother’s Day gift these would make, perhaps for dessert after dinner out or a home cooked meal.  This chocolate was completely inspired by Ricki @ Diet Dessert and Dogs.  She recently made some goji berry sugar free chocolates, and they were amazing. It was my first time using stevia as a sweetener in chocolate, and I have to say, it worked beautifully.  And my chocoholic husband LOVED them, so that’s ALL I need to know.  If he gives me the thumbs up, it’s a winner in my book.  
Ingredients

Dark Chocolate
-2 oz cocoa butter
-1/4 cup cashew butter*
-3 level tablespoons of cacao powder
-1/4 teaspoon vanilla stevia 
-1/4 teaspoon cocoa bean extract stevia
-1/4 teaspoon coffee flavor
-1/4 teaspoon peppermint extract

White Chocolate 
-1 oz cocoa butter
-2 tablespoons cashew butter*
-1 teaspoon coconut oil
-30 drops vanilla stevia

How To:
1.  For dark chocolate: in a double boiler (or just put a nonstick pan on top of a pot filled with water), add cocoa butter, cashew butter, and cacao powder.  Stir as it melts to help break up the cashew butter.  When the chocolate looks nice and hot and it’s melting, turn off heat and continue to stir until everything is well incorporated.  
2.  Add in both vanilla stevia and cocoa stevia.  Stir. 
3.  Transfer melted chocolate into two separate bowls (should be 1/3 cup for each bowl).  
4.  In one bowl add 1/4 teaspoon peppermint extract, and in the other bowl, add coffee flavor.
5.  Allow chocolate to cool and thicken a bit before you start to dip in the strawberries.  
6.  You may need to place the bowls of chocolate in the fridge, but not for long.  Be forewarned, once the bowl gets cold, the chocolate hardens very fast.  So, if this happens, simply put the bowl directly in some hot water to melt and start over.  It may take a few tries to get the chocolate just right, but what you want is a somewhat thick syrup.
7.  It helps if you put a plate in the freezer before you start.  After you dip your strawberries, you can place them on the cold plate and it hardens the chocolate and helps it from oozing.

How To:
1.  For the white chocolate:  in a double boiler (see above), add cocoa butter, cashew butter, and coconut oil. Stir as it melts to help break up the cashew butter.  When the chocolate looks nice and hot and it’s melting, turn off heat and continue to stir until everything is well incorporated.  
2.  Add in vanilla stevia. Stir. 
3.  Transfer melted chocolate into a bowl and allow to cool.  You can place in the fridge to help thicken, but see above if it hardens over completely. 

Notes:
*To make cashew butter, add 1 – 2 cups raw cashews to food processor.  Turn on and blend until creamy.  It will get creamy right after the ball of nut butter forms.  
*You don’t HAVE to make the chocolate with cashew butter!  Skip it for a creamier finish.  
*When you start to dip the strawberries, do 5 to 7 strawberries at a time, the place in the fridge on the cold plate with a non-stick surface, such as parchment paper to help set up.
*Cool the berries, then re-dip in chocolate until you achieve your desired chocolate thickness.  I prefer a thin layer, 
*If you place the strawberries directly on a glass plate, a metal spatchula works well to remove them from the cold plate – be gentle but firm. 
*Garnish when chocolate is wet, before you place in fridge – use shredded coconut, lemon, orange or lime zest. 
*These can be left out at room temperature, they will not melt all over.  Placing in the fridge just helps them set up.  
*Please add your stevia to taste.  I don’t like super sweet, just enough to offset the bitter.  So test the chocolate before you drizzle on the strawberries. 
*Make little chocolates with leftover melted chocolate (see below)
I also use a spoon to cover the strawberry with chocolate 
This is what happens if the chocolate gets too firm, it becomes difficult to work with.  Just warm the chocolate if this happens.  You need to find the right consistency, this takes a little practice.  Remember, the white chocolate will look a little pale, but will become whiter as it cools.  
Shredded coconut and lemon zest for garnish 
Pour your extra chocolate into miniature silicone baking cups and make little individual chocolates.  So fun!

Shared on: Slightly Indulgent Tuesdays,  Allergy-Free Wednesdays, Whole Food Wednesdays, Gluten-Free Wednesdays, Pennywise Platter Thursdays, Wellness Weekends, Fresh Bites Friday, Freaky Friday, Fight Back Friday, Friday Food, Lunchbox Love Friday, Allergy-Friendly Fridays, Pot Luck Party Friday,  Sugar Free Sundays 

Posted by Amber at

Labels: candy alternatives, dairy free, dessert, how to, sugar free, summer treats, vegan.

19 Comments

Leave a Reply

Your email address will not be published. Required fields are marked *