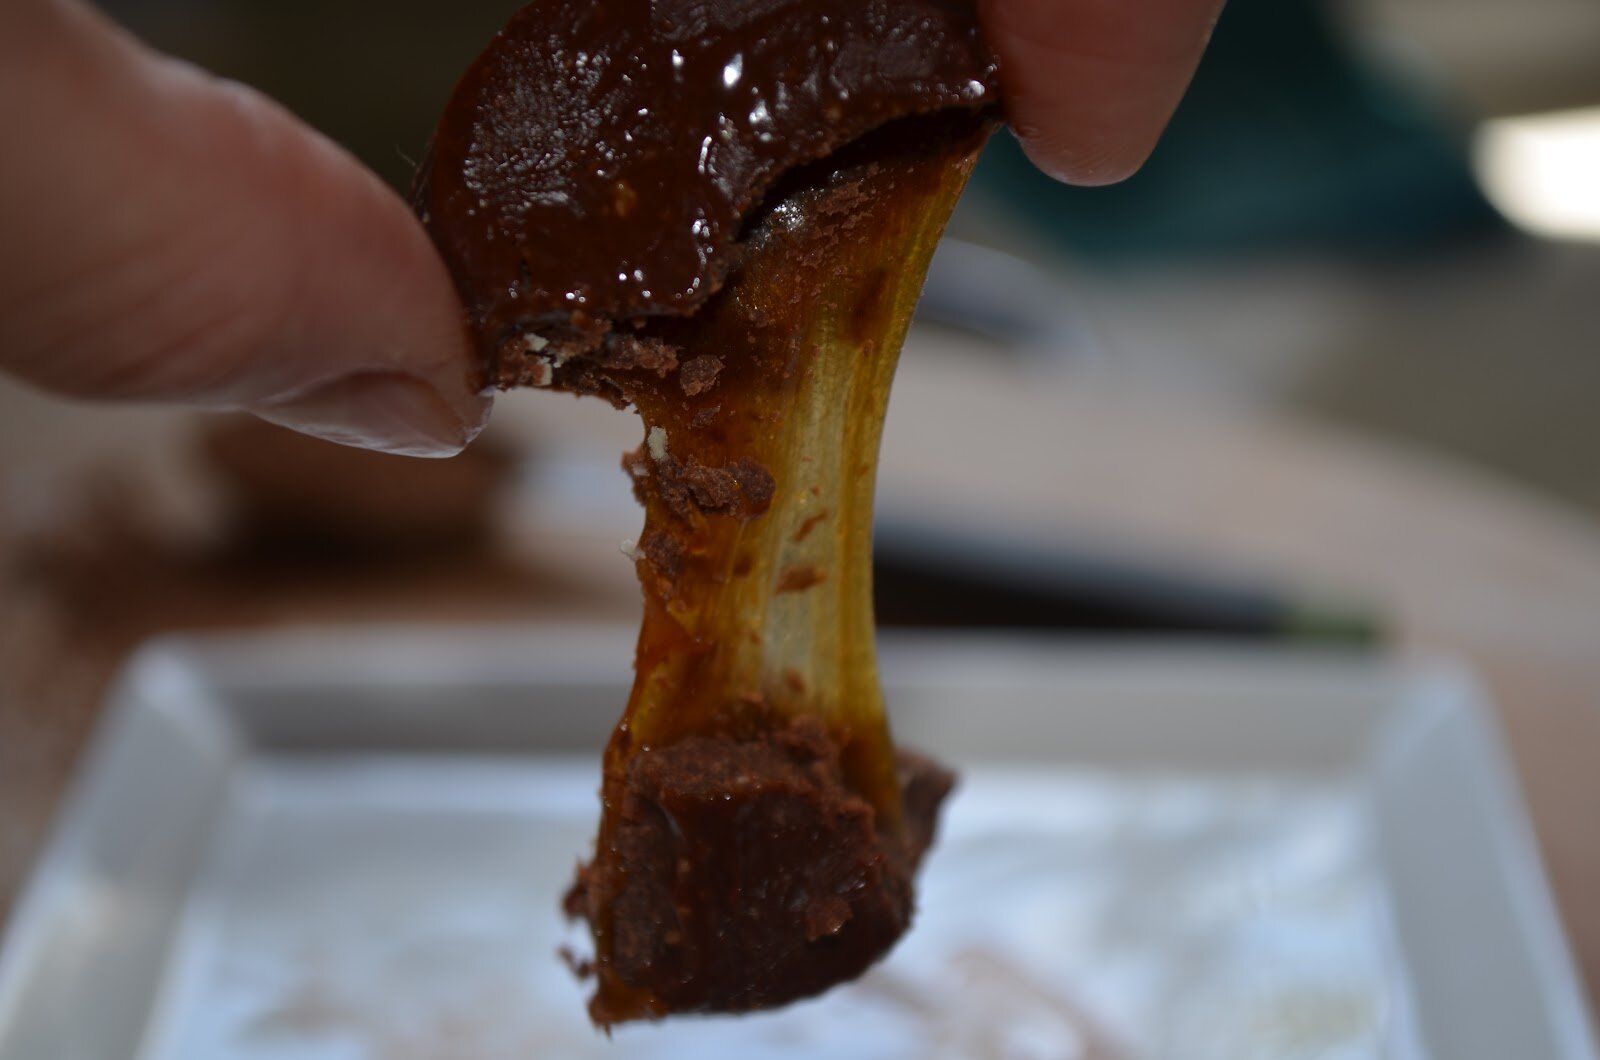
Category Archives: dessert

Friday, May 18, 2012

Chocolate Caramel Chews (vegan, grain free, low glycemic)

Here’s another chocolate recipe, inspired by Ricki.  I’m no chocolate making expert – this is all new to me.  But can I tell you, I’m having a BLAST experimenting.  I’m sure this recipe, like all things, will evolve over time.  This latest creation is chocolate stuffed full of ooey gooey caramel.  Reminds me of a Caramello (anyone remember those)?  I just can’t eat traditionally made caramel (my stomach hurts just looking at those ingredients).  But I can tell you in all honesty, this is a very, very tasty alternative.  And I feel really good about the ingredients.  I just know Scott is going to go crazy over these when he gets home.  Can you tell I love surprising my husband with chocolate.  I’m working on a few other homemade chocolate recipes: ginger chocolates and bacon chocolates (yes, bacon- I know, crazy, but I hear it’s all the rage). I hope you enjoy these in the meantime.  And you can visit here for my chocolate covered strawberries (sweetened with stevia). 

Ingredients
Chocolate
-2 ounces cocoa butter, shaved 
-1/4 cup cashew butter *
-3 tablespoons raw cacao powder 
-1 to 2 tablespoons raw agave (more or less to your sweetness taste, I went with 2)
-1/2 teaspoon vanilla 
-Pinch of salt 

Caramel
-3 tablespoons yacon syrup
-2 tablespoons coconut sugar
-1/2 teaspoon vanilla
-Pinch of salt


How To:

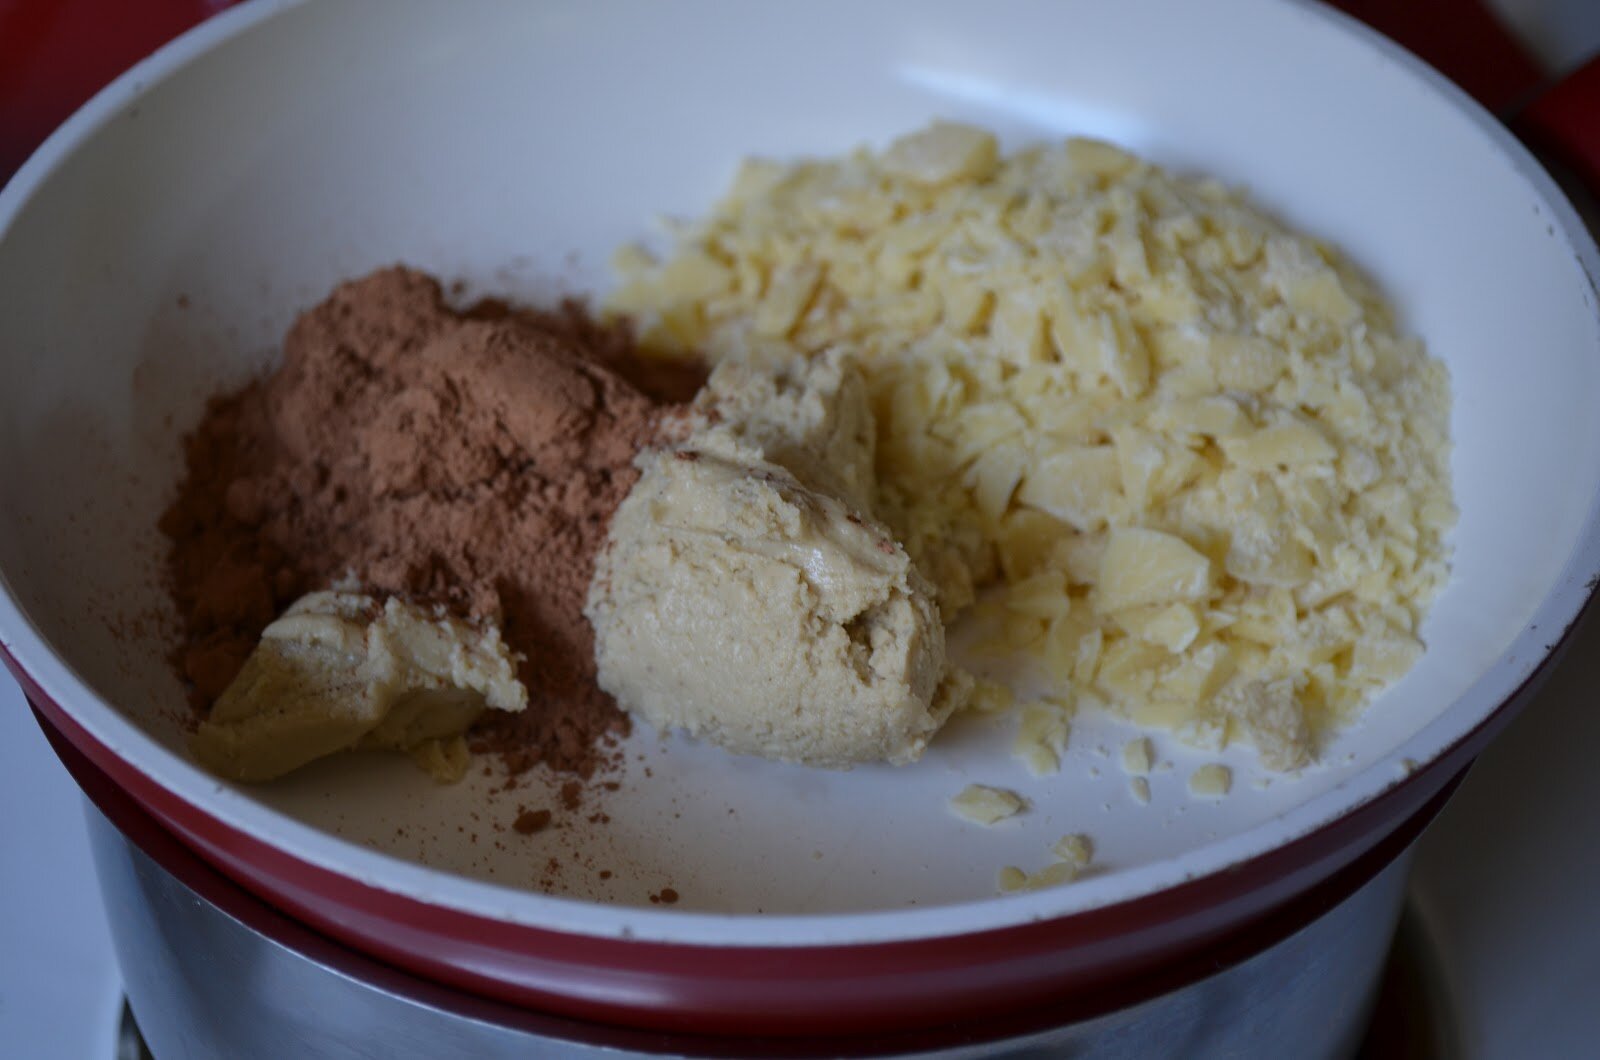
1.  In a small non-stick pan add chocolate ingredients and melt – taking care to not burn.  I recommend stirring the entire time.  Remove from heat once in a while, continue stirring.  Stir to break down the cashew butter.  When the mixture looks smooth with no cashew butter chunks, transfer to 1 cup glass Pyrex (with pour spout).
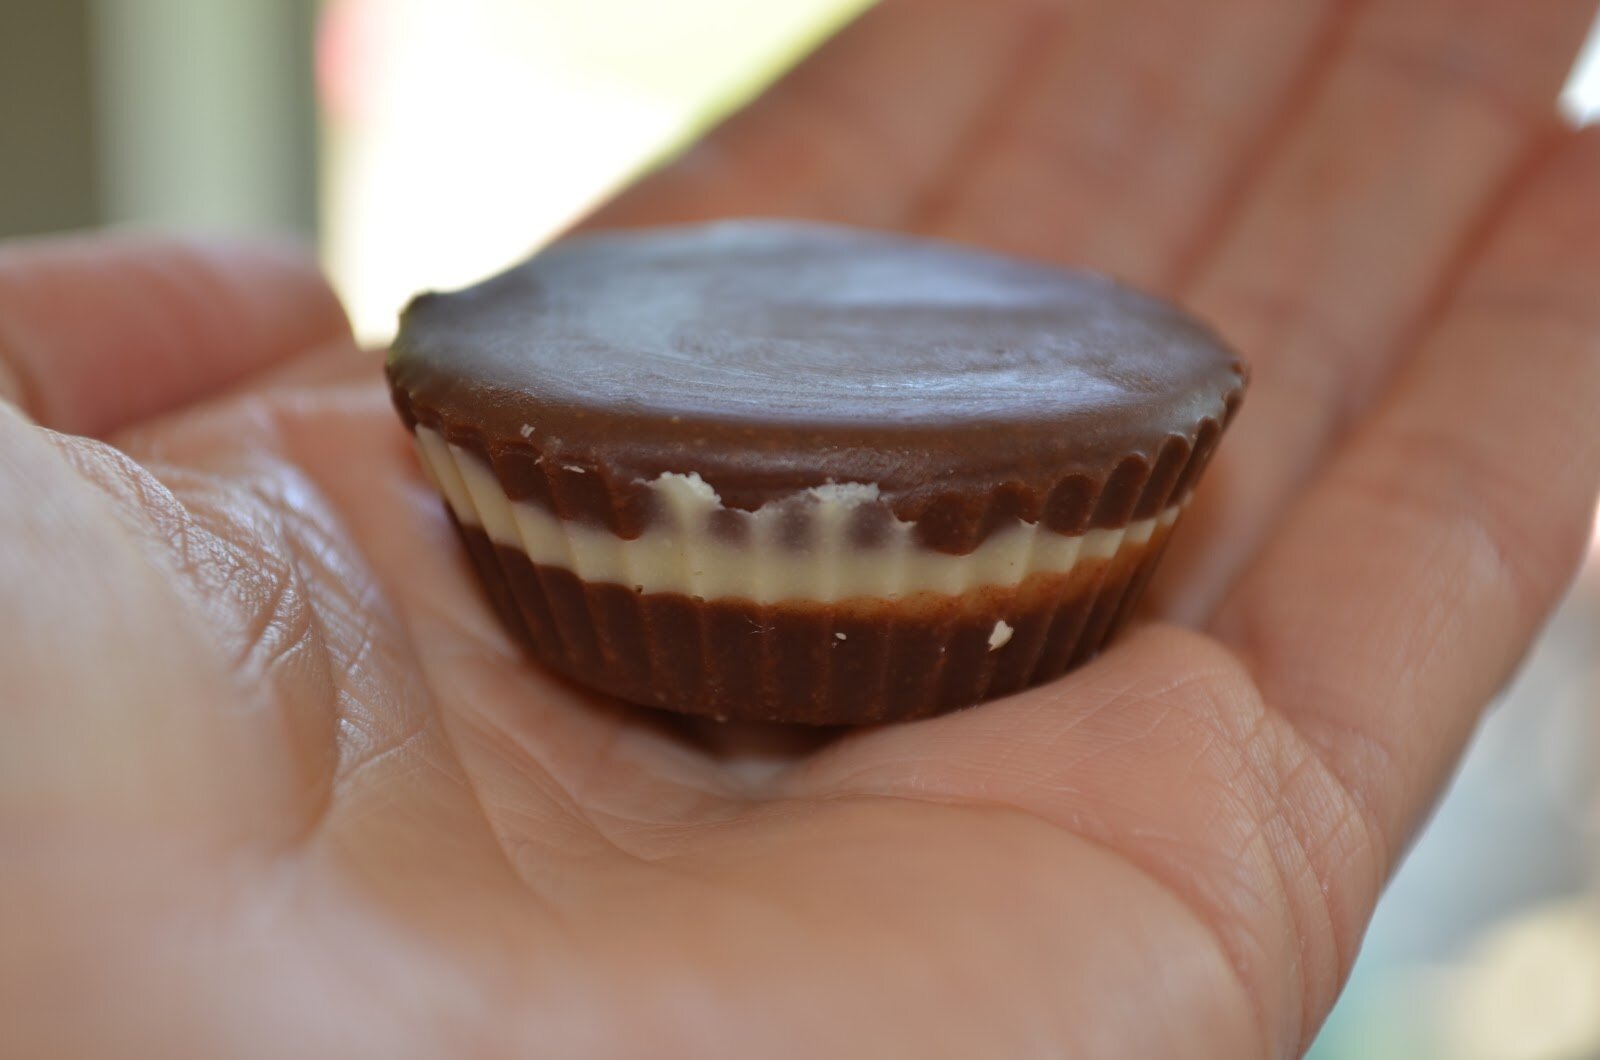
2.  Fill each miniature silicone baking cup 1/3 of the way with chocolate. 
3.  Place in fridge or freezer to set up.  (The chocolate will only take a few minutes to set up in the freezer).
4.  While the chocolate is setting up, make the caramel.  In a small non-stick pan, add the caramel ingredients.  Heat ingredients on med/low, and stir the entire time.  You want to heat this slowly and dissolve the coconut sugar.  Remove from heat when the mixture starts to thicken and stir rapidly, then transfer to a small bowl.  
5.  Remove chocolate from fridge for freezer.  They should be completely solid.
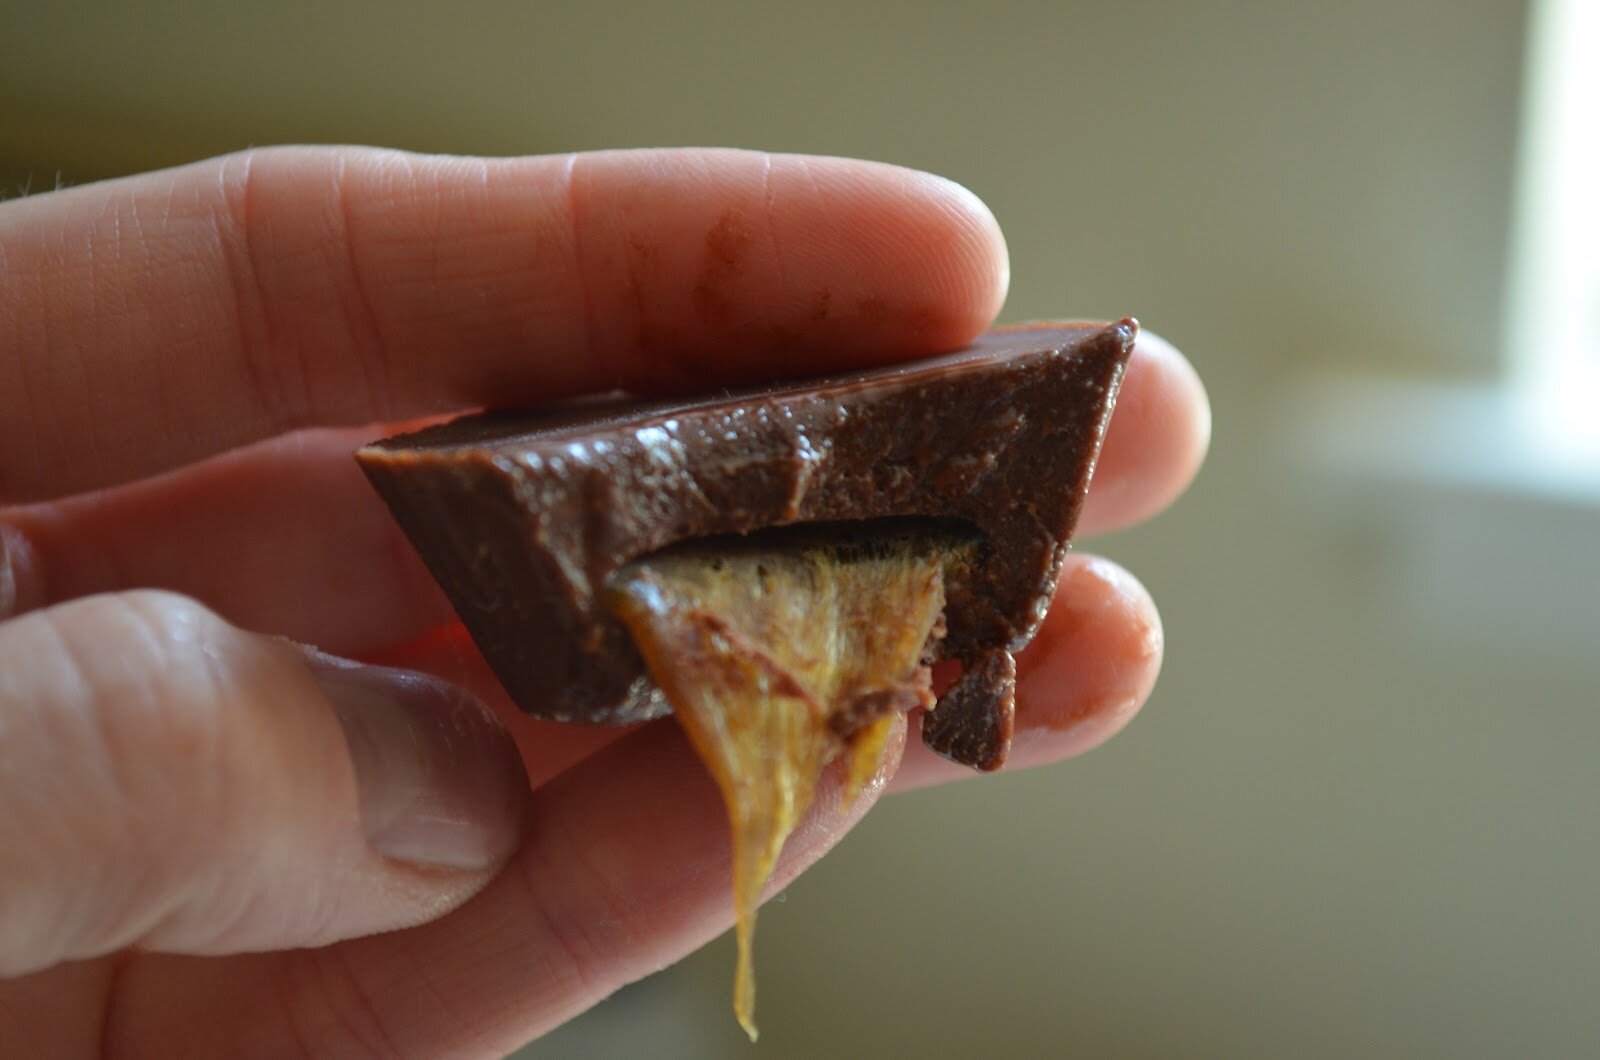
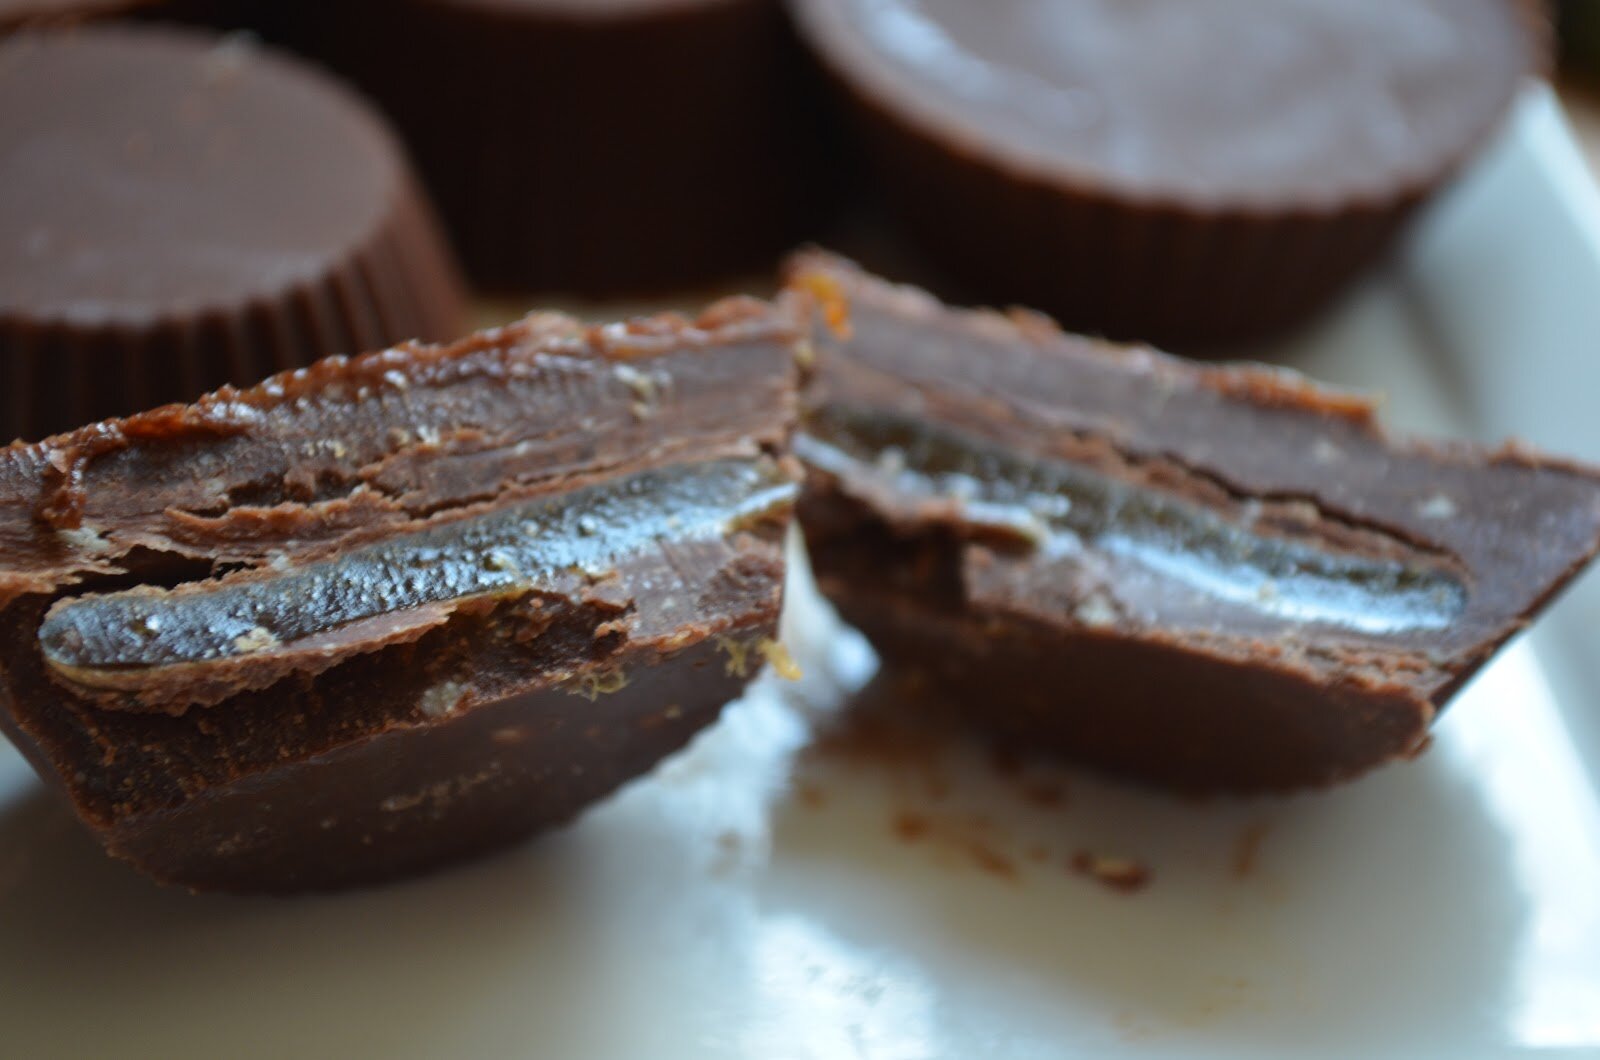
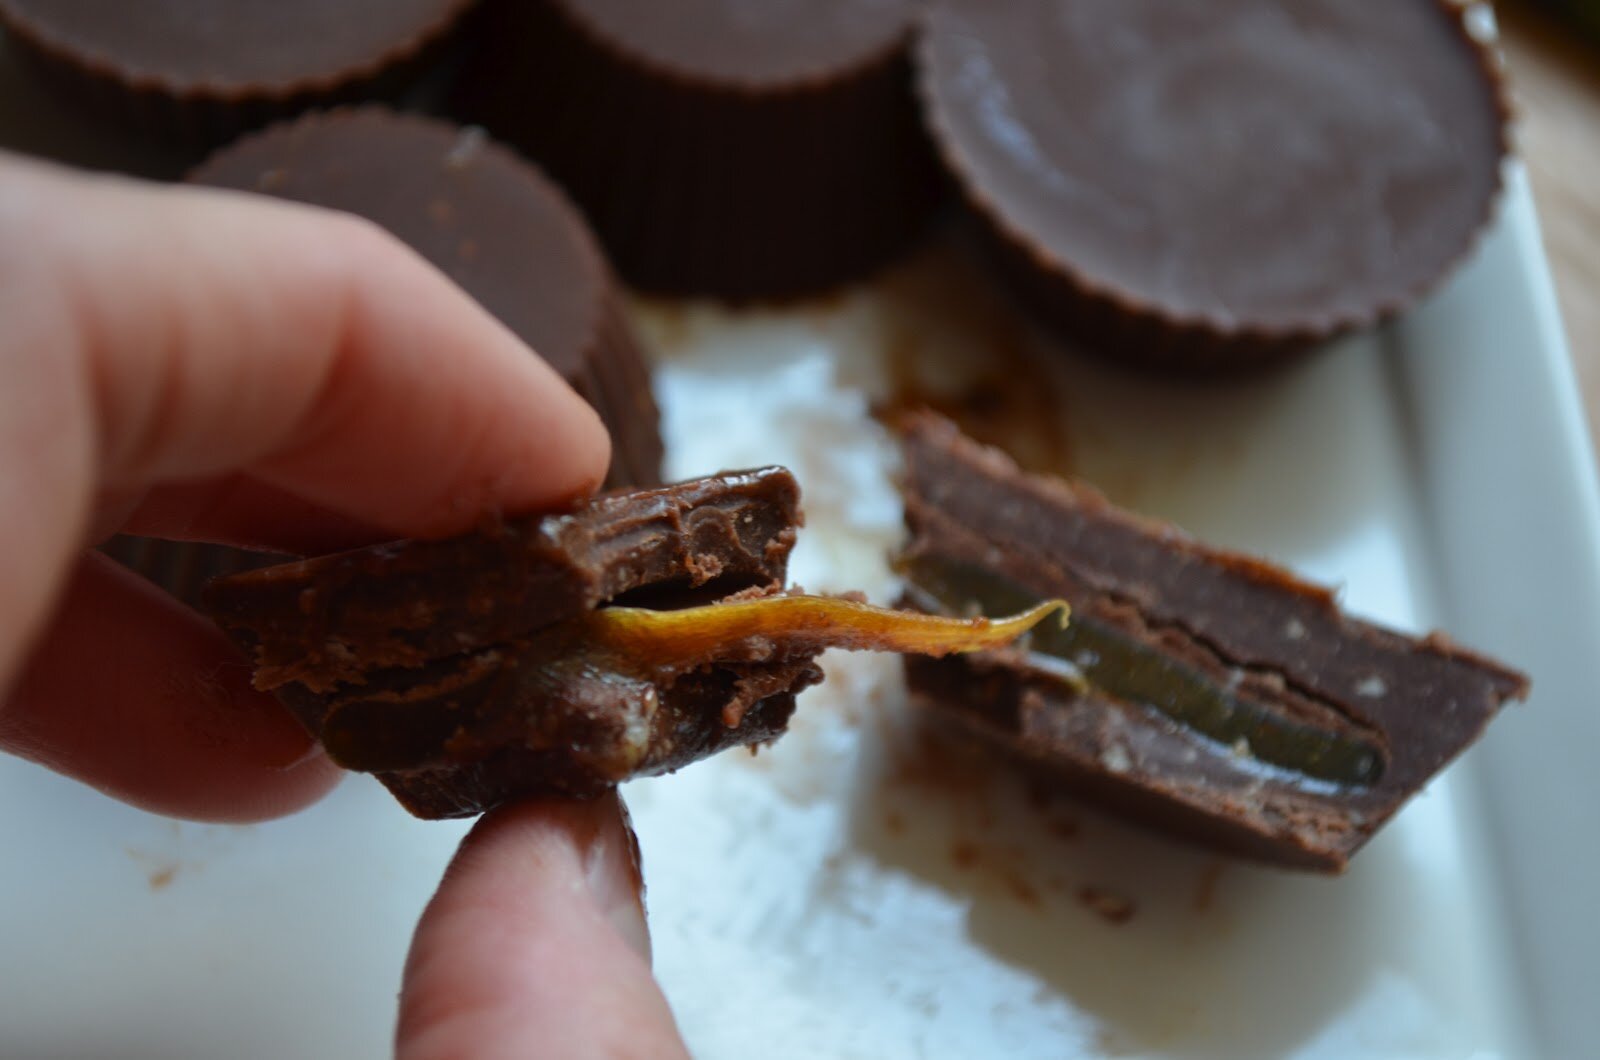
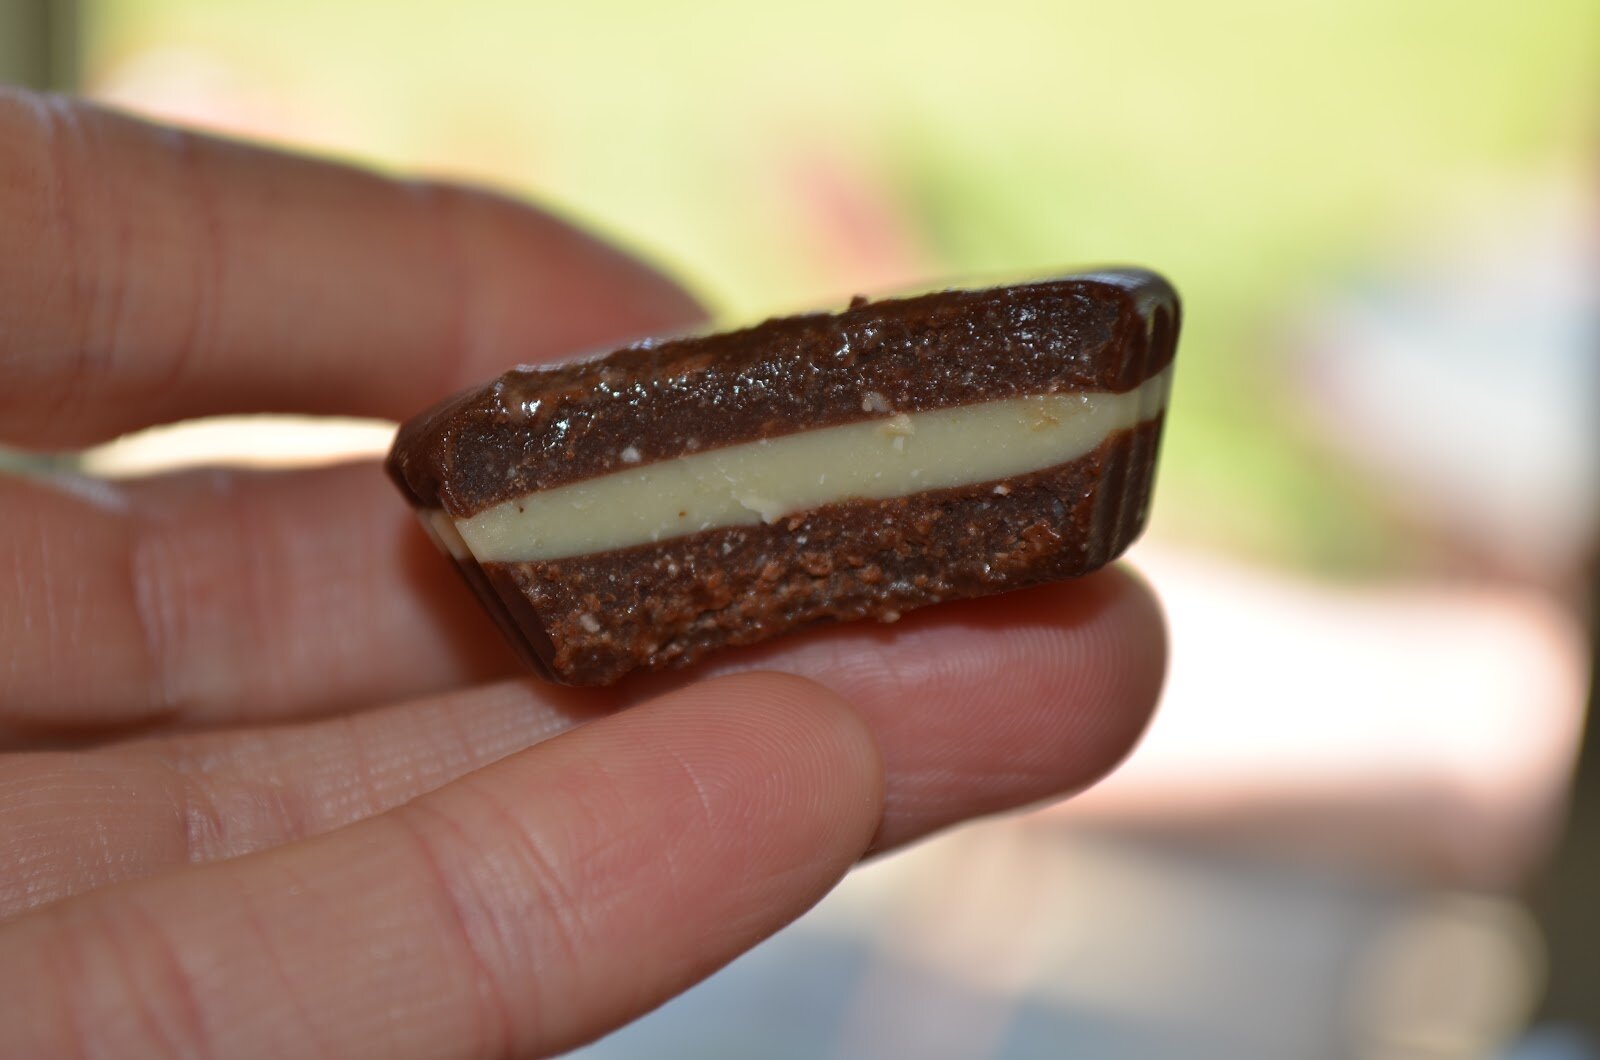
6.  Add an equal amount of caramel to each cup, filling to the halfway mark.  I use a slightly oiled spoon to get the caramel out of the bowl.  It will thicken and get very sticky as it cools.  So work quickly.  After you’ve filled each cup, the caramel should be firm inside the cups from the cold chocolate.
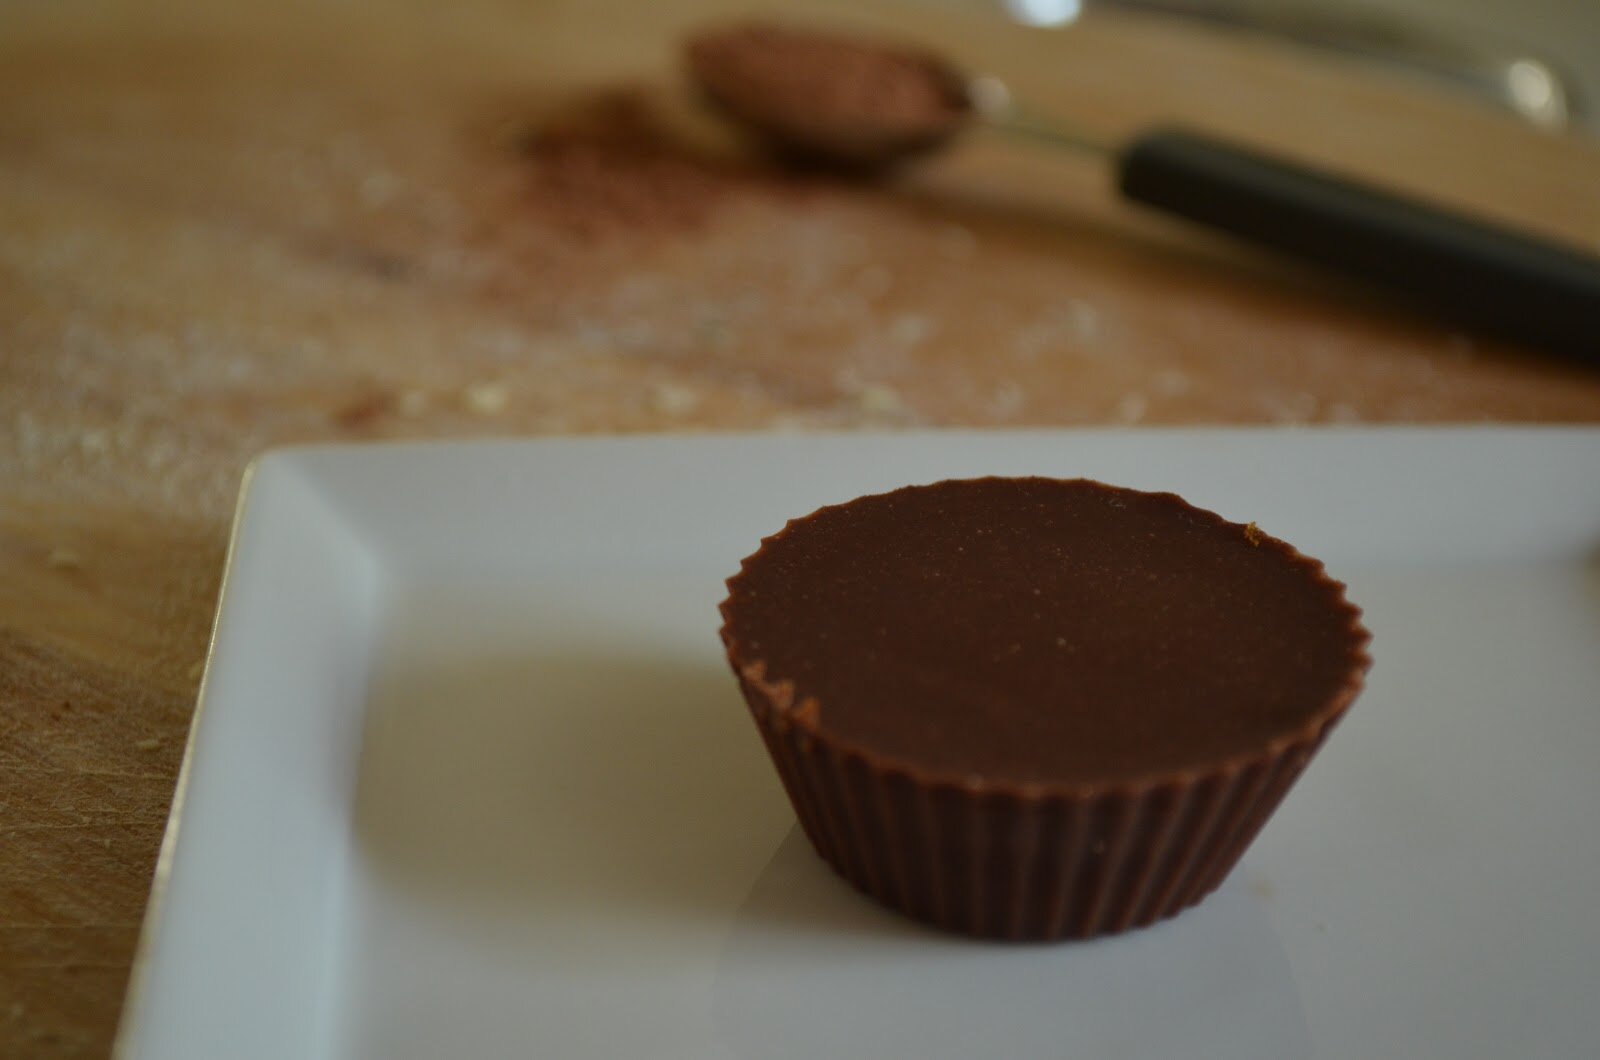
7.  At this point, simply fill the cups with the remaining chocolate and place back in the fridge or freezer.  I utilize the freezer.

Notes:
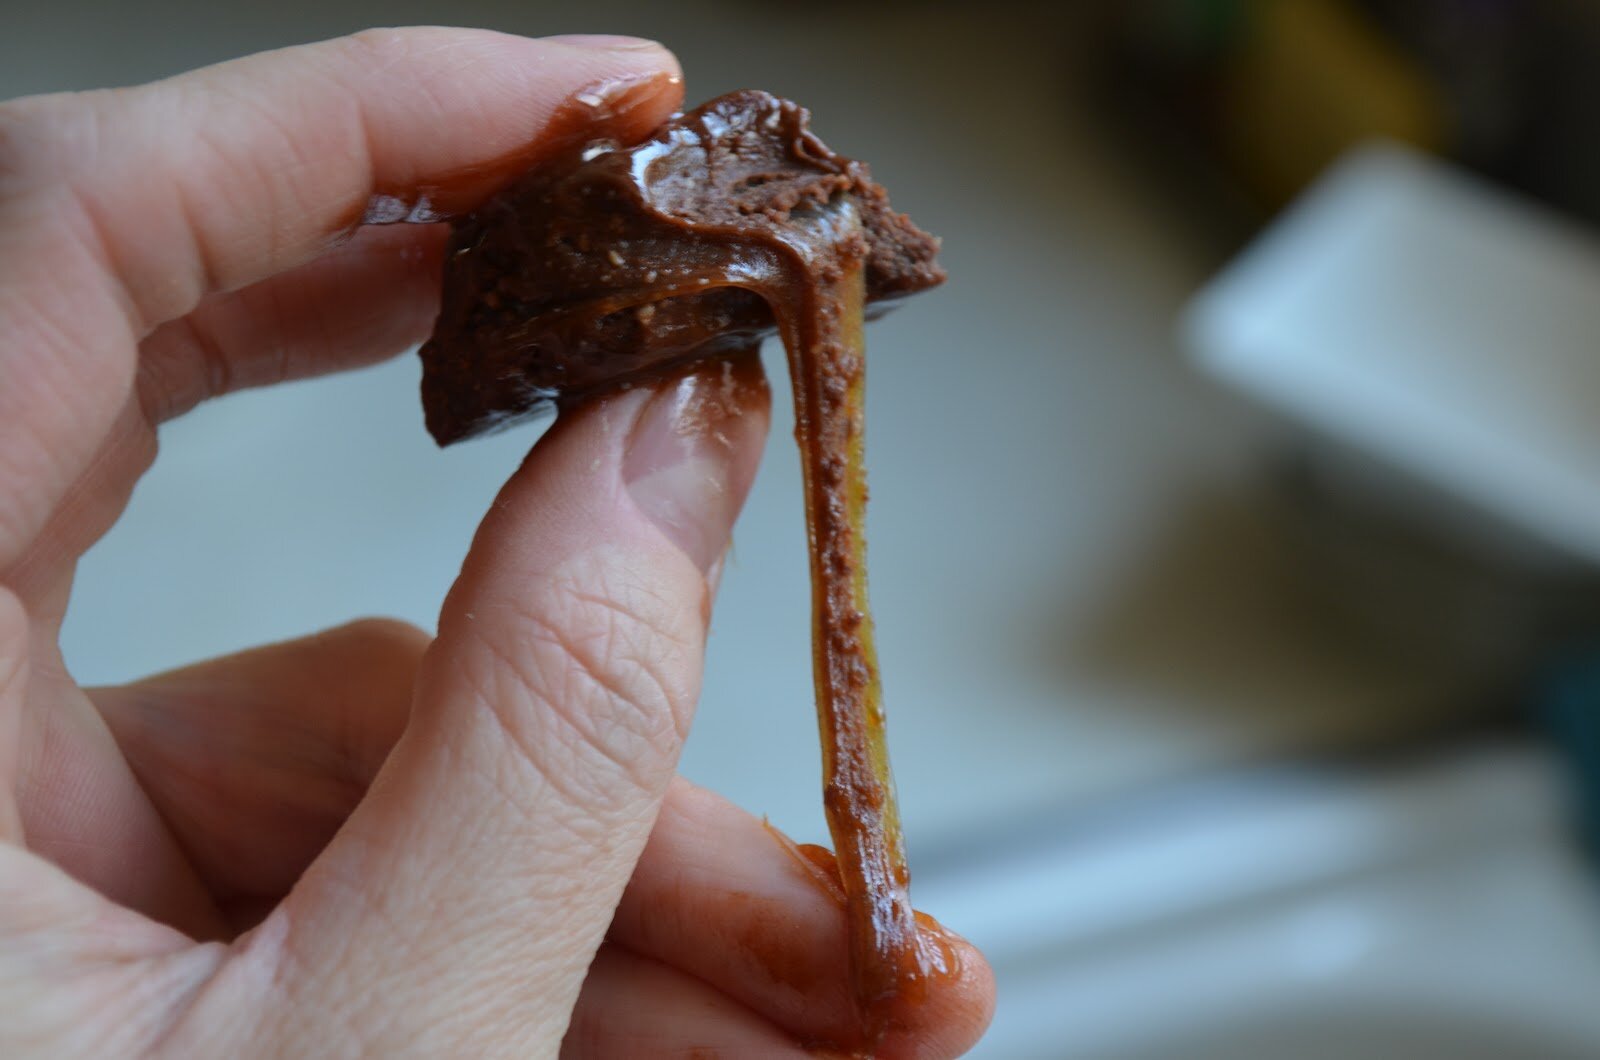
*Because these are made with agave instead of stevia, they melt much quicker at room temperature (and from fingers).  They are best out at room temp for no more than 10 minutes.  It goes without saying, it’s best to store these in the fridge.  The caramel stays ooey and gooey in there too!
*To make cashew butter, add 1 – 2 cups raw cashews to food processor.  Turn on and blend until creamy.  It will get creamy right after the ball of nut butter forms.

*
Melting the chocolate: 
Caramel Sauce: 
Middle layer of caramel:
Sliced open: 
 The caramel stays nice and chewy in the fridge 
Shared on: Just Another Meatless Monday, Melt in your Mouth Mondays, Monday Mania  Ruth’s Real Food 101 (Mondays), Fat Tuesdays, Traditional Tuesdays, Allergy-Free Wednesdays, Whole Food Wednesdays, Gluten Free Wednesdays,  Real Food Wednesdays, Wellness Weekend, Fresh Bites FridayFreaky FridayFight Back Friday, Friday Food, Lunchbox Love Friday, Feed Your Soul Friday, Potluck Party Friday, Super Food Sundays, Sugar Free Sundays, Allergy-Friendly Fridays  
Posted by Amber at

Labels: allergy-friendly, cane sugar free, dairy free, dessert, grain free, low glycemic, vegan.

11 Comments

Leave a Reply

Your email address will not be published. Required fields are marked *

Friday, May 11, 2012

Alert – Foodgasm Ahead!! Chocolate Covered Strawberries (with homemade dark and white chocolate – vegan and sugar free)

We went strawberry picking a few weekends ago and we’ve been eating strawberries every day and I’ve had fun incorporating these red beauties in everything from ice cream to salads.  You just can’t go wrong with strawberries, right!  Don’t these look wonderful drenched in chocolate (um, yes, foodgasm – the perfect mix of sweet and tartswoon)!  What a thoughtful Mother’s Day gift these would make, perhaps for dessert after dinner out or a home cooked meal.  This chocolate was completely inspired by Ricki @ Diet Dessert and Dogs.  She recently made some goji berry sugar free chocolates, and they were amazing. It was my first time using stevia as a sweetener in chocolate, and I have to say, it worked beautifully.  And my chocoholic husband LOVED them, so that’s ALL I need to know.  If he gives me the thumbs up, it’s a winner in my book.  
Ingredients

Dark Chocolate
-2 oz cocoa butter
-1/4 cup cashew butter*
-3 level tablespoons of cacao powder
-1/4 teaspoon vanilla stevia 
-1/4 teaspoon cocoa bean extract stevia
-1/4 teaspoon coffee flavor
-1/4 teaspoon peppermint extract

White Chocolate 
-1 oz cocoa butter
-2 tablespoons cashew butter*
-1 teaspoon coconut oil
-30 drops vanilla stevia

How To:
1.  For dark chocolate: in a double boiler (or just put a nonstick pan on top of a pot filled with water), add cocoa butter, cashew butter, and cacao powder.  Stir as it melts to help break up the cashew butter.  When the chocolate looks nice and hot and it’s melting, turn off heat and continue to stir until everything is well incorporated.  
2.  Add in both vanilla stevia and cocoa stevia.  Stir. 
3.  Transfer melted chocolate into two separate bowls (should be 1/3 cup for each bowl).  
4.  In one bowl add 1/4 teaspoon peppermint extract, and in the other bowl, add coffee flavor.
5.  Allow chocolate to cool and thicken a bit before you start to dip in the strawberries.  
6.  You may need to place the bowls of chocolate in the fridge, but not for long.  Be forewarned, once the bowl gets cold, the chocolate hardens very fast.  So, if this happens, simply put the bowl directly in some hot water to melt and start over.  It may take a few tries to get the chocolate just right, but what you want is a somewhat thick syrup.
7.  It helps if you put a plate in the freezer before you start.  After you dip your strawberries, you can place them on the cold plate and it hardens the chocolate and helps it from oozing.

How To:
1.  For the white chocolate:  in a double boiler (see above), add cocoa butter, cashew butter, and coconut oil. Stir as it melts to help break up the cashew butter.  When the chocolate looks nice and hot and it’s melting, turn off heat and continue to stir until everything is well incorporated.  
2.  Add in vanilla stevia. Stir. 
3.  Transfer melted chocolate into a bowl and allow to cool.  You can place in the fridge to help thicken, but see above if it hardens over completely. 

Notes:
*To make cashew butter, add 1 – 2 cups raw cashews to food processor.  Turn on and blend until creamy.  It will get creamy right after the ball of nut butter forms.  
*You don’t HAVE to make the chocolate with cashew butter!  Skip it for a creamier finish.  
*When you start to dip the strawberries, do 5 to 7 strawberries at a time, the place in the fridge on the cold plate with a non-stick surface, such as parchment paper to help set up.
*Cool the berries, then re-dip in chocolate until you achieve your desired chocolate thickness.  I prefer a thin layer, 
*If you place the strawberries directly on a glass plate, a metal spatchula works well to remove them from the cold plate – be gentle but firm. 
*Garnish when chocolate is wet, before you place in fridge – use shredded coconut, lemon, orange or lime zest. 
*These can be left out at room temperature, they will not melt all over.  Placing in the fridge just helps them set up.  
*Please add your stevia to taste.  I don’t like super sweet, just enough to offset the bitter.  So test the chocolate before you drizzle on the strawberries. 
*Make little chocolates with leftover melted chocolate (see below)
I also use a spoon to cover the strawberry with chocolate 
This is what happens if the chocolate gets too firm, it becomes difficult to work with.  Just warm the chocolate if this happens.  You need to find the right consistency, this takes a little practice.  Remember, the white chocolate will look a little pale, but will become whiter as it cools.  
Shredded coconut and lemon zest for garnish 
Pour your extra chocolate into miniature silicone baking cups and make little individual chocolates.  So fun!

Shared on: Slightly Indulgent Tuesdays,  Allergy-Free Wednesdays, Whole Food Wednesdays, Gluten-Free Wednesdays, Pennywise Platter Thursdays, Wellness Weekends, Fresh Bites Friday, Freaky Friday, Fight Back Friday, Friday Food, Lunchbox Love Friday, Allergy-Friendly Fridays, Pot Luck Party Friday,  Sugar Free Sundays 

Posted by Amber at

Labels: candy alternatives, dairy free, dessert, how to, sugar free, summer treats, vegan.

19 Comments

Leave a Reply

Your email address will not be published. Required fields are marked *

Monday, May 7, 2012

On The Farm: Strawberry Picking! (Strawberry pancakes, strawberry popsilces, and Beth’s strawberry coconut breakfast cookies). Strawberries are taking over my kitchen – and I love it!!

Last weekend we went to a local organic strawberry patch (just up the road from our house in fact). Still a little early in the season, but the kids had an absolute blast searching for those little red berries (okay and so did mommy, I’m such a wannabe farmer).  We came home with a box full of berries and the first thing I made was Strawberry Coconut Breakfast Cookies from Beth @ Tasty Yummies (see below).  They were a total hit with the family!  Thank you for a great recipe Beth.  
This week I’ll be sharing a few additional simple recipes with strawberries.  See below for strawberry teff pancakes and sugar free strawberry cantaloupe popsicles.  
Stayed tuned for: strawberry lemon shortcake and strawberry smoothies!!


Here are Beth’s Strawberry Coconut Breakfast Cookies.  
These are a must! Check out the recipe.  

Strawberry Teff Pancakes with Maple Coconut Whipped Cream:
Ingredients:
-1 1/2 cups teff flour 
-1 1/2 cups filtered water
-2 tablespoons honey (vegan use maple syrup) 
-3 tablespoons oil (coconut is good)
-1 teaspoon baking soda
-1 teaspoon cream of tarter
-1/4 teaspoon salt 
-1 cup chopped fresh strawberries 

How To:
1.  Combine above ingredients and mix (except strawberries).  Fold in berries.  Let batter rest for 1 minute.  Stir and make pancakes (we use a countertop griddle).
2.  See here for maple coconut cream topping.
Sugar-Free Strawberry Cantaloupe Popsicles:

Ingredients:
-12 ounces fresh strawberries
-12 ounces fresh cantelopue
-Vanilla stevia to taste (I use NuNaturals) 

How To:
1.  Combine ingredients in food processor until desired consistency (it’s fun to leave a few strawberry chunks in there).
2.  Makes 6 of these popsicles, I also have these which are super fun (purchased at my local Natural Foods Coop).
Shared on: Just Another Meatless Monday, Melt in your Mouth Mondays, Monday Mania, Ruth’s Real Food 101 (Mondays), Slightly Indulgent Tuesdays, Traditional Tuesdays, Fat Tuesdays, Kids in the Kitchen, Real Food Wednesdays, Allergy-Free Wednesdays, Gluten Free Wednesdays , Whole Food Wednesdays, Pennywise Platter, Simple Lives Thursday, It’s a Keeper Thursday, Raw Foods Thursday, Wellness Weekend, Fresh Bites Friday, Freaky Friday, Fight Back Friday, Friday Food, Potluck Party Friday, Potluck Party Friday: Summer Fruits, Super Food Sundays, 
Posted by Amber at

Labels: allergy-friendly, breakfast, dairy free, dessert, gluten free, on the farm, sugar free, summer treats.

16 Comments

Leave a Reply

Your email address will not be published. Required fields are marked *

Monday, April 30, 2012

Raw-licious Lemon Cookies (SCD Friendly)

After I made my raw carrot cake cookies (inspired by these), one of my readers inquired about the lemon cookies.  I’m not sure if you’re familiar with these raw cookies, but you can check them out here.  They popped up in my Coop a few months ago.  I tried the carrot cake cookies first and was shocked by their deliciousness,  but the price tag is rather discouraging ($6 per bag – and it’s a tiny bag folks).  I was successful in making the carrot cookies at home.  Naturally, the lemon cookies have been on my mind.  So a few weeks ago I made a batch and they were outrageously good, the perfect burst of lemon with all the benefits of a raw, live food.  These differ in one respect from the store bought variety, they aren’t a crunchy cookie.  They are soft, but equally wonderful.  I like them both ways, and I have to tell you, the flavor is spot on.  So if you’ve tried these, and love them, try making them at home (this batch yields 60-70 cookies depending on how big or small you make them)!  And you might be able to get that crunch if you dehydrate longer.  I made both cookies and balls with this batch.  And by the way, my kidsLOVE these.  What a super healthy snack.  I’m making these next!
Ingredients 

-14 dates, pitted and soaked in filtered water until soft (the soaking time will depend on how soft or hard your dates are to begin with.  I usually soak mine for 6 hours or until super soft)
-4.5 ounces unsweetened shredded coconut (1 cup)
-1 cup sesame seeds (soaked for 10 hours)
-1/2 teaspoon lemon flavor (or to taste, start with 1/4 tsp)
-1 teaspoon lemon zest

How To
1.  In food processor fitted with the s-blade, add dates and blend into a paste. Add in lemon flavor, blend.   
2.  In another bowl, add coconut, well drained sesame seeds, and lemon zest.  Mix well. 
3.  Add date mixture to coconut, sesame seeds, and lemon zest and with clean hands, mix well. 
4.  Form into little cookies or balls.
5.  Place in your dehydrator (on a mesh fitting) and dehydrate at 105 degrees for 24 hours (or more).  Crank it up to 135 degrees for the last hour. I know this sounds like a long time, but this low temperature really preserves all the beneficial nutrients.  I have no idea how these would work in the oven, but please let me know if you try.  

Notes:

*I put my dehydrator in the laundry room and just forget about it.  
*If making the balls, dehydrate 105 degrees for 12-15 hours.  They will be soft and chewy.  


Shared on: Just Another Meatless Monday, Melt in your Mouth Mondays, Monday Mania, Ruth’s Real Food 101 (Mondays), Slightly Indulgent Tuesdays, Traditional Tuesdays, Fat Tuesdays, Kids in the Kitchen, Real Food Wednesdays, Allergy-Free Wednesdays, Gluten Free Wednesdays, Whole Food Wednesdays, Full Plate Thursday, Pennywise Platter, Simple Lives Thursday, It’s a Keeper Thursday, Wellness Weekend, Raw Foods Thursday, Fresh Bites Friday, Freaky Friday, Fight Back Friday, Friday Food, Lunch Box Love Fridays,  Feed Your Soul Friday, Allergy Friendly Friday, Superfood Sunday 

Posted by Amber at

Labels: cane sugar free, cookies, dairy free, dessert, gluten free, grain free, nut free, raw, SCD, vegan, vegetarian.

38 Comments

Leave a Reply

Your email address will not be published. Required fields are marked *

Thursday, April 26, 2012

Blueberry Lemon Grain Free Cupcakes

Have you ever read Blueberries for Sal?  When my daughter was about 9 months old we attended story time at our neighborhood library.  The librarian read this book and I thought it was so sweet, so simple.  Fast forward 5 years and both my kids love this book.  Bright, fun drawings and really, just a cute little story.  And I like to think this is just what we would make after a full day of blueberry picking…some delicious blueberry cupcakes!
Blueberry Lemon Cupcakes
 
Author:
Ingredients
  • 2 cups finely ground almond flour
  • Coconut four (if needed to thicken batter)
  • ½ cup tapioca starch
  • ¼ teaspoon salt
  • ½ teaspoon baking soda
  • 3 eggs: 2 whole eggs and 1 egg with just the white (omit the yolk)
  • 1 teaspoon vanilla
  • ¼ teaspoon lemon flavor
  • 1 teaspoon lemon zest
  • ¼ cup coconut oil, liquefied
  • ¼ cup honey
  • 1 cup fresh, organic blueberries
Instructions
  1. Preheat oven to 350 degrees
  2. In a bowl, mix the dry ingredients: almond flour, salt and baking soda.
  3. In a separate bowl, mix the wet ingredients: eggs, vanilla, lemon flavor, lemon zest, coconut oil, and honey. Be careful when adding the melted oil to eggs, temper if you have to, or just use room temperature eggs.
  4. Combine and mix dry and wet ingredients
  5. Add the coconut flour here if you needed to thicken up the batter. Start with 1 tablespoon at a time until a nice creamy cake batter consistency developed.
  6. Fold blueberries into mixture
  7. Fill muffin cups and bake for 13-15 minutes. Yields 10 - 12 muffins
Notes
Use two muffin cups to decrease chance of burning the cupcake
Shared on: Fat Tuesdays, Slightly Indulgent Tuesdays, Traditional Tuesdays, Kids in the Kitchen, Pennywise Platter, Allergy-Free Wednesdays, Whole Food Wednesdays, Real Food Wednesdays, Gluten-Free Wednesdays Full Plate Thursdays, It’s a Keeper Thursday, Freaky Friday, Fresh Bites Fridays, Friday Food, Feed Your Soul Friday, Fight Back Friday, Lunchbox Love Friday, Friday Foodie Fix Superfood Sunday, 
Posted by Amber at

Labels: dairy free, dessert, gluten free, go ahead honey, SCD.

Leave a Reply

Your email address will not be published. Required fields are marked *

Rate this recipe:  

Tuesday, April 17, 2012

Bottomless Key Lime Pie with Whipped Lemon Coconut Cream (SCD Friendly)

Bottomless you say…well you naughty little pie.  Where is your crust?  Truth be told, I’m still working on my own SCD pie crust and didn’t want to wait any longer to share this recipe with you.  I do love crust, but this pie still rocks bottomless.  If you’re a crust lover like me, then check out the crust recipe links below.

After my friend Laura, from Gluten Free Pantry, made her no-bake vegan key lime pie, I started dreaming about it and wanted to make a SCD version.  I’m trying to “beef up” my SCD dessert list here.  The only thickener allowed on SCD (aside from eggs) is gelatin.  Luckily, it works just perfect for this recipe. I did try this recipe with eggs, but it was too eggy for my taste and didn’t set up quite right.  If you like tart, well this dessert if for you.  I LOVE tart, it’s my favorite (far more than the sweet, sweet chocolaty stuff my husband devours). The coconut cream is so sweet with a hint of lemon, and the light texture balances the thick tart lime filling.  I’m in love with this.  Thank you Laura for the inspiration!

Bottomless Key Lime Pie with Whipped Lemon Coconut Cream (SCD Friendly)
 
Ingredients
  • Lime Filling:
  • 1 can SCD legal coconut milk
  • ⅓ cup honey
  • ¾ cup fresh squeezed lime juice (10-15 limes depending on thier size)
  • 1 avocado
  • 2½ teaspoons unflavored gelatin

  • Lemon Coconut Cream:
  • Cream from 1 can of coconut milk
  • 3 tablespoons honey
  • 1 teaspoon vanilla
  • ½ teaspoon lemon flavor
Instructions
  1. Filling:
  2. To food processor add:
  3. Lime juice, honey and avocado. Blend until well incorporated.
  4. Empty mixture in glass bowl.
  5. Add gelatin and whisk until incorporated
  6. Heat coconut milk on stove top (do not boil) and add to
  7. lime juice mixture. Whisk until well incorporated,
  8. Pour into pie dish (with or without a crust) and place in refrigerator for at least 8 hours.
  9. After the mixture has set, top with whipped lemon coconut cream

  10. Coconut Whipped Topping:
  11. To a glass bowl add the honey, vanilla and lemon flavor. Mix.
  12. Scoop out the coconut cream and add to the bowl.
  13. Mix on high with hand-held mixer until well incorporated.
  14. Quickly top pie and place back in the refrigerator for several hours before serving.
Notes
*Place several cans of coconut milk in the coldest part of your refrigerator for several days. Remember that each can is different, some creams will be thicker than others. Use one with the thickest cream.
*Add the whipped coconut cream when the lime filling is completely firm (in fridge for at least 8 hours).
*SCD Legal Crusts: Honey Gram Cracker Crust, Dan's Awesome Pie Crust, Vegan Raw Pie Crust, Deep Dish Pie Crust
Shared on: Fat Tuesday, Slightly Indulgent Tuesdays, Traditional Tuesdays, Tuesday Kids in the Kitchen, Allergy-Free Wednesdays, Whole Food Wednesdays, Real Food Wednesday, Gluten-Free Wednesdays, Pennywise Platter Thursdays, Full Plate Platter Thursdays, It’s a Keeper Thursday,  Freaky Friday, Fresh Bites Fridays, Friday Food, Pot Luck Party Fridays, Feed Your Soul Friday, Fight Back Friday, Allergy-Friendly Fridays, Recipe Lion, 
Posted by Amber at

Labels: allergy-friendly, dairy free, dessert, SCD.

60 Comments

Leave a Reply

Your email address will not be published. Required fields are marked *

Rate this recipe:  

Monday, April 9, 2012

Strawberry Almond Ice Cream (SCD Friendly)

Strawberries are now in abundance at my local Coop.  And they are just gorgeous – so juicy, so sweet!  Strawberry ice cream was in order this weekendbut some for mommy too please.  So an SCD ice cream was created.  My darling daughter informed me that this ice cream recipe tastes like strawberry gelato.  Since I haven’t had gelato is years, I can’t confirm this comparison, but Scott agreed, so hey, I’ll take it.  
I hope you love it too.   

Ingredients
-2 cans coconut milk (this brand is SCD friendly) 
-1 lb. fresh organic strawberries 
-1/3 cup of honey*
-2 tablespoons fresh lemon juice 
-2 teaspoons vanilla extract 
-1/2 teaspoon almond extract (or to taste)

How To
1.  Blend all ingredients together until incorporated.
2.  Immediately transfer to ice cream maker and allow to churn until thick.
3.  Remove ice cream and transfer to glass storage.  Store in freezer and remove 20 minutes before serving. 
4.  Optional: top with fresh strawberries, chopped almonds and shredded coconut.

Notes:

*Vegan option: use 1/3 cup agave, maple syrup, or stevia to taste. 
*This ice cream would be amazing with Vicky’s SCD friendly spounge cake!
*I often get an extra 1/2 pound of strawberries and blend them with the mixture just until they are chunky, then churn.  I love the little fresh strawberry chunks in the ice cream
*You could add 1 cup finely chopped nuts or finely chopped fresh strawberries to the final few minutes in the ice cream maker.   
*This recipe makes too much for my ice cream maker, so I threw some ice in with what remained in my blender and made a smoothie.

Shared on: Just Another Meatless Monday, Melt in your Mouth Mondays, Monday Mania, Ruth’s Real Food 101 (Mondays), Slightly Indulgent Tuesdays, Traditional Tuesdays, Fat Tuesdays, Kids in the Kitchen, Real Food Wednesdays, Allergy-Free Wednesdays, Gluten Free Wednesdays, Whole Food Wednesdays, Full Plate Thursday, Pennywise Platter, Simple Lives Thursday,  Raw Foods Thursday It’s a Keeper Thursday, Freaky Friday, Wellness Weekend, Fresh Bites Fridays, Friday Food, Pot Luck Party Fridays, Feed Your Soul Friday, Superfood Sunday 
Posted by Amber at

Labels: cane sugar free, dairy free, dessert, ice cream, SCD.

18 Comments

Leave a Reply

Your email address will not be published. Required fields are marked *

Pineapple Coconut Cupcakes

(gluten free, common tree nut free, dairy free, egg free, cane-sugar free, & soy free)

I don’t claim to be much of a baker.  Never really have been.  But mommyhood has thrown me head first into the baking arena.  I make muffins every week (often it feels like daily).  I’ve always enjoyed cooking but honestly never found the thrill in baking.  Cookies are more my thing in the sweet department anyway.  So the other day I wanted to make some cupcakes/muffins for my son’s little friend.  We had a play date scheduled and my usual grain-free treat was not the best option, as his little friend can’t have tree nuts.  So a nut free creation was in order, and one that was still allergy-friendly for Ethan (no eggs, dairy, gluten, cane-sugar or soy).  No problem?  Yeah right.  GF baking is difficult and especially if you’re looking for a particular taste and flavor, which I was.  So in these urgent cases I turn to my baking guru, Tessa.  I emailed her a while back with my ingredients and she, of course, offered some great advice.  So thank you Tessa for your consultation!  One tip was to leave the fruit whole (which was an excellent suggestion, as I was pureeing it up).  
Pineapple Coconut Cupcakes 

Ingredients 
Dry
-1/2 cup white rice flour (90 grams)
-1/2 cup coconut flour (52 grams)
-1/4 cup tapioca starch (27 grams)
-2 tablespoons potato starch (19 grams)
-1/2 cup shredded unsweetened coconut (40 grams)
-2 teaspoons baking powder
-1 teaspoon baking soda
-1/4 teaspoon salt

Wet
-1/4 cup oil (I use grapeseed)
-1/3 cup applesauce
-1 1/4 cup filtered water  
-1 tablespoon ground chia seed+ 3 tablespoons water 
-1/3 cup coconut sugar 
-1 teaspoon vanilla 
-6 drops liquid stevia 
-1 can drained pineapple chunks, squeeze all the juice out of the chunks and chop into smaller pieces. 
How To 
Preheat oven to 325
1.  In a bowl, mix together dry ingredients.  Spoon in the flours (otherwise it’s just too dense, so don’t scoop the flour out with your measuring cup.  Or simply follow the flour weights).
2.  In a separate bowl, mix the ground chia with 3 tablespoons of water and let sit for a moment.  Then add in the coconut sugar and mix until incorporated.  It should be sticky and a bit frothy.
3.  Add in the oil, applesauce, vanilla, stevia, and pineapple chunks, incorporate, then add in the water, incorporate.  
4.  Add the dry ingredients to wet and incorporate.
5.  Immediately add batterer to baking cups – yields 12. 
6.  Bake for 20 minutes 
7.  When done, cool on rack

Notes:
*I highly recommend using these baking cups – they are great for nonstick! I And I use them over and over.  They are also biodegradable. 
*These cupcakes don’t rise much, so you can fill to the top of baking cup.
*I greatly dislike a dry cupcake.  And so I’m happy to report that these are incredibly moist.   
*Do not let the batter sit after mixing, as it starts to thicken and froth.  So after you mix the dry with the wet, immediately fill your baking cups and bake. 
*The little boy mentioned above can have coconut (no tree nuts).  I read that in 2007, the FDA classified coconut as a tree nut.  But I do believe coconuts are actually seeds, but can also be described as a fruit and nut.  This is a good read on the matter.  

Whipped Topping

Ingredients 
-1 can full fat coconut milk (I use this brand for its superior coconut cream)
-1/2 teaspoon vanilla
-2 tablespoons Grade B maple syrup 
-4 drops stevia (or to taste)  
-Natural yellow food coloring 
-1/4 teaspoon thickener of choice (optional) 

To make the whipped topping place 1 can of full fat coconut milk in the coldest part of your fridge for at least 3 days (the longer the better).  I have a bunch in there so I just take one out as needed.  Work quickly and remove just the coconut cream from the top of the can.  Add to bowl with above ingredients.  Mix with hand mixer until incorporated.  Frost your cupcake, or place topping in the fridge until you’re ready to use. You could certainly omit the thickener if your coconut cream is working for you.  Every can of coconut milk is different.  I’ve made some very substantial toppings without thickener, and some really needed it.  


And of course, Scott’s dipped in a little chocolate
Shared on: Just Another Meatless Monday, Melt in your Mouth Mondays, Monday Mania, Slightly Indulgent Tuesdays, Traditional Tuesdays, Kids in the Kitchen, Real Food Wednesdays, Allergy-Free Wednesdays, Gluten Free Wednesdays, Whole Food Wednesdays, Full Plate Thursday, Pennywise Platter,  Freaky Friday, Fresh Bites Fridays, Lunch Box Love Fridays,  Allergy-Friendly Fridays, Pot Luck Party Fridays, Friday Food, Superfood Sunday 
Posted by Amber at

Labels: allergy-friendly, dairy free, dessert, gluten free, muffins, vegan.

Leave a Reply

Your email address will not be published. Required fields are marked *

Saturday, April 7, 2012

Baked Apple and Cranberry Crumble

It’s spring planting day today…but before I dive into that I just HAD to post this recipe really quick.  So I wanted to start the day off right with a Paleo breakfast, but didn’t have a lot of time and didn’t want eggs.  Enough with the eggs! So I literally threw this together with what I had on hand here in my kitchen…and it was AMAZING.  Scott’s eyes rolled back in his head when he took a bite, so there you go.  And the kids will be eating this for snack today (no fuss with snack time).  I’m sure most of my readers will have these ingredients on hand.  One thing I’ve learned with Paleo is you MUST get creative with meals, and especially breakfast.  Throw those old meal traditions out the window.  For breakfast I often eat Paleo legal bread/muffins/rolls, leftovers are a big one (soups, roasted veggies, chicken with fruit, Paleo legal granola with nut milk, eggs of course, mixed with veggies).  Point is, be creative and just eat anything you can that makes you body feel good.  Get those calories, and please always eat breakfast.  Okay, off to play in the mud. Have a great weekend!
 .

Baked Apple with Cranberries (Crumble)
 
Author:
Ingredients
  • 1 pound of organic green or red apples, peeled and chopped (about 4). I weighed out the apples after peeling and slicing.
  • 1 cup dried cranberries
  • 3 tablespoons fresh grapefruit juice, orange juice, or lemon
  • 3 tablespoons honey
  • 1 teaspoons vanilla
  • 1 teaspoons cinnamon
  • Pinch of salt
    Topping
  • 1 cup room temperature ground almonds, or almond flour (I grind my own here at home. First in the food processor, then with a coffee grinder to created a finer flour)
  • 3 tablespoons room temperature coconut oil
Instructions
  1. Preheat oven to 400 degrees
  2. In an 8x8 glass Pyrex baking dish, mix together the apple cranberry filling
  3. In a separate bowl, with hands, mix ground almonds with the room temperature coconut oil. Break up the coconut oil as much as you can. Then sprinkle on top of apple cranberry filling. You could double this topping, but I had some ground almonds sitting on my counter, so bam, I used them.
  4. Bake uncovered for 20 minutes.
Notes
Vegan option: substitute maple syrup or coconut nectar for honey, or any other vegan sweetener of choice.

.

Shared on: Just Another Meatless Monday, Melt in your Mouth Mondays, Monday Mania, Slightly Indulgent Tuesdays, Traditional Tuesdays, Fat Tuesdays, Kids in the Kitchen, Real Food Wednesdays, Allergy-Free Wednesdays, Gluten Free Wednesdays, Whole Food Wednesdays, Full Plate Thursday, Pennywise Platter, Simple Lives Thursday, Frugal Food Thursday, It’s a Keeper Thursday, Freaky Friday, Wellness Weekend, Fresh Bites Fridays, Lunch Box Love Fridays, Feed Your Soul Friday, Superfood Sunday 
Posted by Amber at

Labels: breakfast, dessert, grain free, Paleo, SCD, vegetarian.

8 Comments

Leave a Reply

Your email address will not be published. Required fields are marked *

Rate this recipe:  

Thursday, February 23, 2012

Coffee-up your Whip: Vegan Coffee Flavored Whipped Cream (or mousse)

So a fun, weird fact about me.  I love the idea, smell and flavor of coffeebut don’t drink the stuff.  And I come from a looong line of coffee drinkers.  Listen, I would love to be one of those cool sophisticated retro hip moms never to be seen without a cup of Joe in their fun, whimsical coffee mugs, but what can I tell you, I’m a hippie tea drinker at heart.  Once upon a time I worked in a coffee shop and can you believe I never once had a cup of coffee!  Okay, I would have a latte now and then (and thus wouldn’t sleep for like 3 days), but never just a straight cup of coffee.  But I seriously LOVE everything about coffee, it just doesn’t agree with me (and by me I’m referring to my weak little stomach).  Scott doesn’t drink it either – he’s my tea loving partner in crime. During my coffee shop days my beverage (drug) of choice was Oregon Chai Tea. Amazing!  After Scott and I moved in together, we made our own Chai teas and would sip them together in our tiny little apartment and have deep conversations about Dawson’s Creek, and deliberate over which band we were going to see downtown on Friday night.  
Ah, those were the days.  
So I was craving a coffee flavored something and created this incredibly satisfying whipped dessert.  This is crazy good! It tastes like a creamy, delicious mousse.  This would be fabulous on top of your vegan ice creams or milkshakes, on a cookie, or as an icing on a cake.  I have several thoughts on the matter.  So stay tuned!

Ingredients
1 can full fat coconut milk (keep in refrigerator for a few days).  I use this brand because of this issue.
-2 tablespoons grade B maple syrup
-1 teaspoon coffee flavor 
-1/2 teaspoon vanilla 

How To
1.  Scoop out all of the coconut cream from can and add to your favorite mixing bowl.  Save the coconut water for another day.
2.  To the cream add the maple syrup, coffee flavor, and vanilla.
3.  Whip with a hand mixer until well incorporated.
4.  Transfer to glass storage and allow whipped cream to cool and set up in fridge before use. 
*
Shared on:  Just Another Meatless MondayMelt in your Mouth Mondays, Monday Mania, Ruth’s Real Food 101 (Mondays), Slightly Indulgent Tuesdays, Fat Tuesdays, Allergy-Free Wednesdays Real Food WednesdaysGluten-Free WednesdaysWhole Food Wednesdays , Pennywise Platter Thursdays, Wellness Weekend, Freaky Friday, Fresh Bites Fridays & Allergy Free Fridays,
Posted by Amber at

Labels: dairy free, dessert, vegan.

11 Comments

Leave a Reply

Your email address will not be published. Required fields are marked *