
When I was a little girl I loved helping my Gramie make apple pie. She did not play around when it came to the apples. She piled them apples a mile high in a huge mound and placed the crust on top. When the pie cooked the apples settled and there was at least a 4 inch space from apples to the top of the crust. I will always remember how cool it looked. When she broke into the pie, the crust fell nicely onto the apples. What I loved most about her apple pie, however, was the filling. She made it thick and gooey. The liquid ran all over the place. The apples were tart yet sharp with sweet cinnamon flavor. I loved extra scoops of the apple pie liquid on my ice cream which was the ultimate flavor combo. We remember those we love through food. When I taste my apple pie it takes me right back to her kitchen – standing there next to her oven, smelling the cinnamon and drooling for that flaky crust. I’m happy to say I’ve perfected my version of her apple pie with a dairy, gluten, and cane sugar free spin. It’s comforting to smell, taste, and physically enjoy a memory. Food has a way of bringing us closer to those we have lost, and really, then, suddenly they don’t feel so far away.
- 2 batches of Megan's Best Gluten-Free Flaky Pie Crust
- 3 pounds Granny Smith apples
- ¾ cup fresh squeezed orange juice
- ½ cup coconut sugar
- ¼ cup honey
- 2 teaspoons cinnamon
- 3½ tablespoons tapioca starch
- ¼ teaspoon salt
- 1 egg beaten
- Preheat oven to 375 degrees
- Peel and cut the apples. You should have a total of 2 pounds peeled and cut apples.
- To the apples add the orange juice, coconut sugar, honey, cinnamon, salt, and tapioca starch and mix with hands until everything is well incorporated.
- Allow the apples to rest in the liquid while you make the crusts.
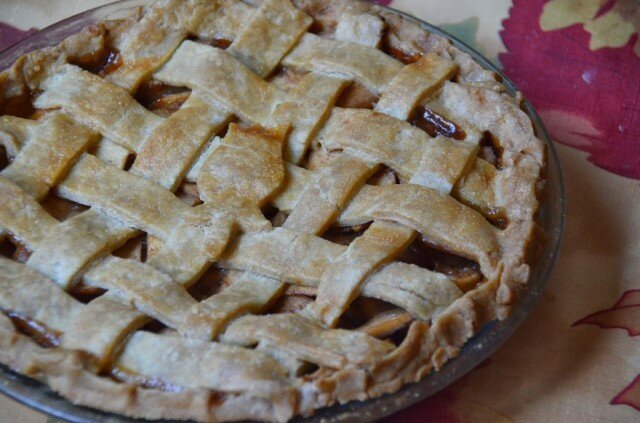
- Add all the apples and ALL the liquid to the pie dish with first pie crust (raw - do not bake) then top with the second crust. See below for fun ways to decorate the top. You can do a lattice design or you can cut out any shape to form the top crust. Always a crowd pleaser to have a fun design on the top crust.
- Coat the top of the pie crust with the beaten egg.
- Place the pie on a cookie sheet on the middle rack and bake for 1 hour. At the 30 minute mark I place this crust protector on the pie for the remainder of the cooking time. Prevents burning.
- Allow the pie to cool thoroughly before serving (this usually takes hours). The filling thickens greatly as it cools. I like to wait 12 or so hours before I serve. As a rule, I make the pie the day before I serve it.
2. Another cooking method for the pie is as follows: Put a baking sheet on the bottom oven rack and preheat to 425 degrees for at least 30 minutes. Put the pie directly on the hot baking sheet and reduce the oven temperature to 375 degrees and bake until the pie is golden and the filling is bubbly, 1 hour to 1 hour, 10 minutes. (instructions courtesy of the food network).


Welcome back Amber!!! What a delicious looking apple pie! I use fresh orange juice in my pies too, it does make a difference. Funny how apple pies remind us of our Grandmothers, me too!
I love the Christmas Apple Pie – that’s a first, how festive to use Christmas trees all over the top – awesome idea!
Vicky xoxo
Hi Vicky. Thank you so much! Great to hear from you. I hope you are doing well. Happy New Year. I need to hop on over to your site to see what you have been cooking up. Big hugs.
Happy new year, Amber! What a beautiful pie! that lattice! hope that 2015 is off to a great start! xoxo
Thanks so much, caralyn! I hope you are great. Happy New year to you too!@ hugs.
Hey girl! This pie looks fantastic! I love “kissed” recipes. 🙂
Hope you had wonderful holidays! Happy 2015, dear! xo,
Shirley
Hello my friend. So glad to hear from you. I’m slowly easing my way back into the blogging world. I won’t be blogging on the same caliber as before so I’m trying to find a way to incorporate it into my life that works well. It’s important to me. I wish you a Happy New Year too. Can’t wait to catch up with GFE! Big hugs.
Oh, honey, you need to re-think/re-state that “caliber” thing. You blog at the highest caliber even when you are not be blogging as frequently! I can tell you from firsthand experience that life takes precedence over blogging. I do understand the sharing and having the creative outlet and that continued connection with friends as being very important. Just know that we will be thrilled to see you when life allows you to post and you have something to share with us!
Love and hugs to you,
Shirley
Thanks Shirley. These last 6 months have definitely been an adjustment! Thanks for the encouragement. You’re amazing. xoxo
I can’t tell you how happy this post made me! Not because you shared my pie crust recipe (although I do appreciate that), but because I have MISSED YOU! I’m so glad you were able to take the time off that you needed to, but overjoyed that you are “back.” 😉 I hope 2015 finds you in better health. Big, big hugs to you from across the miles, my friend!
xoxo,
Megan
Hello Megan. Oh I’ve missed you too! I’ve missed all my blogging buddies. I have to tell you, though, you were strong on my mind throughout this break. I’ve made your crust what feels like 100 times and always think about you when I make it. Since November I’ve made your pecan pie FOUR times! The Allergy Free Alaska spirit is alive and well in my kitchen. I will post a picture of the pecan pie on FB this week. It’s a fabulous recipe, Megan (like everything you make). I’m so tempted to make the pecan cookies too. But back to your crust. I love it. Everyone who eats it loves it. I’m so glad to have it.
I also wish you love and wellness in the New Year. My health is stable as of now (last week was a different story). Always up and down. But after 11 years, I’m used to it. I hope you are dong well too. I look forward to checking out what I’ve missed on your site. The design is beautiful by the way! Big hugs from Cali. xoxo
Hi Amber!!! So excited to see this in my inbox! I’ve missed you. This pie looks amazing, and I love Megan’s crust recipe too. Your desserts always look so beautiful. xo
Hi Emily. Oh so good to hear from you. Thanks for your sweet words. It felt really good to write a post for the first time in months. 🙂 I’ve missed you too. I hope you’re great and your sweet family is doing well. Happy New Year. xo
How yummy! This is something I can do with the apples I keep getting in my organic co-op box!!
Anyhoo, I found your blog through a fellow blogger, and just thought I would stop by and say hi! It would totally make my day if you did the same… or better yet, keep in touch!! <3 – http://www.domesticgeekgirl.com
Yeah! Thanks for stopping by. Have a great weekend. 🙂
Love the apple pie. I will try to bake one this Sunday for our Easter gathering. Thanks for the great pics.
Thank you! Please come back and share how it turned out for you. Thanks. 🙂