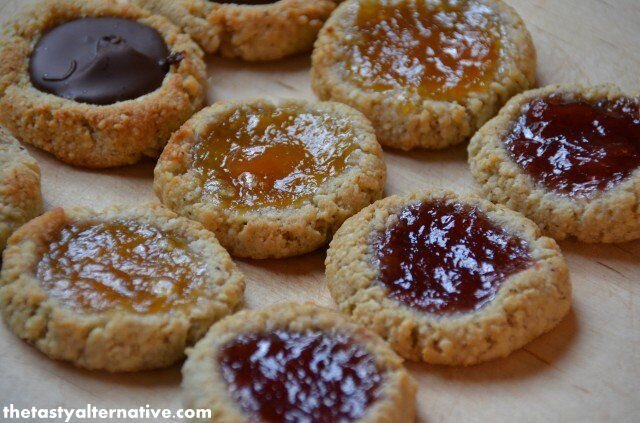
 Okay, these aren’t really thumb prints I guess, more like heel prints (ha ha). I like lots of filling in my cookies so I make the dips bigger than your typical thumb print width. So these cookies were inspired by a new paleo cookie that has arrived at my local natural foods coop (created by a local bakery called Sugar Plum Vegan). The ingredients: super simple. The price: OUCH! One cookie costs $4 – I’m not kidding. That’s a bit outrageous, especially since these cookies are very easy to make with some very basic paleo ingredients. I bought one to taste test (and I really liked it) so took note of the ingredients and made my own batch the next day. My recipe contains an egg because I like to use egg as a binder and like the way it tastes with the cashews (vegan option in notes). The flavor is truly spot on. I could not justify buying another $4 cookie when I literally had everything at home to make a big batch. These are my family’s new favorite treat. I try to make 2 or 3 homemade snacks each week for the kiddos to decrease my dependence on packaged food (especially packaged snacks). And these are super easy to make and low in the sugar department (which is always a plus). Continue reading
Category Archives: grain free desserts
Grain Free Cashew Thumb Print Cookies
Labels: cookies, dessert, grain free, grain free desserts, Paleo.
Leave a Reply

Raw Pepperminty Nutty-Roons
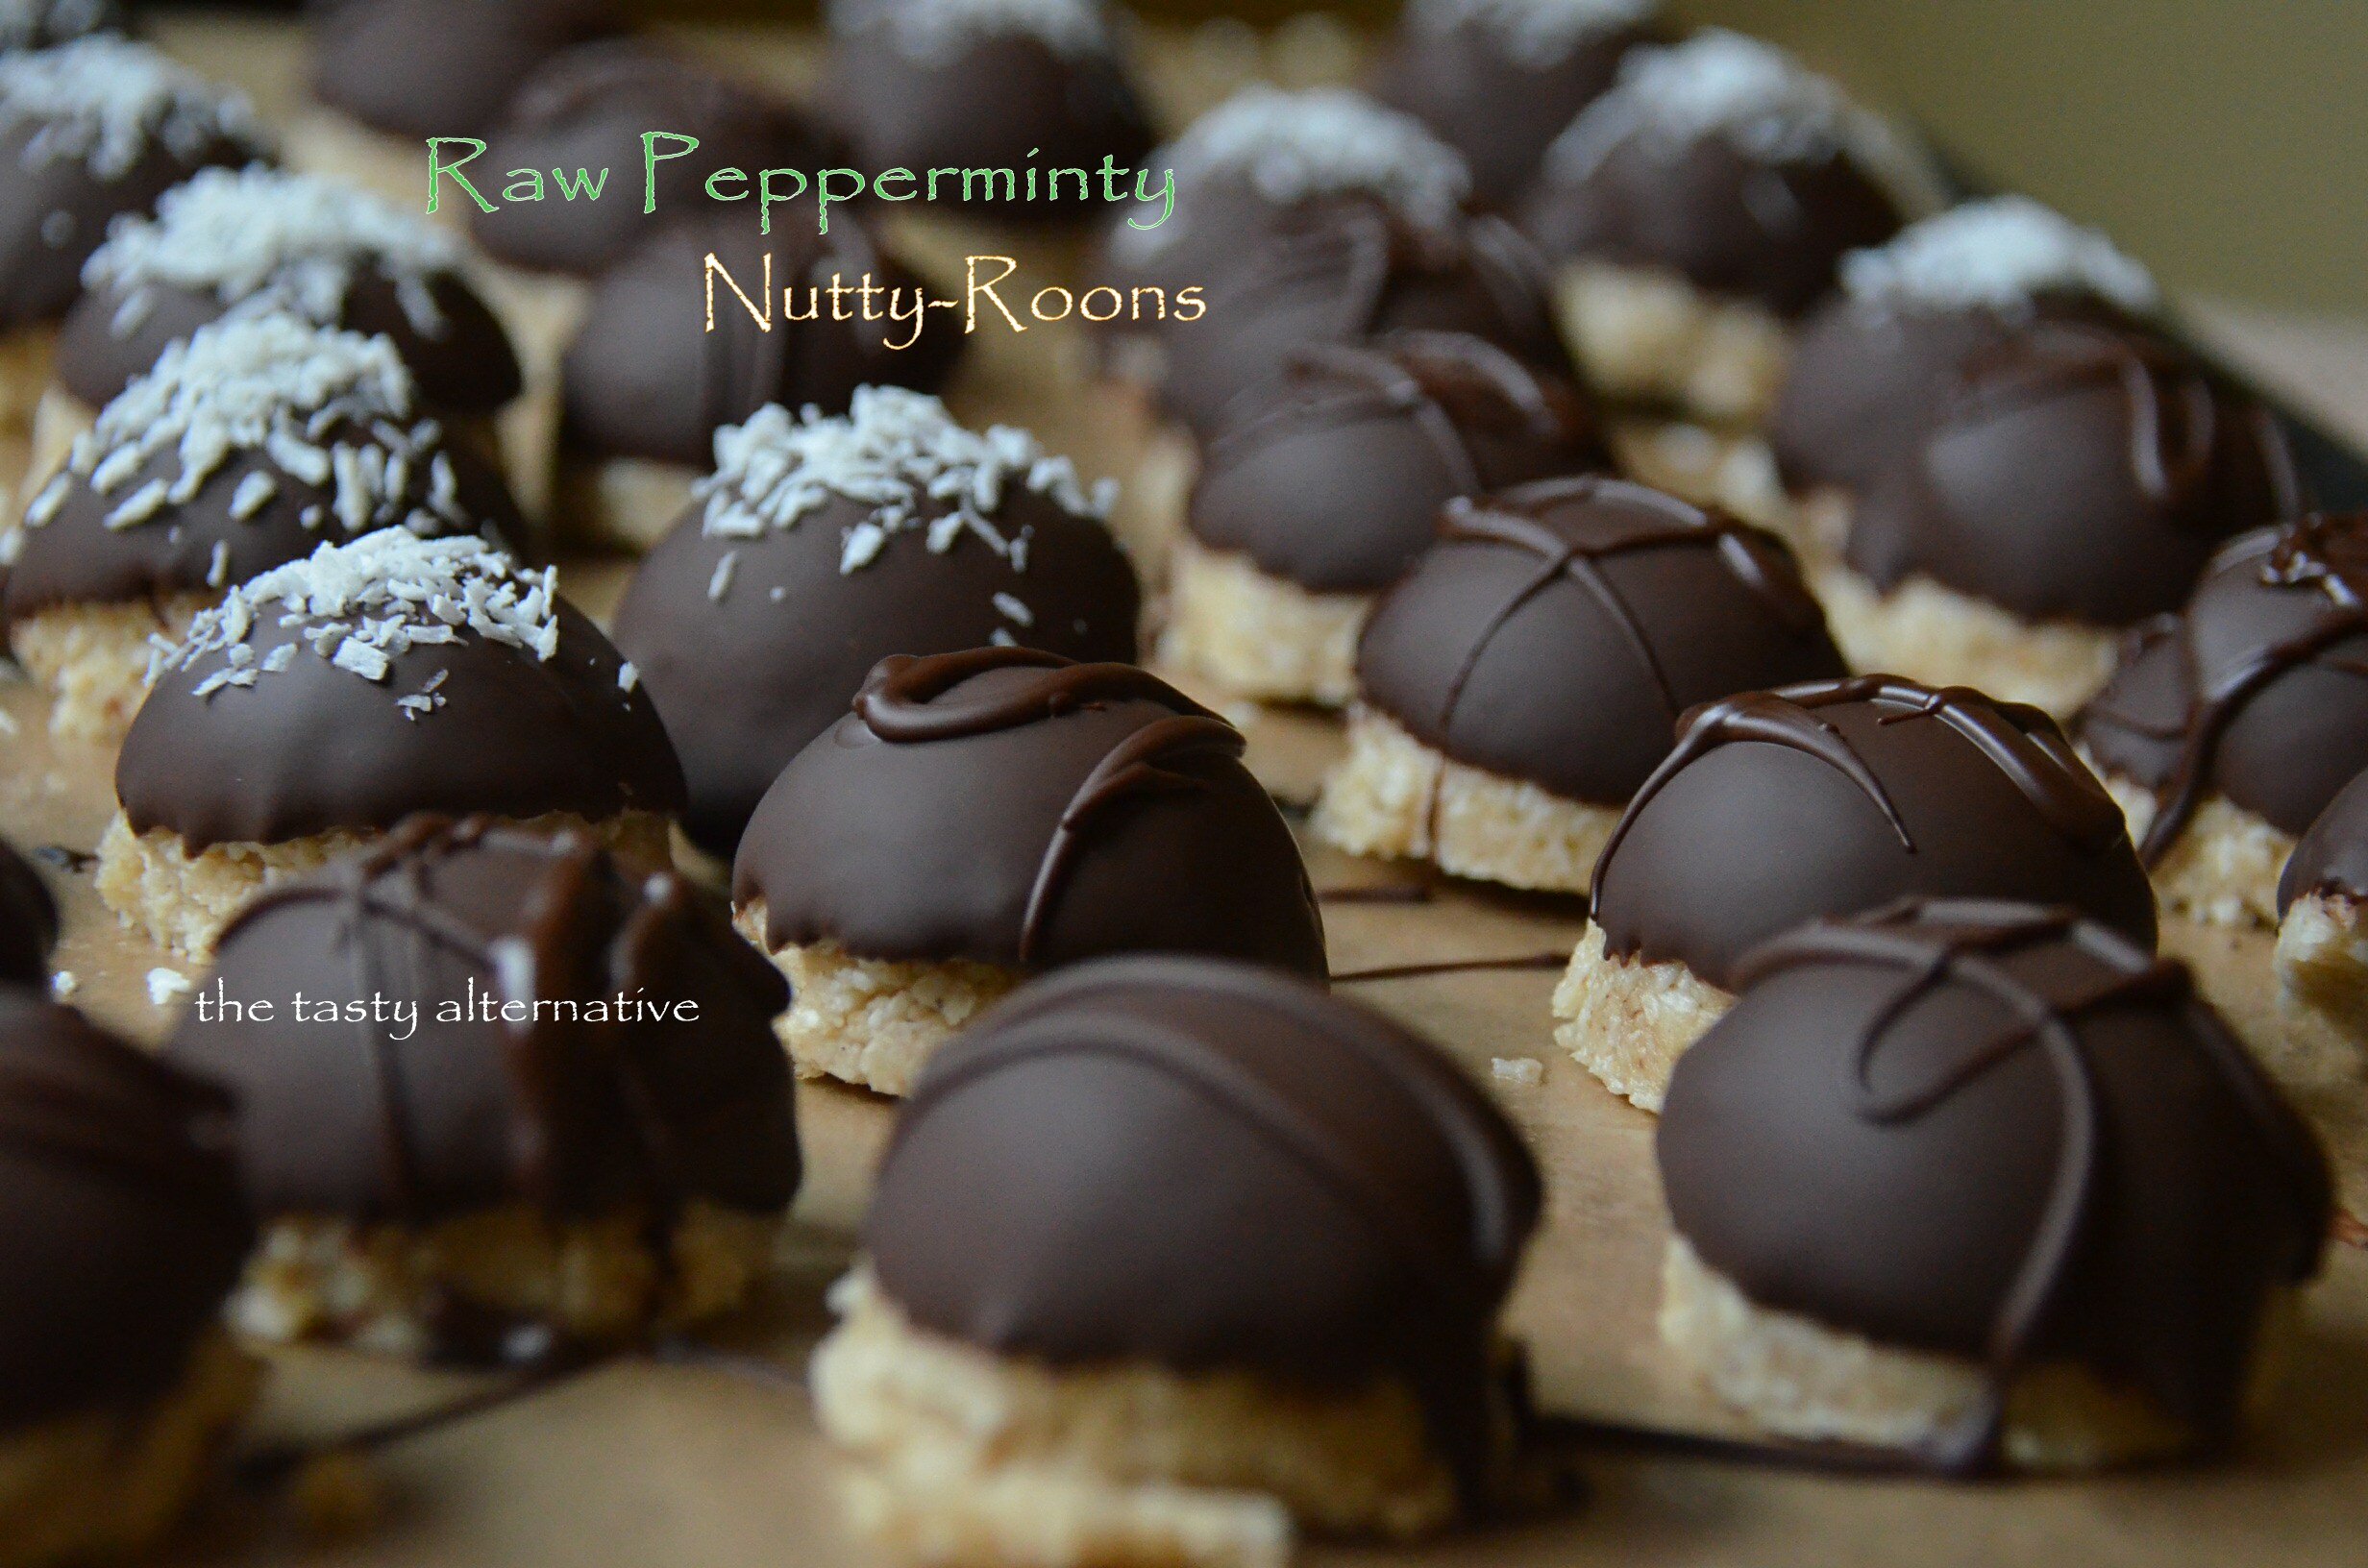
I shared this recipe last month with Ricki on her blog: Ricki Heller. I found Ricki’s blog shorty after I started blogging (about 2 1/2 years ago). I distinctly remember visiting Wellness Weekend for the first time to share a recipe and instantly fell in love with Ricki, her writing style, and (of course) her recipes (of which I’ve made many)! Personally, I suffer from candida, so her blog is of great interest and value to me. I reference it constantly and refer friends and family to her site. Ricki’s cookbook Naturally Sweet and Gluten Free is one of my favorite cookbooks with so many healthy treats for my family. For the guest post I wanted to share a recipe for Ricki’s readers reminiscent of her cooking style with common ingredients used by Ricki herself. I call these “Nutty-Roons” because they are like a macaroon, but with a nice nutty bite to them. Made with only a few simple ingredients, these raw little bites of coconut bliss are sure to please. I made about 10 batches of these as Holidays gifts last year (I kid you not) and they were well received by all. I hope you enjoy them too. You can view my guest post here.

- 2 cups unsweetened shredded coconut
- ⅔ cup raw walnuts
- ⅓ cup raw cashews
- 2 tablespoons melted coconut oil
- 2 tablespoons maple syrup, honey, or coconut nectar
- 1 teaspoons vanilla extract
- 1 teaspoons peppermint flavor (or more to your preference)
- 5 drops liquid stevia (plain or flavored)
- In a food processor fitted with the S blade, add in the walnuts and cashews and blend for 20 seconds.
- Next add in the shredded coconut and blend with the nuts for another 20 seconds.
- In a small cup, mix together the maple syrup, stevia, vanilla extract, and peppermint oil.
- With the food processor running, pour in the coconut oil and the maple syrup mixture.
- Blend for 10 seconds.
- Scoop out mounds of the mixture and create little macaroon shapes (I use a small ice cream scooper).
- The mixture makes about 15 nutty-roons. Place them in freezer for ½ hour.
- While the nutty-roons are in the freezer, melt some chocolate*. I like to use a 1 cup glass Pyrex, placed in a pot of boiling water. This keeps the chocolate raw and melts nicely.
- Remove the nutty-roons from the freezer and dip each into the chocolate.
- Store the nutty-roons in the fridge. They hold up well at room temperature too, but I like how they taste cold.
2. You could also make your own chocolate (see recipe below).
- 2 tablespoons coconut oil
- 2 tablespoons coconut nectar, honey, or maple syrup
- 1 tablespoon + 1 teaspoon raw ground cacao
- ½ teaspoon vanilla extract -Optional: a few drops of stevia
- Place the above ingredients into a 1 cup glass Pyrex.
- Place the glass Pyrex into a pan of very hot water and mix around until everything is melted. Do not heat over 110 degree


This recipe was shared on: Allergy-Free Wednesdays, Raw Foods Thursday, Plant Based Potluck Party, Savoring Saturdays
Labels: chocolate, dessert, grain free desserts, guest post, low glycemic, Paleo, raw.
Leave a Reply
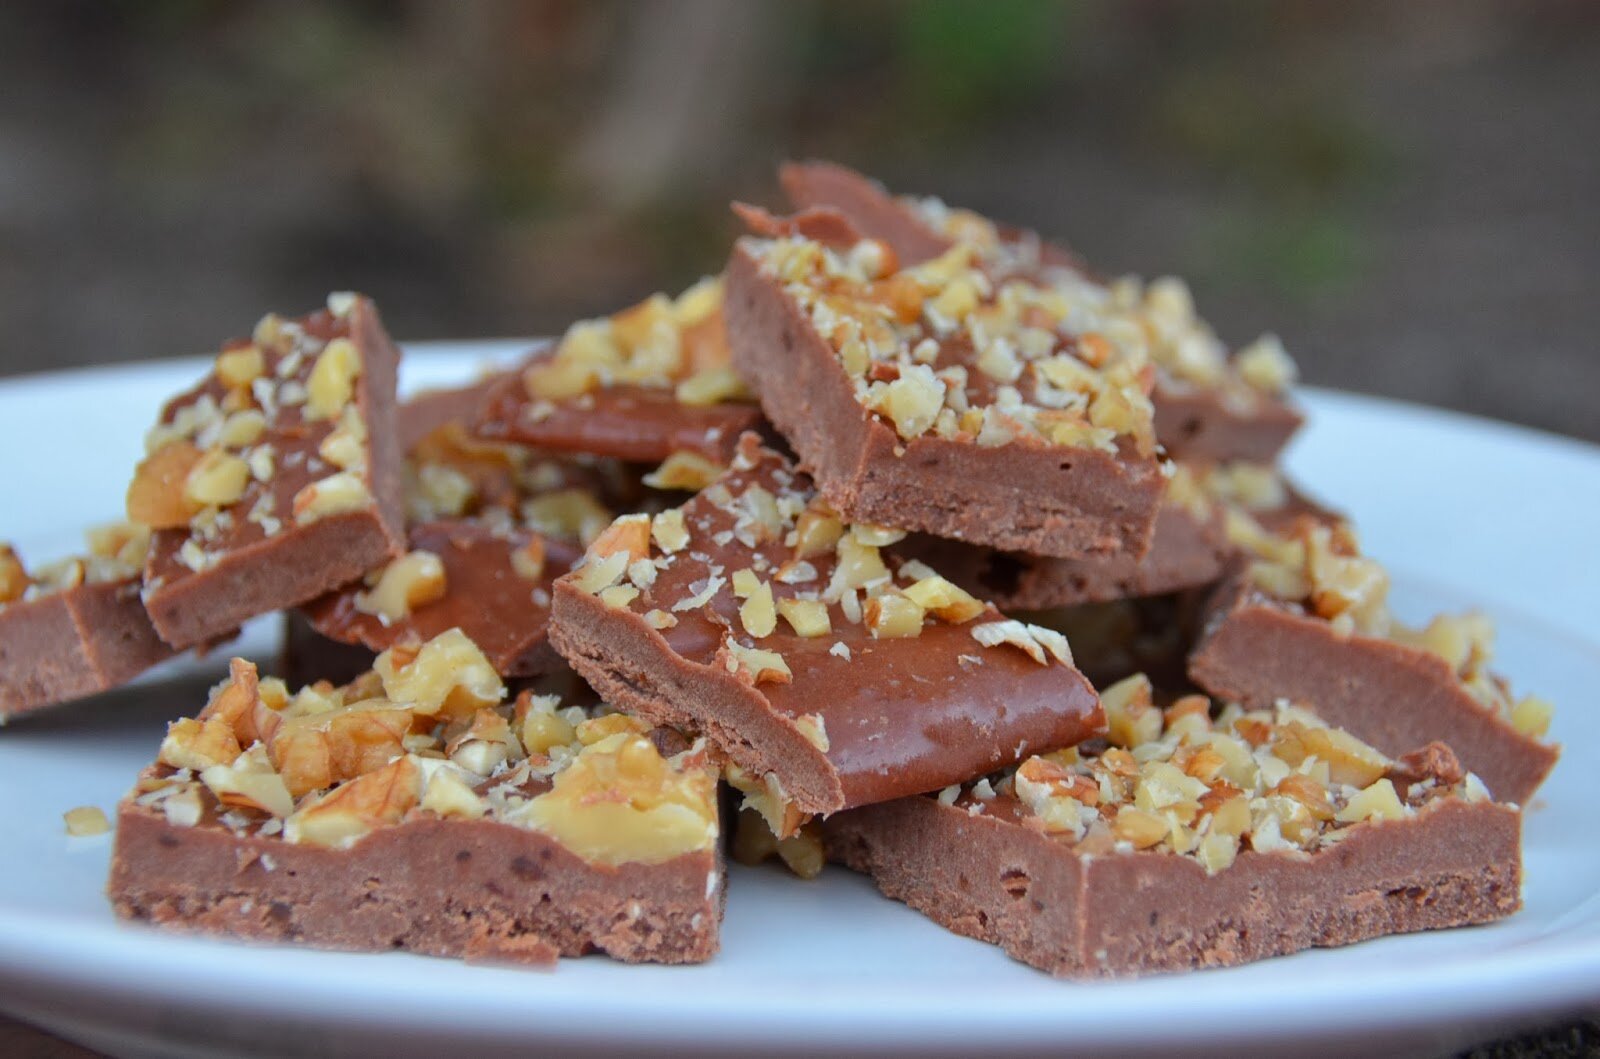
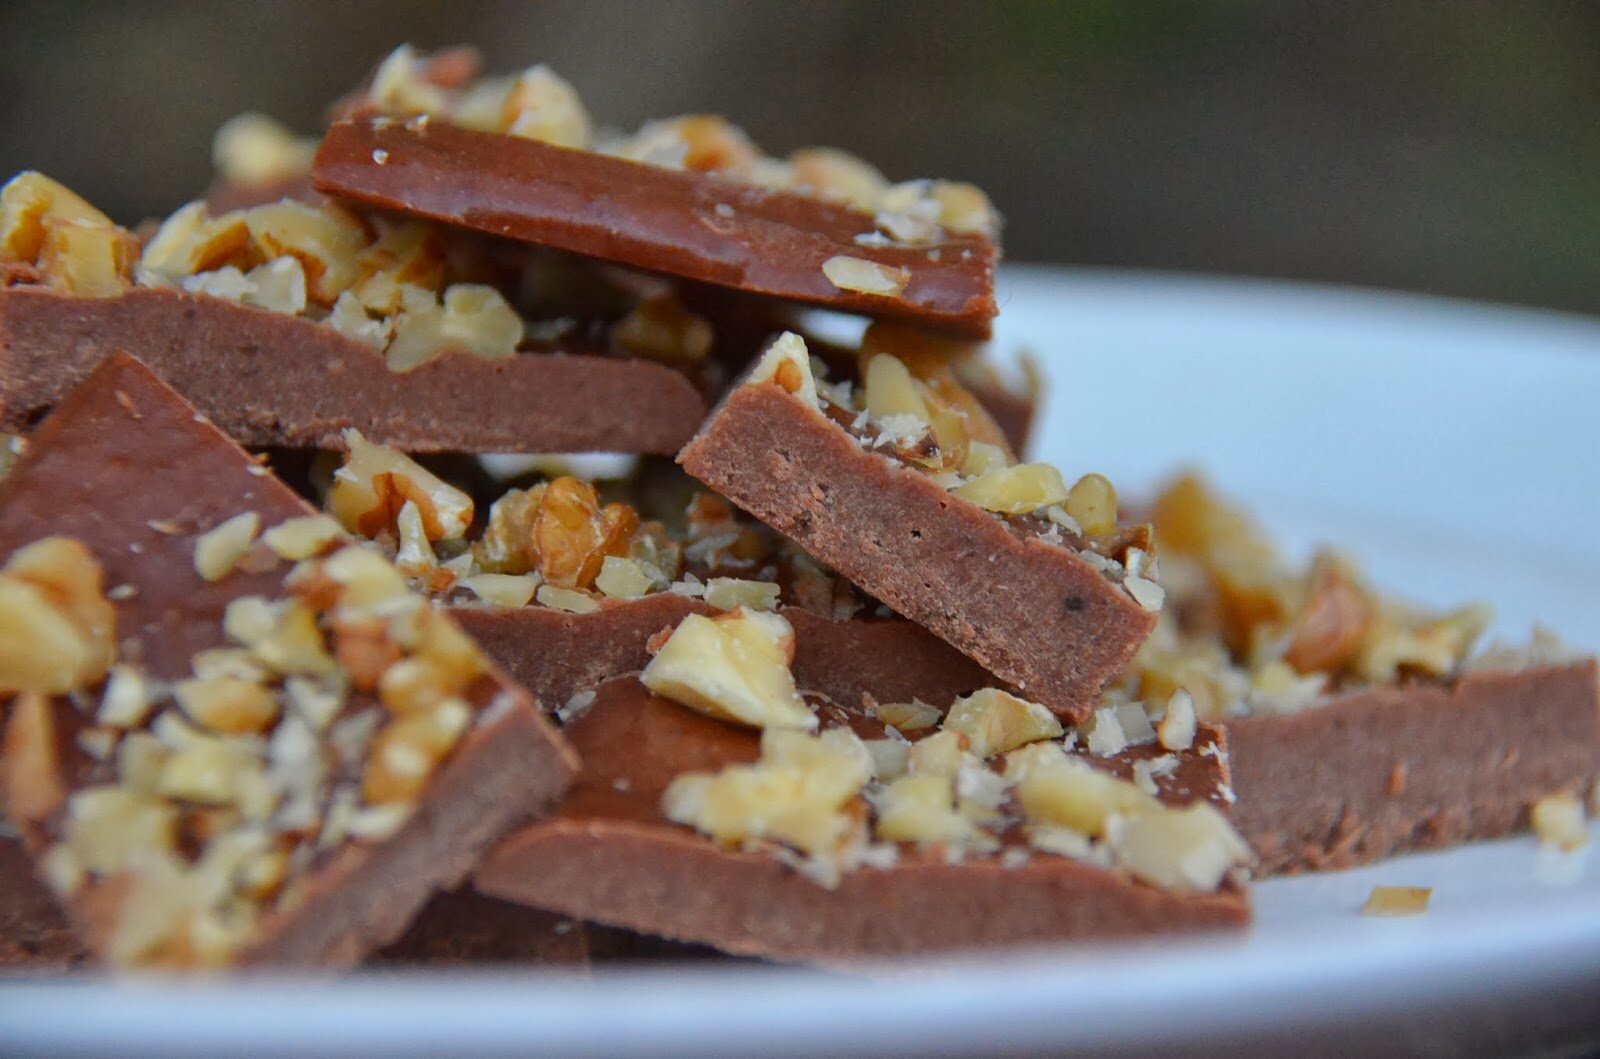
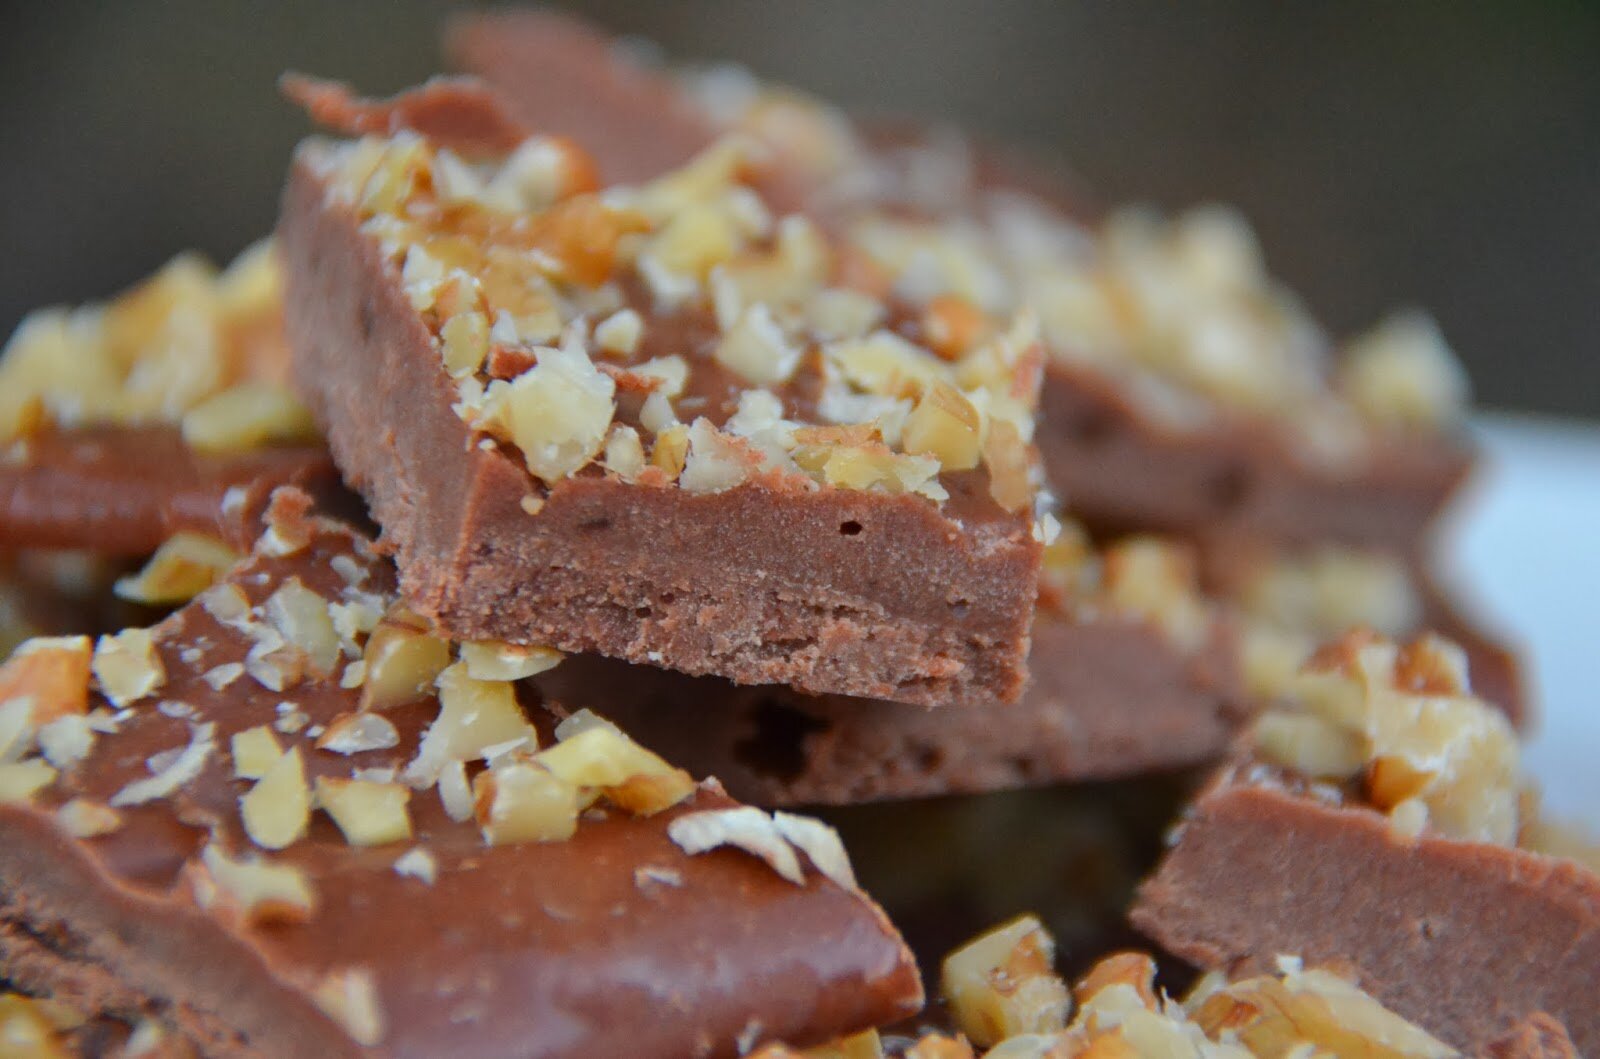
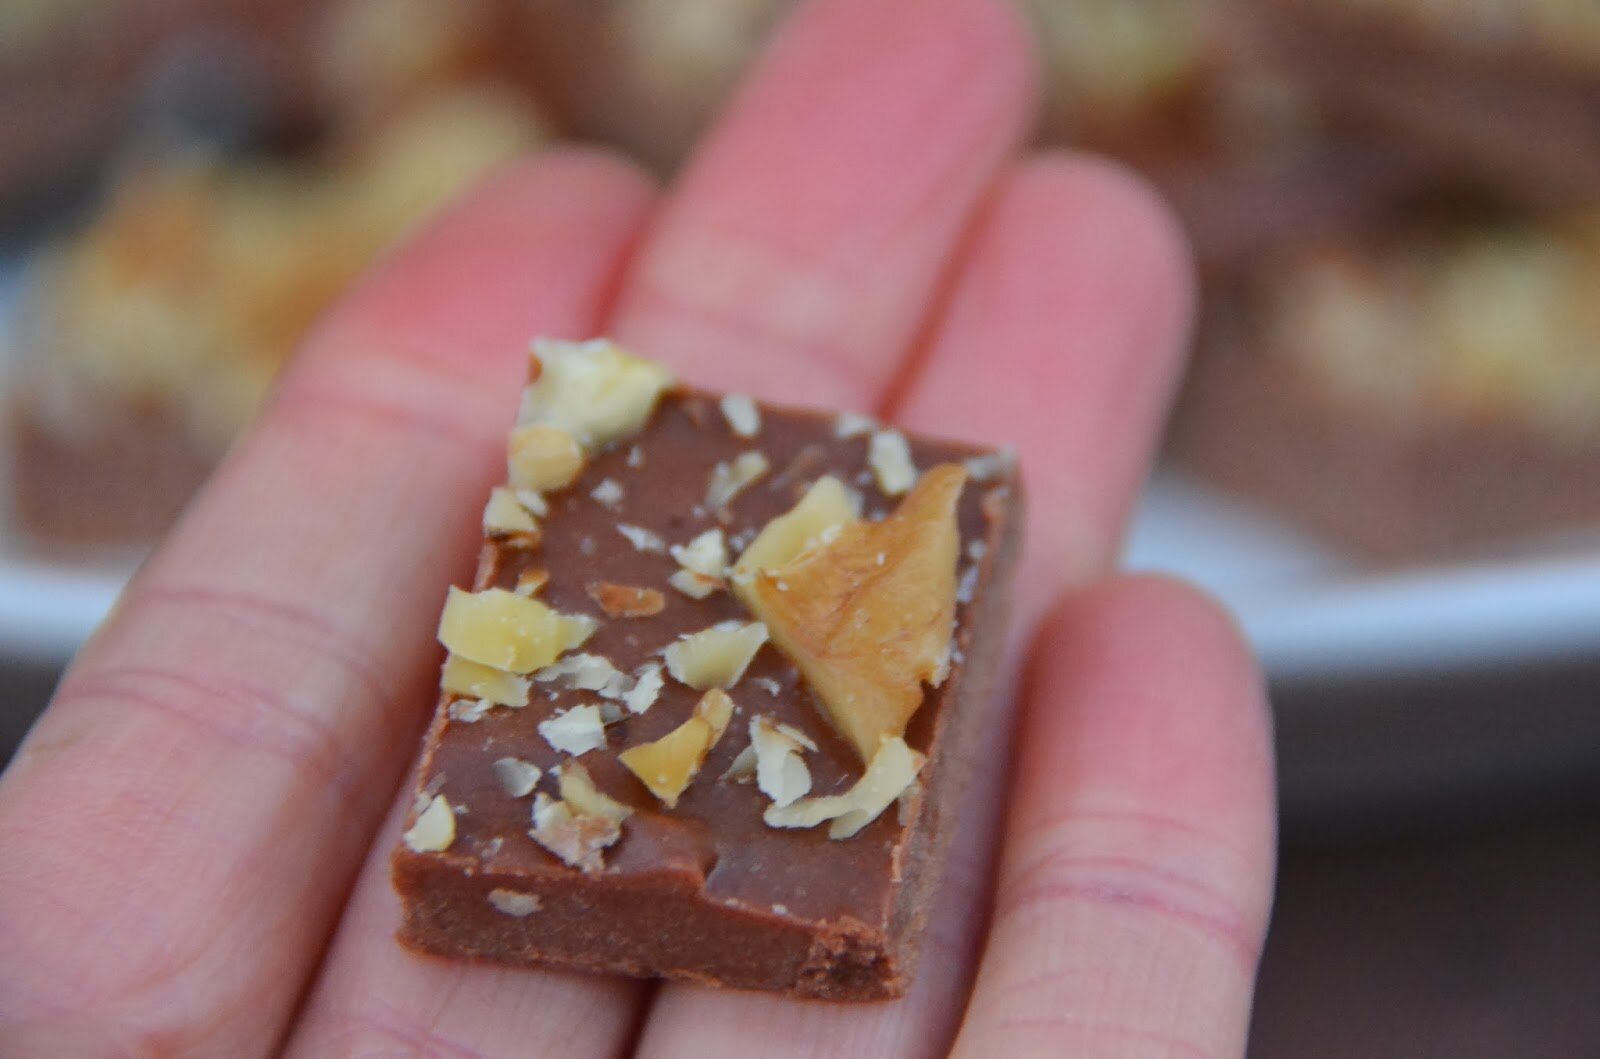
Raw Freezer Fudge

Shared on these wonderful link parties: Raw Foods Thursday, Wellness Weekend, Paleo Link Party, Whole Food Fridays, Gluten Free Wednesdays,


Gorgeous little cookies and I love that you’ve offered vegan options!
St Dalfour jams are my favourite too!
Vicky xo
Thanks Vicky.
Wow Amber, these look amazing! I’m like you, I can’t stand to pay top dollar for something when I can make it at home. I think these will definitely be a treat my family will like… just need to pick up some more cashews 🙂
Thanks for another great recipe. I hope you’re having a great week!
xo,
Cassidy
Thanks Cassidy. You also have a great week. Hugs.
Hello,
Could almond flour be used in the thumbprint cookies, and if so, how much? Thanks.
Micki
Hi Micki,
Not sure about the almond flour. I suggest just using 2 cup of whole almonds and use the same method suggested in the recipe. If you experiment with the almonds, let me know how it turns out. thanks.
fyi I’m not getting into the links for the ingredients you posted in your recipes, it just takes me to a screen that says http
Thanks for letting me know. Something is wrong with the recipe template. I hope to have it fixed here soon. Thank you.
Hi Amber! Do you think arrowroot starch could be subbed for tapioca starch? Thanks!
Absolutely! Good question.
Oh my, I must make these STAT! I will try using my newly found cashew meal I found at Trader Joes!
Cashew meal! Very interesting. I wonder if it is organic? Thanks Tessa. Let me know how they turn out for you. xo
I made these! I used my cashew meal (not organic btw), but it enabled me to skip the chilling step and mix it all quickly in a bowl by hand. I am betting almond flour would have similar results. Anyways, the first batch I baked 10 minutes, and it was too long, they were kind of dry. Next batch I baked at 7 minutes and they were perfect! I also noticed my homemade jelly bled into the cookie a lot more..but the store bought was more thick and sticky and did as it was supposed to! Really yummy snack Amber, thank you!
Great information, Tessa. Thank you! I’m glad you enjoyed them. It’s nice to hear your experience with the cashew flour, as that does act much differently than using raw cashews. For example, 15 minutes is a good bake time when using raw cashews for the cookies, so if making with a nut flour that has been professional ground, the baking time is cute in half! I agree that the store bought jelly is much sticker and more user friendly for this recipe. Thanks for the great feedback. I can’t wait to make your thumb print cookies soon too.
These look super yummy! I must make them! Thanks for sharing!
I hope you enjoy them!