I am on a never ending mission to make new and fun snacks and lunches for my kiddos. It makes me happy to fill their lunch bags every morning with nutritious whole food that I feel good about. My kids LOVE corn dogs, as do I. I recently saw a new product pop up in the frozen food isle. They are these little mini corn dogs – they are round and gluten free (the coating is mostly corn). I bought some to try. They were good, but the coating was really hard, but I loved how they were bite size! And do you know what else is bite size?….MINI MUFFINS. So I created a very basic almond flour batter as the “corn” and used our favorite grass fed beef dogs to make a fun little snack that isn’t deep fried, isn’t on a sick, but mimics the flavor and essence of a corn dog. My kids gave them a rousing thumbs up, so yay! Another fun idea for their lunch boxes.
Category Archives: kids


Road Trips with Kids…Accessories, Entertainment, & Snacks!
 I grew up traveling and taking road trips up and down California and longer ventures to Colorado, Texas, and Oklahoma. Because of these experiences, I am old-school when it comes to traveling with my kids. As a child, I didn’t have the luxury of a portable DVD player or an ipad or handheld video game… and yes there was a lot of car squabbles and frustrations, but there was also a lot of imagination, games, laughter, singing, stories, and memories. Don’t get me wrong though, we live in a digital world, of course we have a tablet for the last stretch of the trip…or when traffic becomes horrendous. Continue reading


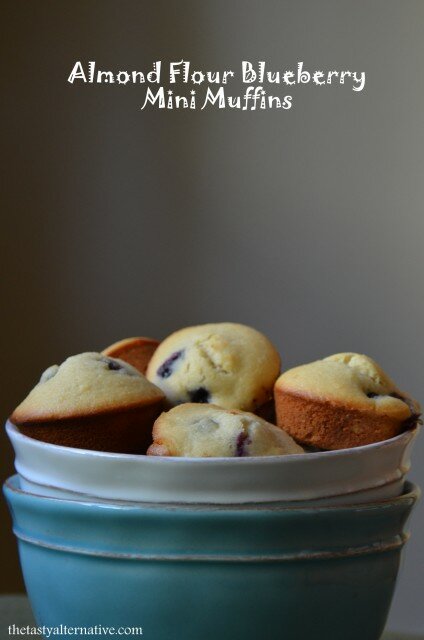
Almond Flour Blueberry Mini Muffins
Last year I finally bought myself a mini muffin pan…and I love it! I try to keep snack time creative and healthy for the kiddos and mini muffins were a perfect new addition. I love using almond flour for the muffins, as they are packed with protein. Any flavor combo is possible and I adore that they are easy to make, easy to pack, and easy to eat. Today I am sharing blueberry, as blueberries are in season and such a delightful little berry. I also use cherry, strawberry, or raspberry or any combo of each. The kids also love banana chocolate chip, which I will share soon. Have you ever made mini muffins? I am addicted! Continue reading
Labels: grain free, kids, muffins, Paleo, snacks, summer cuisine, summer treats.
Leave a Reply


Homemade Cashew Butter + Cashew Honey Spread
- 2 cups room temperature raw organic cashews *
- ½ teaspoon oil (or as needed)
- Add the cashews to blender and start on low, allowing the cashews to turn into flour. Then turn it up a notch and use the tamper to keep things moving.
- You will feel like the motor is going to burn out, but you're okay (and it's loud). Keep it moving.
- I don't turn the blender on high during this process (you know, that left switch) - I just keep it turned up to about 10.
- After it looks really well incorporated and starts getting creamy, add in the little bit of oil and continue blending. The oil just helps move things along in the final process. Add more as needed.
- The cashew butter will be very warm the longer you blend. YOu might want to take a break if things are getting too hot. Use a silicone spatchula to scoop everything out. Don't worry about the little bit remaining between the blades, just make a smoothie and it will clean it right out.
- You can store the cashew butter in an air tight container in the cupboard.
- 1 tablespoon honey
- 2 tablespoons cashew butter
- Mix until incorporated
Shared on: Melt in your Mouth Mondays, Keep It Simple Mondays, Monday Mania, Mealtime Monday, My Meatless Monday, Just Another Meatless Monday, Fat Tuesday, Slightly Indulgent Tuesdays, Allergy-Free Wednesdays, Gluten Free Wednesdays, Real Food Wednesdays, Whole Foods Wednesdays, Raw Foods Thursdays,


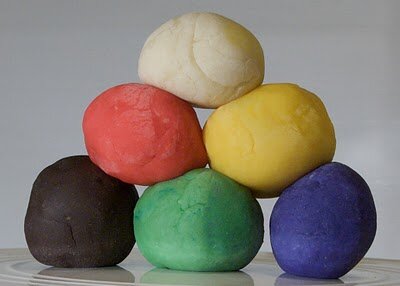
Allergy-Friendly Play Dough (2 ways)
1 tablespoon vegetable oil, or oil of choice


Such a fun idea! I bet my kiddos would love these. My husband would too.
Oh I am sure of it, Emily. They are a fun…and really good.
Thanks so much for sharing this with us over at Savoring Saturdays linky party! I can’t wait to make these for my family. Yum!
Here’s another recipe of yours that I’m going to personally make and share, Amber! I’ve seen gluten-free recipes with grains, but not a grain-free one. Thank you!
Shirley
Oh thanks Shirley! You are so kind. I really hope you like it. My kids had some again in their lunch today and they were so excited. I love when they get happy about food. 🙂
My kiddos go nutzo for these too Amber! We have made multiple variations..you know me..I can;t leave a recipe alone! We will try your version this week!
Hi Tessa. Do yo also make them in a mini muffin pan? Such a fun, kid-friendly food. 🙂
Yes!! Easier to pack that way….
So easy! love it.
Hello I am not doing any starches at this time, is there anything that can be substituted for the tapioca starch?
Thanks so much
Hi Michelle, you can most certainly try it without the tapioca. Just be sure to increase the almond flour a bit. Good luck!