Category Archives: summer cuisine

Monday, August 3, 2015

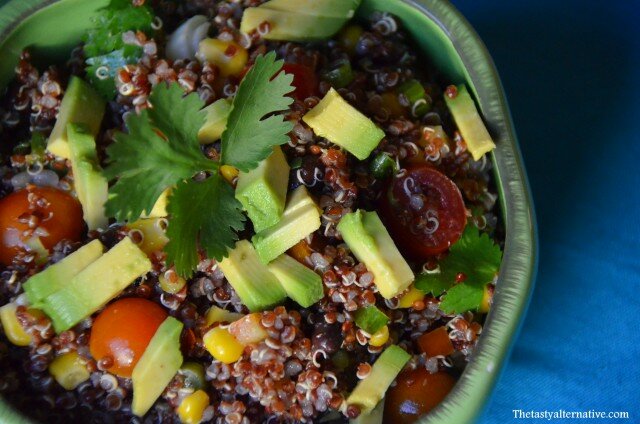
Southwestern Quinoa Salad

Thetastyalternative.com

My local Natural Food Coop has been making a fiesta quinoa salad for years (10+).  I ate it like crazy when it first showed up in the deli and would also pick some up for potlucks or for dinner.  A few years ago I started making it myself.  I remember it was a blistering hot summer, and for weeks it was over 100 degrees and I refused to turn on my oven for most of it.  Like most summers, we live off of cool meals such as avocado mint soup, salads galore, raw treats and homemade ice cream. This quinoa salad is super refreshing and it’s a favorite among my family and friends. Maybe this dish will make an appearance at your next party…or for dinner one hot summer night.  xo, –Amber  Continue reading

Posted by Amber at

Labels: allergy-friendly, grain free, salads, summer cuisine, vegan, vegetarian.

6 Comments

Leave a Reply

Your email address will not be published. Required fields are marked *

Rate this recipe:  

Monday, July 20, 2015

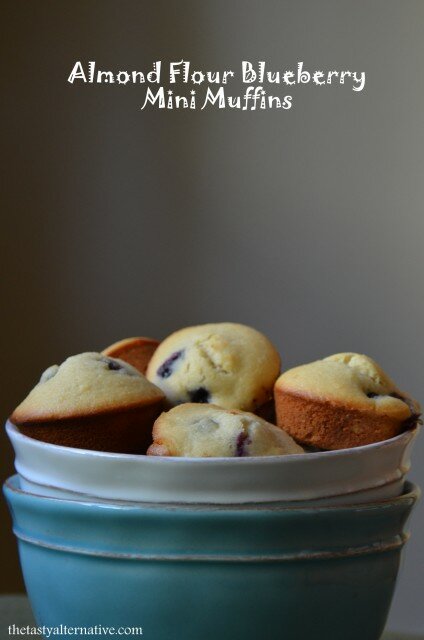
Almond Flour Blueberry Mini Muffins

DSC_0022text

Last year I finally bought myself a mini muffin pan…and I love it! I try to keep snack time creative and healthy for the kiddos and mini muffins were a perfect new addition.  I love using almond flour for the muffins, as they are packed with protein.  Any flavor combo is possible and I adore that they are easy to make, easy to pack, and easy to eat.  Today I am sharing blueberry, as blueberries are in season and such a delightful little berry.  I also use cherry, strawberry, or raspberry or any combo of each.  The kids also love banana chocolate chip, which I will share soon.  Have you ever made mini muffins?  I am addicted! Continue reading

Posted by Amber at

Labels: grain free, kids, muffins, Paleo, snacks, summer cuisine, summer treats.

12 Comments

Leave a Reply

Your email address will not be published. Required fields are marked *

Rate this recipe:  

Thursday, May 1, 2014

Honey Kissed Mint Watermelon Salad
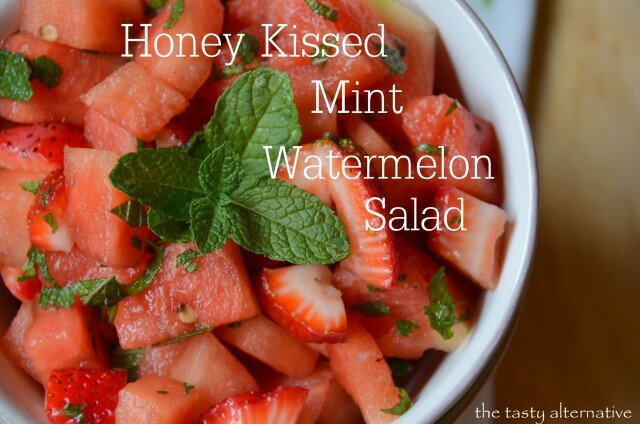
textIt’s warming up here in these parts.  A heat wave is moving through right now and pushing temps into the 90s.  Therefore cool, refreshing dishes are in demand.  It will drop back down to cooler temps next week, and let’s hope May is nice and mild. May is usually our last month of decent weather before the searing summer heat blankets our region.  But it’s all good.  I love the summer and I’m no stranger to hot, dry heat.  As a child I grew up in the desert near Death Valley (in Southern California) – so bring it on.  I was at Costco the other day and found organic, fair-trade mini seedless watermelons.  Awesome-sauce!  They are super delicious and so sweet. I’m thinking this would be a great dish for any summer gathering.

Continue reading

Posted by Amber at

Labels: AIP, GAPS, Paleo, raw, salads, SCD, sides, summer cuisine.

18 Comments

Leave a Reply

Your email address will not be published. Required fields are marked *

Rate this recipe:  

Thursday, January 23, 2014

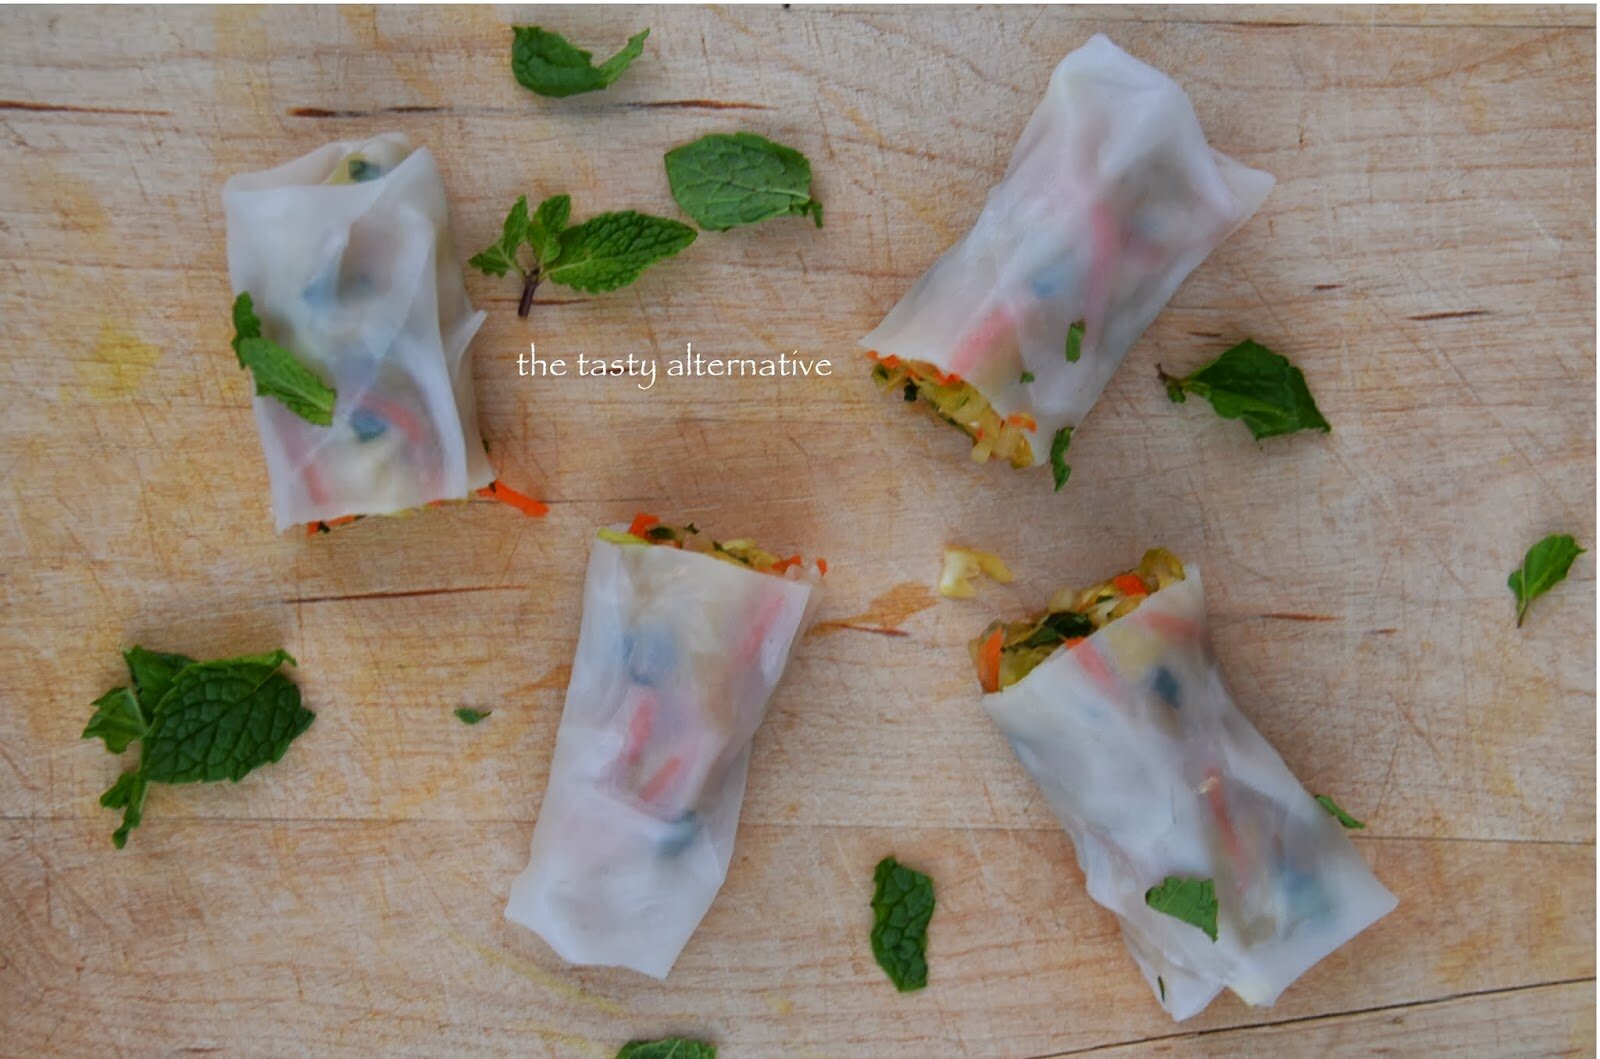
Fresh Cabbage & Herb Spring Rolls with Sunbutter Honey Dipping Sauce

 About a month after I started blogging I posted a recipe for baked spring rolls and they were my favorite food for months.  I made them over and over againuntil like most things I make over and over againI became satiated (and over it).  I haven’t really made spring rolls in a while.  Last month (in December) I was looking for a recipe to bring to a holiday party.  I thought, “What would everyone like, carnivores and vegetarians alike?”  So I made some raw spring rolls and wowza they are fun to make and super yummy.  I forgot how much I enjoy stuffing those little rice wrappers.  And the sauce, oh the sauce!  The sunbutter honey dipping sauce that accompanies these little rolls has such a delightfully complex flavor.  Sunbutter is a great sub for peanut butter in traditional peanut-based sauces.  Definitely give it a try.

Continue reading

Posted by Amber at

Labels: allergy-friendly, appetizer, sauces, spring cuisine, summer cuisine, vegetarian.

22 Comments

Leave a Reply

Your email address will not be published. Required fields are marked *

Rate this recipe:  

Thursday, August 22, 2013

Zughetti with Roasted Butternut Squash, Roasted Cherry Tomatoes and Baked Chicken Topped with Lemon Garlic Cashew Sauce


I don’t know about you, but I am always on the hunt for dinner ideas.  I like to keep things fresh and different.  For one, it helps me stay motivated to cook the dinner, and two, I think variety is important.  I made this last week for dinner and everyone loved it.  For me, the cashew cream sauce really made the dish and the overall favors were quite pleasing.  The sweet butternut squash is nicely complimented by the sweet and tart tomatoes.  The savory chicken adds in a nice texture and the fresh herbs with their earthy, fresh taste.  The sauce is lemony with just the right amount of garlic, light and so creamy.  You can add as much or as little sauce as you like…or none at all.  It’s sort of like an Alfredo sauce, but it won’t kill your gut.  Vegetarians can leave out the chicken and add more veggies or white beans would be great.  
Salud. 
Zughetti with Roasted Butternut Squash, Roasted Cherry Tomatoes and Baked Chicken Topped with Lemon Garlic Cashew Sauce 
(SCD, GAPS, Paleo)

Ingredients:

Zughetti 
  
-1 medium butternut squash
-2 1/2 cups cherry tomatoes
-2 pounds chicken 
-3 1/2 pounds zucchini
-A handful of fresh parsley and/or basil

Lemon Garlic Cashew Cream Sauce
2 cups cashews soaked 4 – 6 hours

-1 1/4 to 1 1/2 cups filtered water
-1/2 teaspoon salt (or to taste)
-2 teaspoons garlic granules (or 1 fresh clove)
-1/3 cup fresh squeezed lemon juice

How To:

1.  Preheat the oven to 400.
2.  Prepare the butternut squash by peeling and cubing.  Add to a baking dish with 1 1/2 tablespoons of oil and 2 teaspoons garlic granules (optional).  Set aside. 
3.  Wash the cherry tomatoes and cut them in half.  Place them open face in a baking dish.  Sprinkle with oil and salt.  Set aside.
4.  Add the chicken to a baking dish.  Add in salt, onion granules and garlic granules (to your flavor preference, I do about 1 1/2 teaspoons of each).  Add in 1/4 cup water.  Drizzle with 2 tablespoons of oil.  Set side.
5.  When the oven comes to temp, put everything into the oven together (the butternut, tomatoes, and chicken).  Set timer for 30 minutes.  This should be enough time for the tomatoes and chicken to finish (check for chicken’s internal temp to be 180 degrees or more).  The butternut squash takes about 45 minutes.  So set the timer for an extra 15.  
6.  While everything is roasting and baking, make your zughetti and the cashew cream sauce.
7.  For the zughetti, peel, trim ends, and spiralize the zucchini.  Boil for 8 minutes in water.  Allow to drain while you make the cashew cream sauce.  
8.  For the cashew cream sauce add the soaked and drained cashews to a blender along with all the other ingredients.  Add in 1 1/4 cups water for a thicker sauce, and the 1 1/2 cups for a thinner sauce (as shown above).
9.  When everything is out of the oven, build the dish.  Zughetti, butternut, chicken, tomatoes, fresh herbs, and drizzle on that sauce!
    Shared on: Fat Tuesdays,  Slightly Indulgent Tuesdays, Allergy-Free Wednesdays
Posted by Amber at

Labels: chicken recipes, GAPS, main dish, Paleo, SCD, summer cuisine.

4 Comments

Leave a Reply

Your email address will not be published. Required fields are marked *

Monday, August 5, 2013

Asian Chicken with Sweet Orange Cabbage Salad (Paleo, gluten free, soy free)

You all know I love cabbage.  I LOVE it.  Many things upset my digestion, but cabbage has always been okay (crazy right).  Did you know that cabbage juice is used for those of us with IBD flare ups (especially helpful for colitis)?  Have you heard of this?  You simply run the raw cabbage through a juicer and drink six ounces four times per day.  It’s also touted to heal ulcers.  So my friends, if you are in a flare and nothing is pulling you out, try the cabbage juice.  You might need a chaserso also juice some fresh apples and mix together (if need be).  Okay, back to the food, this is perhaps one of my favorite dishes.  I love the Asian flavors along with the warm baked chicken and cold cabbage.  The fresh squeezed orange juice creates a nice sweet and sour touch.  I hope you enjoy this recipe as much as my family.  So easy to make. Oh and I’ve included my other cabbage recipes at the end of the post for ya! 
Asian Chicken with Sweet Orange Cabbage Salad 
(gluten free, soy free, paleo)

Ingredients:

-2 pounds boneless skinless chicken breasts 

The marinade
-1/4 cup coconut aminos 
-2 tablespoons honey
-2 tablespoons sesame oil
-1 teaspoon garlic granules (or fresh)
-3 tablespoons fresh squeezed orange juice
-1 teaspoon fresh ginger (zested)
-1/2 cup chopped green onions
The Salad
1 pound red cabbage
-1 pound savoy cabbage (a sweet, tender cabbage that I love)
-1 1/2 cups sliced red onion

The Salad Dressing  
-3 tablespoons coconut vinegar (or apple cider vinegar)
-2 tablespoons + 2 teaspoons sesame oil
-2 tablespoons honey
-1 teaspoon garlic granules
-1 teaspoon ginger (zested)
-1/4 teaspoon salt 
-1 tablespoons sesame seeds
-1 large segmented orange for garnish 
-1/2 cup green onions for garnish 

How To:
1.  Combine all the marinade ingredients in a small bowl, mix.  
2. In a glass Pyrex baking dish combine the chicken and marinade. Allow the chicken to marinate for at least an hour (I do about 3). After the chicken has soaked up this yummy goodness, preheat an oven to 400 and put the glass Pyrex with the chicken right into the oven and bake for 30 minutes (or until internal chicken temp is at least 180 degrees).  I cover the Pyrex baking dish with a baking sheet while the chicken cooks, but this is not necessary.   
3.  For the salad, thinly slice both cabbages.  Wash and spin dry.  Place the cabbage in a large bowl.  Add in the sliced onions.  
4.  Make the dressing, including everything from the coconut vinegar to the salt.  Mix and pour over the cabbage.  
5.  Mix the cabbage dressing well.  The cabbage will shrink down by half (it wilts quickly with liquid and salt). 
6.  Garnish with oranges, green onions, and sesame seeds.
Serves 4

~Other cabbage recipes by The Tasty Alternative~

Shared on: Melt in your Mouth Mondays, Motivate Me Mondays, Fat Tuesdays, Slightly Indulgent Tuesdays
Posted by Amber at

Labels: chicken recipes, main dish, Paleo, sides, summer cuisine.

4 Comments

Leave a Reply

Your email address will not be published. Required fields are marked *

Wednesday, June 26, 2013

Healthy and Hearty Summer Salad with Homemade Honey Balsamic Vinaigrette

Salads are a MUST make dish this week here in Northern California.  There is a heat wave coming through pushing us up into the triple digits for several days.  Today is gorgeous and so we are taking advantage of this mild weather and heading to the Farmer’s Market tonight for some dinner and fun.  Yesterday I made a big batch of honey balsamic vinaigrette in preparation for the heat and the many salads I have planned to make.  My kids always gobble up their greens with this sweet and tangy dressing.  Also a great drizzle for roasted potatoes, veggies, chicken, etc.  I think we all need a good go-to balsamic vinaigrette recipe.  I hope this one makes it into your kitchen soon.  
Summer Salad with Homemade Honey Balsamic Vinaigrette 

Salad Ingredients:
-9 ounces fresh greens (I used 3 ounces each of: dinosaur kale, arugula, and baby spinach)

-1 1/2 cups peeled and chopped apple
-1 cup chopped cucumber
-2/3 cup diced red onion
-2/3 cup chopped sweet orange pepper (I like the gypsy variety)
-1/4 cup raw pumpkin seeds 
-Fresh herbs for garnish (I used parsley and tarragon) 

Vinaigrette Ingredients:
-1/2 cup balsamic vinegar 
-3 tablespoons local honey (vegans sub with 3 tablespoons coconut nectar and maybe a drop or two of stevia to your sweet preference, perhaps maple syrup would work as a sub too)
-3/4 cup extra virgin olive oil
-1/2 teaspoons salt
-1/2 teaspoon garlic granules 
-1/2 teaspoon onion granules
-1 teaspoon dijon mustard

How To:
1.  To a blender, add in the vinegar, honey, salt, garlic grans, and onion grans.  Blend on low for 10 seconds.  
2.  Keep the blender running on low and drizzle in the oil very slowly.  
3.  Then add in the mustard.  Blend on medium-high for 10 seconds.
4.  Adjust salt and other flavors to taste.

Notes:
*I’ve included two links above to the products I use.  I buy them in town, but I wanted to give you an example of what I am using. 

Shared on: Raw Foods Thursday, Wellness Weekend  Fat Tuesday
Posted by Amber at

Labels: Paleo, raw, salads, SCD, sides, summer cuisine, vegetarian.

5 Comments

Leave a Reply

Your email address will not be published. Required fields are marked *

Thursday, June 20, 2013

Ditch Those Frozen Fruit Plastic Bags – How To Make Waste-Free Smoothies

WHY plastic Bags SUCK-IT! 
Okay, we all know plastic bags are terrible.  I hate them (and I don’t use that word lightly).  So come smoothie time of year I really, really, REALLY try to NOT purchase any frozen fruit in plastic bags.  I mean, yes, it’s difficult during the off season when fresh fruit (err, organic fresh fruit) is not in season.  But during the summer it’s everywhere. So no excuses.

The easiest way to avoid packaged frozen fruit is to purchase loose fruit and freeze it.  When I say loose fruit I am talking about fruit that is not packaged in any plastic.  This is how fruit is sold at my local Natural Foods Coops here in Northern California.  Sometimes you can find a Farmer’s Market that is really good about selling loose fruit.  I use these Care Bags for my produce/loose fruit, again, NO plastic bags are used at any point in my purchasing process.  Listen, I don’t have a panic attack if I have to purchase fruit in plastic.  For example, Costco has great deals on blueberries and raspberries.  But at least those plastic containers ARE able to be recycled.  Frozen fruit plastic bags are not – they go right into the landfill.  So think about what will do less harm.  

See below for some other suggestions on how to make a fabulous smoothie without the use of bagged frozen fruit.  
*

Here is how I freeze fruit.  I wash, dry, and freeze on silicone mats.  Then I store the fruit in air-tight glass containers in the freezer (not in plastic bags). 

Here we have mango and bananas

Bananas, apple and strawberries… 
Bananas, blueberries, raspberries
Strawberries are everywhere this time of year 
Fresh, loose picked, frozen strawberries for a fraction of what the packaged frozen strawberries cost! 

Okay, moving along
See HERE for my bulk green drink.  
I like to freeze little cubes of this green drink and use in smoothies.  For the smoothie, add in the frozen green drink cubes, some nut milk (or coconut milk), fresh fruit, your choice protein powder, and blend.  What a fabulous way to start the day.
I still have my old BPA/toxic free baby food containers (yes, I made all my kid’s baby food from scratch).  I knew these would be put to good use and below I have them full of homemade walnut milk for smoothies. 

Homemade nut/seed milks from The Tasty Alternative: 
We are surrounded by citrus here in California   So when harvest time comes, I like to freeze lemon and orange juice for smoothies (or for like a million other uses). 
These silicone (BPA free) ice cube trays are awesome.  They make small portions of frozen nut milk or coconut milk. 

Here I have some banana puree.  I had four bananas that were ready for something (super ripe)so I pureed them with a little water and made little frozen banana cubes for smoothies.  With the banana you can also add in a handful of spinach or fresh fruit  (such as an avocado or strawberries).  Just make sure you add in some water so you can pour the mixture into the trays.  

It is possible to create low-waste or no-waste smoothies.  It depends on where you live and what you like, but it is possible.  The point here is to become more mindful of the waste-free options and get creative. 
*

~Smoothie/Milkshake Recipes by The Tasty Alternative~

Top of post bags of fruit Image Source 
___________________________________________________________________________________
Shared on: Allergy-Free WednesdaysWellness Weekend 
Posted by Amber at

Labels: green living, green living tips organization, smoothie, summer cuisine.

10 Comments

Leave a Reply

Your email address will not be published. Required fields are marked *

Saturday, June 15, 2013

My Favorite Chicken Salad ~ With Apples and Fresh Tarragon

I flippen LOVE chicken salad.  Especially with lots of add-ins.  Oh the flavor and texture combination can be magnificent.  And I am one who loves to mash food together. There are no boundaries between food on my plate.  It’s a friendly place.  I will mix everything together on my plate so each bite equally represents each food.  That must be why I love things like chicken salad.  Everything is nicely mixed together and I just love it.  I can eat chicken salad for any meal (yes, even breakfast).  I hope you enjoy this recipe.  It’s super easy and a fantastic way to use up that leftover chicken (see the notes section for additional add-ins).    
Chicken Apple Salad with Fresh Tarragon 

Ingredients:
-2 cups shredded chicken*
-1/2 cup dill pickle, small chop
-1/2 cup celery, chopped 
-1/2 cup peeled apple, small chop 
-1/3 cup diced red onion
-1/3 cup mayo ~ here or here , vegan or homemade vegan
-1 teaspoon Dijon or stone ground mustard (optional) 
-1/2 teaspoon garlic granules 
-1/4 teaspoon salt (or to taste)
-1 teaspoon fresh chopped tarragon or 1/2 teaspoon dried

How To:
1.  To a bowl add in the above ingredients and mix.
2.  Best if made 4 – 6 hours before serving.  

Notes:
*The best way to “shred”  chicken is in a food processor.  Simply add in the two cups of chicken and give it a whirl.  Personally, I like to cook chicken in the crock-pot, this makes it shred naturally.  So I use leftover crock-pot chicken for my chicken salad.  You could also used cubed chicken, it’s really up to you.  
*There are endless possibilities with chicken salad.  Here are some of my other favorite add-ins: sliced grapes, sweet yellow or red peppers, cucumber, hard boiled egg, radish, green onions, fresh dill, cashews, mango, slivered almonds, walnuts, kalamata olives, bacon, curry spice, or dried cranberries.  Go crazy folks.  

Posted by Amber at

Labels: allergy-friendly, dairy free, gluten free, lunch, snacks, summer cuisine.

3 Comments

Leave a Reply

Your email address will not be published. Required fields are marked *

Monday, June 3, 2013

Cherry Amaretto Coconut Ice Cream (SCD, Paleo, dairy free, cane-sugar free)

Ever had that So Delicious Cherry Amaretto Coconut Ice Cream or Coconut Bliss Cherry Amaretto Ice Cream? I have, and they are pretty darn tasty.  But I don’t like all the other added ingredients (or the agave used to sweeten).  And speaking of ingredients, I was thinking about amaretto today.  What is it?  Oh okay, thanks again Wikipedia, it’s a liqueur.  No wonder I didn’t know this.  I am (err, was) a beer drinker.  Don’t know too much about those fancy liqueurs.  I looked at three popular ice cream brands that were “cherry amaretto” and you know what?  I did not see amaretto in any of the ingredients.  Hmmm.  I am not going to go through the trouble of buying a bottle of liqueur for an ice cream recipe if Haagen Dazs won’t.  I’m not a Mad Men character, what am I going to do with a bottle of amaretto liqueur anyway?  Okay, so almond flavoring will have to do.  And it did.  And it’s delicious.  And by golly, it tastes like this and this.  And can’t say for sure, but maybe even this.  So there you go with the amaretto info.  
And oh yes, yeah for cherry season!! 
Cherry Amaretto Coconut Ice Cream
dairy free, cane-sugar free 

Ingredients:
-2 cans full fat coconut milk this or this   
-2 1/2 cups fresh pitted sweet cherries (comes out to 13 ounces)
-1/3 cup honey (vegans use maple syrup, NOT SCD or Paleo)  
-1/2 teaspoon vanilla extract 
-1 teaspoon pure almond extract  

How To:
1.  Blend the above ingredients until smooth.
2.  Add the mixture into an ice cream maker and churn until thick.
3.  Transfer ice cream into a glass container and freeze for 4 to 6 hours.
4. Remove 5 to 10 minutes before serving to allow ice cream to soften a bit.

Notes:
*I have made this ice cream two ways.  The first is the method in this post.  The second way is to leave 1 cup of the fresh cherries out of the blended mixture.  Finely chop the 1 cup of cherries and then add them into the ice cream maker in the last few minutes of churning.  At this time you can also add in 1 cup of cacao nibs, chocolate chunks, or finely chopped almonds.  
 Cherry Nutrition 
Other ways to enjoy the beloved cherry

In a smoothie
In a pie
In my belly!
_________________________________
Shared on: Allergy-Free WednesdaysHealthy Vegan Fridays
Posted by Amber at

Labels: cane sugar free, dessert, ice cream, Paleo, raw, SCD, summer cuisine.

15 Comments

Leave a Reply

Your email address will not be published. Required fields are marked *