Category Archives: candy alternatives

Monday, October 12, 2015

Healthy Halloween Treats the Whole Family Can Enjoy

alternative treats cover

Yay!  It’s almost Halloween!  My favorite holiday.  There is something about Halloween I’ve always loved.  And it’s not all about the candy and treats (as you might know, I’m not a huge sweet tooth). Truth be told… I’m a big ole’ scaredy cat and don’t even believe in ghosts, but man I love the spirit of Halloween.  It’s so fun to dress up and I remember how exciting it was as a kid walking around in the dark gathering candy with the anticipation of being scared out of my Princess Leia buns any minute.  My kiddos participate in Halloween, but they agree to eat mommy’s healthy treats and they turn in their trick-or-treating candy for a gift from the “Great Pumpkin” (who comes the morning of November 1st).  I’ve done this for years now (since my daughter was 2) and my kids love it.  We usually come in early from trick-or-treating and I make some popcorn and other favorites like caramel apples and ginger cookies (via Ricki Heller) and we snuggle up on the couch and watch a low-key Halloween cartoon.  And I’m the nerdy neighbor who does NOT give out candy (I know…booo to me) please don’t egg my house.  I hit up the dollar store for festive stickers, pencils, erasers, and other little trinkets and that’s my “treat.”  It’s nice to have some variety, right.  

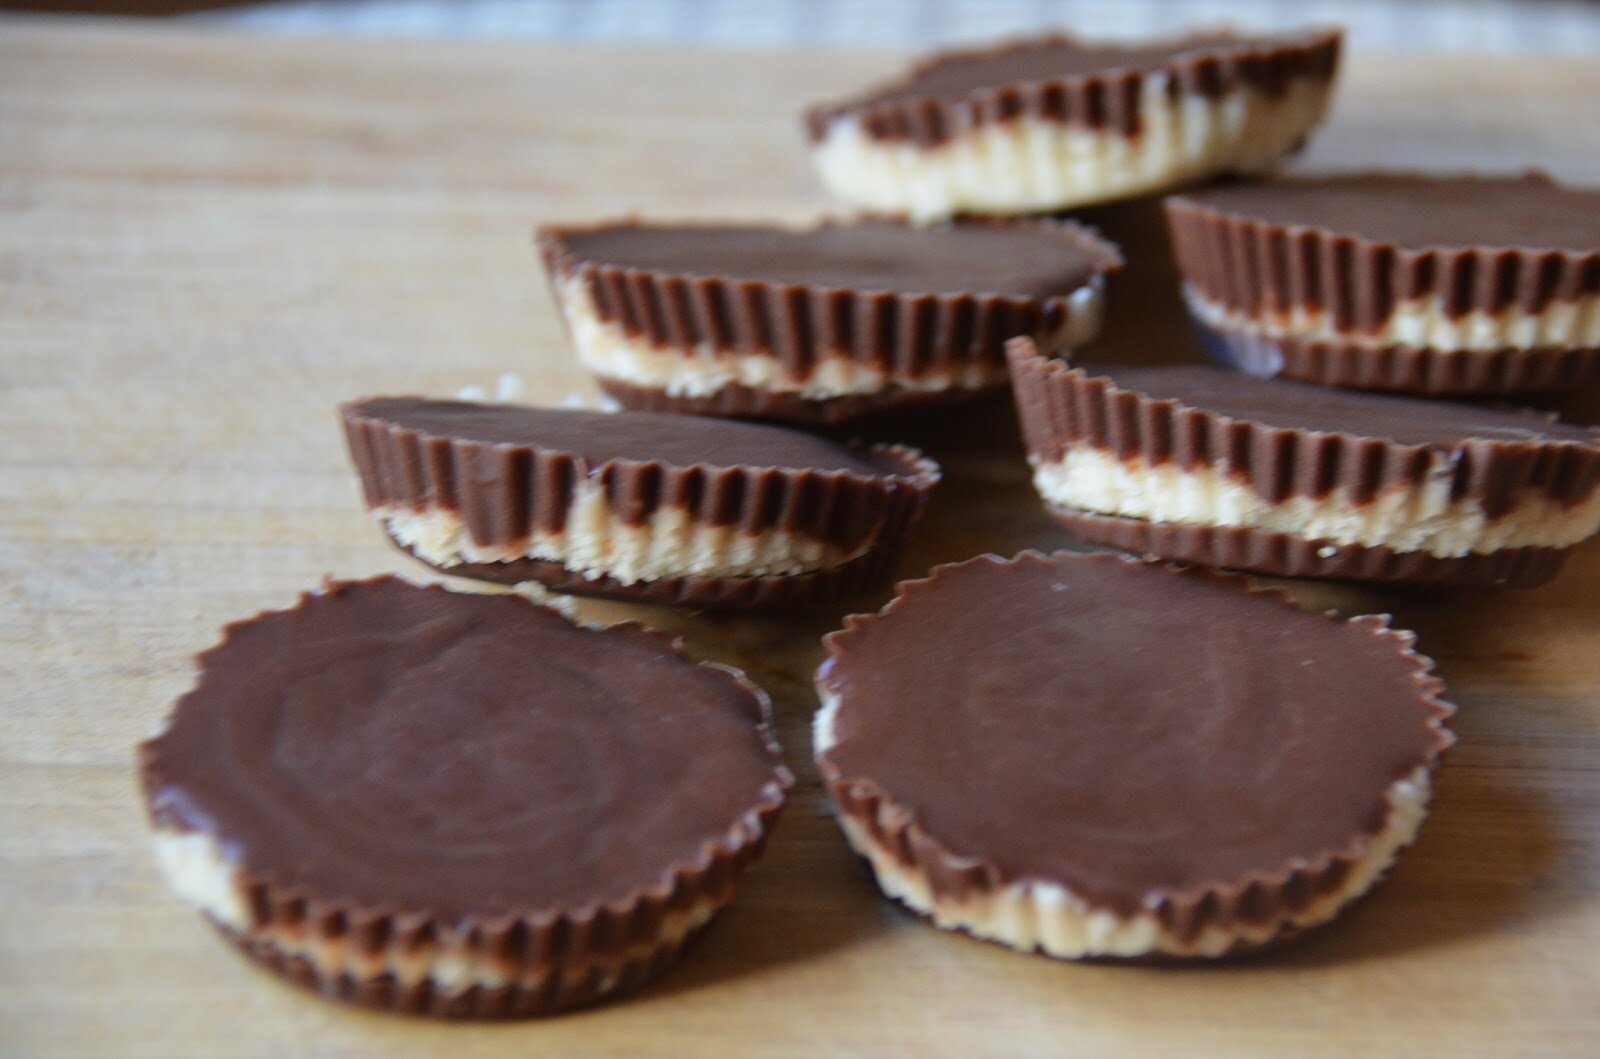
Below are my family’s favorite treats for Halloween. Continue reading

Posted by Amber at

Labels: candy alternatives, carob, chocolate, dessert, Halloween, holidays.

11 Comments

Leave a Reply

Your email address will not be published. Required fields are marked *

Thursday, July 25, 2013

Raw Peppermint Patties

These raw peppermint patties are dedicated to my handsome chocoholic husband.  This is his favorite combination (chocolate, peppermint, and coconut).  I love creating healthy treats for my family…I feel like such a superstar mom when I’m like, “Why yes, we have a fun sweet treat for snack, or yes, there is something tasty and healthy for dessert.”  I love it.  I’ve been working on this recipe for a while. I’m excited to share the final product with you today.  Enjoy!   
Raw Peppermint Patties 
 
Ingredients:
 
Chocolate Shell
-1/4 cup melted cocoa butter
-1/4 cup honey (vegans use 3 T maple syrup, 4 T coconut nectar or 1 teaspoon stevia) 
-1/4 cup raw cacao powder
-1/4 cup melted coconut oil 
-1 teaspoon vanilla extract 
-Tiny pinch of salt 
Filling
-1 cup shredded coconut
-1 to 2 tablespoon honey* (vegans use maple syrup or coconut nectar) 
-1 teaspoon vanilla 
-1 tablespoon peppermint extract/flavor (or more to your preference) 
-1 tablespoon cocoa butter (optional, but worth it) 
-Cacao nibs (optional) 
How To:
1.  Melt the cocoa butter.  Here is how to keep it raw while melting: fill a small pot with water (half full) and place a 1 cup glass Pyrex in the water.  Add the cocoa butter (shredded for quicker, more even heating).  Stir while it’s melting.  Once melted, remove from the water.  
2.  To the melted cocoa butter add in all the above chocolate shell ingredients.  Stir until the raw cacao powder is incorporated.  
3.  Don’t skip this next step:  Use an immersion blender (or some blender) to emulsify the mixture for only about 10 seconds* (see notes).  If you skip this step, the honey will sink to the bottom and will not be evenly distributed throughout the chocolate.  
4.  Pour chocolate (as much or as little as you like) into the bottom of a mold (silicone or paper) – place in the freeze for about 5 to 10 minutes to harden.  
5.  In a food processor make the filling.  Add the 1 cup of shredded coconut and blend 3 to 5 minutes.  Scrape down sides as needed. Add in the rest of the ingredients and blend until incorporated.  If adding the cacao nibs, add last and pulse a few times to incorporate.  
6.  Remove the molds from freezer and (with your hands) add in the filling on the layer of chocolate, leaving enough room on all side for the top layer of chocolate to form around the filling and touch the bottom layer of chocolate.  Add as much or as little as you like. 
7.  Transfer to fridge or freeze to harden.  
8.  Makes 4 to 5 large peppermint patties.  I pour any leftover chocolate into small silicone candy molds and refrigerate.   
Notes:
*Be careful…DO NOT blend the chocolate too long.  Something crazy will happen: the honey and coconut oil blob together and the cocoa butter separates.  There is no recovery when this happens.  
*I use 1 tablespoon of honey for the filling – these puppies are RICH, but add in more sweetener to your preference.    
Here they are with cocoa nibs for added texture and flavor 
Here’s what they look like made thin(er) 
*
Here is the general building process
Shared on: Fat Tuesdays, Raw Foods Thursdays, Allergy-Free Fridays, Wellness Weekend, Healthy Vegan Friday 
Posted by Amber at

Labels: candy alternatives, chocolate, dessert, Paleo, raw.

26 Comments

Leave a Reply

Your email address will not be published. Required fields are marked *

Thursday, August 16, 2012

No Guilt, Sugar-Free Vegan Carob Chocolates

I’ve been addicted to making chocolates since I made Ricki’s Orange-Goji Berry Chocolates a few months ago.  Homemade chocolate is ridiculously easy – and if you’re moving into whole food eating, making your own is the perfect opportunity to have total control over the ingredients.  When it comes to chocolate in our home, I generally use carob.  I discovered carob several years ago and I have to say, I really like it.  I know, I know, chocolate is revered by many (insert picture of my husband here) and touted for healing properties, but since I’m not a huge chocolate lover (ahem, like my chocoholic husband) I therefore don’t feel an incredible urge to eat it (ahem, like my chocoholic husband).  But moreover, I’m not ready to expose my son to the stimulating effects of chocolate.  always experience this side effect when I eat or drink something with raw cacao (I don’t drink coffee either, so I can REALLY feel the chocolate). So I can only imagine what it does to a little 3-year-old (and I will let nothing stand in the way of nap time – cyber high-five to all my mommy peeps who know what I’m talking about – LOVE nap time).  But moreover, my son suffers from eczema and we’ve come to find out that chocolate aggravates my husband’s eczema (oh boy, that was a sad day).  Okay, so, long story short here on the chocolateit’s a fun treat once in a while for my daughter and husband, but carob is used far more frequency in this house and that’s just fine with meAND my family.  Less stimulating effects, less eczema, more smiles.  See HERE for health benefits of carob. 
Sugar-Free Vegan Carob Chocolates
(slightly adapted from Ricki’s Orange-Goji Berry Chocolate recipe)

Ingredients:
-2 ounces raw organic cocoa butter
-2 tablespoons organic carob powder 
-1/4 teaspoon vanilla stevia, or to taste (orange or cocoa stevia would be great too) 
-1 tablespoon homemade cashew butter
-1 teaspoon vanilla 

How To:
1.  In a small non-stick pan, melt the above ingredients on medium heat, taking care not to burn mixture.  Mix the entire time.  Remove from heat and continue mixing until everything is melted and happy.
2.  Transfer to 1 cup glass Pyrex (you will have approximately 1/2 cup of liquid).  Whisk mixture as you pour into silicone molds to prevent separation.  
3.  Transfer to freezer (for 10 – 20 minutes)
4.  Remove from molds and store chocolates in fridge in glass container.
Makes 12 small chocolates 

Shared on: Keep It Real Thursdays, Wellness Weekend, Fight Back Friday, Fresh Bites Friday. Freaky Friday, Lifeologia Summerizing Party, Friday Food,  Allergy-Free Wednesdays, Sweet Saturday, 

Posted by Amber at

Labels: candy alternatives, dessert, sugar free, vegan.

19 Comments

Leave a Reply

Your email address will not be published. Required fields are marked *

Friday, May 11, 2012

Alert – Foodgasm Ahead!! Chocolate Covered Strawberries (with homemade dark and white chocolate – vegan and sugar free)

We went strawberry picking a few weekends ago and we’ve been eating strawberries every day and I’ve had fun incorporating these red beauties in everything from ice cream to salads.  You just can’t go wrong with strawberries, right!  Don’t these look wonderful drenched in chocolate (um, yes, foodgasm – the perfect mix of sweet and tartswoon)!  What a thoughtful Mother’s Day gift these would make, perhaps for dessert after dinner out or a home cooked meal.  This chocolate was completely inspired by Ricki @ Diet Dessert and Dogs.  She recently made some goji berry sugar free chocolates, and they were amazing. It was my first time using stevia as a sweetener in chocolate, and I have to say, it worked beautifully.  And my chocoholic husband LOVED them, so that’s ALL I need to know.  If he gives me the thumbs up, it’s a winner in my book.  
Ingredients

Dark Chocolate
-2 oz cocoa butter
-1/4 cup cashew butter*
-3 level tablespoons of cacao powder
-1/4 teaspoon vanilla stevia 
-1/4 teaspoon cocoa bean extract stevia
-1/4 teaspoon coffee flavor
-1/4 teaspoon peppermint extract

White Chocolate 
-1 oz cocoa butter
-2 tablespoons cashew butter*
-1 teaspoon coconut oil
-30 drops vanilla stevia

How To:
1.  For dark chocolate: in a double boiler (or just put a nonstick pan on top of a pot filled with water), add cocoa butter, cashew butter, and cacao powder.  Stir as it melts to help break up the cashew butter.  When the chocolate looks nice and hot and it’s melting, turn off heat and continue to stir until everything is well incorporated.  
2.  Add in both vanilla stevia and cocoa stevia.  Stir. 
3.  Transfer melted chocolate into two separate bowls (should be 1/3 cup for each bowl).  
4.  In one bowl add 1/4 teaspoon peppermint extract, and in the other bowl, add coffee flavor.
5.  Allow chocolate to cool and thicken a bit before you start to dip in the strawberries.  
6.  You may need to place the bowls of chocolate in the fridge, but not for long.  Be forewarned, once the bowl gets cold, the chocolate hardens very fast.  So, if this happens, simply put the bowl directly in some hot water to melt and start over.  It may take a few tries to get the chocolate just right, but what you want is a somewhat thick syrup.
7.  It helps if you put a plate in the freezer before you start.  After you dip your strawberries, you can place them on the cold plate and it hardens the chocolate and helps it from oozing.

How To:
1.  For the white chocolate:  in a double boiler (see above), add cocoa butter, cashew butter, and coconut oil. Stir as it melts to help break up the cashew butter.  When the chocolate looks nice and hot and it’s melting, turn off heat and continue to stir until everything is well incorporated.  
2.  Add in vanilla stevia. Stir. 
3.  Transfer melted chocolate into a bowl and allow to cool.  You can place in the fridge to help thicken, but see above if it hardens over completely. 

Notes:
*To make cashew butter, add 1 – 2 cups raw cashews to food processor.  Turn on and blend until creamy.  It will get creamy right after the ball of nut butter forms.  
*You don’t HAVE to make the chocolate with cashew butter!  Skip it for a creamier finish.  
*When you start to dip the strawberries, do 5 to 7 strawberries at a time, the place in the fridge on the cold plate with a non-stick surface, such as parchment paper to help set up.
*Cool the berries, then re-dip in chocolate until you achieve your desired chocolate thickness.  I prefer a thin layer, 
*If you place the strawberries directly on a glass plate, a metal spatchula works well to remove them from the cold plate – be gentle but firm. 
*Garnish when chocolate is wet, before you place in fridge – use shredded coconut, lemon, orange or lime zest. 
*These can be left out at room temperature, they will not melt all over.  Placing in the fridge just helps them set up.  
*Please add your stevia to taste.  I don’t like super sweet, just enough to offset the bitter.  So test the chocolate before you drizzle on the strawberries. 
*Make little chocolates with leftover melted chocolate (see below)
I also use a spoon to cover the strawberry with chocolate 
This is what happens if the chocolate gets too firm, it becomes difficult to work with.  Just warm the chocolate if this happens.  You need to find the right consistency, this takes a little practice.  Remember, the white chocolate will look a little pale, but will become whiter as it cools.  
Shredded coconut and lemon zest for garnish 
Pour your extra chocolate into miniature silicone baking cups and make little individual chocolates.  So fun!

Shared on: Slightly Indulgent Tuesdays,  Allergy-Free Wednesdays, Whole Food Wednesdays, Gluten-Free Wednesdays, Pennywise Platter Thursdays, Wellness Weekends, Fresh Bites Friday, Freaky Friday, Fight Back Friday, Friday Food, Lunchbox Love Friday, Allergy-Friendly Fridays, Pot Luck Party Friday,  Sugar Free Sundays 

Posted by Amber at

Labels: candy alternatives, dairy free, dessert, how to, sugar free, summer treats, vegan.

19 Comments

Leave a Reply

Your email address will not be published. Required fields are marked *

Saturday, October 15, 2011

Tasty Alternatives to Traditional Halloween Candy

 Healthy versions of some traditional Halloween treats    

Rice Crispy Chocolate Bars
(my spin on a traditional candy bar)

Ingredients
*I used this recipe for “rice crispy treats” from the Gluten
Free Goddess for the inside of the bars
*One bar of this chocolate for the coating
*Shredded coconut, if desired

How To
*I made the above rice crispy treats, smoothed the mixture out
on a silicone baking mat  – around 1 inch high.  Chilled them
in the fridge until nice and solid.  Then cut them into bars
*Melt an entire bar of chocolate on a double boiler (I fashioned
my own using a small 8″ non-stick saute pan on top of a small
sauce pan filled with some water)
*Quickly cover bars with chocolate, rolling them around
with a wooden pair of tongs.  When fully coated,
transfer immediately to a cooling rack with a baking sheet
underneath to catch the chocolate drippings
*Transfer to fridge until cooled
*These do very well sitting out at room temperature,
the chocolate does not melt.  Perfect to eat like a “candy bar”


These are so decadent.  But I love that the 

chocolate bar is only sweetened with 

filtered beet sugar.  
My husband said the 
coconut covered
ones tasted (like, but much better 
than)
a Mounds bar.


Chocolate Covered Figs
(my spin on a Tootsie Roll Pop)
Ingredients
*Fresh Figs
*One bar of this chocolate for the coating

How To
*Melt an entire bar of chocolate on a double boiler (I fashioned
my own using a small 8″ non-stick saute pan on top of a small
sauce pan  filled with some water).
*Place lollipop stick into fig.  All I had on hand when I made these was a few wooden skewers, a little too sharp on the end for children.  I found some 4″ lollipop sticks here in town the next daymuch better.
*Using a silicone spatchula, drizzle chocolate quickly over fig 
*Be sure to get some chocolate on the area between the stick and the fig, this will provide a nice hold, like a glue, ensuring the fig won’t fall off.  I missed this on a few as you can see in the above picture and these were much more precarious
*Transfer immediately to a cooling rack with a baking sheet 
underneath to catch the chocolate drippings
*Transfer to fridge until cooled
*These do very well sitting out at room temperature,
the chocolate does not melt.  Perfect to eat like a “Tootsie Roll Pop”

These fig pops are so delicious! I was very pleased with 
how they turned out.  These would make super 
cute hors d’oeuvres at a party!


Caramel Pops and Caramel Apples
(My spin on traditional caramel)

Ingredients
*5 Tablespoons brown rice syrup (or Yacon Syrup might work)
*5 Tablespoons coconut sugar
*1 Tablespoon coconut oil

How To
*Spray some oil on wax or parchment paper and strategically place lollipop sticks on paper
*Have a small space on paper sprayed with oil for the apple.  Have apple ready (with wooden skewer firmly in place) 
*In a small non-stick saute pan (same as used above but not as a double boiler) heat brown rice syrup until bubbly, always stirring quickly to avoid burning
*Add in coconut sugar and coconut oil and stir quickly 
*Keep on med/low heat with a slight bubble for about 2 minutes stirring the entire time to prevent burning
*Remove from heat and continue stirring for about 30 seconds
*With a silicone spatchula, pour a small amount of the sauce on the end of each lollipop stick. Let it sit and repeat once more, this will make it a little thicker and give the stick a little more to hold on to
*For apple, hold apple by the skewer and drizzle the sauce quickly over apple and then place on the oiled paper 
*Transfer lollipops and apples into the fridge to cool
*When the sauce has hardened, take out items and remove from paper.  You may get a little paper stuck on your treat, but it peals off pretty easy
*I suggest eating the lollipops right away, as they do get a little soft at room temperature
*Slice apple and let it sit at room temperature before eating.  The sauce turns ooey and gooey when it warms up.  So delicious with the tart apple!
*You will see in the picture below (the pops in the jar) here look a little different than the flat version described above.  For these I made another batch of the sauce and let it cool a little and then started pulling it like taffy.  It took a bit to get the texture just so, but it allowed me to make a thicker sucker
*This recipe may work with honey (instead of the brown rice syrup) or with Yacon syrup, but I didn’t test it out. 

I haven’t had “real” caramel is so long.  It was even years before I was diagnosed.  I never loved caramel, but I thought this would be a fun challenge and I am very please with how it turned out. And I am now remembering that as a young girl I was forbidden to eat caramel apples due to a mouth full of braces.  Bummer.  For fun I looked up a traditional caramel recipe and can I tell you that my stomach started hurting from just reading the ingredients

Posted by Amber at

Labels: candy alternatives, dessert, Halloween, holidays.

4 Comments

Leave a Reply

Your email address will not be published. Required fields are marked *