Author Archives: Amber

Friday, December 9, 2011

How To Roast Garlic & Why This Delicious Allium is Nature’s #1 Immune Booster

Hello.
My name is Amber.
And I’m a garliholic.  
Okay, got that out there.  I’m a true garlic lover.  I love garlic like my sweet husband loves chocolate, and that’s saying something!  The words crave and satisfy come to mind.
 
Let me give you an example.   
If given the choice between a jar of chocolate covered nuts and a jar of marinated garlic clovesfuggedaboutit!  Pass me the stinking rose please. 
Think I’ve made my point here.  
 
What makes garlic so powerful anyway?  So health-fullso immune boosting?  Well, if you lu-uv garlic like me and eat it all the time, there are a few things you should know.  
 
#1
Garlic’s powerful anti-fungal, anti-viral and anti-biotic properties are found in the sulfur compound: Allicin.
Allicin is released from garlic when cut, chopped, crushed, etc. 
 
#2
Allicin immediately starts to break down after it’s produced.  Heat causes additional breakdown and microwaving garlic completely eliminates allicin.    
 
#3 
To receive the health-full benefits garlic has to offer, add raw chopped garlic to cooked food and mix well.  This method protects the fragile allicin by reducing contact with direct heat, and may even slightly decrease the spiciness.   
 
#4

Garlic also comes with precautions, and these should be considered in full if you’re a frequent garlic user.
Safety First(Ahembody odor and bad breath do not count as cautions in my opinion).

*Garlic may interact with some prescription medications.  For example, take great caution in consuming large amounts of garlic if taking prescription blood thinners. Please consult your doctor or holistic practitioner before taking garlic supplements or eating garlic on a daily basis. 

*Believe it or not, garlic allergies do exist (oh boy, I would take my peanut allergy over a garlic allergy any day).  

Symptoms may include: skin rashes, mild fever, nausea, vomiting and headaches.  Consult your doctor or holistic practitioner if you suspect a garlic allergy.

*Garlic can irritate your digestive tract and cause some disruption in digestive function.  One key symptom is nausea.  Other symptoms may include loose stools or diarrhea, even vomiting if you consume too much.

   
*
I eat raw garlic when I feel a cold coming on and consume in small amounts until I start to feel better.  However, I also eat roasted garlic quite regularly, so feeling sick or not, I usually have some on hand in the fridge.  I smear it on gluten free bread, add it to soup, hummus, eggs.  It’s such an easy way to get that delicious garlic flavor and without the very intense spiciness of garlic. 
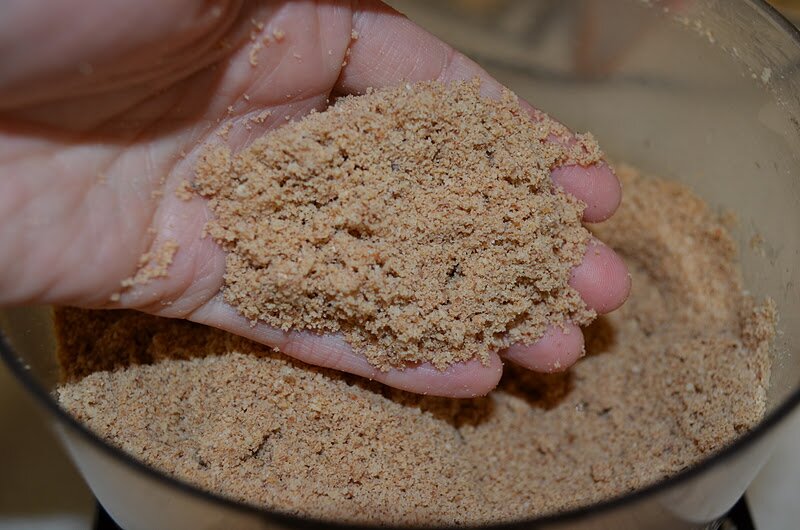

How To Roast Garlic

1.  Preheat oven to 400 degrees 
2.  Cut head of garlic in half
3.  Add a bit of oil and salt to your preferred roasting pan and place garlic face down in pan
4.  Roast for 20-30 minutes; check at 20 and if garlic is tender and sizzling then remove.  
*Another popular method is to wrap a cut head of garlic (with salt and oil) with parchment paper.  Secure with oven-proof string or make a little parchment-pouch.  I prefer creating less waste and using a glass pan.  But do whatever works for you.  
This is what you will remove from the ovendeliciousness!  
Allow garlic to cool before handling
It’s pretty fun to pop out those little cloves  
Mash Mash  
Add some oil to support your mashing efforts  
Mash until your desired consistency 
I like mine just like this:
Salud.
Garlic breath and all!

Shared on:
Wellness Weekend over at Diet, Dessert & Dogs
Posted by Amber at

Labels: Holistic healing, how to, spreads.

4 Comments

Leave a Reply

Your email address will not be published. Required fields are marked *

* Copy This Password *

* Type Or Paste Password Here *

You may use these HTML tags and attributes: <a href="" title=""> <abbr title=""> <acronym title=""> <b> <blockquote cite=""> <cite> <code> <del datetime=""> <em> <i> <q cite=""> <s> <strike> <strong>

Tuesday, December 6, 2011

Flavorful Grain Free Quinoa Stuffing

I’ve been struggling with how to make a quinoa stuffing that doesn’t taste like a quinoa summer salad.  Then I came across a secret ingredient that saved the day: poultry seasoning.  This created a dish that has a real authentic taste to it, without all the traditional gluten/grain type hassle.  

And a quick word about quinoa.  I’ve been cooking it for years, and just the other day I found this website that rocked my world.  I’ve been wasting valuable time and energy trying to get a fluffy quinoa (I do the presoak but alas wasn’t using the correct water to quinoa ratio).  Finally, mystery solved! Just FYI: it’s 1 1/4 cups liquid to 1 cup quinoa.  So simple! 
Ingredients
4 cups cooked quinoa (to your texture preference, see above notes).  
1 medium onion, small chop
1 cup walnuts, chopped 
1 medium apple, peeled and small chop
2 celery sticks, chopped
1 cup dried cranberries (unsweetened or sweetened with fruit juice and always sulfur dioxide free)
2 cups mushrooms, small chop (optional, not shown in recipe above)
1 teaspoon salt
1/4 teaspoon dried thyme
1/2 teaspoon poultry seasoning 
Few turns of the pepper grinder 
Oil of choice 

How To
1.  Coat bottom of pot with oil.  Add onions & salt.  Saute on med/low for 5 minutes.
2.  Add celery & walnuts, stir and cook for 2 minutes.
3.  Add apple, thyme, pepper, & poultry seasoning.  Stir and cook for 2 minutes.
4. Turn off heat and add in the 4 cups of quinoa along with the cranberries.  Mix together quinoa, saute mixture, and cranberries. 

Notes
*This was excellent the next morning with eggs as a breakfast scramble!
Shared on: Gluten-Free Holiday week 4 @ Daily Bites, Traditional Tuesdays, Wellness Weekend,  Monday Mania, Real Food 101, Meatless Monday, Just Another Meatless Monday, The Prairie Homestead, Melt in your mouth Monday, Mangia Mondays
Posted by Amber at

Labels: ACD, dairy free, gluten free, grain free, sides, vegan.

6 Comments

Leave a Reply

Your email address will not be published. Required fields are marked *

* Copy This Password *

* Type Or Paste Password Here *

You may use these HTML tags and attributes: <a href="" title=""> <abbr title=""> <acronym title=""> <b> <blockquote cite=""> <cite> <code> <del datetime=""> <em> <i> <q cite=""> <s> <strike> <strong>

Monday, December 5, 2011

What is Colloidal Oatmeal? And How Does it Help Eczema?

Please read my disclaimer before you continue reading.  
Thank you!

Simply speaking, colloidal oatmeal is very finely ground oatmeal.  Pretty easy explanation right!  

So what in the world is this stuff used for? 

First let me tell you that I ran across colloidal oatmeal from reading the ingredients off a bottle of Eucerin.  I’ve never purchased Eucerin, but I was curious why it is so popular and why so many people recommend it for my son’s eczema and dry skin.  First, check out the ingredients in Eucerin.  I’ve linked research and information to some of the concerning ingredients from The Skin Deep Database

Glycerin, Cetyl Palmitate, Mineral Oil, Caprylic/Capric Triglyceride, Octyldodecanol, Cetyl Alcohol, Glyceryl Stearate, Colloidal Oatmeal, Dimethicone, PEG – 40 Stearate, Carbomer, Sodium Hydroxide, Phexoxyethanol, DMDM Hydantion, Iodopropynyl, Butylcarbarmate.

I was very curious about this oatmeal so I did some research.

I ran across this great site dedicated to colloidal oatmeal.  I recommend checking it out, but I will also share information from this site here.  All quotes are from site link.

So back to the original question: 
What in the world is this stuff used for?

The popular use for colloidal oatmeal is in the bath.  
I have used this with my son.  I grind 2 cups of oatmeal in a coffee grinder and add it to his bath water.  Works great.  Please use oatmeal with caution if you have issues with gluten (or even if you aren’t sure).  It’s best to purchase certified gluten-free oats to avoid any averse reactions.  Please discuss the use of oatmeal as a means for holistic healing with a medical professional or holistic practitioner before using.     

Colloidal oatmeal has properties that comfort itching, so it is a good choice for relieving the pains of eczema. Simply run your bath with lukewarm water, and while the tub is filling, add a packet (two to three cups) of colloidal oatmeal under the faucet to help disperse the oatmeal. Soak in the bath for ten to fifteen minutes. When you are ready to get out of the bath, Be Careful. The bathtub will be slick from the oatmeal. When drying, don’t rub your skin since this can irritate the sore areas. Instead, pat yourself dry with a clean towel. This treatment can be taken up to three times daily to help ease the dry, itchy skin of eczema”

What a great holistic remedy for children and babies suffering from eczema (or adults for that matter).  My son’s skin looks awful in the bath (like burns all over his legs) and so this is a great addition to bath time.  Wish I had this information when he was 6 months old with weepy eczema patches all over his body.  

How does it work?
“Colloidal oatmeal is simply oats ground into an extremely fine powder. When added to bathwater, it creates a milky dispersion that prevents the oatmeal from settling rapidly. So the oatmeal stays in the water and doesn’t just sink to the bottom of the bath. When you get into the tub, the colloidal oatmeal feels silky, as it coats, moisturizes, softens, and protects your skin.”

How do I use it?
“Run your bath with lukewarm water, and while the tub is filling, add a packet (two to three cups) of colloidal oatmeal under the faucet to help disperse the oatmeal. You may have the urge to take a hot bath, but this will only irritate the skin and remove moisture from your body, so a warm bath is preferable. Soak in the bath for ten to fifteen minutes. When you are ready to get out of the bath, BE CAREFUL. The bathtub will be slick from the oatmeal. When drying, don’t rub your skin since this can irritate the sore areas. Instead, pat yourself dry with a clean towel.”

I added colloidal oatmeal to my latest homemade eczema lotion (recipe coming soon) as a dry-skin remedy this winter.  

Check this out if you are interested in making large amounts of colloidal oatmeal.  But a coffee grinder or other blender will suffice.  

Colloidal oatmeal is also used for:
Poison Ivy
Chickenpox
Diaper Rash
Pets
Insect Bites
picture credit
Shared on: Homestead Barn Hop & Traditional Tuesdays
Posted by Amber at

Labels: eczema, Holistic healing, homemade remedies.

12 Comments

Leave a Reply

Your email address will not be published. Required fields are marked *

* Copy This Password *

* Type Or Paste Password Here *

You may use these HTML tags and attributes: <a href="" title=""> <abbr title=""> <acronym title=""> <b> <blockquote cite=""> <cite> <code> <del datetime=""> <em> <i> <q cite=""> <s> <strike> <strong>

Saturday, December 3, 2011

The Skin Deep Cosmetic Database

Ever feel curious about what’s in your lotion, shampoo, lipstick, foot scrub, toothpaste, eye shadow, dish soap, gel?  
I sure do.

A few years ago I came across the greatest website on the planet for the curious, health-conscience mind.  If you’re not sure about an ingredient but really want to know what it is, research results, and how toxic it is (on a scale from 1 – 10) well then look no further.  

The website is
The Skin Deep Cosmetic Database
Start here to get to know the site and how to use it.
Also a good read: the myth about cosmetic safety

This site is SO user friendly, by the way.  You simply type in the ingredient (or just copy and paste from the internet) and you will instantly receive valuale information on its level of toxicity. 
An essential element in any holistic healing routine or holistic lifestyle is knowing exactly what you are putting on your skin and exactly what you are bringing into your home.  This is also so very important for children’s products.  Say NO to chemicals in your products, polluting our bodies and earth.  
Have peace of mind and take control with knowledge. 

Posted by Amber at

Labels: beauty, Holistic healing.

Leave a Reply

Your email address will not be published. Required fields are marked *

* Copy This Password *

* Type Or Paste Password Here *

You may use these HTML tags and attributes: <a href="" title=""> <abbr title=""> <acronym title=""> <b> <blockquote cite=""> <cite> <code> <del datetime=""> <em> <i> <q cite=""> <s> <strike> <strong>

Thursday, December 1, 2011

Monthly Round-Up (November 2011)

I was in a recipe wonderland this month.  With the huge food celebration day that is Thanksgiving, amazing recipes were coming from all angles – LOOK OUT, DUCK!  It was difficult to choose my 10 favorites from the month.  I went with an allergy-friendly list that includes everything from kale chips to parsnip fries.  

Tessa’s Totally Addictive Kale Chips
These were a huge hit with the family,  Such a great idea.

Shirley’s “Samoa” Cookies
These were so delicious!  I used the coconut sugar and honey options Shirley provided in the recipe.

Tessa’s Millet-Almond Banana Muffins with Chocolate Chips 
These are on my to-make list for the kids.

Grain Free Granola Options: 
Hallie’s Grain Free Granola
Kelly’s Homemade Chai Granola 
Ricki’s Carob Buckwheat Pancakes with Almonds and Carob Chips
I’m loving this ingredient combo.  So creative! 
Adrienne’s Homemade Powdered Egg Replacer Recipe
I avoid using eggs due to my son’s eczema, such a great idea to make your own, especially if you run out of the box mix.

Hazelnut Fig and Sage Crackers with Honey Walnut Spread – ALL RAW!!
Gasp, how amazing does this look?

Spicy Parsnip Fries from Allergy-Free Vintage Cookery
Such a creative idea.  Omit cayenne if making for children.
Posted by Amber at

Labels: Monthly Round-Up.

4 Comments

Leave a Reply

Your email address will not be published. Required fields are marked *

* Copy This Password *

* Type Or Paste Password Here *

You may use these HTML tags and attributes: <a href="" title=""> <abbr title=""> <acronym title=""> <b> <blockquote cite=""> <cite> <code> <del datetime=""> <em> <i> <q cite=""> <s> <strike> <strong>

Tuesday, November 29, 2011

Ginger Parsnip Muffins (grain free, vegan, dairy free, cane-sugar free)

(grain free, gluten free, dairy free, cane-sugar free, egg free, xanthan gum free, soy free)but oh so flavor-full


When I saw that Kim and Ricki’s SOS Kitchen Challenge for November was parsnips, I was pumped.  A vegan, grain-free muffin idea started to swirl around in my brain and yes it took me an entire month to finally bring this idea to reality.  Time can sure slip away from you when you’re a busy mommy.  Can I tell you though, I am so pleased with these muffins!  They are very moist (my favorite characteristic in a muffin) and my 2-year-old son LOVES them, which warms my heart because I make these allergy-friendly recipes with him in mind (due to his eczema ).  But kids are the world’s best food critics, don’t you think?  My husband also ate these up.  I hope you enjoy them too.  
Salud.

Ingredients
Dry:
2 cups organic almonds
1/2 cup coconut flour
2 tablespoons arrowroot starch or tapioca starch 
1 tablespoons GF aluminum-free baking powder
1/2 teaspoon baking soda 
1/4 cup tapioca starch
1/2 teaspoon salt
2 teaspoons ground ginger (or 1 teaspoon for a milder ginger flavor)
1 tablespoon cinnamon
Wet:
2 cups grated parsnips
1/2 cup unsweetened applesauce
1 tablespoon vanilla 
1/2 cup coconut oil
1/3 cup coconut nectar  + 5 drops liquid stevia (raw honey or agave will also work)
1/4 cup filtered water 

How To
Preheat oven to 375
Bake time: 20 – 22 minutes 
(check at 20 and remove if tops are browned) 
Makes about 15 muffins 

In a food processor:
1.  Grind almonds until they release a little oil and you can make a ball

2.  Add coconut flour, pulse until incorporated 

3.  Add arrowroot, baking powder, salt, tapioca starch, cinnamon and ginger: pulse, pulse then blend, blend, blend!!

It should looks like this (and feel soft, like flour)

In a separate bowl~wet ingredients:

4.  Add oil, coconut nectar, vanilla, applesauce, stevia, and water; mix until incorporated 
5.  Add grated parsnips and mix
6.  Add dry ingredients from food processor and mix until incorporated.  Do not over mix.  
And don’t be afraidthis is a thick batter!  It’s all good.
7.  Immediately transfer to baking cups and fill about 3/4 full – they will rise slightly, but not much
*Bake as instructed above
*Make a warm cup of tea and enjoy a healthy snack

Also Shared on: Traditional Tuesdays, Slightly Indulgent Tuesdays, Gluten-Free Wednesdays, The Healthy Home Economist, Real Food 101, Midnight Manic Meatless Mondays, Melt in your Mouth Mondays & Wellness Weekend
Posted by Amber at

Labels: dairy free, egg free, gluten free, grain free, muffins, vegan, xanthan gum free.

10 Comments

Leave a Reply

Your email address will not be published. Required fields are marked *

* Copy This Password *

* Type Or Paste Password Here *

You may use these HTML tags and attributes: <a href="" title=""> <abbr title=""> <acronym title=""> <b> <blockquote cite=""> <cite> <code> <del datetime=""> <em> <i> <q cite=""> <s> <strike> <strong>

Sunday, November 27, 2011

The Perfect Base Hummus

We are big fans of hummus in this family so I always have some on hand in the fridge.  Nothing beats homemade!  And it’s so easy.  Making the perfect base hummus allows you to add other ingredients to create a whole new flavor, for example using cilantro.  But you don’t have to rely on beans.  Adding carrots in place of beans, for example, yields a delicious raw hummus.  Pictured above is hummus topped cucumber (served for snack time) – just a little something extra like this can put a fun twist on the everyday dish.  

Ingredients
2 1/2 cups prepared garbanzo beans (soaked overnight or 24 hours and boiled in filtered water)
1/2 cup tahini 
Juice from 2 lemons 
1 1/2 teaspoons garlic granules (or 1/2 clove fresh garlic – fresh garlic will make your hummus very spicy, so take caution when making for children)
1/2 teaspoon salt 
1/2 cup oil of choice (I use grapeseed oil)
Filtered water as needed 

How To
*Add beans & tahini to food processor, pulse a few times
*Add lemon juice, salt, garlic and pulse
*Drizzle in oil while blending 
*At this point you will have a very thick hummus and it will need some water for a creamy consistency, so add in 1/4 cup of filtered water (at a time) until it’s creamy and smooth to your liking
Posted by Amber at

Labels: ACD, dairy free, dips, gluten free, grain free, snacks, spreads, vegan.

9 Comments

Leave a Reply

Your email address will not be published. Required fields are marked *

* Copy This Password *

* Type Or Paste Password Here *

You may use these HTML tags and attributes: <a href="" title=""> <abbr title=""> <acronym title=""> <b> <blockquote cite=""> <cite> <code> <del datetime=""> <em> <i> <q cite=""> <s> <strike> <strong>

Wednesday, November 23, 2011

Giving Thanks

Well we are off today on our first long drive as a family (7 hours).  I’m very curious to how this is all going to go – I’m pulling for manageable.  I’ve found a few tricks for our short journeys (the grandparents all live out of town, but nothing over a 2.5 hour drive).  So I have prepared yummy goodies, activities, fun CDs, stories on CDs, some car games and if things get ku-ray-zee I will bust out the portable DVD player (that I just bought yesterday at Target, on sale – woot).  We usually don’t travel on Thanksgiving, but it feels right this year.  

Have food sensitivities– will travel!
Having food sensitivities and food allergies makes things difficult when traveling in general, but more so when you’re traveling on one of the biggest food days of the year.  Arg, I can’t help but feel anxious about the food situation.  But I take control, get real and bring food with me.  This year I’ve made two desserts: these brownies and a delicious carrot cake with a vegan/sugar-free frosting (that I will share with you very soon); a side favorite (honey roasted sweet potatoes with apples and pears); my cranberry sauce; pan seared green beans with an orange sauce; and gluten free dinner rolls (from my local gluten-free bakery).  I know the turkey will be okay to eat, and I’m sure there will be a salad.  So, I’m good and Ethan will be fine.  My husband is so great about bringing me back down to a “breathe, everything is fine, it’s all good” place and I love him so much for that.  We are a great match in that way. 

This year I feel grateful for so many things

My sweet, wonderful, supportive husband
My two amazing, magical children
My loving family  
My fabulous friends 
And my fabulous new internet foodie friends
My health on good days
My body for pulling me through the tough days
A roof over my head and access to healthy food 
Clean drinking water
Our beautiful earth for providing us with nourishment and life

And for special days like this.
Singing with my kids, enjoying each other and cherishing the moment

Have a Wonderful, Safe and Happy Thanksgiving.
Be Well,
–Amber
Posted by Amber at

Labels: Uncategorized.

4 Comments

Leave a Reply

Your email address will not be published. Required fields are marked *

* Copy This Password *

* Type Or Paste Password Here *

You may use these HTML tags and attributes: <a href="" title=""> <abbr title=""> <acronym title=""> <b> <blockquote cite=""> <cite> <code> <del datetime=""> <em> <i> <q cite=""> <s> <strike> <strong>

Tuesday, November 22, 2011

Chocolate Pumpkin Ice Cream (dairy free, cane-sugar free, vegan)

I haven’t had “real” ice cream in ohabout 8 years.  I can’t even remember what the stuff tastes like, although when eating ice cream I do remember feeling thirsty and wanting french fries.  What’s that about?  I’m a salty-girl at heart really, not a dedicated sweet tooth like my husband.  I enjoy frozen treats, as does Scott, so we were very intrigued when we started seeing coconut ice cream on the shelves a few years back.  It was love at first bite for me and for the first time in years I was eating ice cream again – and delicious ice cream, ice cream that didn’t make me phlegmy, thirsty, or crave deep fried salty food (and hooray finally for a dairy free, soy free ice cream)!  It wasn’t long after that I started making my own here at home.  It’s ridiculously easy.  My final recipe in my chocolate + pumpkin series is a delicious, creamy chocolate pumpkin ice cream.  Enjoy.
Ingredients
-1 can full fat coconut milk (Native Forest is BPA free)
-1/2 cup plain pumpkin puree (I used the Cinderella variety)
-3 tablespoons raw cacao powder (or to tasteI liked it at 2 tablespoons, Scott, of course, needed one more tablespoon in there)
-1/4 cup Grade B maple syrup (or sweetener of choice and to taste)
-5 drops liquid stevia
-2 teaspoons cinnamon
-1 teaspoon vanilla 

How To
1. Blend all ingredients until creamy and well incorporated 
2. Immediately add to ice cream maker
3.  When the mixture is very thick (the consistency of frozen yogurt) transfer to freezer
4.  Freeze for a few hours before serving
5.  If serving the next day, don’t fret when you take the ice cream out of the freezer and it resembles a block of ice.  You’re okay. Allow ice cream to sit at room temperature for about 20 minutes, it will thicken up as it warms and will be super creamy and delicious
6.  Garnish with shredded coconut and cinnamon, or your favorite topping

Notes:
Below are other chocolate + pumpkin recipes you may enjoy 

Shared on: Slightly Indulgent Tuesdays & Traditional Tuesdays
Posted by Amber at

Labels: cane sugar free, chocolate + pumpkin, dairy free, dessert, gluten free, ice cream, soy free, vegan.

2 Comments

Leave a Reply

Your email address will not be published. Required fields are marked *

* Copy This Password *

* Type Or Paste Password Here *

You may use these HTML tags and attributes: <a href="" title=""> <abbr title=""> <acronym title=""> <b> <blockquote cite=""> <cite> <code> <del datetime=""> <em> <i> <q cite=""> <s> <strike> <strong>

Sunday, November 20, 2011

Winter Gardening Advice from Don at Redwood Barn Nursery

I live in a big gardening town.  So naturally I became very interested in gardening when we settled in, but I was lost and confused on how to start this whole gardening process.  I wanted to feel successful and competent at what looked like a very easy and natural activity.  A friend told me about a magical little place call Redwood Barn Nursery and the rest is history!  

I walked into Redwood Barn one warm summer day and there was Don moving passionately among the flowers, vegetables, and organic soil.  I roamed around for a while and then thought, maybe next yearthis is a little more involved than I had anticipated (how am I supposed to choose between 15 different varieties of tomatoes?).  But before I left I approached Don and said, “I know nothing about gardening, can you help me?”  Um, help is an understatement.  I’m guessing I learned more about summer gardening in that 1/2 hour than I would have in a month long class.  Why?  Experience.   Don has been operating his nursery for 30 years! So long story short, I left Redwood with a Prius full of dirt, starters, fertilizer and hope.  I can do this!  I was excited, motivated and you know whatI did it.  That summer I became an official gardener.  I fell in love with the process and I don’t sweat the technical stuff because Don is there to save the day and keep me feeling competent and successful.  You are a lucky soul if you have a Don in your town to consult when your garden is overthrown by snails, when you can’t choose between 15 varieties of tomatoes, when your cabbage stops growing, when you have no idea when to plant strawberries, ph balance what?, when your carrot sprouts disappear or if your soil needs conditioning.  He’s the man with the answers, a man with a passion, he’s Don, my gardening guru!


I had the pleasure of speaking with Don recently about growing winter gardens here in Northern California.  Although specific to our particular climate and region, his advice translates to similar climates and you could easily adapt the advice to fit your region.  This was our first video, first take.  We will film inside for future videos, as the traffic buzzing by the barn is distracting.  But I wanted to get this video up for those of you still contemplating a winter garden.  It’s not too late!
Check out Don’s advice on winter planting and come on over to the the Redwood Barn Nursery for your organic seeds and starters! 
Here’s what I came home with today
Onion starters (about 20)
Some lettuce 
And garlic (you just pop these cloves right into the ground – so easy!)
One of my garden beds with the addition of today’s new finds 
Shared on: Homestead 101
Posted by Amber at

Labels: adventures in gardening.

6 Comments

Leave a Reply

Your email address will not be published. Required fields are marked *

* Copy This Password *

* Type Or Paste Password Here *

You may use these HTML tags and attributes: <a href="" title=""> <abbr title=""> <acronym title=""> <b> <blockquote cite=""> <cite> <code> <del datetime=""> <em> <i> <q cite=""> <s> <strike> <strong>