Category Archives: sides

Monday, September 28, 2015

Perfectly Whipped Sweet Potatoes

Cover2

Fall where are you!  It’s hitting the mid 90’s again this coming week (insert big eye roll here).  I am yearning to wear my sweaters and boots!  Soon…soon.  Around these parts it starts to really feel like fall at end of October, early November, so we have a few weeks yet.  But this hot weather is not stopping me from making some yummy fall inspired food. I made some absolutely out-of-this-world delicious whipped sweet potatoes on Saturday night for dinner. Seriously tasted like dessert. SO GOOD.  My kids loved it!  My daughter said, “Mommy, what’s in here…it tastes like pie.”  I made the sweet potatoes with this pork dish (sans the applesauce) that is so easy and always a hit and the two went together like gangbustas.  Anyway, if you are looking for a new way to eat sweet potatoes, try whipping them up.  I am totally going to make these whipped sweet potatoes for Thanksgiving and I’m so excited about it!  They are seriously delicious.  Look out fall…I’m coming for ya.  Continue reading

Posted by Amber at

Labels: ACD, AIP, GAPS, holidays, Paleo, sides, Thanksgiving, thanksgiving side dishes, vegan, vegetarian, winter cuisine.

5 Comments

Leave a Reply

Your email address will not be published. Required fields are marked *

Rate this recipe:  

Monday, September 21, 2015

The Perfect Coconut Rice

First Pics for blog

I love rice!  For a while I stopped eating it when I was exploring different diets, such as the SCD and Paleo.  Luckily, rice (white rice in particular) agrees with me so I eat it often.  My friend Eileen from Phoenix Helix has a great post all about white rice.  It’s worth the read to gain more information about how rice interacts with the body.  Something important I always do when preparing rice is soak and rinse.  This is especially important when preparing brown rice because it helps leach out the arsenic that occurs naturally in all rice, but in higher amounts in brown. Continue reading

Posted by Amber at

Labels: sides, vegan, vegetarian.

4 Comments

Leave a Reply

Your email address will not be published. Required fields are marked *

Rate this recipe:  

Thursday, May 1, 2014

Honey Kissed Mint Watermelon Salad
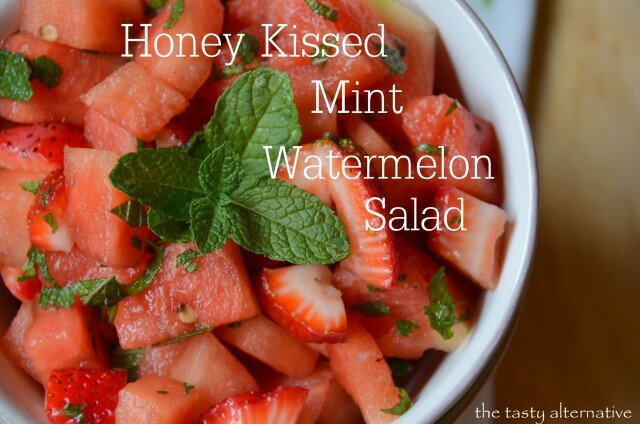
textIt’s warming up here in these parts.  A heat wave is moving through right now and pushing temps into the 90s.  Therefore cool, refreshing dishes are in demand.  It will drop back down to cooler temps next week, and let’s hope May is nice and mild. May is usually our last month of decent weather before the searing summer heat blankets our region.  But it’s all good.  I love the summer and I’m no stranger to hot, dry heat.  As a child I grew up in the desert near Death Valley (in Southern California) – so bring it on.  I was at Costco the other day and found organic, fair-trade mini seedless watermelons.  Awesome-sauce!  They are super delicious and so sweet. I’m thinking this would be a great dish for any summer gathering.

Continue reading

Posted by Amber at

Labels: AIP, GAPS, Paleo, raw, salads, SCD, sides, summer cuisine.

18 Comments

Leave a Reply

Your email address will not be published. Required fields are marked *

Rate this recipe:  

Wednesday, November 27, 2013

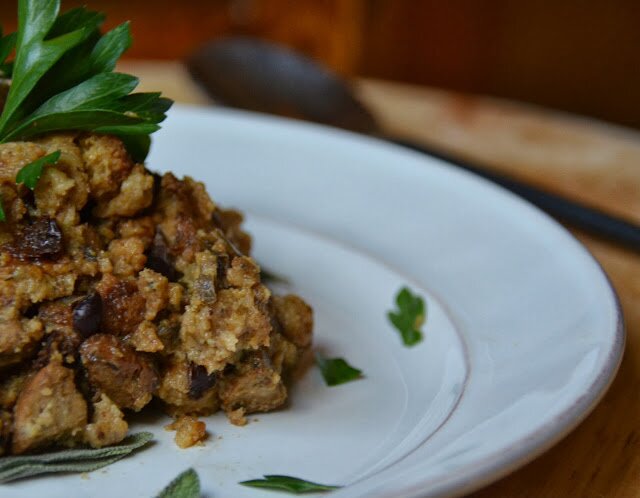
Perfectly Moist Crock Pot Stuffing (gluten and dairy free)

For many years now I have not been too happy with my holiday stuffing (downright disappointed actually).  Arg.  It was totally my favorite Thanksgiving side as a kid and every year I’m bewildered at my fruitless attempts at a dish that seems like a no-brainer.  Hey, cooking is my thing, what’s going on here?? Why is it soooo dry!   Ahhhhh.  Finally this year it dawned on me.  The stuffing I loved as a kid was stuffed and cooked inside a turkey.  Oh right!  It was always so moist and creamy, never, ever dry!  Since I won’t be stuffing a turkey (because I don’t cook a whole turkey, I buy turkey parts, okay more on this later) anyway, stuffing a turkey is not an option so I had to figure out a way to recreate that uber moist stuffing.  So I turned to my crock pot.  And you know what my friends, it totally worked.  I experimented last week and I was over the moon with how moist and delicious the stuffing turned out.  Finally after all these years.  I ate so much my stomach hurt, but it was worth it.  So, if you’re like me and LOVE that good ole’ stuffed turkey stuffing texture than give it a go in your crock pot.  Or just stuff a turkey, whatever works.  I like using the crock pot too because it frees up space in my oven.  Sweet!  
Perfectly Moist Crock Pot Stuffing

Ingredients: 

7 cups homemade dried bread cubes/crumbs 
-2 tablespoons coconut oil
-1 medium yellow onion, chopped 
-1 1/2 cups chopped celery
-2 cups chopped mushrooms
-1 apple, peeled and chopped 
-2 cups chopped sausage of choice (optional) 
-1 tablespoon fresh sage (or 1 1/2 teaspoon dried)
-1 teaspoon poultry seasoning
-2 teaspoons garlic granules 
-2 teaspoons of salt
-Few turns of the pepper grinder (roughly 1/2 teaspoon) 
-4 cups broth
-1 egg (this makes the stuffing very moist and almost souffle like- which I LOVE)
1 cup dried cranberries and/or 1/2 cup chopped walnuts (optional) 


How To:
1. In a pot add the oil, onion, celery, mushrooms and teaspoon of salt.  Saute until soft (5 – 7 minutes).  Add in the sausage and saute with the veggies for an additional 3 – 5 minutes.  
2.  Turn off the heat and add in the chopped apple and optional dried cranberries/walnuts.  Mix.
3.  Now add in the fresh sage, poultry seasoning, 1 teaspoon of salt, pepper and mix.
4.  Add in all the bread cubes.  Mix.
5.  In a separate bowl beat the egg, then add it to the mixture and mix well.
6.  Add in the 4 cups of liquid (or as much liquid as it takes to soak up all the bread, don’t add too much or it will become soup).  
7.  Add everything to a 5-quart crock pot and cook on medium/low for 2 to 4 hours (mix it around after about 2 hours).  I like to remove the lid and allow to cook for an additional 1/2 hour to an hour.  You should have some nice crunchy browning on the sides and a soft, moist, souffle-like middle.  Mix it around before serving. 8.  Let me know if you try this and how it turns out for you!

Notes:
*If you use a larger or smaller crock pot, adjust the time accordingly.  With a larger pot, cook for shorter time.  With a smaller pot, cook longer.  
*If you don’t have a crock pot, simply put the mixture into a covered dish and bake in the oven at 375 degrees for 50  – 60 minutes.  
Get the homemade bread cubes/crumbs HERE 
{affiliate links in post} 
Posted by Amber at

Labels: fall cuisine, sides, Thanksgiving.

Leave a Reply

Your email address will not be published. Required fields are marked *

Monday, August 5, 2013

Asian Chicken with Sweet Orange Cabbage Salad (Paleo, gluten free, soy free)

You all know I love cabbage.  I LOVE it.  Many things upset my digestion, but cabbage has always been okay (crazy right).  Did you know that cabbage juice is used for those of us with IBD flare ups (especially helpful for colitis)?  Have you heard of this?  You simply run the raw cabbage through a juicer and drink six ounces four times per day.  It’s also touted to heal ulcers.  So my friends, if you are in a flare and nothing is pulling you out, try the cabbage juice.  You might need a chaserso also juice some fresh apples and mix together (if need be).  Okay, back to the food, this is perhaps one of my favorite dishes.  I love the Asian flavors along with the warm baked chicken and cold cabbage.  The fresh squeezed orange juice creates a nice sweet and sour touch.  I hope you enjoy this recipe as much as my family.  So easy to make. Oh and I’ve included my other cabbage recipes at the end of the post for ya! 
Asian Chicken with Sweet Orange Cabbage Salad 
(gluten free, soy free, paleo)

Ingredients:

-2 pounds boneless skinless chicken breasts 

The marinade
-1/4 cup coconut aminos 
-2 tablespoons honey
-2 tablespoons sesame oil
-1 teaspoon garlic granules (or fresh)
-3 tablespoons fresh squeezed orange juice
-1 teaspoon fresh ginger (zested)
-1/2 cup chopped green onions
The Salad
1 pound red cabbage
-1 pound savoy cabbage (a sweet, tender cabbage that I love)
-1 1/2 cups sliced red onion

The Salad Dressing  
-3 tablespoons coconut vinegar (or apple cider vinegar)
-2 tablespoons + 2 teaspoons sesame oil
-2 tablespoons honey
-1 teaspoon garlic granules
-1 teaspoon ginger (zested)
-1/4 teaspoon salt 
-1 tablespoons sesame seeds
-1 large segmented orange for garnish 
-1/2 cup green onions for garnish 

How To:
1.  Combine all the marinade ingredients in a small bowl, mix.  
2. In a glass Pyrex baking dish combine the chicken and marinade. Allow the chicken to marinate for at least an hour (I do about 3). After the chicken has soaked up this yummy goodness, preheat an oven to 400 and put the glass Pyrex with the chicken right into the oven and bake for 30 minutes (or until internal chicken temp is at least 180 degrees).  I cover the Pyrex baking dish with a baking sheet while the chicken cooks, but this is not necessary.   
3.  For the salad, thinly slice both cabbages.  Wash and spin dry.  Place the cabbage in a large bowl.  Add in the sliced onions.  
4.  Make the dressing, including everything from the coconut vinegar to the salt.  Mix and pour over the cabbage.  
5.  Mix the cabbage dressing well.  The cabbage will shrink down by half (it wilts quickly with liquid and salt). 
6.  Garnish with oranges, green onions, and sesame seeds.
Serves 4

~Other cabbage recipes by The Tasty Alternative~

Shared on: Melt in your Mouth Mondays, Motivate Me Mondays, Fat Tuesdays, Slightly Indulgent Tuesdays
Posted by Amber at

Labels: chicken recipes, main dish, Paleo, sides, summer cuisine.

4 Comments

Leave a Reply

Your email address will not be published. Required fields are marked *

Wednesday, June 26, 2013

Healthy and Hearty Summer Salad with Homemade Honey Balsamic Vinaigrette

Salads are a MUST make dish this week here in Northern California.  There is a heat wave coming through pushing us up into the triple digits for several days.  Today is gorgeous and so we are taking advantage of this mild weather and heading to the Farmer’s Market tonight for some dinner and fun.  Yesterday I made a big batch of honey balsamic vinaigrette in preparation for the heat and the many salads I have planned to make.  My kids always gobble up their greens with this sweet and tangy dressing.  Also a great drizzle for roasted potatoes, veggies, chicken, etc.  I think we all need a good go-to balsamic vinaigrette recipe.  I hope this one makes it into your kitchen soon.  
Summer Salad with Homemade Honey Balsamic Vinaigrette 

Salad Ingredients:
-9 ounces fresh greens (I used 3 ounces each of: dinosaur kale, arugula, and baby spinach)

-1 1/2 cups peeled and chopped apple
-1 cup chopped cucumber
-2/3 cup diced red onion
-2/3 cup chopped sweet orange pepper (I like the gypsy variety)
-1/4 cup raw pumpkin seeds 
-Fresh herbs for garnish (I used parsley and tarragon) 

Vinaigrette Ingredients:
-1/2 cup balsamic vinegar 
-3 tablespoons local honey (vegans sub with 3 tablespoons coconut nectar and maybe a drop or two of stevia to your sweet preference, perhaps maple syrup would work as a sub too)
-3/4 cup extra virgin olive oil
-1/2 teaspoons salt
-1/2 teaspoon garlic granules 
-1/2 teaspoon onion granules
-1 teaspoon dijon mustard

How To:
1.  To a blender, add in the vinegar, honey, salt, garlic grans, and onion grans.  Blend on low for 10 seconds.  
2.  Keep the blender running on low and drizzle in the oil very slowly.  
3.  Then add in the mustard.  Blend on medium-high for 10 seconds.
4.  Adjust salt and other flavors to taste.

Notes:
*I’ve included two links above to the products I use.  I buy them in town, but I wanted to give you an example of what I am using. 

Shared on: Raw Foods Thursday, Wellness Weekend  Fat Tuesday
Posted by Amber at

Labels: Paleo, raw, salads, SCD, sides, summer cuisine, vegetarian.

5 Comments

Leave a Reply

Your email address will not be published. Required fields are marked *

Thursday, May 9, 2013

Kalamata Olive and Sweet Pepper Macaroni Salad (gluten free & vegan)

Confession: I LOOOOOVE macaroni salad.  I love it goopy or dry, with hard boiled eggs, chicken, hot peppers, bacon, or veggiesand whatever else you want to throw in there, I’ll eat it.  I find macaroni salad just delightful.  And it’s a must for me to eat macaroni salad along side baked beans (and chicken of course).  The beans must be hot, the macaroni salad nice and cool, chop that chicken up and mix everything together so you get a flavor blast of every bite.  Mmmmmm.  So awesome together. It’s the whole summer food vibe that brings back wonderful memories of camping and backyard barbecues.  But there is just something magical about that macaroni/baked bean/and chicken combo that screams summer.  Rock your macaroni salad however you like – it’s a versatile dish.  The macaroni recipe I am sharing today is a crowd pleaser (and bonusit’s vegan and gluten free).  I made it last weekend for a family gathering and it was a hit. Summer arrives early for us here in Northern California and I am already deep in a macaroni salad state of mind.  I hope you get a chance to enjoy this recipeor perhaps it will inspire you to make your own version of this classic summer dish.  Salud. 
Ingredients:
-3 1/2 cups dried gluten free Tinkyada elbow pasta* 
-1 cup small chop sweet orange or yellow pepper
-1/2 cup small chop dill pickles 
-1/3 cup chopped green onion
-1/3 cup chopped celery
-1/3 cup chopped kalamata & green olive mix, or just kalamatas 
-1/2 cup soy free vegenaise mayo OR make your own
-1/4 teaspoon garlic granules (or more, just be careful with the spice factor if serving to chidlren)
-1/2 teaspoon onion granules 
-1/4 to 1/2 teaspoon salt (to taste – remember the olives are salty)
-3 tablespoons oil 
-1 tablespoon apple cider vinegar OR coocnut vinegar 
-1 to 2 teaspoons dried parsley
-optional: juice from pickle jar to taste

How To:
1.  Boil and rinse the pasta.  
2.  Add in all the ingredients listed above to prepared pasta.  Mix well.  
3.  It is my STRONG recommendation that you make this at least 12 hours ahead of time.  Store in a covered glass container in the fridge.  Macaroni just gets better as it sits with all the flavors.  It’s also my suggestion to remove the macaroni salad at least 30 minutes before serving and add in some additional liquid if necessary (such as, more mayo, pickle juice, vinegar, oil, etc).  I like to add in some additional oil and mayo
Serves 6 – 8 (if used a a side dish). 

Notes:
*Tinkyada is my favorite pasta brand.  To make, bring nearly a gallon of water to a rapid boil.  Add in some oil and a touch of salt.  Then add in the dried pasta and stir, continuously until the water starts to again rapidly boil.  Now you can leave it alone until the pasta is soft. I find that stirring continuously in the very beginning helps the pasta from sticking together.  Test pasta 15 minutes later for doneness. Now this is an important stepbrown rice pasta must be rinsed. So I rinse with cool water until the pasta is cool and clean of excess starch.    
Here are the kiddos enjoying their macaroni salad with a turkey and avocado sandwich with a side of crisp lettuce and fresh blueberries. 
Yum! 
I made Megan’s Paleo breaded chicken recipe last week and it was amazing!  The perfect accompaniment for baked beans and my macaroni salad (and yes, after I took this picture I dumped that bowl of baked beans all over the plate).  I’m a dedicated food mixer.  
Shared onShared on: Melt in your Mouth Mondays, Motivate Me Mondays, My Meatless Monday, On The Menu Monday, Mealtime Monday, Fat Tuesdays, Slightly Indulgent Tuesdays, Wellness Weekend, Healthy Vegan Friday, Pure Ella Potluck Party Friday
Posted by Amber at

Labels: gluten free, sides, summer cuisine, vegan, vegetarian.

7 Comments

Leave a Reply

Your email address will not be published. Required fields are marked *

Sunday, May 5, 2013

Chickpea and Sweet Potato Medley (gluten free, dairy free, vegetarian)

Well hello fabulous you!  How is your weekend?  I am up in gorgeous Northern California – we are up visiting family this weekend (which is only about a 2 1/2 hour drive north of us from here in the Sacramento Valley).  My awesome-possum sister is visiting from New York!  I’m close with my brother toowe all enjoy spending time together and laugh uncontrollably quite often.  My brother lives close by here in California and my little 8-month old nephew is the cutest thing EVER (see for yourself below)I just want to eat him up with two scoops of ice cream.  He’s just precious and he loves playing with his cousins.  Okay, so back to the food.  I’ve had some time this weekend to finish up this post with an Indian inspired recipe I’ve been making for a few months and very excited to share with you.  It’s a sweet dish that’s full of wonderful spice and flavors.  Great on its own, as a side, with rice (I serve it with boiled millet) or with with a meat (such as lamb or chicken), also GREAT for potlucks or such gatherings.  Enjoy.  
Ingredients:
-1 cup chopped yellow onion
-2 cups peeled chopped carrots 
-2 cups peeled and chopped sweet potatoes 
-3 cups soaked and boiled garbanzo beans (or 2 cans garbanzos)
-2 cans salt-free chopped tomatoes*
-1/2 cup dried Turkish apricots (small chop)
-3/4 cup canned coconut milk 
-2 tablespoons honey (vegans use maple syrup or coconut sugar)
-3 tablespoons of oil
-1/2 teaspoons salt
Spices
-2 teaspoons garlic granules
-1 teaspoon salt
-1 1/2 teaspoons ground turmeric
-1/2 teaspoon ground cumin 
-1/4 teaspoon ground coriander 
-1/4 teaspoon ground cardamon 
-A few turns of the pepper grinder 
-Optional 1/4 teaspoon ground ginger

How To:
1.  In a large pot add 3 tablespoons of oil, 1/2 teaspoon salt, and the onions.  Saute for 3 minutes.  Next add in the carrots and sweet potatoes and saute for 5 minutes.
2.  Next add in the garbanzo beans, tomatoes, apricots, coconut milk, and all the listed spices.
3.  Bring to a boil for 2 minutes.  Turn down to low, gentle simmer and cover for 30 minutes (stir once in a while).  After 30 minutes, remove the lid and continue simmering on low for another 30 minutes allowing some of the liquid to thicken.  Before serving, you want to make sure all the veggies are soft and cooked through and the garbanzo beans are soft.  Keep on low heat until ready to serve, or reheat thoroughly before serving.  
Serves 4 to 6 (depending on the serving size – this can be served as meal or as a side dish).

Notes:
*like this brand for canned tomatoes for off season cooking.   If making this dish in tomato season, use 3 cups fresh chopped heirlooms or small slicers – these have lots of juice.
And here is my sweet, adorable, practically edible nephew
Shared on: Melt in your Mouth Mondays, Motivate Me Mondays, Mealtime Monday My Meatless Monday, On The Menu Monday, Mix It Up Monday, Fat Tuesdays, Slightly Indulgent Tuesdays, Gluten Free Wednesdays, Real Food Wednesdays, Whole Foods Wednesdays, Pennywise Platter Thursdays, Wellness Weekend, Whole Food Fridays, Healthy Vegan Friday, Fresh Bites Friday, Show  Off Friday, 
Posted by Amber at

Labels: dairy free, gluten free, main dish, sides.

15 Comments

Leave a Reply

Your email address will not be published. Required fields are marked *

Friday, January 25, 2013

Roasted and Mashed Celery Root – A Healthy and Tasty Alternative to Traditional Mashed Potatoes (SCD, Dairy Free, Vegan, Paleo)

Over the Holidays I made mashed potatoes a couples of times for family get togethers (I used red, New Potatoesmy favorite variety).  And so my kids have been asking for mashed potatoes quite often since.  As much I do really loves potatoes, I know they are not the healthiest choice.  Perhaps the most important thing to understand about potatoes is that they are a nightshade, and thus contain alkaloids which can impact nerve-muscle function and digestive function.  Now I can attest to this first hand.  Potatoes do not agree with me (for me, they cause digestive disruption and seem to exacerbate inflammation).  If you follow the SCD, GAPS, or Paleo diet, you know that potatoes are not allowed.  If you’re interested, you can read more about nightshades here.  So I use celery root A LOT as a sub for potatoes.  A while back I made Jill’s celery root fries, and LOVED them.  And I’ve graduated to using celery root to replace mashed potatoes. And I have to say, it’s a very tasty alternative.  One thing you will notice is celery root has a creamy, velvety texture.  I just love this.  Not as starchy as potatoes.  So do my kids love celery root mash as much as mashed potatoes? My son loves it, but by daughter would rather have the massed taters (but my kids don’t get a choice, if they are not allergic to it, they have to eat it).  I usually make roasted celery root mash with chicken and a lovely dairy free lemon garlic gravy, so it all works really well together and I get few objections.  I highly recommend roasting the celery root as a way to impart a deep, rich favor in the dish.  Enjoy!


Ingredients:
-4 large celery root, peeled and small chop (5 to 6 pounds)
-4 tablespoons oil + 1/3 cup olive oil (must be olive oil, or another rich, creamy oil)*
-1 teaspoon + 3/4 teaspoon garlic granules
-3/4 teaspoon salt (or to taste) 
-Pepper to taste  
-Omit paprika if avoiding ALL nightshades 

How To:
Preheat oven to 400 degrees
1.  Peel and small chop the celery root.  Add celery root to your favorite roasting dish (I recommend 13×9 inch pan or larger, I use a glass Pyrex), along with 4 tablespoons oil and 1 teaspoon garlic granules.  Toss all ingredients well and make sure the celery root is well coated with oil.  Roast in a 400 degree oven for 60 minutes* (you will want browning to occur for maximum flavor).  Move the celery root around after about 25 minutes of roasting. 
2.  After the celery root is well roasted, allow to cool for about 10 minutes.
3.  Add the roasted celery root to a food processor.*  Pulse a few times to get things incorporated.  With the food processor on, drizzle in the oil.  Please use more if the mash is not creamy enough for you.  But start with 1/3 cup.  
4.  After you add the oil, add in 3/4 teaspoon salt, 3/4 teaspoon garlic granules, and pepper.  Blend until all the ingredients are well incorporated (see notes).  
5.  The mixture should be creamy, velvety and warm.  
-Serve immediately.  Serves 4 – 5 (depending on serving size).  Top with optional paprika. 

Notes:
*I honestly recommend olive oil as the oil in this dish, as it adds a creamy, buttery flavor that is difficult to emulate with a light oil. 
*It’s important to roast the chunks until they are very tender, this will ensure it whips up in the food processor.
*I have a fairly small food processor, so I put all the roasted chunks in at first, add the oil, salt, garlic granules, and pulse until everything looks incorporated, then I take half of it out, and whip in two batches to make sure everything is smooth.  If you do not roast the celery root long enough or over pack the pan, you will have a chunky mash.  
Whipping it up in a food processor works really well.  
I have had no success trying to do it by hand.  

Coming soonout of this world lemon garlic chicken gravy (SCD).  Seriously, SOOO good! 

Shared on: Wellness Weekend, Fight Back Friday, Fresh Bites Friday, Whole Foods Friday, Gluten Free Fridays, Healthy Vegan Friday, Sweet Saturday, 
Posted by Amber at

Labels: dairy free, grain free, Paleo, SCD, sides.

14 Comments

Leave a Reply

Your email address will not be published. Required fields are marked *

Friday, November 16, 2012

Easy Homemade Gluten Free Bread Cubes for Stuffing (gluten free, dairy free)

 Homemade bread cubes are so simple to make!  I hope you give it a try this Holiday.  This is a great idea too if you are having a difficult time locating GF bread cubes at the store.  Also great for salads – you can really have fun with the ingredients.   

Ingredients:
-One 18 ounce bag of gluten free bread
-1/4 cup oil (I used grapeseed) 

-2 teaspoons poultry seasoning
-1 teaspoon garlic granules 
-1 teaspoon onion granules 
-1 teaspoon dried parsley 
-1 teaspoon salt
-5 turns of the pepper grinder

How To:
Preheat oven to 325 degrees

1. Cut bread into preferred cubes (small, med, or large).

2.  In a large bowl add the bread with poultry seasoning, garlic grans, onion grans, parsley, salt, and pepper.  Toss until incorporated.  

3.  Drizzle in oil and mix very, very well until all the cubes are coated with oil.

4.  Transfer the mixture onto 2 baking sheets (or whatever you have on handI used my stainless steel baking sheet and a glass Pyrex).  Make sure each bread cube is touching the baking surface.  Do not layer the cubes, as they will not toast properly if they are on top of each other.  

5.  Transfer bread cubes to oven and toast for 20 minutes.  After this initial 20 minutes, give the cubes a toss around, and then turn the temperature down to 250 degrees and toast for an additional 15 minutes.  After the total 35 minutes of toasting, check some of the LARGEST cubes for texture.  If they are still soft, then toast for an additional 5 minutes.  Keep checking for texture, being careful to not burn the smaller cubes.  Mine all toasted up within the initial 35 minute toasting (with a medium/large cube cut).  If you go with really small cubes, check for texture after the initial 20 minute toasting time (the smaller cubes will toast up faster and may burn).  

Notes:
*Please adjust seasoning to your bread weight.  If the bread you purchase weighs more, then add in slightly more seasoning and oil.  And remember to always add your seasoning, salt, and pepper to taste.  Upon making any recipe, always test for spice level.  We all have different preferences and palates, so be your own best taste testing advocate in the kitchen.    

This bread cube recipe will fill an 8×8 Pyrex (with other stuffing fixins’) and serves 4 to 6 (depending on portion size). 
Shared on: Whole Foods Friday, 
Posted by Amber at

Labels: dairy free, fall cuisine, gluten free, sides, thanksgiving side dishes.

8 Comments

Leave a Reply

Your email address will not be published. Required fields are marked *