Category Archives: appetizer

Thursday, January 23, 2014

Fresh Cabbage & Herb Spring Rolls with Sunbutter Honey Dipping Sauce

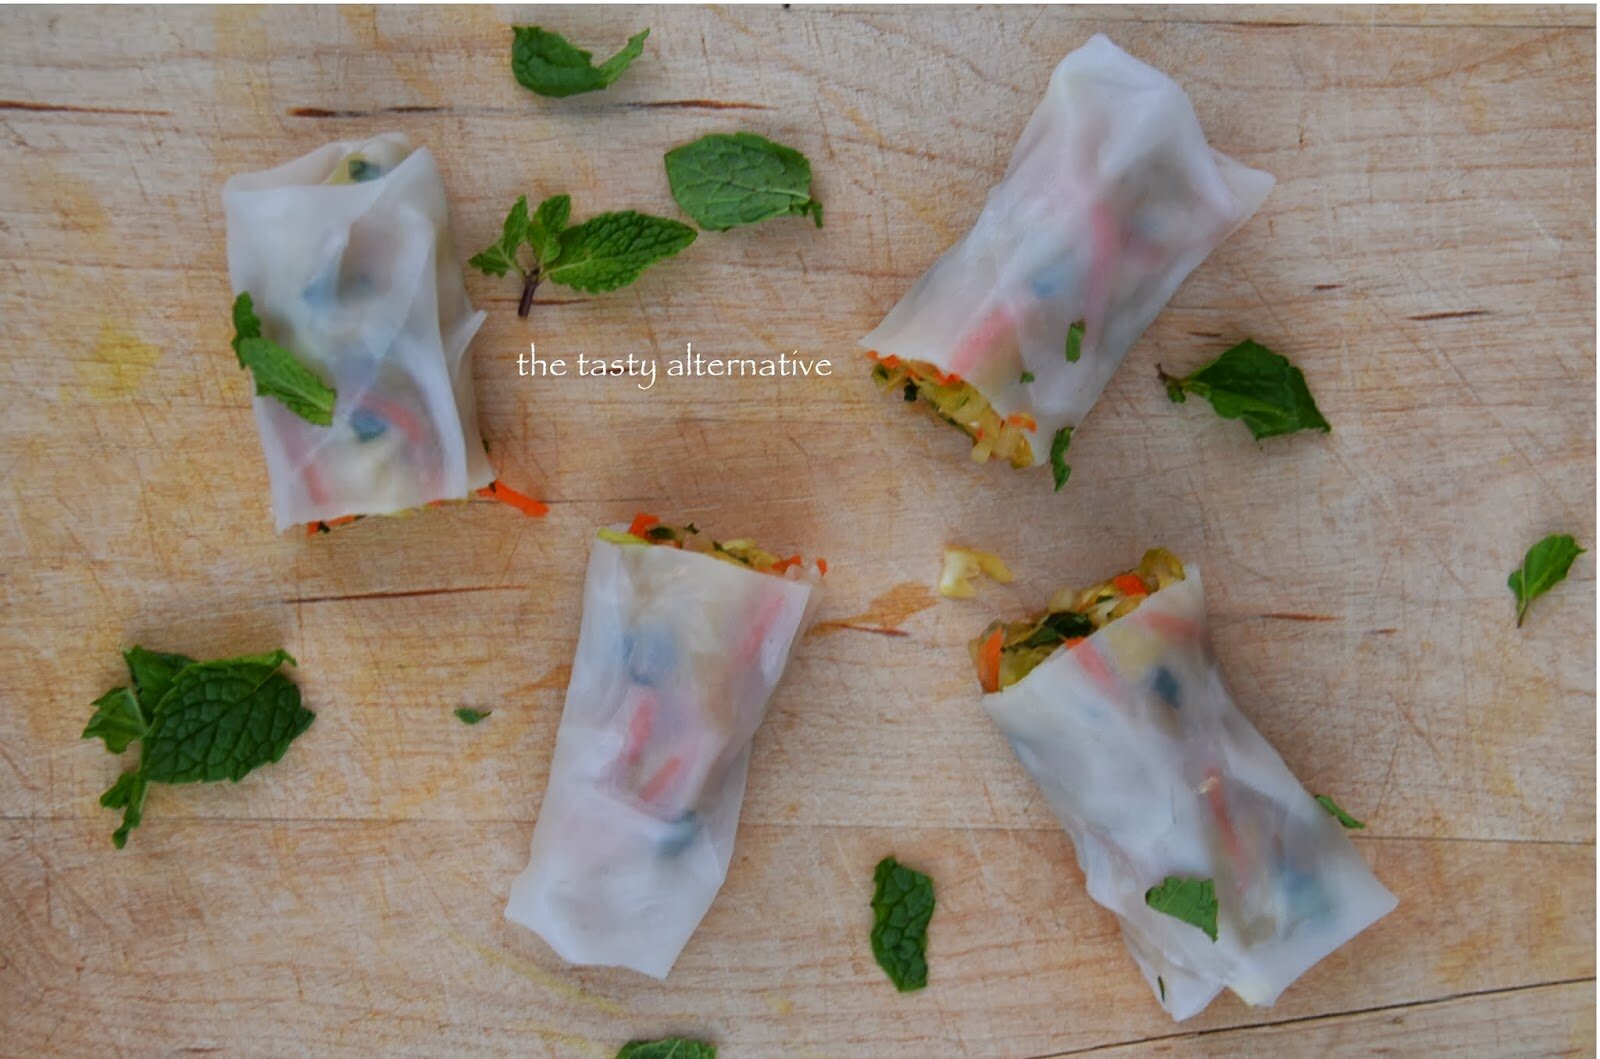
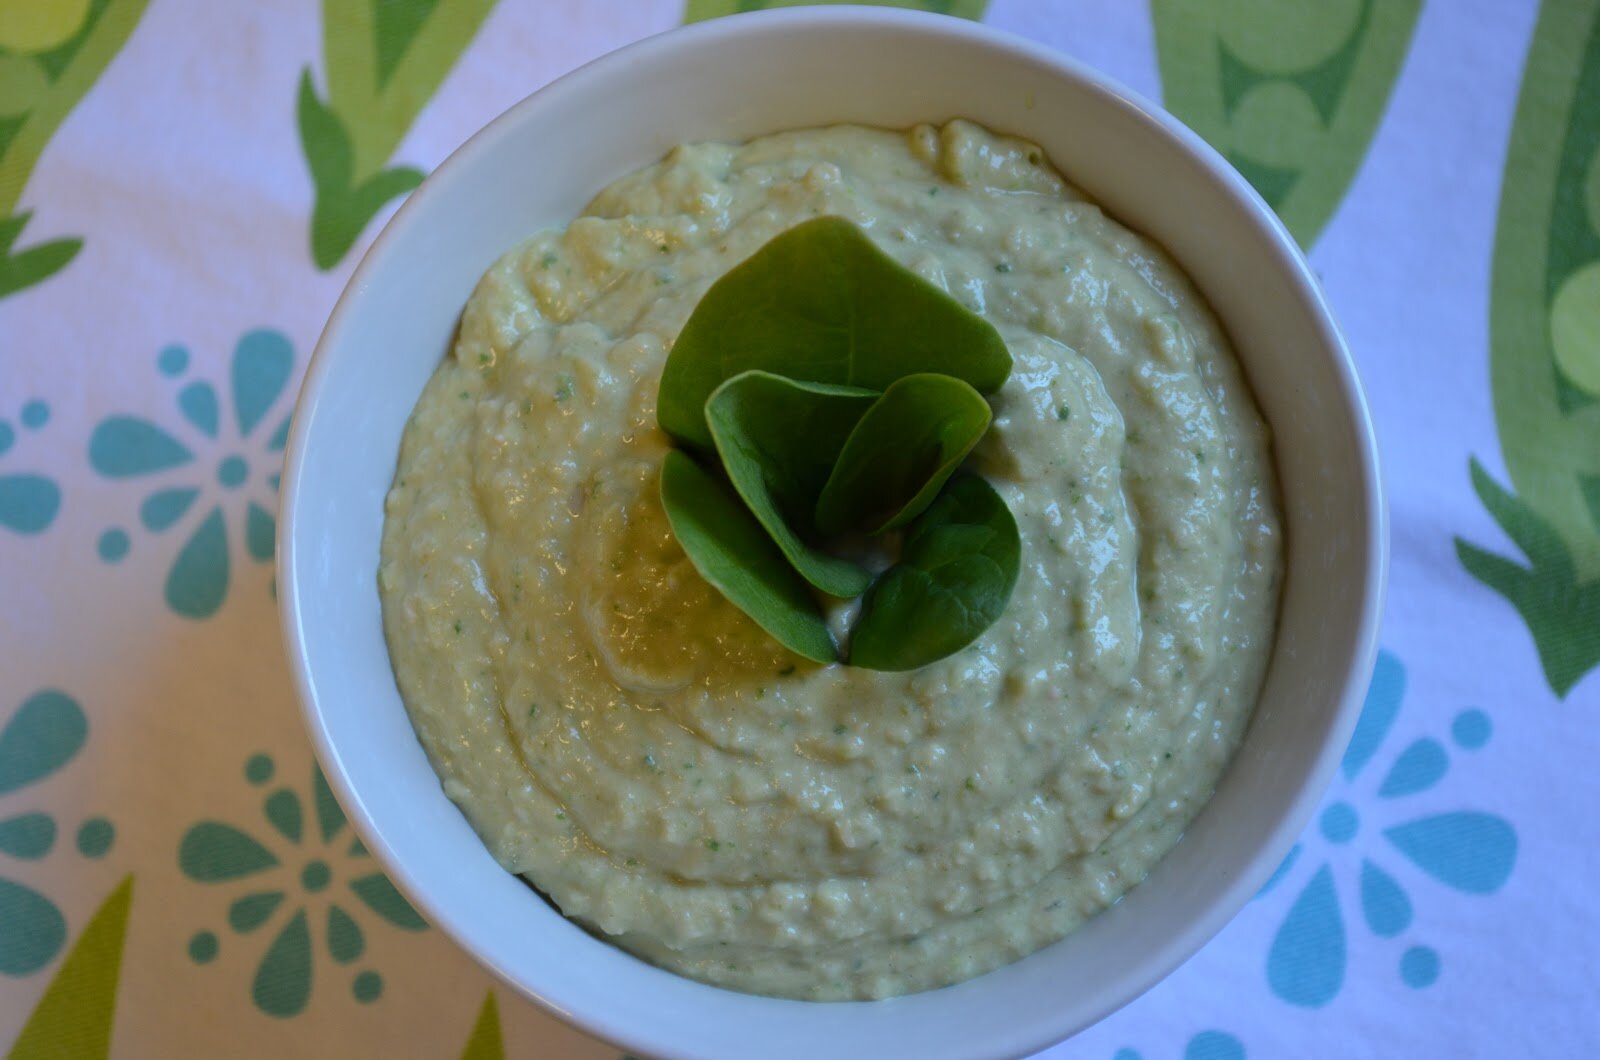
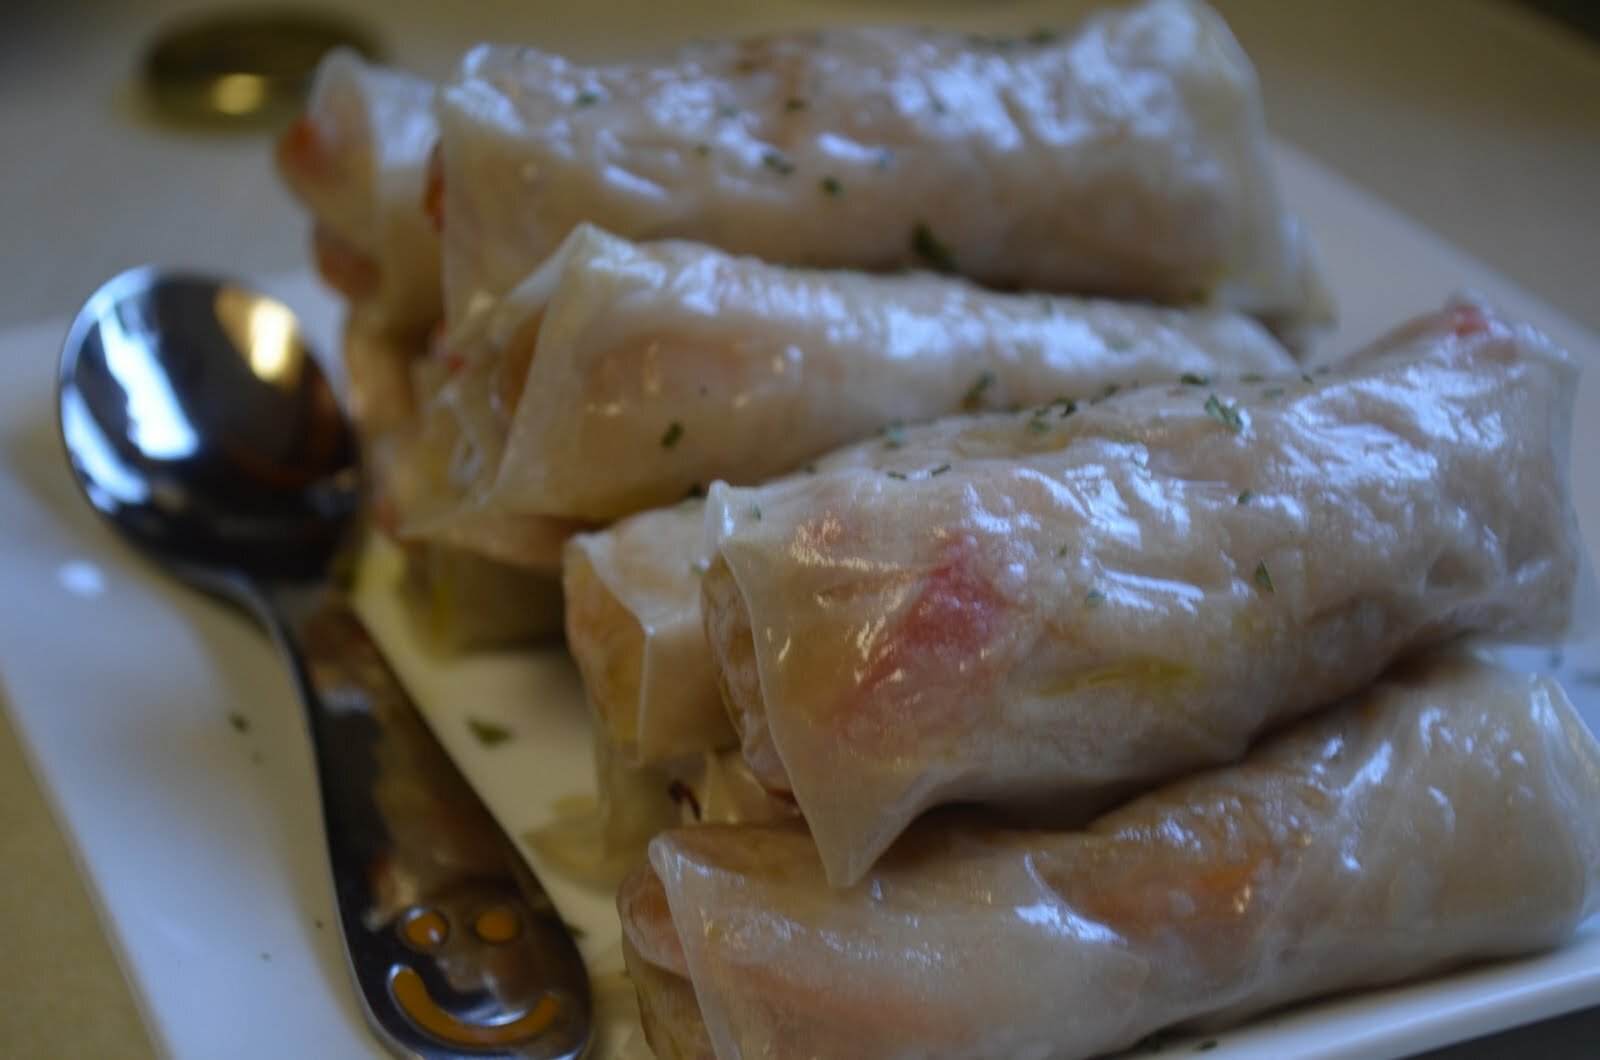
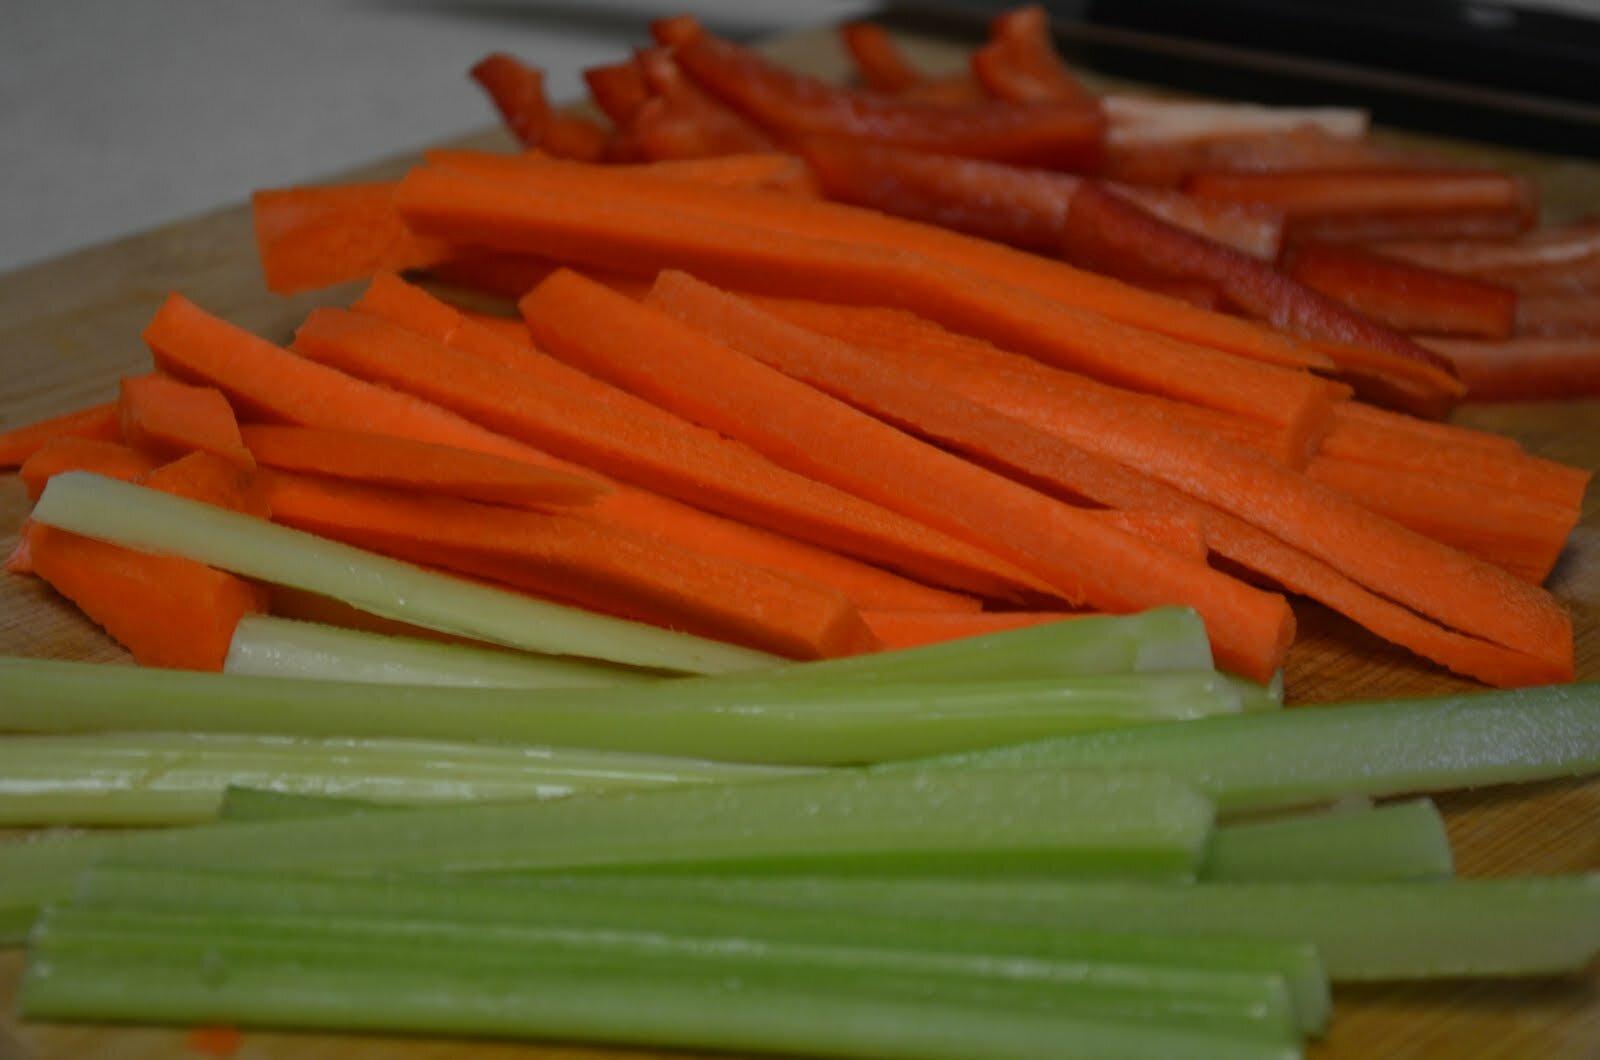
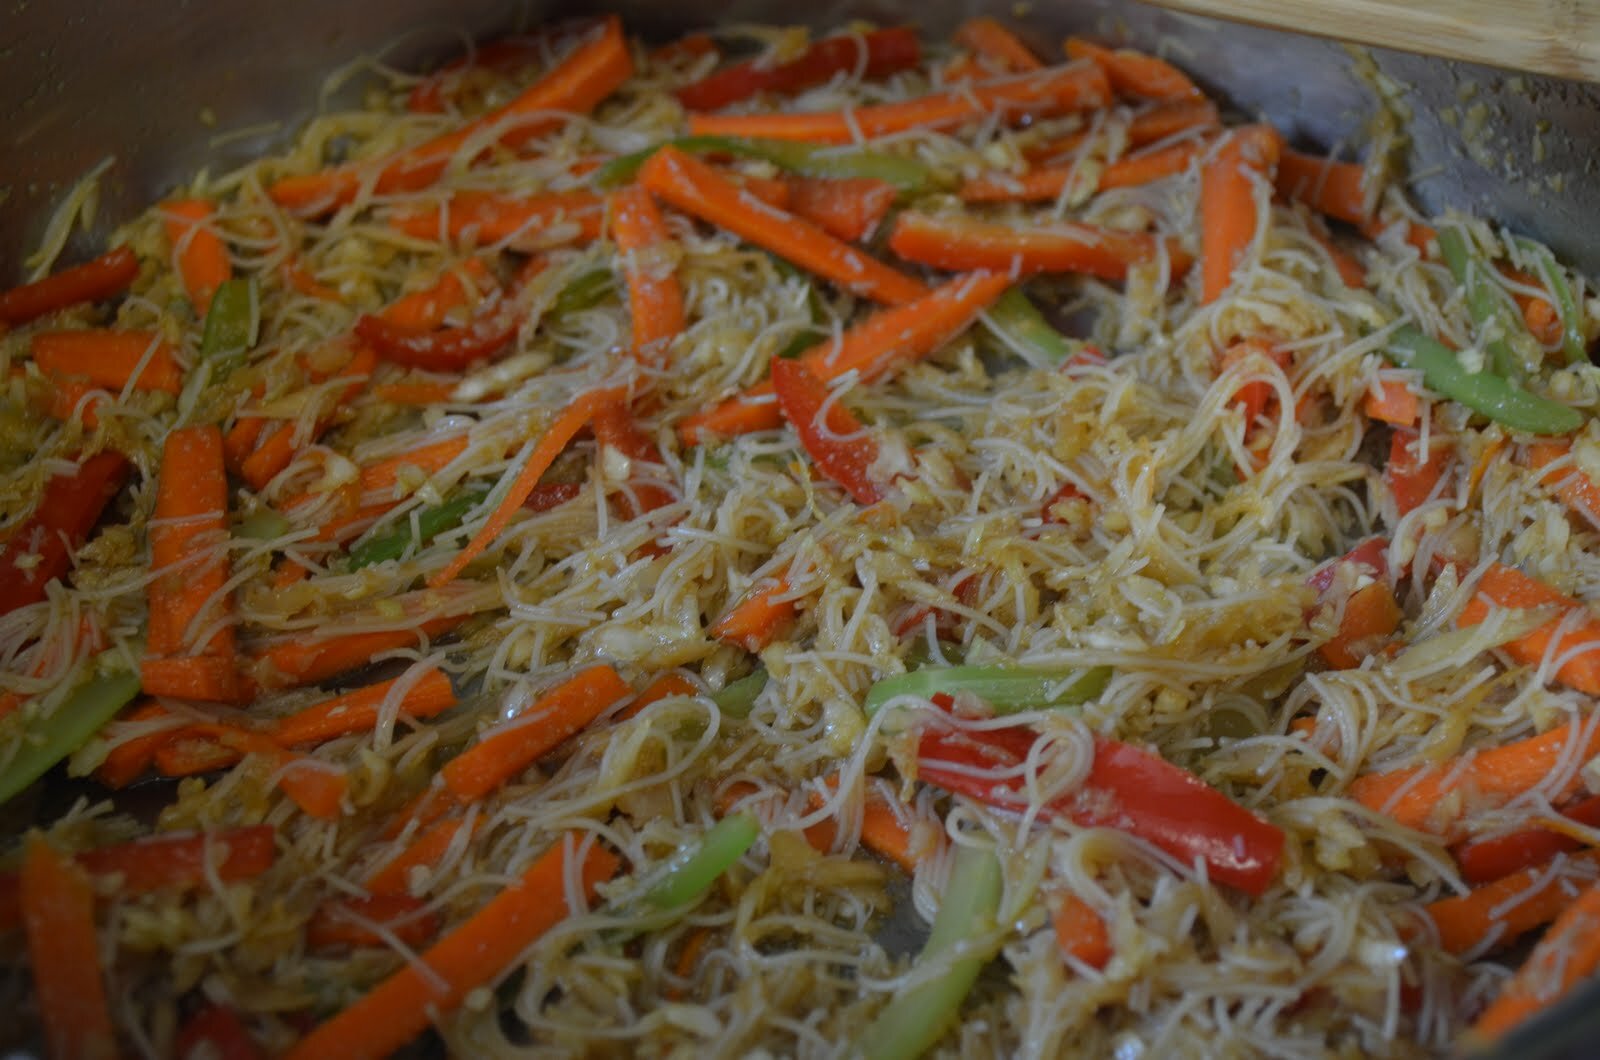
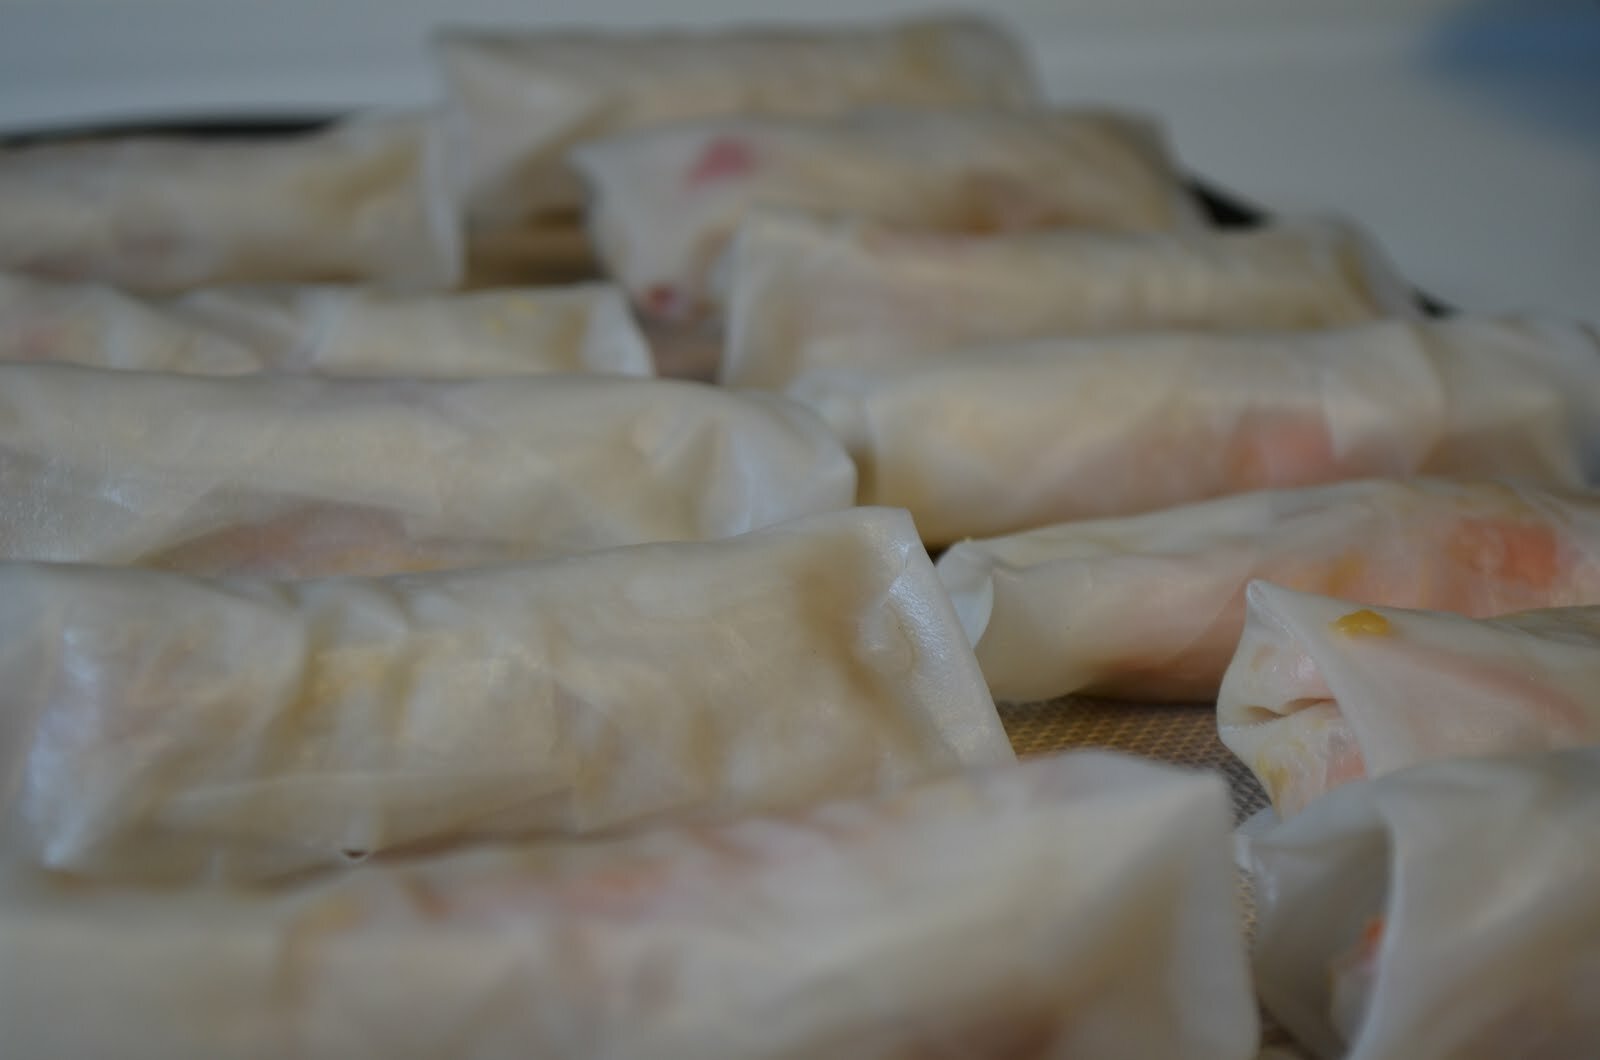
 About a month after I started blogging I posted a recipe for baked spring rolls and they were my favorite food for months.  I made them over and over againuntil like most things I make over and over againI became satiated (and over it).  I haven’t really made spring rolls in a while.  Last month (in December) I was looking for a recipe to bring to a holiday party.  I thought, “What would everyone like, carnivores and vegetarians alike?”  So I made some raw spring rolls and wowza they are fun to make and super yummy.  I forgot how much I enjoy stuffing those little rice wrappers.  And the sauce, oh the sauce!  The sunbutter honey dipping sauce that accompanies these little rolls has such a delightfully complex flavor.  Sunbutter is a great sub for peanut butter in traditional peanut-based sauces.  Definitely give it a try.

Continue reading

Posted by Amber at

Labels: allergy-friendly, appetizer, sauces, spring cuisine, summer cuisine, vegetarian.

22 Comments

Leave a Reply

Your email address will not be published. Required fields are marked *

Rate this recipe:  

Thursday, August 29, 2013

Snack Time: Sophisticated ~ Prosciutto Wrapped Figs w/ a Drizzle of Honey

While getting ready for a most recent play date, I thought it would be fun to give the mommies a little snack time treat, something a littlesophisticated.  As I packed the usual homemade treat, apples, and carrot sticks for the kiddos, I also began wrapping some gorgeous figs with freshly cut prosciutto.  A quick bake in the oven, with a little drizzle of honey, and perhaps the easiest and most delicious snack was born.  I had a strong craving for something sweet and savory and this beyond satisfied.  I was also quite pleased when my mommy friend raved about the flavor combination.  They were delightful.  I’m obsessed.  I hope you will give these a try.    
Prosciutto Wrapped Figs w/ a Drizzle of Honey  

Ingredients:
-10 fresh Black Mission Figs 
-1/3 pound fresh cut prosciutto (if you have it in your deliit’s cheaper to have it cut than buy it packaged)*
-Drizzle of honey

How To:
1.  Preheat oven to 400 degrees
2.  Wash, dry, trim off the stem, and slice the figs in half 
3.  Remove the prosciutto from the fridge and layer them on top of one another
4.  Cut down the middle to make two rows of prosciutto
5.  Begin rolling up the figs in the prosciutto
6.  Bake for 12 minutes 
7.  Allow to cool for about 10 minutes, then lightly drizzle with honey
Makes 20 little individual servings and best served at room temperature

Notes:
*Green Kitchen Tips: for the prosciutto, take a glass container (such as a Pyrex or glass lock n’ locks) instead of having the prosciutto cut and put into paper packaging. Use Carebags instead of plastic bags for the figs. 
*Utilize the deli!  I don’t think people use the deli for fresh cut meats.  I never buy packaged meat, as it’s cheaper to have it sliced in the deli, and I then have the green option of bringing in my own container and thus using less paper and plastic waste.  Deli’s will generally have prosciutto – go for a locally made variety (cheaper than the stuff from Italy too).  
*Proscuitto drys out fast, so try and use it shortly after you buy it.  It will last longer if stored in an airtight container. 
Shared on:  Slightly Indulgent Tuesdays  Allergy Free Wednesdays, 
Posted by Amber at

Labels: appetizer, GAPS, Paleo, SCD, snacks.

6 Comments

Leave a Reply

Your email address will not be published. Required fields are marked *

Friday, July 13, 2012

Breaded Jalapeno Poppers Stuffed with "Cheese" and Bacon (dairy free, gluten free, grain free)

In college I ate A LOT of jalapeno poppers.  They were my favorite finger food.  Scott and I would buy those deliciously unhealthy frozen ones filled with cream cheese and deep fried in lard.  But oh man did they taste awesome with a tall glass of Guinness.  I haven’t thought much about poppers in years, but a few weeks ago I decided my cashew “cheese” would taste fab stuffed in a pepper – and why not throw some bacon in there too.  Or keep them vegan, both ways are fun.  This “cheese” spread is outrageous.  It makes a great spread on gf toast, stuffed in celery, and I’ve used it as a “cheese” in grilled turkey and cheese sammies for the kids.   If anything, just try the filling.  But I think you’ll really like these tasty popper alternatives to the gut-busting traditional version.  These would make fantastic appetizers for your next allergy-friendly shindig!  Serve with a cold glass of gluten free beer.
Ingredients:
-15 to 30 jalapeno peppers – quantity really depends on the size of the pepper, so you be the judge.  Twenty medium sized peppers should do ya. 
-1 cup cashews soaked for at least 4 hours (I soak mine for 8)
-1/4 cup + 1 tablespoon filtered water   
-2 tablespoons lemon juice
-1/4 teaspoon garlic granules, onion granules, salt, and Italian Seasoning (the Italian Seasoning is optional but I love these herbs and think they taste great with the cashews).  
-4 to 5 strips of bacon (1/3 cup)

How To:
Preheat oven to 375 
1.  With careful, patient hands, hollow out the jalapenos.  I place all the jalapenos in a large bowl of water.  Wash, keep them in the water, and hollow out each one.  I rinse each one off after I hollow to remove any remaining seeds. 
2.  Cook bacon and set aside. 
3.  In a food processor, add drained cashews, water, lemon juice, and spices.  Blend until well incorporated.   Chop up the bacon into little pieces and the add to the food processor.  Blend until well incorporated. 
4.  With a pastry bag (with no tip) pipe in cheese bacon.  
5.  Do not fill completely, as the cashews cheese expands quite a bit when it’s baked.  I leave a little room on the end.  
6.  Mix together breading (almond flour, salt and garlic grans).  Beat the eggs in a separate bowl.
7.  Dip each pepper in the egg, then roll round in the breading.  You can do this twice for extra thick breading.  Be sure to coat and bread the opening of the pepper.  This will help the cheese stay in place.  
8.  Line a baking dish with parchment paper and place each breaded pepper on the paper (say that 5 times fast)!
9.  Bake for 30 to 40 minutes, or until the breading is slightly browned.  
10.  Serving size will depend on the size of the pepper.   I’ve made one batch with 20 (big ones) another batch had 30 (smaller ones).  

The Breading Ingredients:
Mix together: 1 cup almond flour, 3/4 teaspoon salt and garlic granules.  Add more as needed  
-2 eggs
Notes:
*The breading is not essential, but makes them taste more like their traditional cousins.  The most time consuming part of this recipe is hollowing out the peppers, the remainder is pretty simple.  Just please be careful with the peppers.  And don’t touch your face under any circumstances.  Bad news.  

Awesome bacon, but not SCD friendly I’m afraid 

This bacon “cheese” is ridiculous.  Love it
Here are some breaded bacon stuffed mixed with naked vegan stuffed ready for the oven (the first time I made these I didn’t line the baking dish, I recommend this step).
Just out of the oven (the middle popper was double breaded) 
See how the “cheese” pushes out.  This is fine, still tastes great, but if you egg and bread over the opening, it helps to hold the stuffing in place (and don’t over stuff). 
Shared on: Melt in your Mouth Mondays, Keep It Simple Mondays, Monday Mania, Mealtime Monday,Scratch Cookin’ Tuesdays, Keep It Real Thursdays, Pennywise Platter Thursdays, Simple Lives Thursdays, Frugal Food Thursdays Fresh Bites Friday, Fight Back Friday, Friday Food, Show Off Friday, Freaky Friday, Friday Foodie Fix
Posted by Amber at

Labels: appetizer, dairy free, gluten free, grain free.

15 Comments

Leave a Reply

Your email address will not be published. Required fields are marked *

Tuesday, May 15, 2012

Three White Bean Dip Recipes: Plain, Kalamata Olive, & Spinach

#3

Last month I made Maggie’s omega 3 white bean dip and loved it (I ate the entire batch actually).  So I decided to make a few of my own white bean recipes.  These dips are full of flavor and super creamy – my favorite combo.  If you’re a dip lover like me, then please give these recipes a try.  For SCD, omit coconut aminos.  See notes.
Dip #1 
Classic Style 
 
Ingredients:
-1 1/2 cups prepared white beans*
-1/4 cup fresh squeezed lemon juice
-3 tablespoons oil (I use walnut oil)
-2 tablespoons tahini (optional, but worth it)
-1 teaspoon garlic granules (or 1/2 clove garlic)
-3 tablespoons coconut aminos
How To:
1.  Add beans, lemon juice, tahini, garlic, and coconut aminos to food processor (or blender of choice). Salt is optional here.
2.  Blend until incorporated.
3.  Drizzle in oil while blending
4.  Store in glass container in fridge.
Notes:
*I soak white beans for 48 hours, rinsing 2-3 times.  You certainly don’t need to soak this long, but I think it’s worth it.  After the beans are properly soaked, boil in filtered water until tender.
*For SCD, omit coconut aminos and add 1/2 – 1 teaspoon salt.
Dip #2 
Karazy Kalamata 
Ingredients:
-1 1/2 cups prepared white beans*
-3 tablespoons fresh squeezed lemon juice
-3 or 4 tablespoons oil (I use grapeseed)
-2 tablespoons tahini (optional, but worth it)
-1/2 teaspoon garlic granules (or 1/2 clove garlic)
-3 tablespoons coconut aminos
-1/2 cup pitted kalamata olives
How To:
1.  Add beans, lemon juice, tahini, garlic, aminos, and olives to food processor (or blender of choice).
2.  Blend until incorporated.
3.  Drizzle in oil while blending
Notes:
*I soak white beans for 48 hours, rinsing 2-3 times.  You certainly don’t need to soak this long, but I think it’s worth it.  After the beans are properly soaked, boil in filtered water until tender.
*For SCD, omit coconut aminos and add 1/2 – 1 teaspoon salt.
Dip #3 
Simple Spinach 
 
Ingredients:
-1 1/2 cups prepared white beans*
-1/4 cup fresh squeezed lemon juice
-3 or 4 tablespoons oil (I use grapeseed)
-2 tablespoons tahini (optional, but worth it)
-1 teaspoon garlic granules (or 1/2 clove garlic)
-3 tablespoons coconut aminos 
-1/2 to 1 cup fresh spinach (I like one cup in there)
How To:
1.  Add beans, lemon juice, tahini, garlic, aminos, and spinach to food processor (or blender of choice).
2.  Blend until incorporated.
3.  Drizzle in oil while blending
Notes:
*I soak white beans for 48 hours, rinsing 2-3 times.  You certainly don’t need to soak this long, but I think it’s worth it.  After the beans are properly soaked, boil in filtered water until tender.
*For SCD, omit coconut aminos and add 1/2 – 1 teaspoon salt.

I made Danielle’s Savory and Sweet Crackers (SCD) with this dip and they were delicious!! Don’t mind if I do.
Looking for some additional homemade cracker recipes?  
Well look no further…
THIS should get you started! 
__________________________________________________
Shared on:    Just Another Meatless Monday, Melt in your Mouth Mondays, Monday Mania  Ruth’s Real Food 101 (Mondays),  Traditional Tuesdays Fat Tuesdays,  Real Food Wednesdays, Gluten Free Wednesdays, Pennywise Platter, Simple Lives Thursday, Thriving on Thursday, Wellness Weekend, Fresh Bites Friday, Freaky Friday, Fight Back Friday, Friday Food, Lunchbox Love Friday, Feed Your Soul Friday, Allergy-Friendly Friday, Potluck Party Friday, Super Food Sundays, Slightly Indulgent Tuesdays, Allergy-Free Wednesdays, Whole Food Wednesdays 
Posted by Amber at

Labels: allergy-friendly, appetizer, dairy free, dips, dips and spreads, gluten free, SCD, snacks, soy free, spreads, vegan, vegetarian.

16 Comments

Leave a Reply

Your email address will not be published. Required fields are marked *

Tuesday, March 27, 2012

Sautéed Lemon Pepper Brussels Sprouts (SCD/ACD/Paleo Friendly)

I’ve been on a HUGE Brussels sprout kick lately, sauteing them up for lunch, or as a side dish for dinner.  They are so delicious.  I like to keep mine very simple – some salt and fresh lemon juice does the trick my friends.  Ah, the perfect springtime food!  Please try this one for me.   
Curious about these cute little greens?  See here for their history, nutritional info and more. 

Ingredients
-1 lb of Brussels 
-1/2 cup leeks (optional, but worth it)
-1/4 teaspoon salt (or to taste)
-1/4 cup fresh squeezed lemon juice  
-Fresh ground pepper to taste (optional, but worth it)
-2 tablespoons oil of choice (I use grapeseed)

How To
1.  Add oil, leeks and salt to a large saute pan.  Sauté on medium heat until wilted and soft (about 5 minutes).
2.  Trim, slice and wash the Brussels.  Add to leeks and sauté on medium heat.
3.  When Brussels are slightly wilted turn off heat and add in lemon juice and mix.  I like my Brussels with a bit of crunch (not mushy).    
4.  Serve warm or room temp (or cold).  Garnish with fresh ground pepper.  
Serves 4

Shared on: Cowgirl Up Mondays, Just Another Meatless Monday, Melt in your Mouth Mondays, Monday Mania, Ruth’s Real Food 101 (Mondays), Slightly Indulgent Tuesdays, Traditional Tuesdays, Fat Tuesdays, Allergy-Free Wednesdays, Real Food Wednesdays, Whole Food Wednesdays, Gluten Free Wednesdays, Full Plate Thursday, Pennywise Platter, It’s a Keeper Thursday, Freaky Friday, Wellness Weekend, Fresh Bites Fridays, Lunch Box Love Fridays, Fight Back Friday, Friday Food, Superfood Sunday, GFE April Virtual Support Group.

Posted by Amber at

Labels: ACD, appetizer, Paleo, SCD, sides, vegan, vegetarian.

16 Comments

Leave a Reply

Your email address will not be published. Required fields are marked *

Monday, March 19, 2012

Beet Pickled Eggs

I nearly cried over these eggs, the smell alone actually made me very emotional.  Why?  Well yes they are super good, but I was overcome with emotion due to the warm, loving memories these eggs brought rushing back.  So I was nineteen years old the last time I ate one of these eggs.  It was with my beloved Gramie, whom I speak of often here on this blog.  She made these ALL the time for me growing up.  So the last time I ate one of these gorgeous, perhaps unconventional eggs, was fifteen years ago in my Gramie’s kitchen where we sat and salted these delicious pickled purples, laughing about something I’m sure (she was a born prankster, had a killer sense of humor – very early on I was exposed to the likes of George Burns, Groucho Marks, Jack Benny, Lucille Ball, Milton Berle, etc.), hence my current love of comedy.  I digress… 
I didn’t have Gramie’s recipe here for these eggs, however, I’m elated over my attempt – pretty spot on.  Oh these eggs.  It’s hard to describe the flavor, I think they are simply delicious.  They are so easy to make.  Fun for a spring celebration.  If you’re feeling adventurous, I encourage you to try.  You won’t be disappointed…and Gramie will smile knowing people are making her famous purple eggs!  

Ingredients:
-6 peeled hard boiled eggs (or more, I would say up to 12, and pickle a tad longer)
-4 medium red beets, peeled and cut (use raw, not cooked)
-2 cups raw apple cider vinegar
-2 cups filtered water
-1/2 teaspoon salt
 
How To:
1.  Combine all the ingredients in a glass bowl
2.  Cover and pickle in fridge for 36-48 hours
3.  The longer these pickle the deeper the color penetrates the egg
4.  When ready to eat, simply slice open and serve with a touch of salt or make them into deviled eggs


Notes:
*Don’t throw out those gorgeous pickled beets either, add them to a salad as is, or try roasting or a saute.  
I made deviled eggs with my pretty purple huevos.
They were outrageous!
Shared on: Just Another Meatless Monday, Melt in your Mouth Mondays, Monday Mania, Ruth’s Real Food 101 (Mondays), Cowgirl up Mondays, Slightly Indulgent Tuesdays, Traditional Tuesdays, Fat Tuesdays Real Food Wednesdays, Whole Food Wednesdays, Gluten Free Wednesdays, Full Plate Thursday, Pennywise Platter Thursdays, Freaky Friday, Fresh Bites Fridays, Lunch Box Love Fridays, Fight Back Friday, Friday Food, Superfood Sunday
Posted by Amber at

Labels: ACD, appetizer, SCD, sides.

24 Comments

Leave a Reply

Your email address will not be published. Required fields are marked *

Monday, October 31, 2011

Lemon Walnut Stuffed Avocados (SCD Friendly)

I simply adore avocados.  So today I decided to not smoosh my beautiful green healthy friend and serve her whole in all her glory.  
These would make such cute appetizers.  You could obviously add anything in there, I chose some seasonably appropriate walnuts with a little added kick.  

Ingredients
2 avocados, firm but soft
For the filling: 
-1/2 cup chopped walnuts (soak and dehydrate for better digestion)
-1/4 cup apple, peeled and small chop
-1/4 cup red onion, small chop
-1/4 cup fresh squeezed lemon juice
-1/4 cup walnut oil
-1/2 teaspoon dried basil
-1/4 teaspoon garlic granules
-1/4 teaspoon sea salt (or to taste)

How To
1.  In a small bowl, mix lemon, oil, basil, garlic, and salt
2.  Add walnuts, onions, and apple
3.  Let flavors mingle for a few hours before serving (the longer the better)
4.  Add to avocado 
5.  Drizzle a little oil on the top before serving

In other news
It has been simply gorgeous and warm here in Northern California – around 80 degrees yesterday.  My winter garden is loving all this sun and the little sprouts are singing.  We are all, however, anxiously waiting for the rain here in the valley and snow to drop up in Tahoe so we can hit the slopes! 
Playing with my daughter in the backyard

I enjoy our time together while Ethan naps. 

These leaves will all be gone soon!
Soaking up their green while we can.
Shared on: Wellness Weekend 
Posted by Amber at

Labels: appetizer, fall cuisine, GAPS, Paleo, SCD, vegan.

3 Comments

Leave a Reply

Your email address will not be published. Required fields are marked *

Lemon Walnut Stuffed Avocados

I simply adore avocados.  So today I decided to not smoosh my beautiful green healthy friend and serve her whole in all her glory.  
These would make such cute appetizers.  You could obviously add anything in there, I chose some seasonably appropriate walnuts with a little added kick.  

Ingredients:
-2 avocados, firm but soft
For the filling: 
-1/2 cup chopped walnuts (soak and dehydrate for better digestion)
-1/4 cup apple, peeled and small chop
-1/4 cup red onion, small chop
-1/4 cup fresh squeezed lemon juice
-1/4 cup walnut oil
-1/2 teaspoon dried basil
-1/4 teaspoon garlic granules
-1/4 teaspoon sea salt (or to taste)

How To:
1.  In a small bowl, mix lemon, oil, basil, garlic, and salt
2.  Add walnuts, onions, and apple
3.  Let flavors mingle for a few hours before serving (the longer the better)
4.  Add to avocado 
5.  Drizzle a little oil on the top before serving

In other news
It has been simply gorgeous and warm here in Northern California – around 80 degrees yesterday.  My winter garden is loving all this sun and the little sprouts are singing.  We are all, however, anxiously waiting for the rain here in the valley and snow to drop up in Tahoe so we can hit the slopes! 
Playing with my daughter in the backyard

I enjoy our time together while Ethan naps. 


These leaves will all be gone soon!
Soaking up their green while we can.
Shared on: Wellness Weekend 
Posted by tta_admin at

Labels: appetizer, fall cuisine, GAPS, Paleo, raw, SCD, vegan.

3 Comments

Leave a Reply

Your email address will not be published. Required fields are marked *

Sunday, September 11, 2011

Baked Veggie Spring Rolls (gluten free, dairy free, sugar free with soy free option)

What’s better than stir fry?  Stir fry wrapped up in a cute little package!  What’s a good word to describe more than craving something?  I don’t know, but this is how I feel about egg rolls/spring rolls, but alas my weak digestion doesn’t love the trifecta factor, the deep-fried/sodium/gluten factor.  So for this month’s Go Ahead Honey, It’s Gluten Free challenge hosted by the beautiful and talented chef, Iris of The Daily Dietribe, I figured why not make a healtheir and gluten-free version of my favorite Asian cuisine: spring rolls.  I nearly cried over these.  First, because they were hopelessly delicious, and two because I tripped and smashed my toe sprinting to the oven when the timer went off.  I also burned my mouth.  Yes, I’m that impatient when it comes to taste testing…no control.  The true test came at dinner.  The verdict:  Husband loved them.  Daughter loved them.  Son loved them.  Happy bellies.  Happy mommy.

I served these spring rolls with vegetarian fried rice and cold cabbage salad. 

Ingredients
-1 small red pepper, julienned
-2 carrots, julienned
-2 celery stalks, julienned
-1 cup shredded cabbage
–Rice noodles, about 2 cups cooked 
-2 1/2 tablespoons coconut aminos 
-1 tablespoon garlic granules
-2 teaspoons onion powder  
-Red Pepper flakes, to taste 
-Oil of your choice (GS, sesame, olive, coconut, etc)
-Rice wrappers 

How To
1.  Saute veggies (carrots, celery, pepper & cabbage) with some oil. Add the coconut aminos, garlic granules and onion powder. 
2.  Cook the rice noodles.  In a large pot, bring water to a boiland add noodles.  Drain and rinse noddles. 
3.  Add cooked rice noodles to veggies.  Cook on medium until the flavors meld (you can add red pepper flakes to taste, but I left this out for my kids)
4.  Let this mixture cool completely…nice to make this earlier in the day and have it ready to assemble the rolls, but it only takes about 20 minutes to cool

After mixture cools:
1.  Preheat oven to 375 degrees 
2.  Add some filtered water to a flat wide pan or dish and soak the rice paper until pliable.  Add the filling and roll – while you are filling one, have another in the water waiting
3.  Fill rice wrappers and place on baking sheet.  I use my favorite silicone baking mat 
4.  At this point you can spray the rolls with oil if you so desire, it makes them very shinny.  Be forewarned, however, oil sprayed or not, the tips and ends of the rolls get very poky when cooked
5.  Bake for 15 minutes.  (I didn’t test these any longer than 15 minutes, so I’m guessing they will become crispier if left in longer.  I happen to prefer the chewy texture at the 15 minute mark). 
6.  Walk with caution to the oven, minding chair & table legs, toys and furniture 
7.  Do not eat these right out of the oven like a wild animal (like moi)

Notes
*You can add just about anything you like to these rolls.  Other suggestions include: mushrooms, bamboo shoots, bean sprouts, chicken/pork, onions, cilantro, basil or fennel.  Have fun with your food! 
*Traditional spring rolls call for oyster sauce, but I couldn’t find any gluten-free brands.  The rolls taste absolutely delicious with the coconut aminos. 
*I didn’t bother making a dipping sauce for the rolls, they were tasty all on their own.  But see comments for suggestions. 
*These take a while to cool.  Have these out and cooling a good 15 minutes before you eat, 30 minutes if serving to children.  

Shared on: Just Another Meatless MondayMelt in your Mouth Mondays, Monday Mania, Ruth’s Real Food 101 (Mondays), Whole Food Wednesdays, Lunch Box Love Friday, Allergy-Friendly Fridays
Posted by Amber at

Labels: appetizer, gluten free, snacks, vegan, vegetarian.

16 Comments

Leave a Reply

Your email address will not be published. Required fields are marked *