Category Archives: GAPS

Monday, September 28, 2015

Perfectly Whipped Sweet Potatoes

Cover2

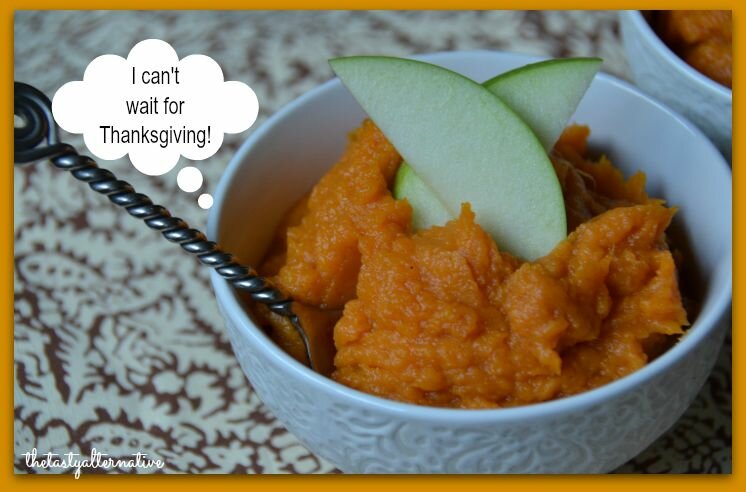
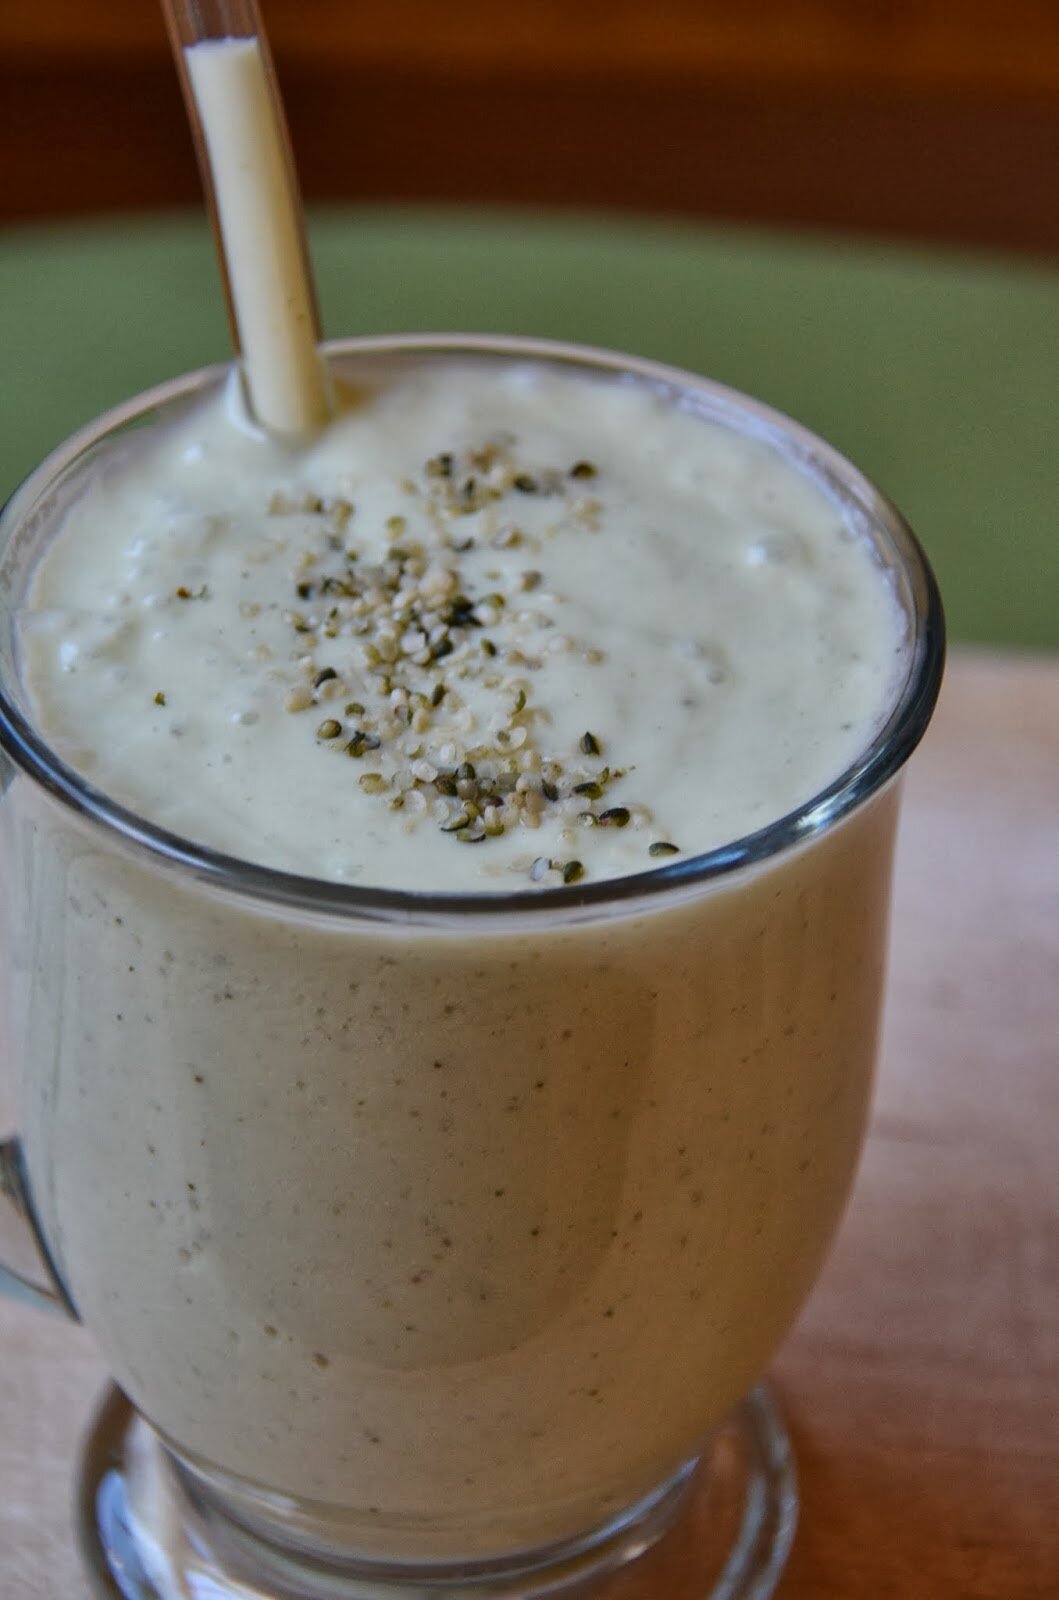
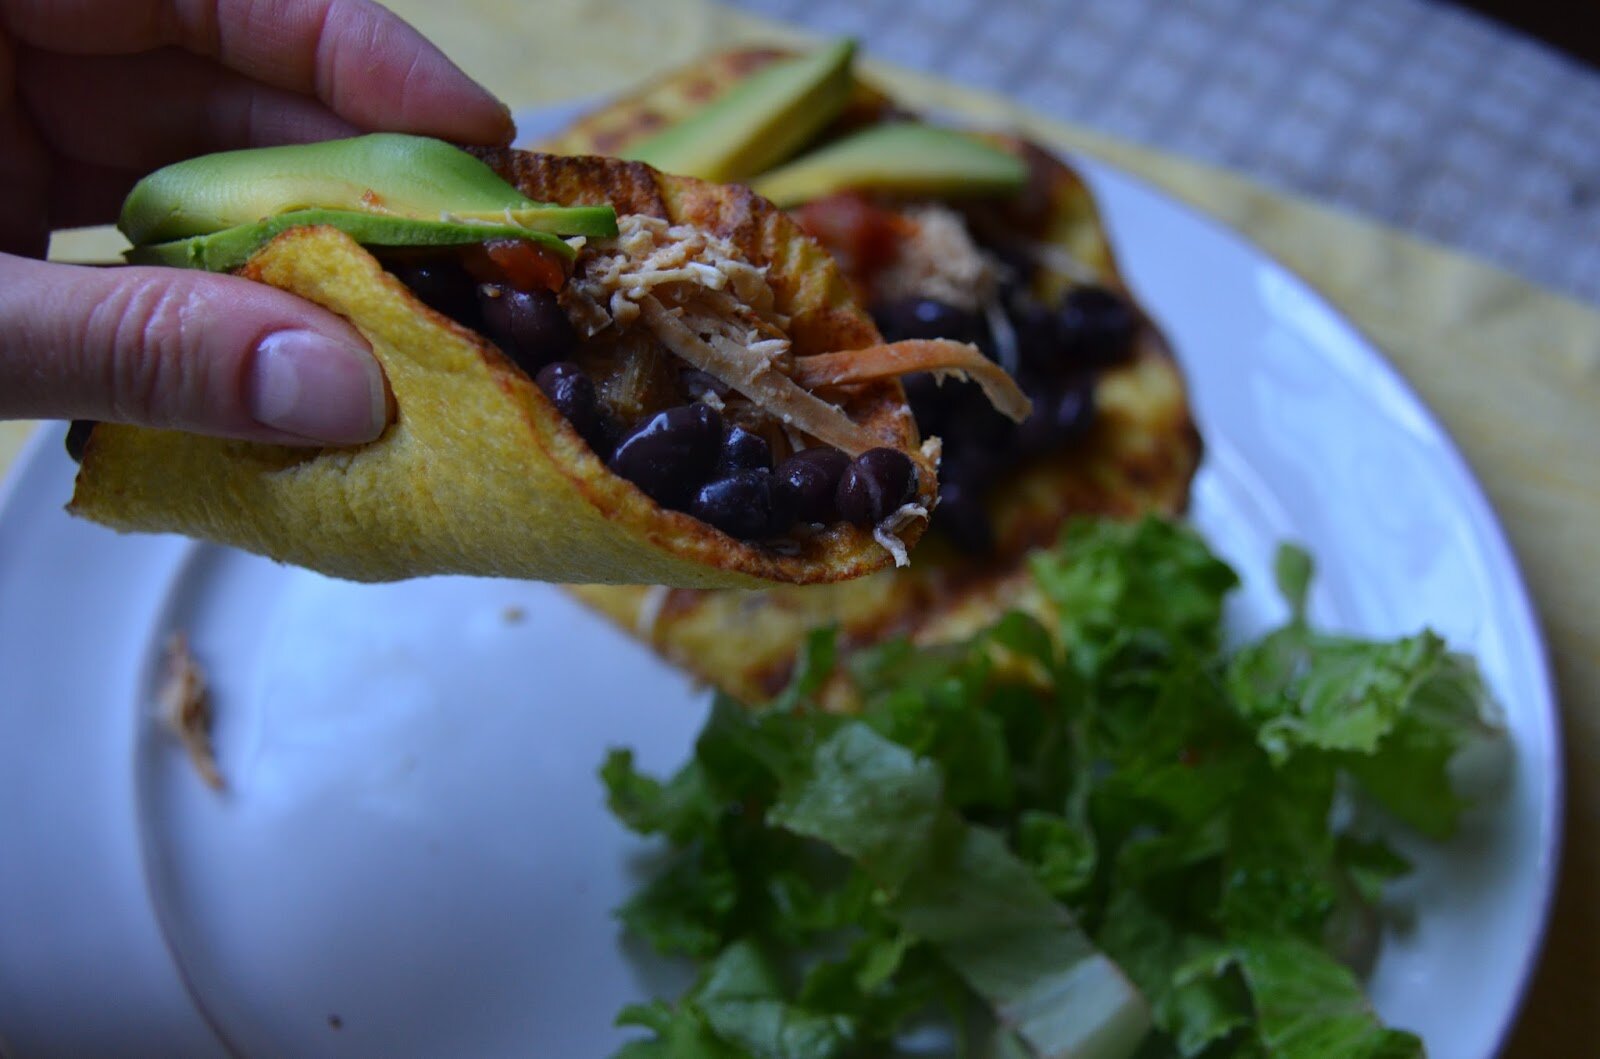
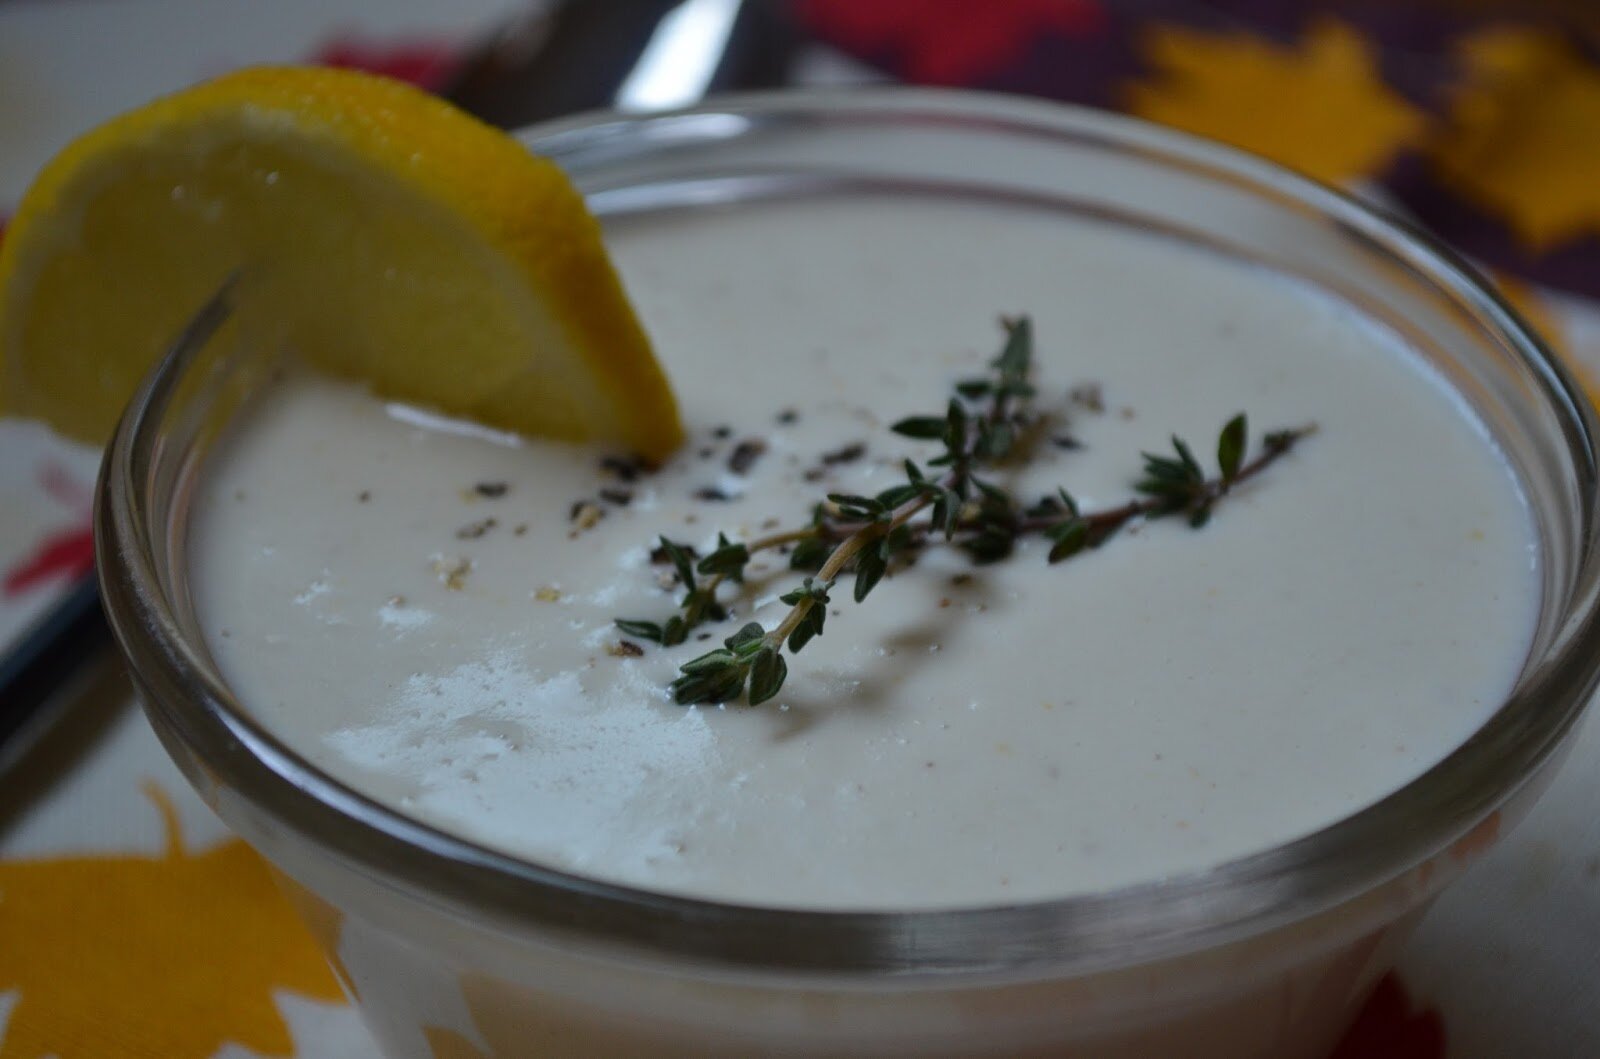
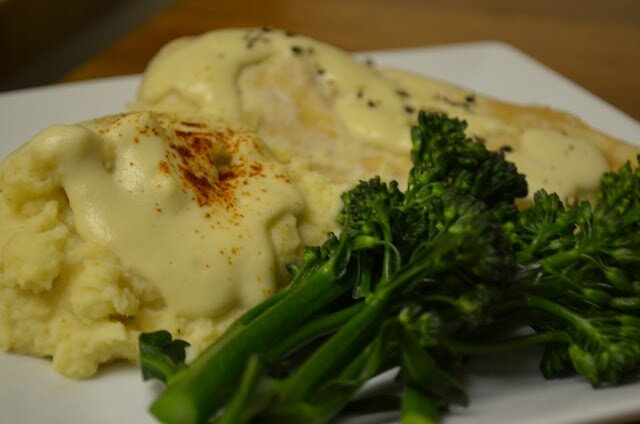
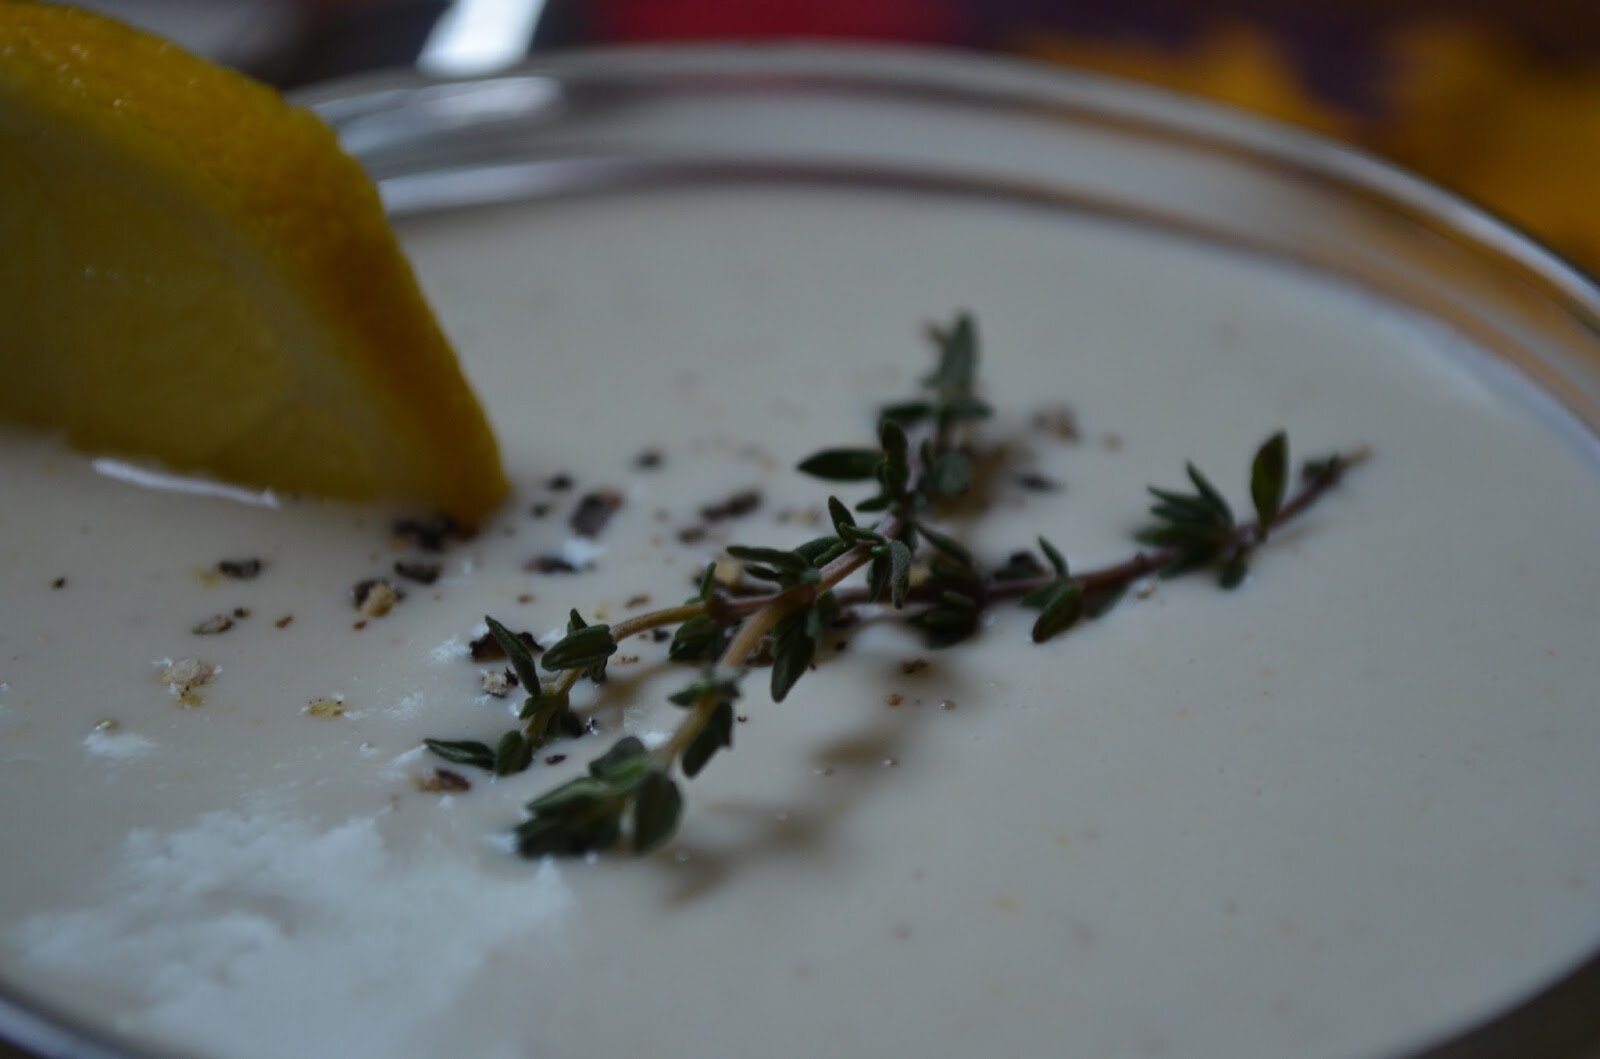
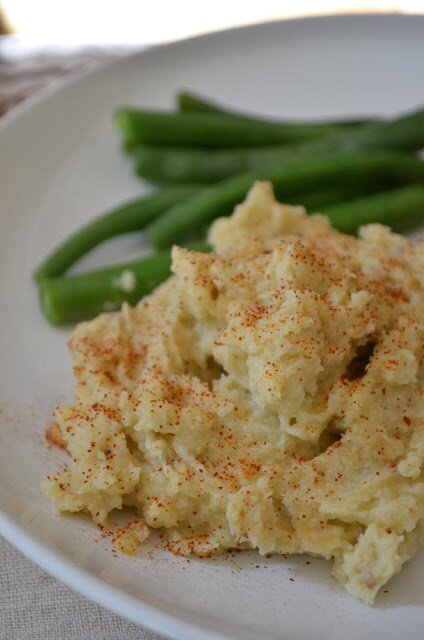
Fall where are you!  It’s hitting the mid 90’s again this coming week (insert big eye roll here).  I am yearning to wear my sweaters and boots!  Soon…soon.  Around these parts it starts to really feel like fall at end of October, early November, so we have a few weeks yet.  But this hot weather is not stopping me from making some yummy fall inspired food. I made some absolutely out-of-this-world delicious whipped sweet potatoes on Saturday night for dinner. Seriously tasted like dessert. SO GOOD.  My kids loved it!  My daughter said, “Mommy, what’s in here…it tastes like pie.”  I made the sweet potatoes with this pork dish (sans the applesauce) that is so easy and always a hit and the two went together like gangbustas.  Anyway, if you are looking for a new way to eat sweet potatoes, try whipping them up.  I am totally going to make these whipped sweet potatoes for Thanksgiving and I’m so excited about it!  They are seriously delicious.  Look out fall…I’m coming for ya.  Continue reading

Posted by Amber at

Labels: ACD, AIP, GAPS, holidays, Paleo, sides, Thanksgiving, thanksgiving side dishes, vegan, vegetarian, winter cuisine.

5 Comments

Leave a Reply

Your email address will not be published. Required fields are marked *

Rate this recipe:  

Thursday, May 1, 2014

Honey Kissed Mint Watermelon Salad

textIt’s warming up here in these parts.  A heat wave is moving through right now and pushing temps into the 90s.  Therefore cool, refreshing dishes are in demand.  It will drop back down to cooler temps next week, and let’s hope May is nice and mild. May is usually our last month of decent weather before the searing summer heat blankets our region.  But it’s all good.  I love the summer and I’m no stranger to hot, dry heat.  As a child I grew up in the desert near Death Valley (in Southern California) – so bring it on.  I was at Costco the other day and found organic, fair-trade mini seedless watermelons.  Awesome-sauce!  They are super delicious and so sweet. I’m thinking this would be a great dish for any summer gathering.

Continue reading

Posted by Amber at

Labels: AIP, GAPS, Paleo, raw, salads, SCD, sides, summer cuisine.

18 Comments

Leave a Reply

Your email address will not be published. Required fields are marked *

Rate this recipe:  

Monday, January 27, 2014

Nightshade Free Roasted Veggie Pasta Sauce (SCD, Paleo, AIP, GAPS)

To the average person pasta sauce is a pretty healthy choice.  But if you suffer from an auto-immune disease and trying to decrease pro-inflammatory foods, tomato-based pasta sauces can be quite aggravating on the system.  Some folks find great success and relief by eliminating nightshades from their diets.  What are nightshades you ask?  Good question.  Nightshades are the following foods: Potatoes, tomatoes, sweet and hot peppers, eggplant, tomatillos, tamarios, pepinos, pimentos, paprika, tobacco, goji berries, ground cherries, and cayenne peppers (and more).  See this post by the Paleo Mom with a complete list of all nightshades.  
Posted by Amber at

Labels: AIP, GAPS, main dish, Paleo, sauces, SCD.

29 Comments

Leave a Reply

Your email address will not be published. Required fields are marked *

Monday, January 6, 2014

Avocado Grapefruit Hemp Smoothie (full of protein and nutrients)

I feel so fortunate to have such great friends in my life.  I was thrilled to receive so many homemade treats this holiday.  Me, Scott and the kiddos spent time with our friends, visiting each family with homemade goodies in hand – chatting, laughing, and catching up.  And to my delight, we always left with a little something special: homemade applesauce, homemade beer, homemade fig & honey jelly, homemade chocolate, spiced nuts, homemade chap stick, organic pears, fresh picked plump grapefruits.  It was very special.  I was particularly intrigued by all the grapefruits.  I have been juicing and enjoying them in a variety of ways.  Most notably in my morning smoothie.  I wanted to share my concoction with you, as I think it’s quite delicious.  It’s a smoothie just the way I like it – thick and creamy (not icy or too sweet).  This is a nice pick-me-up first thing in the morning (as I’m not a coffee drinker) but love to make a little something to sip on.  If you get your hands on some grapefruits, try them in a smoothie.  I’m hooked.  See HERE for a list and description of the most common grapefruits.  My favorite for smoothies (hands down) is Pomelo.  
Avocado Grapefruit Hemp Smoothie
(click the links provided below for where to purchase)
 
Ingredients:
-1 cup fresh squeezed grapefruit juice
-1/2 cup full fat coconut milk
-1/2 ripe avocado
-1 medium ripe banana
-1 tablespoon raw hemp seeds*
-1 tablespoon grass fed gelatin or vegan pea protein powder 
-1 tablespoon sweetener of choice* (or 15 drops stevia)
-4 ice cubes (made from this silicone tray) 
-Handful of spinach (optional) 
 
How To:
1.  Add all of the above ingredients to a blender and blend until smooth and creamy.  Drink immediately or save in the fridge.  
Notes:
*Hemp is 
Paleo, I referenced a trusted site, The Paleo List, (yes it’s permitted).  
*AIP & SCD, omit hemp seeds – they are not permitted.  
*For sweetener I like raw local honey or coconut nectar.
{affiliate links in post – thank you for supporting The Tasty Alternative} 
Shared on: Whole Food Fridays, Wellness Weekend , Gluten Free Wednesdays 
Posted by Amber at

Labels: AIP, drinks, GAPS, green drinks, Paleo, SCD, smoothie.

13 Comments

Leave a Reply

Your email address will not be published. Required fields are marked *

Thursday, November 28, 2013

Dairy and Cane-Sugar Free Pumpkin Pie (SCD, GAPS, Paleo)

I adore am obsessed with pumpkin pie! I can easily eat it for breakfast, lunch, or dinner.  My recipe uses sugar (from dates and honey), so you can feel good about eating it at any time of the day. I’ve been making this pumpkin pie recipe for a few years now and I think it’s quite delicious.  My family loves it too.  It’s a tasty alternative to traditional pumpkin pie, but trust me, you won’t miss that condensed milk and all that cane-sugar. My favorite squash to use for pumpkin pie is the kabocha squash.  Kabocha is a hearty squash with a thick creamy meat and is VERY sweet (and take a sniff of the raw flesh next time you buy oneit smells JUST like a cucumberI kid you not).  Kabocha creates such a substantial pie filling.  Give it a try if you can – they are found next to the other squash.  Wishing everyone a very happy Thanksgiving – see ya in December.
Dairy and Cane-Sugar Free Pumpkin Pie (SCD, GAPS, Paleo)
 
Author:
Ingredients
  • 1¾ cups fresh baked pumpkin or 1 can of pumpkin puree
  • cream from 1 can of full fat coconut milk
  • ¼ cup honey
  • 2 eggs
  • 7 large soft Medjool dates (optional)
  • 1 teaspoon vanilla extract
  • 2 teaspoons ground cinnamon
  • ¾ teaspoon ground ginger
  • ¼ teaspoon ground nutmeg
  • ¼ teaspoon ground cloves
  • 1 extra egg for crust (this is an optional step)
Instructions
  1. Soak dates in warm water for at least 2 hours before making this recipe.
  2. Preheat oven to 400 degrees
  3. To a blender, add in all the above ingredients (except the extra egg) and blend until well incorporated (about 15 seconds), then pour the mixture into a pie crust.
  4. Beat the extra egg in a small bowl and brush the egg onto the entire exposed crust. I like to cover the crust with this silicone crust shield (it's awesome and my crust never burns).
  5. Place the pie onto a baking sheet (to catch overflow) and bake for 15 minutes. Then turn the oven temperature down to 350 and bake an additional 35 minutes. When the middle poofs up, your pie is ready. The middle will be jiggly, and that's okay. It will thicken as it cools.
  6. Remove pie from baking sheet and allow to cool on a cooling rack.
Notes
-If you don't want to make fresh baked squash, this is a great organic brand and can be found at any store.
-I like to use dates in pumpkin pie because it adds a natural sweetness and helps thicken the mixture. If you don't want to use dates, just add additional sweetener (another 2 or 3 tablespoons).
-Maple syrup or coconut nectar is a nice substitute for the honey.
- I generally bake my pumpkin pie the night before and let it sit out at room temperature. When ready to serve, top with vanilla bean coconut whipped cream.
 .
Vanilla Bean Coconut Whipped Cream Topping
 
Author:
Ingredients
  • Cream from 1 can of full fat coconut milk
  • ½ cup cashews soaked for 4 to 6 hours (for a thicker whipped cream as shown in the picture, use 1 cup of soaked cashews)
  • 3 tablespoons honey
  • 1 teaspoon vanilla, maple syrup,or coconut nectar.
  • 1 vanilla bean cut in half and scraped out
Instructions
  1. In a blender (high speed preferably) add all the above ingredients and blend until smooth.
  2. Transfer to a bowl and refrigerate for 2 to 4 hours.
  3. Mix well before serving.
Notes
To get the coconut cream, place the canned coconut milk in the fridge 3 to 5 days before opening. Open the can and scoop out all the coconut cream. Do not add in the water found at the bottom of the can.
 
 
Pie Crust Options:
1.  Paleo Pie Crust 
2.  Coconut Flour Pie Crust 
3.  Gluten Free Whole Grain Pie Crust 
4.  Gluten Free Vegan Pie Crust (this is the pie crust pictured in this post)   
{affiliate links in post}
This recipe was shared on the following link parties:  Allergy-Free Wednesdays, 
Posted by Amber at

Labels: dessert, fall cuisine, GAPS, nut free, Paleo, SCD, Thanksgiving.

6 Comments

Leave a Reply

Your email address will not be published. Required fields are marked *

Rate this recipe:  

Thursday, November 21, 2013

3-Ingredient Creamy Raw “Caramel” (SCD, GAPS, Paleo)

One of my more popular posts and perhaps one of my favorite recipes is my raw “caramel” sauce.  I make it quite frequently and practically drink the stuff.  I’ve been experimenting with the original recipe in hopes to make a thicker version that would mimic actual caramel so I could spread it or use it in chocolate.  Well, with very little effort I made it work just by adding more dates and excluding some of the liquid ingredients.  Let me first say that the cashew butter is a must in this recipe. You can make your own or buy the super expensive (albeit super delicious) store brand.  Either way, cashew is the way to go.  This “caramel” is thick, creamy, and delicious.  And it remedies my husband’s sweet tooth like nobody’s business.  Great for kids too – check out how fun and easy it is to spread on tart apples.  I hope you’ll give this a try.  It’s a delightful raw treat.  
Creamy Raw Caramel
 
Ingredients:
-2 cups of Medjool dates – 24 dates (make sure they are fresh and soft)
-1/2 cup cashew butter*
-2 tablespoons honey*
-2 teaspoons vanilla (optional)
 
How To:
1.  Seed the dates and soak the dates in room temperature water for 1 hour (do not soak longer, as they will become too soft and create very thin caramel).
2.  After the dates have soaked for 1 hour, drain all the water off and add them to a food processor fitted with the S blade and pulse until broken down and coming together as a paste.
3.  Add in the cashew butter and blend.
4.  Drizzle in the honey and optional vanilla 
5.  Blend until everything is well incorporated and the mixture is thick and creamy.
6.  Eat as is or store in refrigerator.
 
Notes:
*For the cashew butter, use homemade or this store brand is quite delicious. 
*Cannot have cashews, try sunflower seed butter – it will completely change the flavor (just FYI).  Almond butter might work, but it has a much different texture, so the final product will not be as creamy (probably thin and gritty).  Sorry if you cannot have dates, I don’t have any subs for the dates. 
*In place of the honey, vegans use grade B maple syrup, coconut nectar, yacon syrup (or 10 drops of stevia).
{affiliate links in post} 
Shared on:  Busy Monday, Sweet Sharing Monday, Melt in your Mouth Monday, Mix it up Monday,  Allergy-Free Wednesdays, Gluten Free Wednesdays, Whole Foods Fridays, Raw Foods Thursday, Wellness Weekend, Lunchbox Love Friday,  Allergy-Free Wednesdays 
Posted by Amber at

Labels: dessert, GAPS, Paleo, raw, SCD, snacks.

20 Comments

Leave a Reply

Your email address will not be published. Required fields are marked *

Wednesday, October 16, 2013

Butternut Squash Coconut Hemp Smoothie

Oh boy, folks, this smoothie is incredible.  It’s thick, creamy, and not icy (my three musts in a smoothie).  I don’t know about you, but I use pumpkin and butternut squash interchangeably.  TruthfullyI find butternut squash is much sweeter than pumpkin and I love it in desserts.  It’s fun to mix it up though, as I feel like pumpkins are taking over my life.  Ha ha.  A delicata would also be great in here!  They are perhaps my favorite squash of all! My son slurped this down for his morning snack and off to play.  I’m not a coffee drinker, so I like to make smoothies for a little pre-breakfast pick me up.  Be adventures and try the many different varieties of squash available this time of year.  I think you’ll be pleasantly surprised.  
Butternut Squash Coconut Hemp Smoothie 

Ingredients:
-1/2 cup filtered water
-1/2 cup full fat coconut milk
-1/2 cup baked butternut squash
-1/2 cup ripe banana (1 medium)
-2 tablespoons coconut nectar (honey or maple syrup)
-1 tablespoon raw hemp seeds (optional)
-1 teaspoon ground cinnamon (more to taste)
-1/4 teaspoon ground ginger (optional)
-3 ice cubes*

How To:
1.  Add everything to a blender and blend until the ice cubes are properly crushed.  The smoothie should be chilled, but not icy.  If you like icy smoothies, than by all means, add in more ice.  

Notes:
*AIP & SCD, omit hemp seeds – they are not permitted.  
*I use these for ice cubes – I purchase at a store in town, but they can also be found online.  
*Use any protein source or powder in place of the hemp, or just omit.  
*In place of the ice cubes, freeze the banana (cut up first) over night and add an additional 1/4 cup of water or coconut milk.
*Want to start with pumpkin in your smoothie?  Try my Chocolate Pumpkin Hemp Smoothie or Pumpkin Coconut Almond Smoothie. 
Shared on: Wellness Weekend, Whole Food Fridays, Whole Food Fridays, Allergy-Free Wednesday,  Healthy Vegan Friday  Lunchbox Love, My Meatless Mondays, Fat Tuesdays 
Posted by Amber at

Labels: AIP, fall cuisine, GAPS, SCD, smoothie, snacks, vegan.

5 Comments

Leave a Reply

Your email address will not be published. Required fields are marked *

Thursday, September 19, 2013

Pulled Pineapple Chicken with Cauliflower Tortillas ~ Guest Post for "The Seasonal REAL Food Blog Series" @ Recipes To Nourish

The lovely Emily from Recipes to Nourish is hosting “The Seasonal REAL Food Blog Series” showcasing a diverse collection of recipes from guest bloggers for the month of September.  I’m so honored to be part of this series.  I adore Emily, her blog, and her philosophy on food.  Emily is passionate about healthy, whole, REAL food, and also shares holistic healing and herbal remedies.  Be sure to visit Recipes to Nourish.  You can also connect with Emily on Facebook and Pinterest. 
Put your slow cooker to good use with this 
Pulled Pineapple Chicken recipe. 

Join me today over at Recipes to Nourish for the entire recipe.
Posted by Amber at

Labels: GAPS, guest post, main dish, Paleo, SCD.

2 Comments

Leave a Reply

Your email address will not be published. Required fields are marked *

Cauliflower Tortillas

Once upon a time (not too long ago) I received an email from a sweet girl named Lauren informing me about her new blog: Empowered Sustenance.  Like me, Lauren has been diagnosed with IBD (Inflammatory Bowel Disease).  I was thrilled to learn that Lauren followed a SCD/Paleo diet, used real food to heal and had some awesome nut-free recipes.  Well, I’m am sure you’ve heard of Lauren by now.  Her blog has rightfully become a powerful source in the grain free, holistic healing blogosphere.  I am so very thankful she started blogging.  I reference her blog constantly regarding the many topics she covers and recipes she shares.  And speaking of recipes, I wanted to share a recipe of hers that I have been making since, well, she published the post: Cauliflower Wraps.  Literally the day after her post came out I made her cauliflower wraps and I’ve been making them ever since.  Over the months I’ve tried to make my own version, but it became clear that I didn’t need to reinvent the wheel here.  Her recipe is perfect and I love it.  See below for my slight modifications to the process.  I started making smaller versions of her wraps to use as “tortillas.”  We are big fans of taqueria night and when I can, I try to follow a grain free diet.  Her wraps work absolutely perfect as little tortillas and I actually pile on the ingredientsand they do great.  So my friends, take all the “OMG my kitchen smells like a garbage can now from the cauliflower” comments with a grain of salt.  It’s not that terrible.  So go for it, and be sure to thank Lauren for this awesome recipe.  
Cauliflower Tortillas 
Recipe inspired by: Lauren from Empowered Sustenance 
Ingredients:
-1 head of cauliflower 
-4 eggs
-1/2 teaspoon salt
-3/4 teaspoon garlic granules 
-1/2 teaspoon Mexican seasoning/spices (optional)

How To:
1.  Cut the cauliflower into florets
2.  Add 1/2 of the florets to a food processor and pulse until they are a crumb like texture, then pulse a little further until a fine texture is achieved.  Remove the cauliflower and add it to a steamer basket.  Add the remaining florets to the food processor and repeat, adding this batch now to the steamer.  Add in 3/4 cup water to the pot and steam for 8 minutes.  
3.  After steaming, the cauliflower will be HOT, so I like to spread it out on a plate to cool.
Preheat the oven to 375 degrees 
4.  After it has cooled, I use my nut milk bag to squeeze out ALL the water from the cauliflower.  THIS STEP WILL MAKE OR BREAK THE TORTILLAS!  You must squeeze all the water out as much as your can.  I’ve found the less moisture, the better results.
5.  Add the cauliflower to a bowl.  To the bowl also add in the eggs and spices.  Mix well.  It will look like a batter.  Somewhat thick.
6.  Fit some parchment paper on top of two baking pans.  
7.  Spoon the batter onto the parchment paper.  I get about 6 out of this recipe, so three on each pan. 
8.  The trick is to evenly spread the batter in a circle.  And as Lauren states, keep the batter compact – there should be no parchment showing through any area of the tortilla.
9.  Bake for 17 minutes.  After they bake, I flip mine over and give them another 2 minutes.  
10.  Remove from parchment and transfer to a cooling rack.  

Notes:
*I prefer to make these earlier in the day.  I store them in the fridge and simply heat on a pan before I serve.
*I cannot offer any subs for the eggs, and I’ve only made these with eggs.  
*The cauliflower is not overwhelming and they don’t taste to “eggy” either.   
Shared on: Allergy Free Alaska 
Posted by Amber at

Labels: GAPS, grain free, main dish, Paleo, SCD.

20 Comments

Leave a Reply

Your email address will not be published. Required fields are marked *

Thursday, September 12, 2013

Lemon Garlic Baked Chicken w/ Lemon Garlic Gravy (Paleo, SCD, GAPS)

Any gravy lovers out there?  Mmmmm, I LOVE the stuff.  I like it thick, creamy, and bursting with flavor.  I don’t reserve gravy for JUST the holidays.  No ma’am.  I like it all year round.  I’ve been making this recipe for over a year now and finally sharing it.  It’s super easy and adds a little panache to the usual weeknight dinner.  Anyone else enjoy gravy year round?  I have made this with turkey drippings before and it as fabulous (just a FYI with turkey day right around the corner)….what!  Man, I can’t believe it’s already September.  
Lemon Garlic Roasted Chicken w/ Lemon Garlic Gravy


Ingredients:

Chicken
-2 pounds boneless skinless chicken breasts
-1 cup chopped yellow onions
-3 tablespoons oil
-1/4 cup filtered water
-2 teaspoons garlic granules (or 2 chopped garlic cloves)
-1 teaspoon salt
-6 to 8 lemon slices
-0.3 ounces fresh thyme with stems (about 7 small stems)

How To: 
1.  Preheat the oven to 400 degrees 
2.  Arrange the chicken in a large glass Pyrex baking dish.  Add the oil, water, salt, garlic granules, sprinkle the onions around, top with two lemon slices per chicken breast, and fresh thyme. 
3.  Cover and bake for 35 minutes.  Make sure internal temp is at least 180 degrees.  I use my stainless steel baking sheet as a cover (I don’t use foil in my kitchen).
4.  When the chicken is done, remove each breast from the baking dish and let rest on a plate
5.  Now make the gravy

Gravy
-All the liquid from baked chicken (just over 1 cup)
-2 of the baked lemon slices
-1/2 teaspoon garlic grans (or 1/2 teaspoon chopped fresh)
-1/3 cup + 2 tablespoons raw cashews 
-Salt and pepper to taste 


How To:
1.  Remove all the thyme and baked lemons from the baking dish (reserve 2 lemon slices).
2.  Pour all the liquid, including all the onions, and the 2 baked lemon slices from the baking dish into a blender.  
3.  To the liquid add the cashews, garlic, and salt/pepper (if needed).
4  Blend on high for 20 seconds and until smooth and creamy.
5. Add more cashews for thicker gravy, add some water to thin it out.  

Notes:
*I use a lot of garlic granules because garlic is not always in season at my Coop.  I rely on garlic granules (which I purchase in bulk).  

Shown below with the chicken and gravy is 
roasted and pureed butternut squash
This gravy also goes GREAT with my
Shared on:  Allergy Free Wednesdays Allergy Free Alaska 

Posted by Amber at

Labels: GAPS, main dish, Paleo, SCD.

5 Comments

Leave a Reply

Your email address will not be published. Required fields are marked *