 We are big pancake lovers in this house. I mean, come on…pancakes! What’s not to love. For years we made pancakes with teff flour, then I found a few other pancake recipes that used white gluten free flours. Then over Thanksgiving break I found a gluten free mix at a Safeway up in Tahoe, this one. I liked it, but didn’t love the way the cornmeal tasted and the texture. I susepct it was added to give the pancakes some fluff or non-stick. I began to pay more attention to the ingredients in the many, many store bought gluten free pancake mixes (that you can find at just about any grocery store). I noticed they use virtually the same ingredients: a rice flour, one or two other gluten free flours, a starch, baking soda, corn meal or another mealy grain, salt, and a gum. One brand was nearly $8.00! I was like, oh no, I can make my own gluten free mix just fine thank you. So I did, and I loves it. This recipe works great on a regular pancake griddle or with oil in a skillet and they pop up nice and fluffy ya’ll (that’s what I’m talken’bout). Enjoy…and long live breakfast food! Continue reading
Category Archives: breakfast
Gluten Free Pancakes

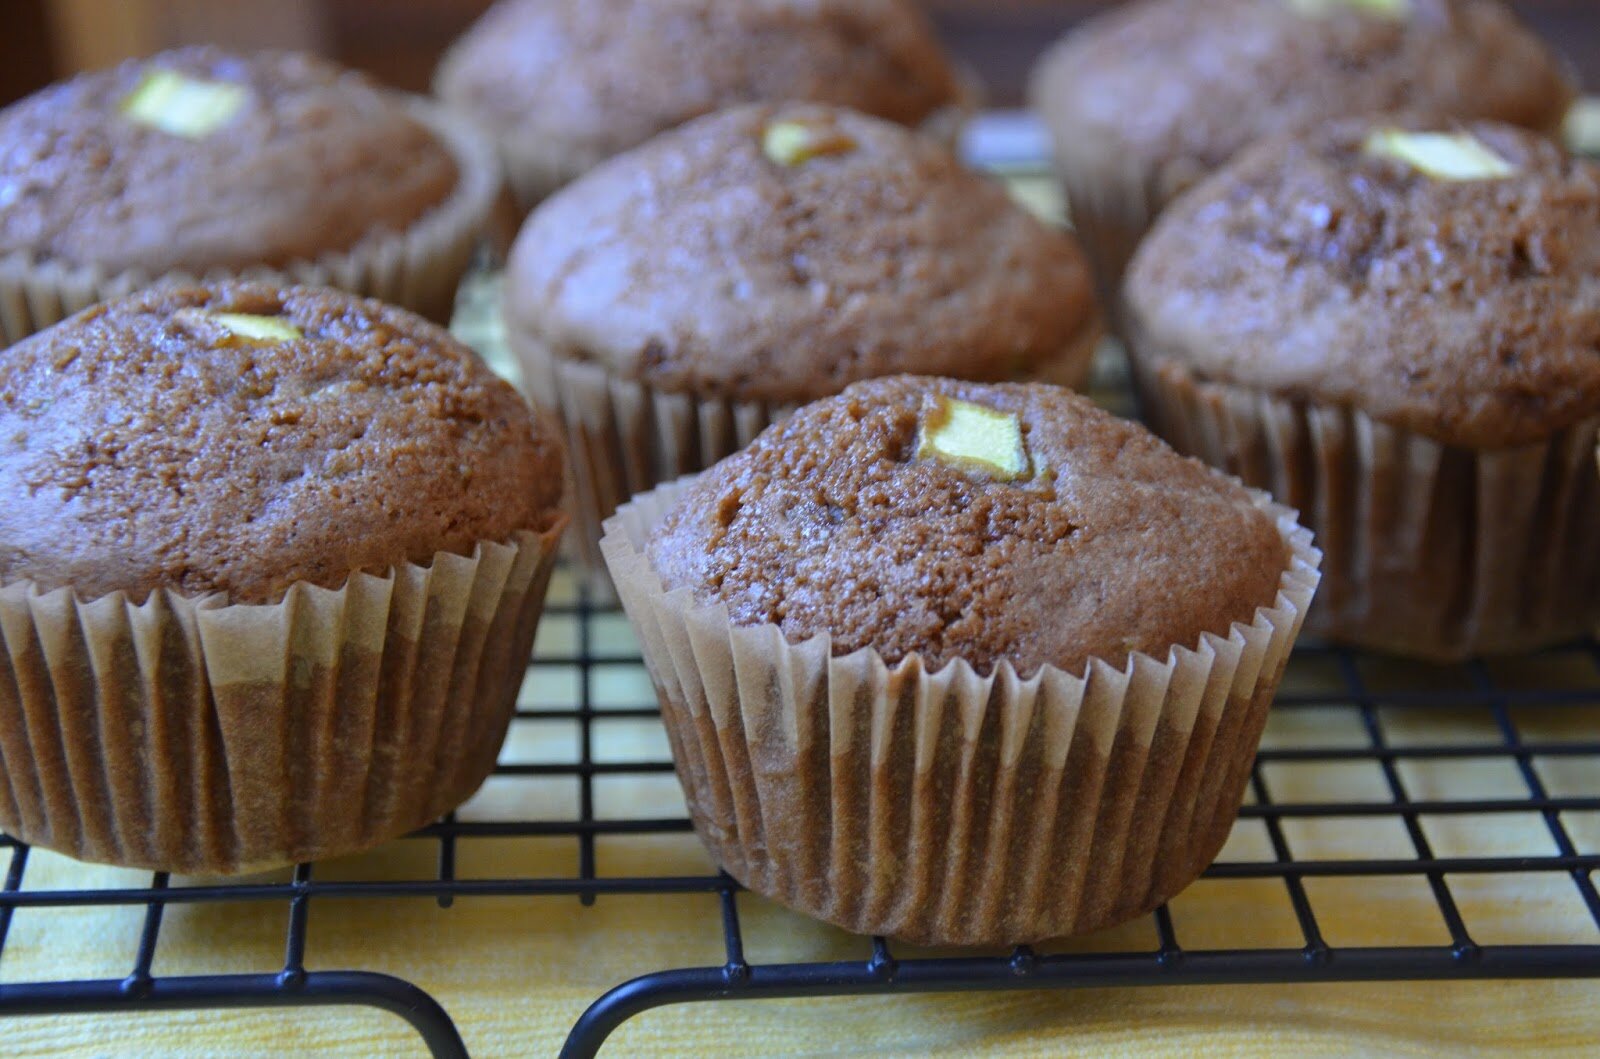
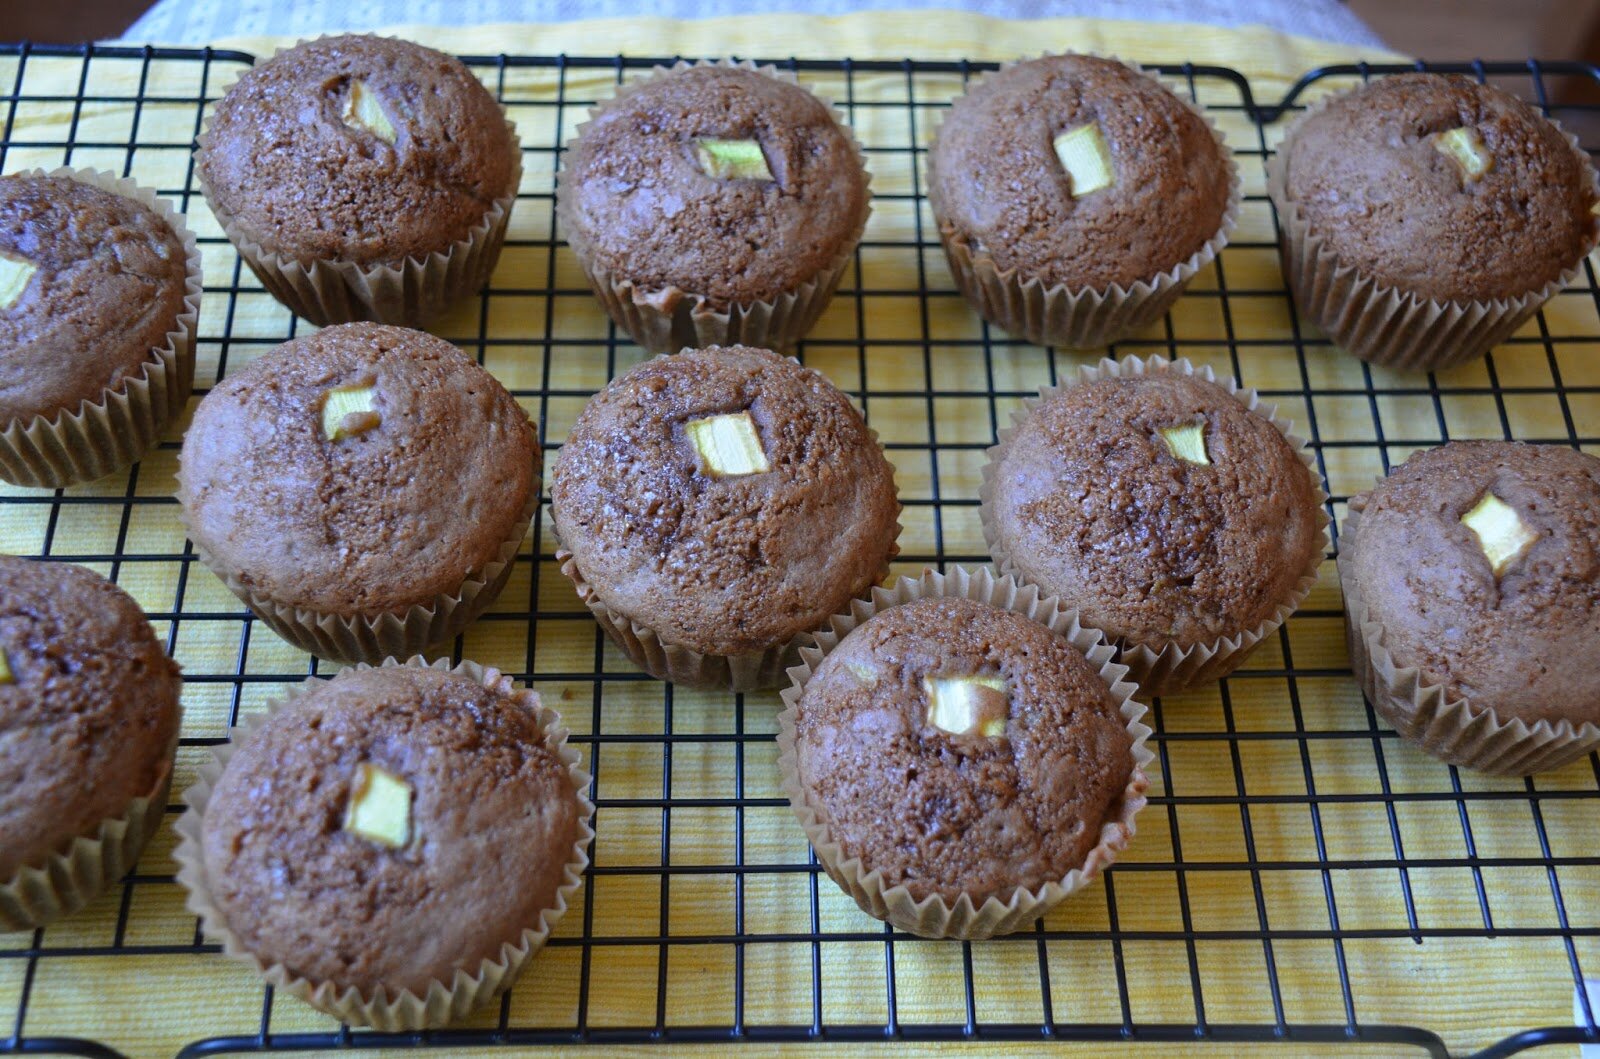
I love You Cinnamon Apple Muffins

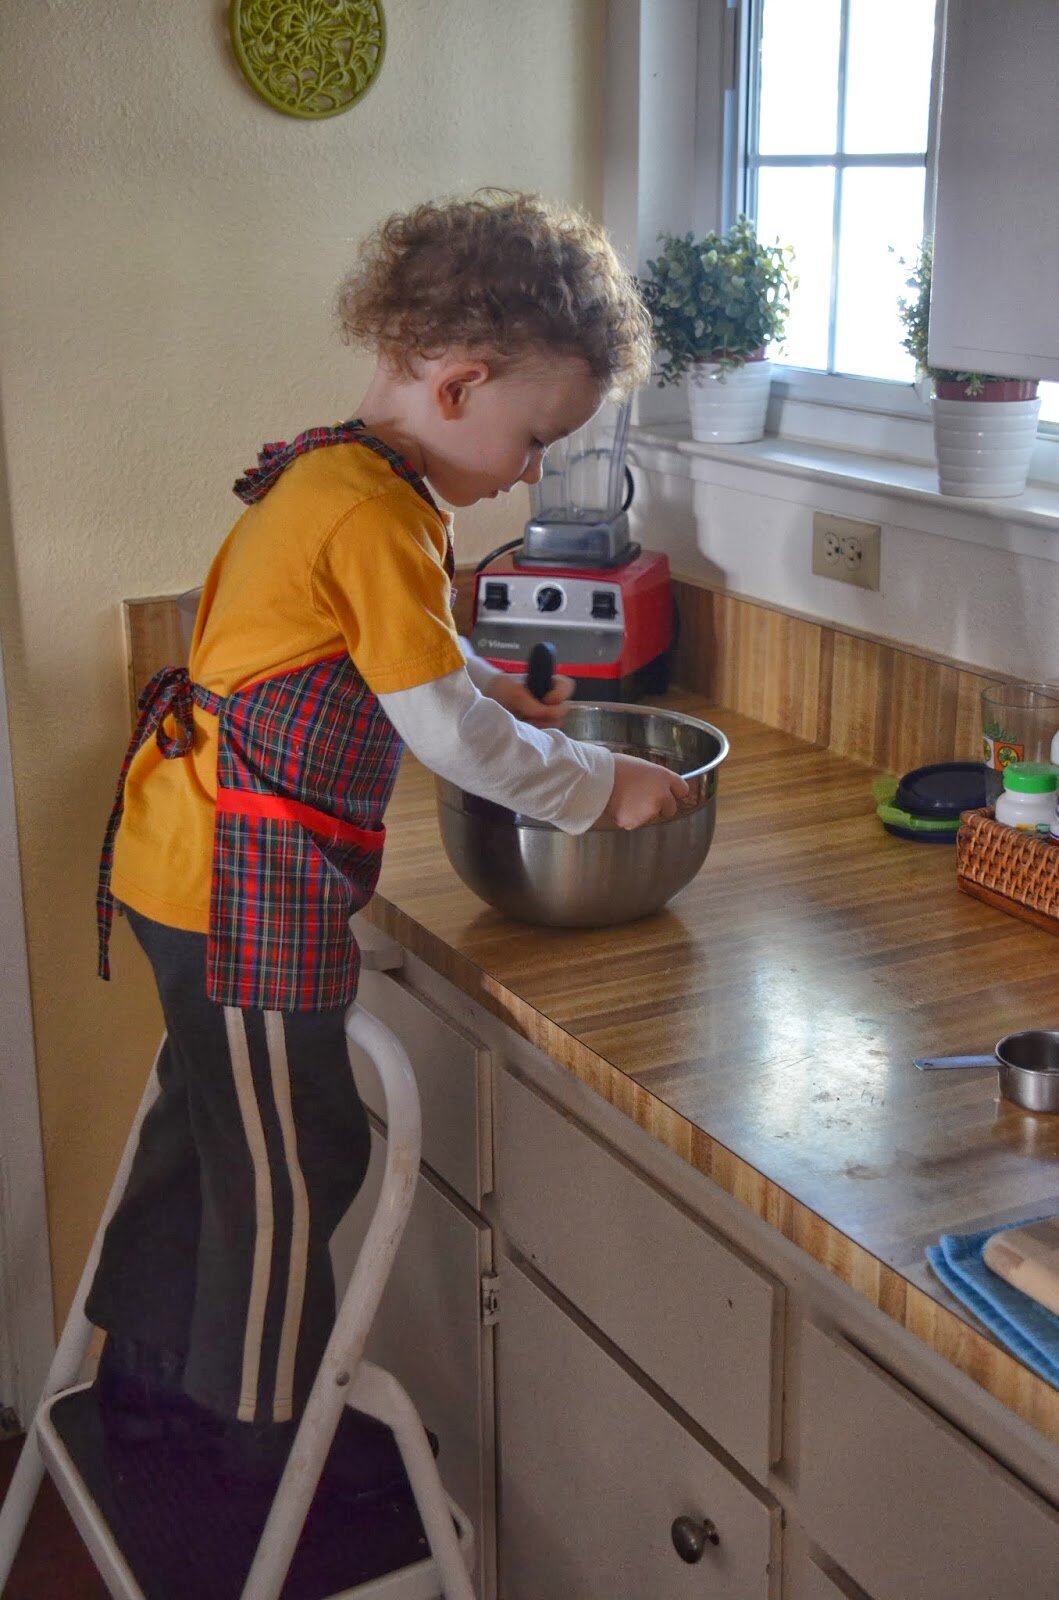
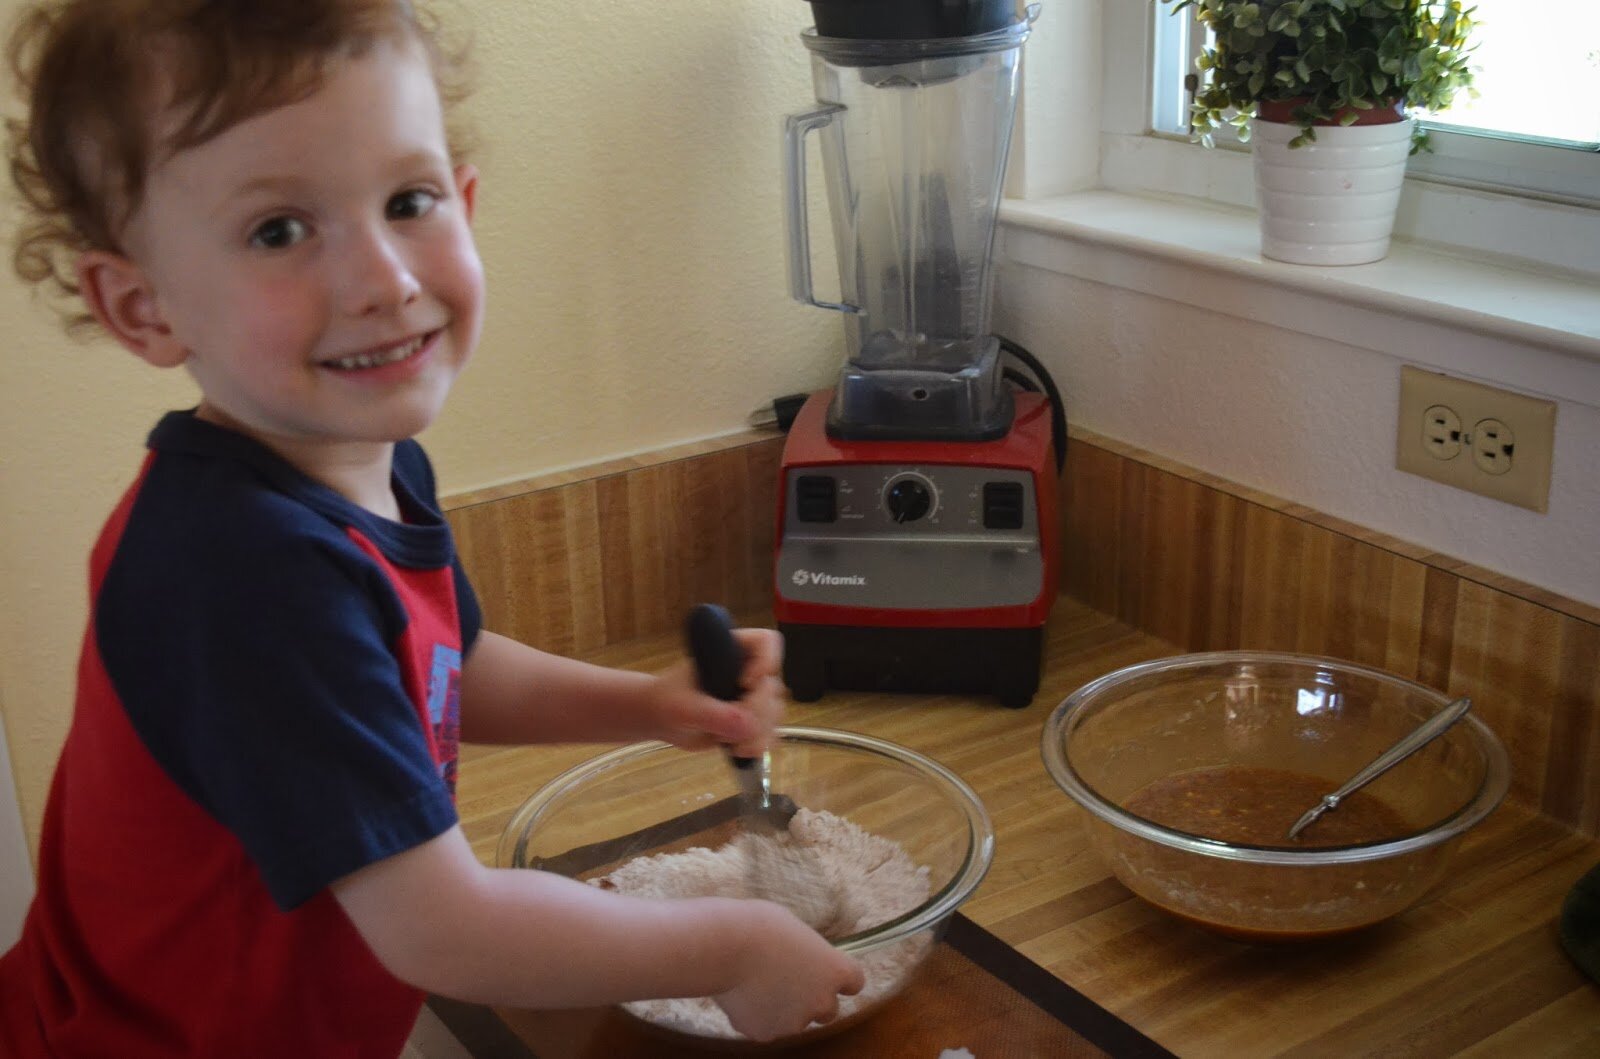
I call these “I Love You Cinnamon Apple Muffins” because I make them especially for my children (Daddy gets a few too of course). My kids LOVE these muffins—and they love to make them with me (it’s just a big ole’ love-fest). I’ve included a few pictures of my son, Ethan, helping me one morning before preschool. These muffins are moist, yet fluffy and have such a nice cinnamon apple flavor. They make excellent snacks or can be part of a healthy breakfast. I hope your family enjoys these muffins as much as we do. Join me over at Gluten Free Easily for my gluten free Cinnamon Apple Muffin Recipe (gluten free, dairy free, cane-sugar free, nut free). I shared these muffins last month on March Muffin Madness over at my friend Shirley’s Blog, Gluten Free Easily. You can check out the guest post here.
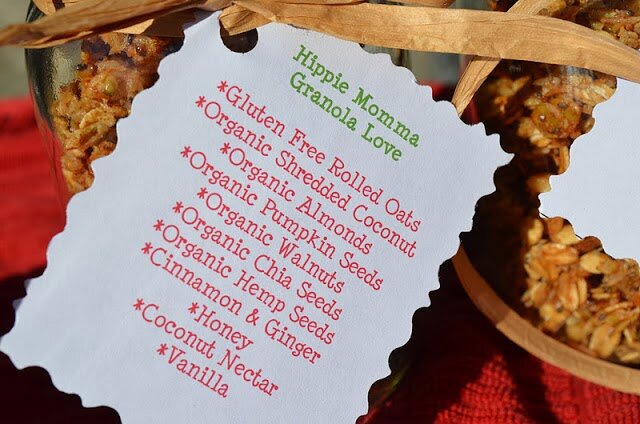
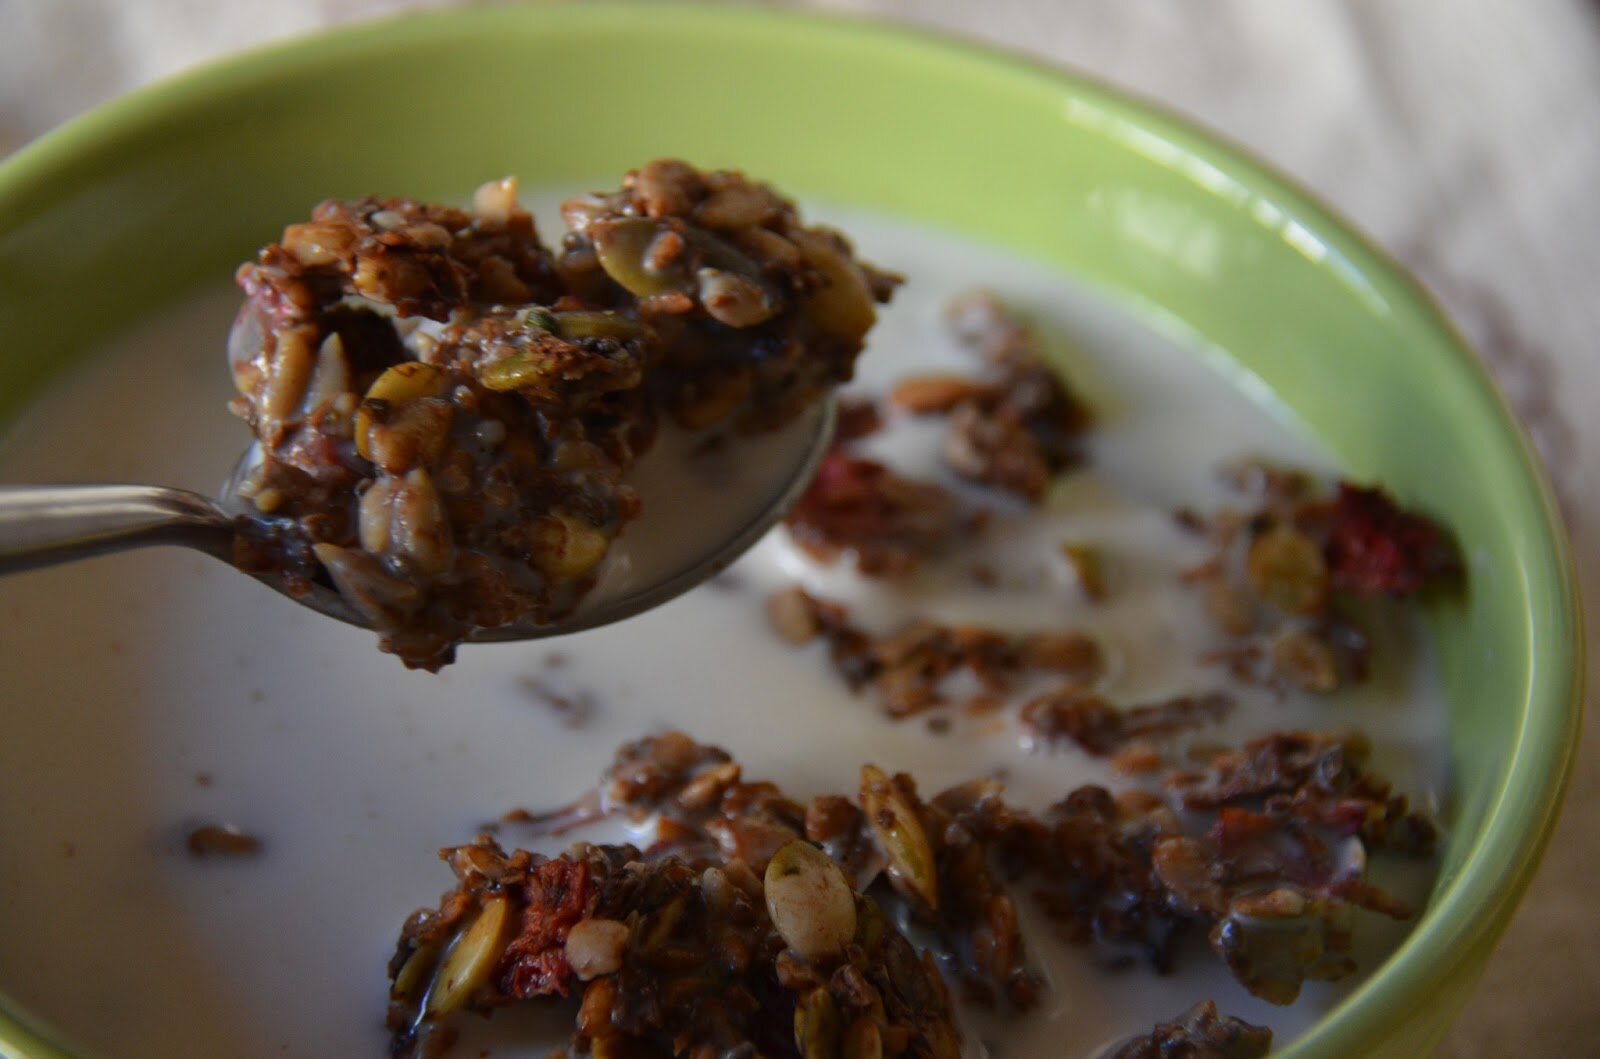
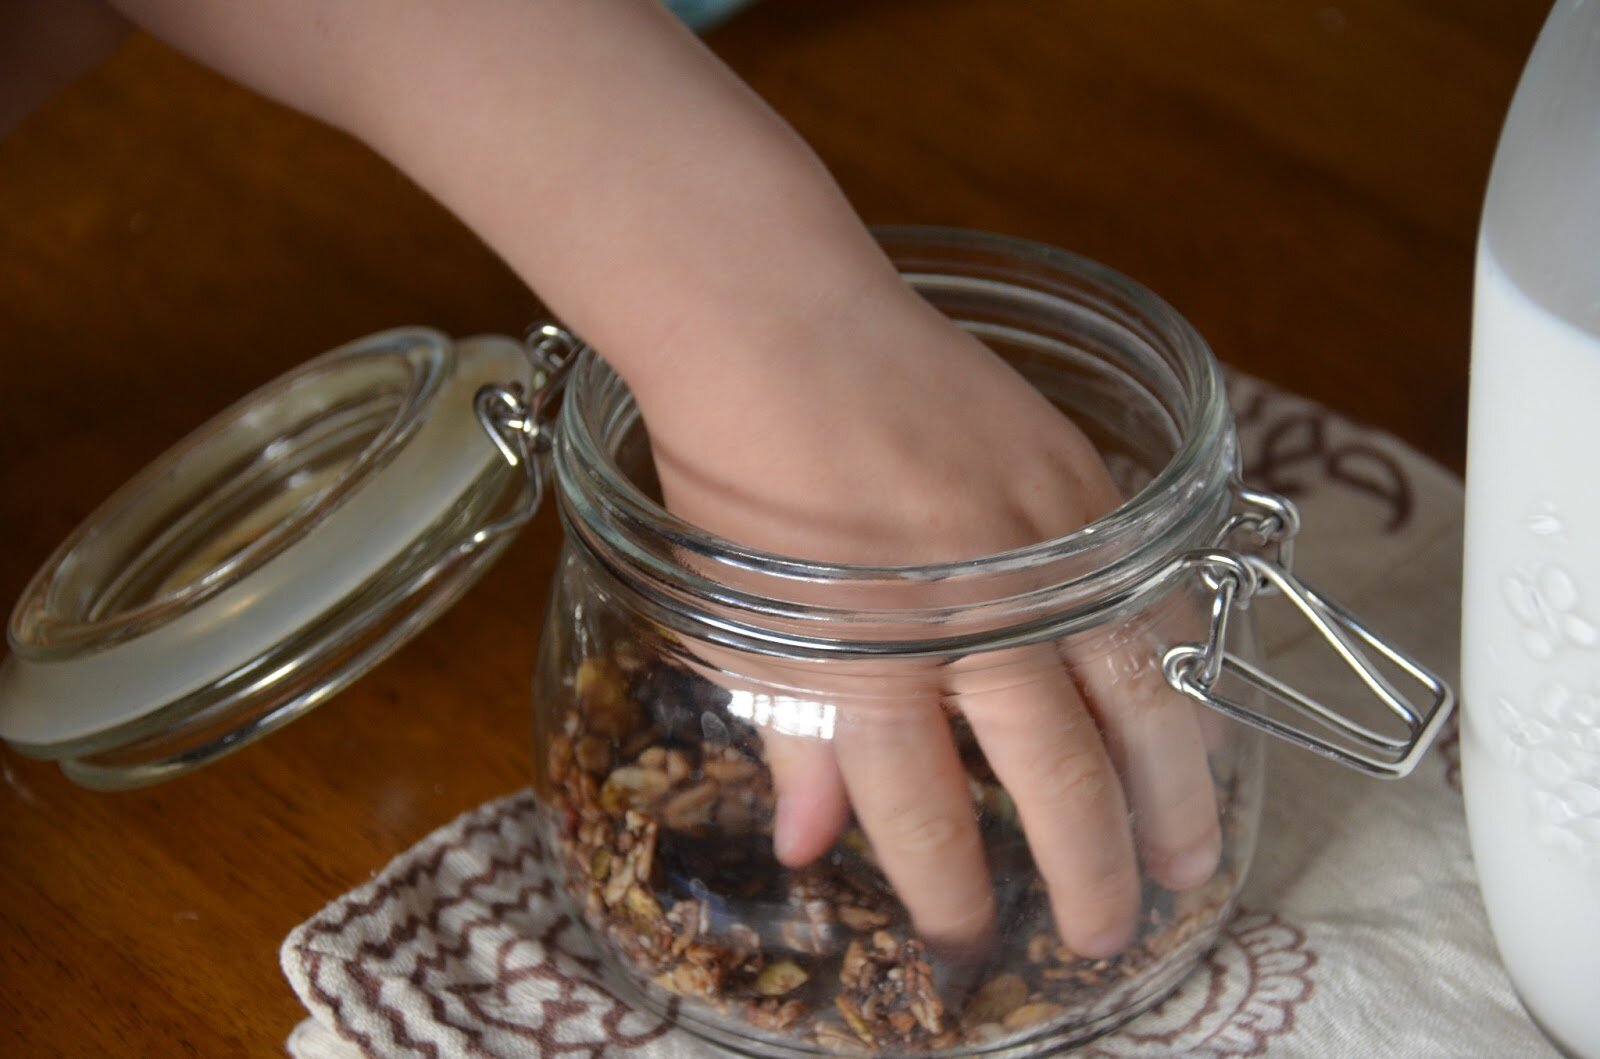
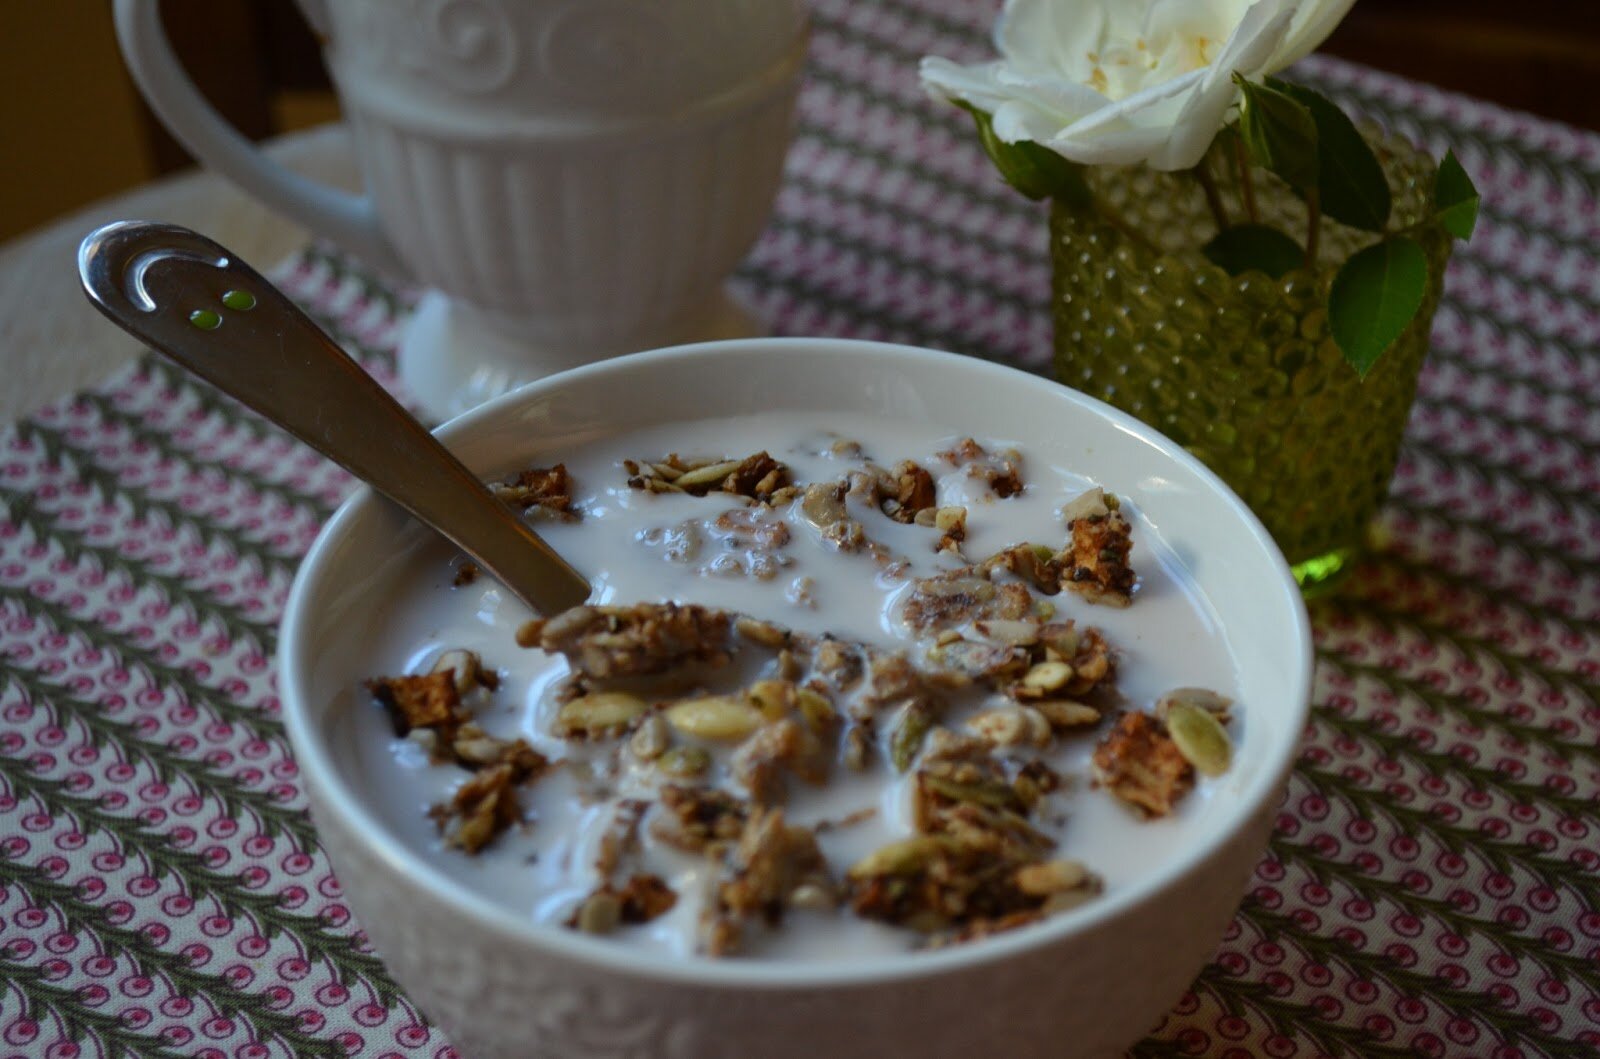
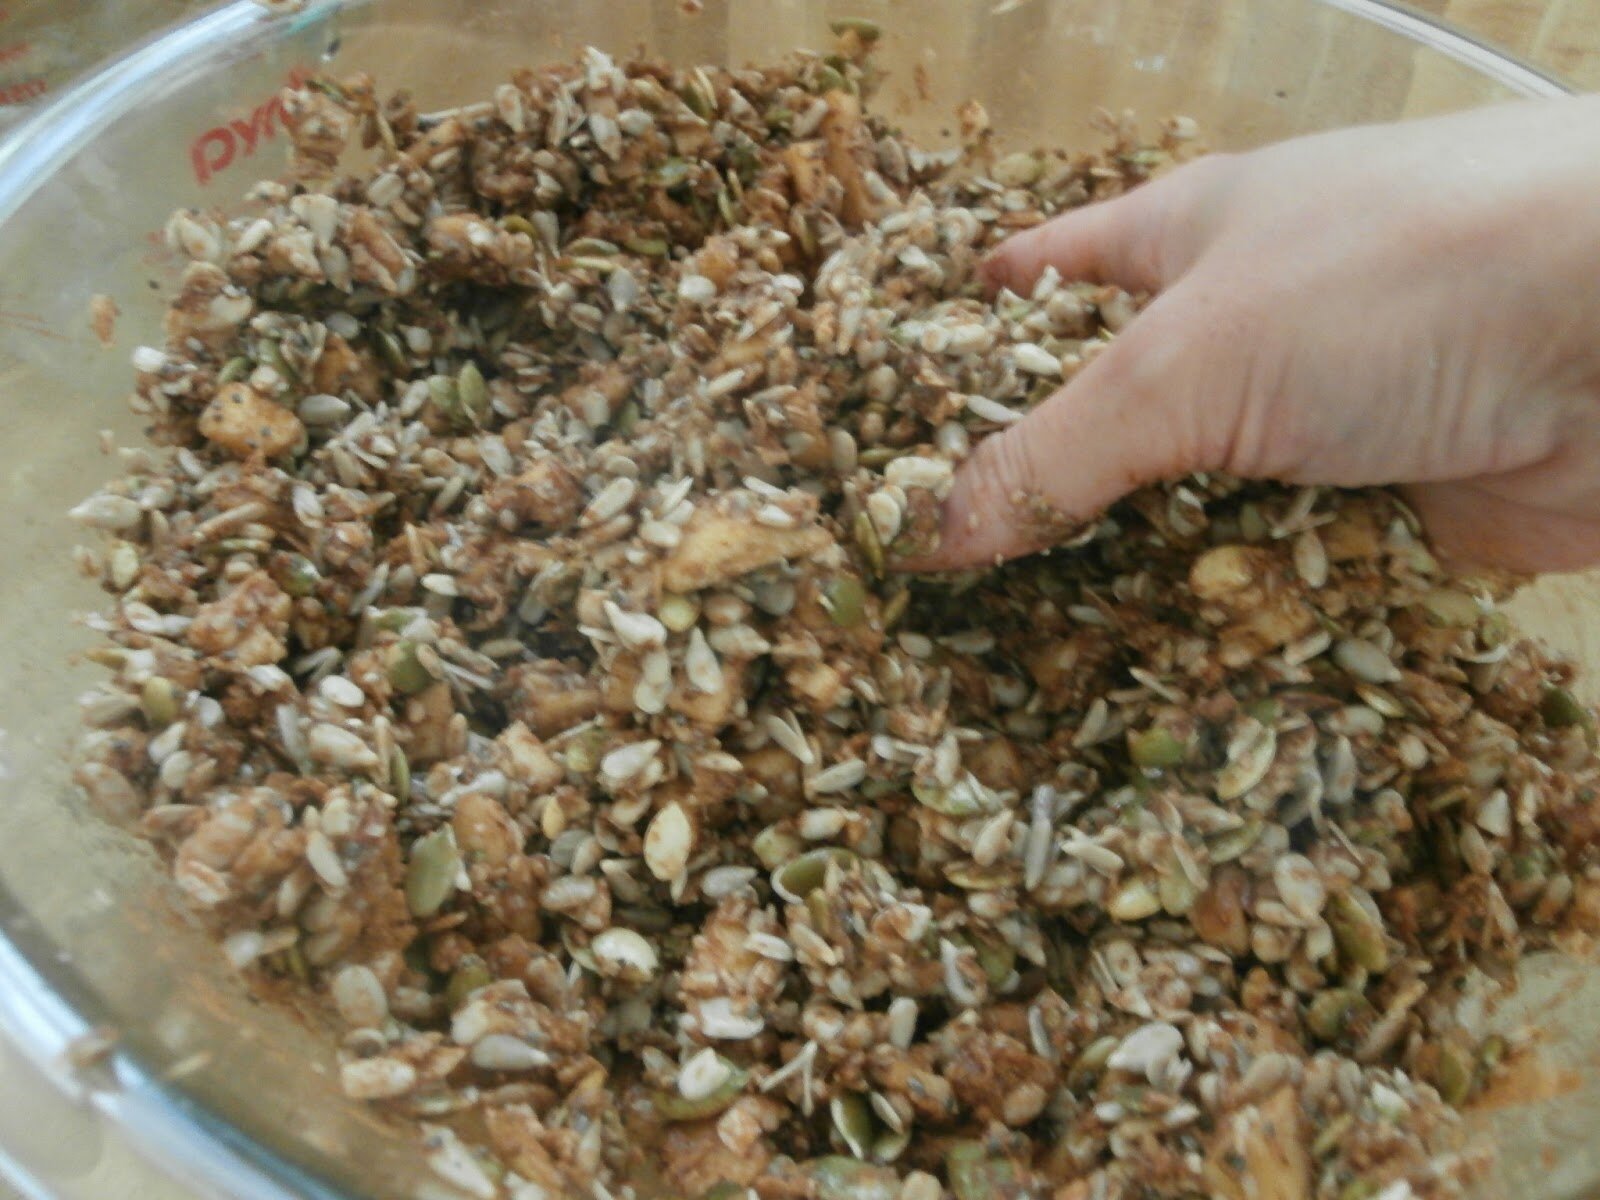
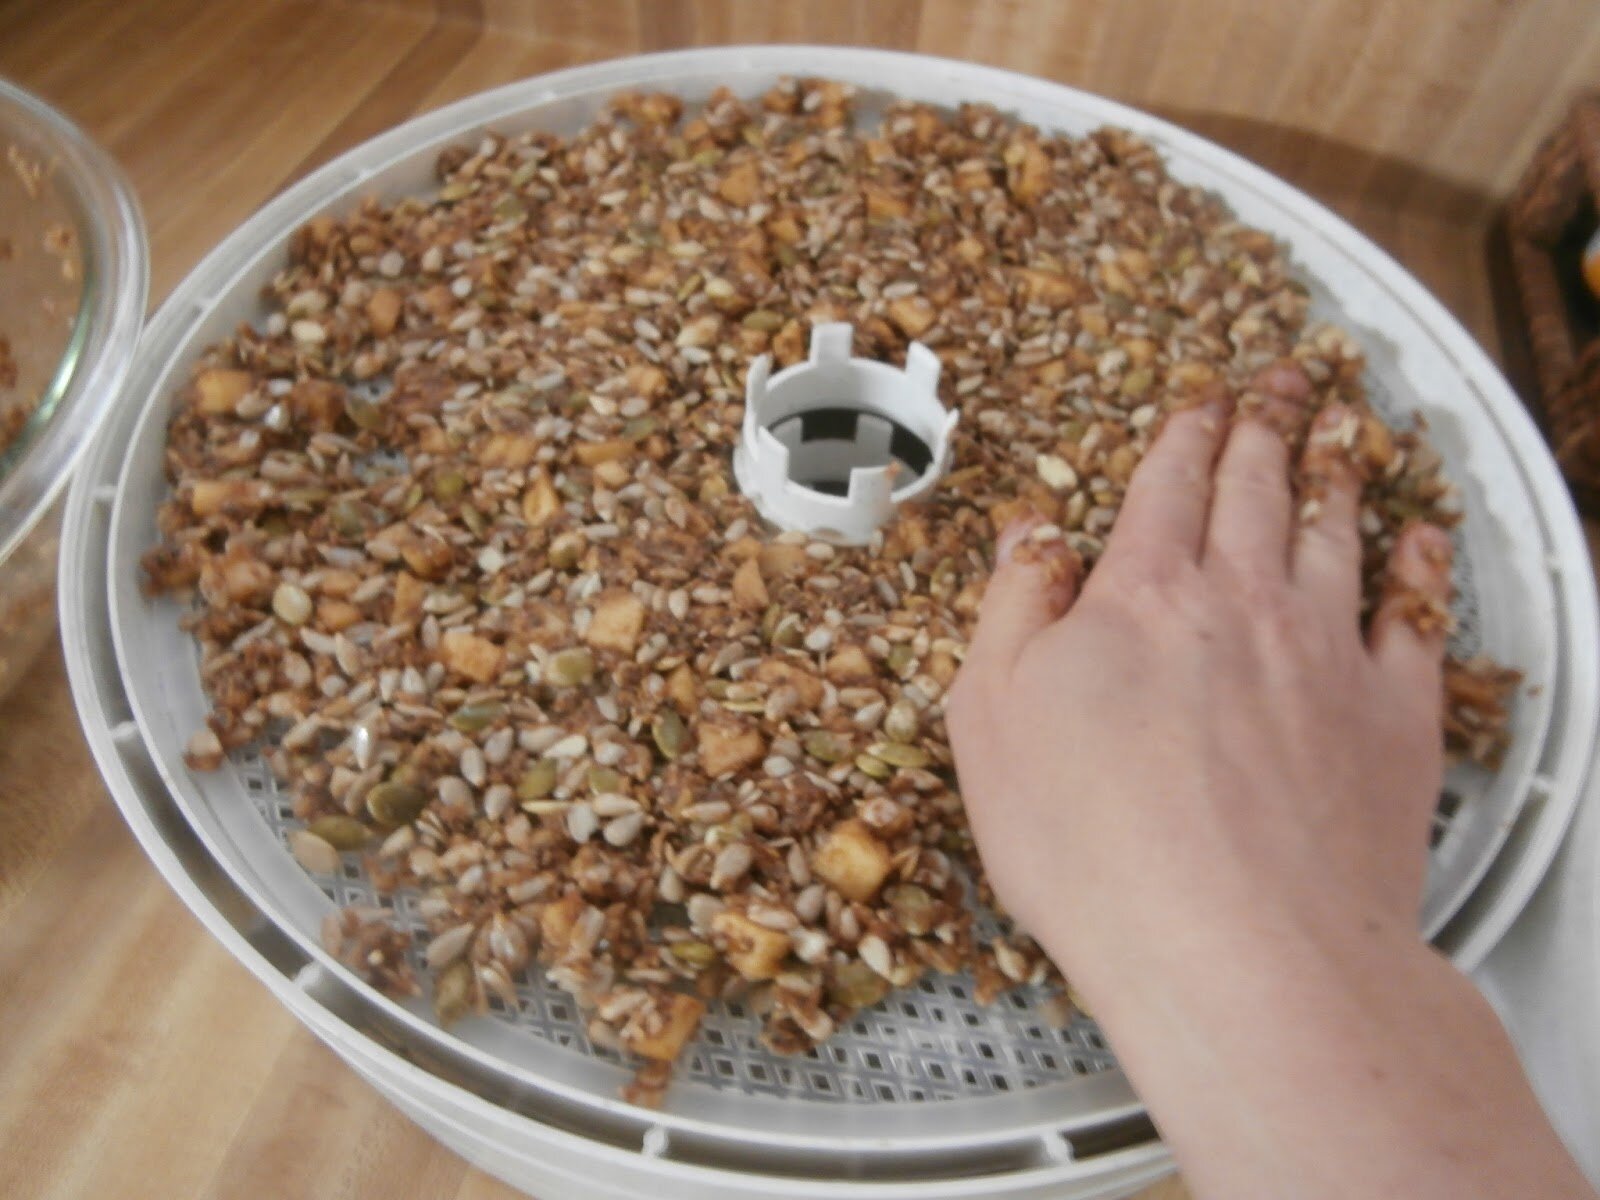
Festive Coconut Ginger Granola


Ingredients
(click on links for where to buy)
dry:
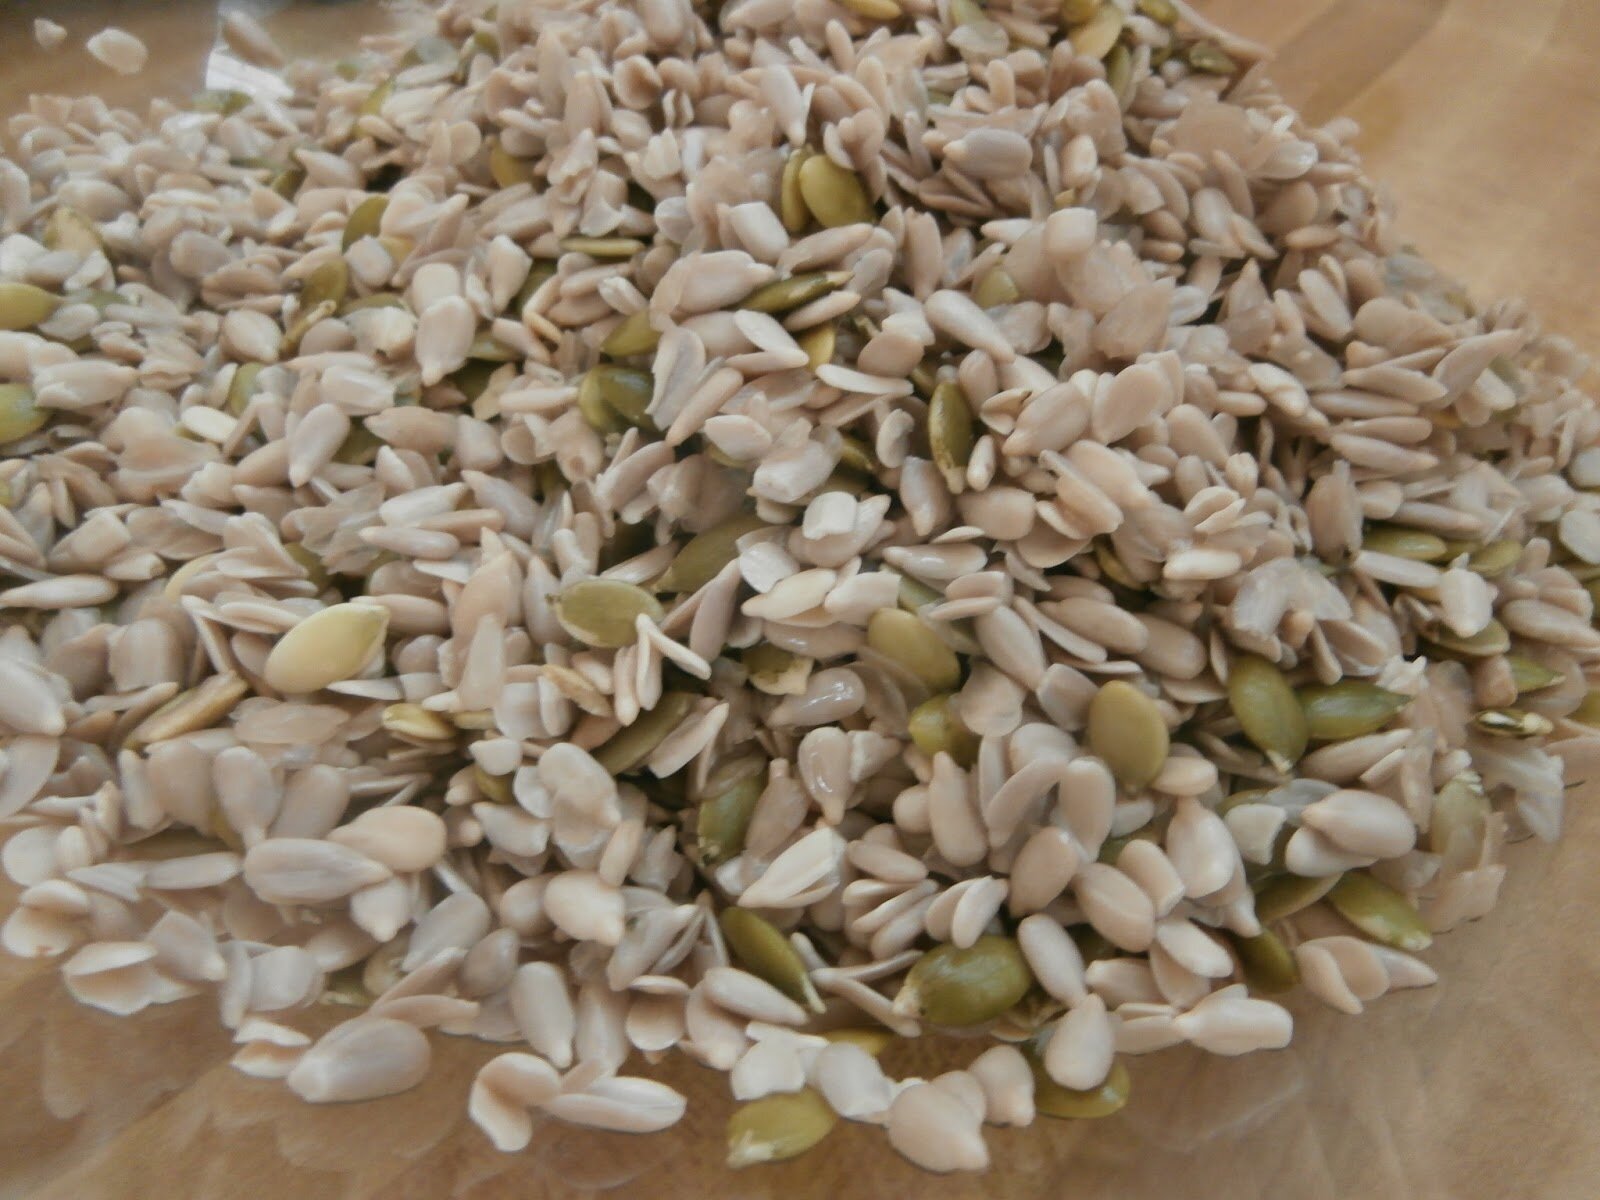
-2 cups certified gluten-free rolled oats
-1 cup unsweetened shredded coconut
-1/2 cup raw organic almonds
-1/2 cup raw organic walnuts
-1/2 cup pumpkin seeds
-2 tablespoons hemp seeds
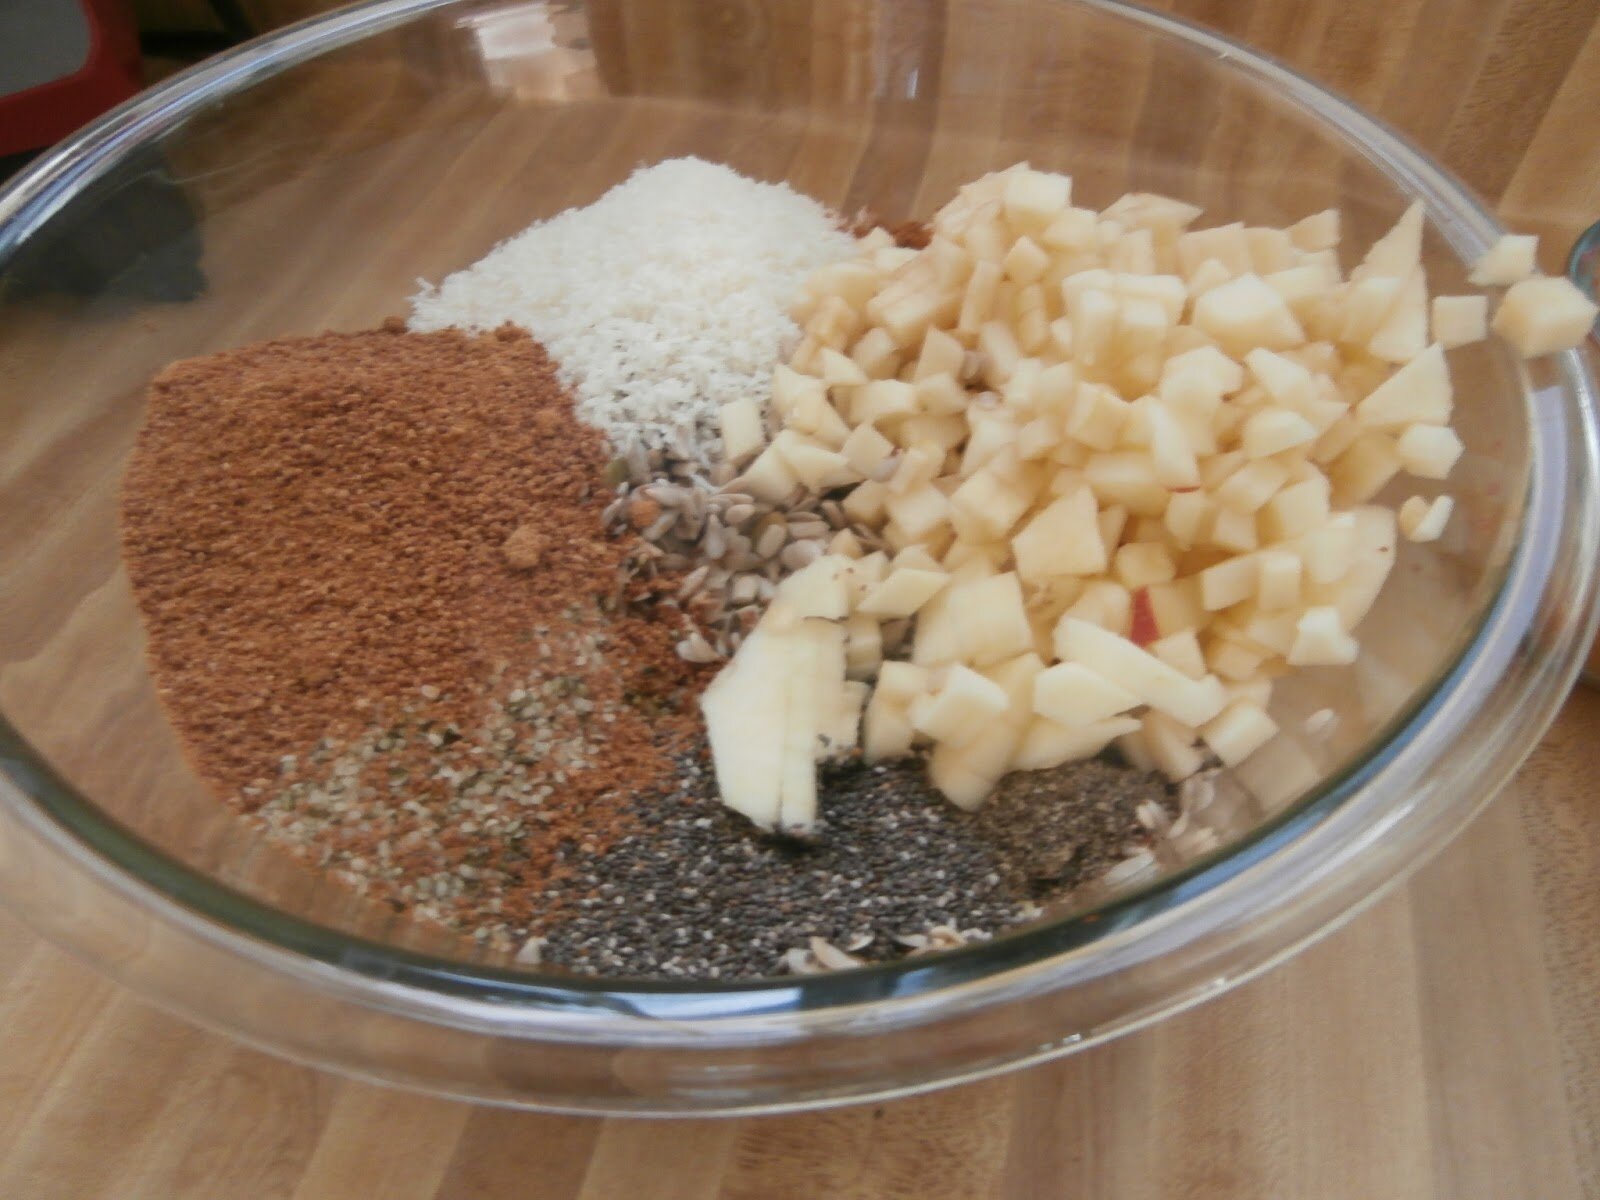
-1 tablespoon chia seeds
-1/4 cup coconut sugar
-Pinch of salt
-1/2 teaspoon ground cinnamon
-1 teaspoon ground ginger
wet:
-1/2 cup local honey (vegans use maple syrup or coconut nectar)
-1 teaspoon vanilla extract
-3 tablespoons melted coconut oil here or here
How To
Preheat oven to 350
1. Combine oats and shredded coconut in a large bowl.
2. Add the almonds to a food processor (with S-blade), and chop up until they are in little bits, then add almonds to the oats and shredded coconut.
3. Add the walnuts and pumpkin seeds to a food processor and chop until they are in small bits, add to mixture.
4. Then to the bowl add the hemp, chia, salt, ginger and cinnamon.
5. In separate bowl add honey, coconut oil and vanilla. Mix well with spatchula (I use a silicone).
6. Add wet ingredients to dry and mix (with hands preferably) until the entire mixture is well incorporated and moist. Now allow this mixture to rest for about 10 minutes.
7. Put a piece of parchment paper on a baking sheet. Spread the granola out on the parchment paper. Please note that when you spread out the granola, it needs to be in a very thin layer with small holes of parchment paper showing through. This allows the heat to cook all around the granola and latch it together.
8. Bake for 10 minutes exactly (not a second longer). Transfer the parchment paper to a cooling rack. The granola will be soft out of the oven, but become hard once cooled.

{affiliate links in post}
This recipe was shared on: Wellness Weekend
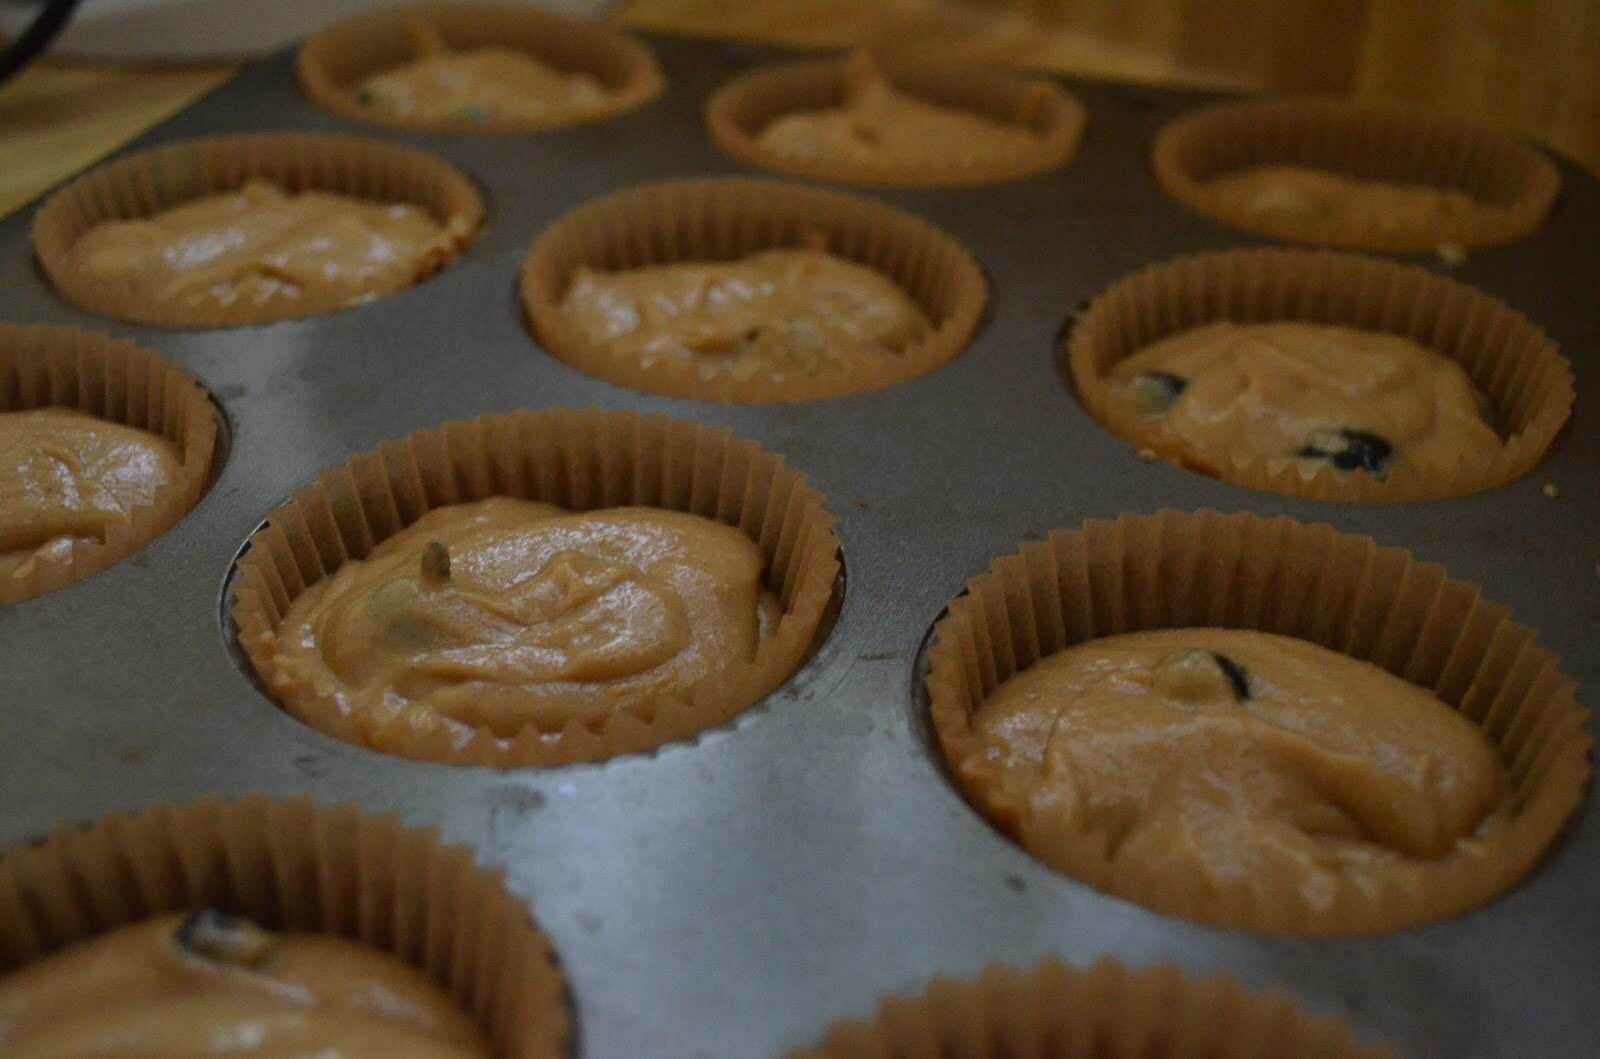
Pumpkin, Banana, Cranberry Muffins (gluten free, dairy free, cane-sugar free, nut free)

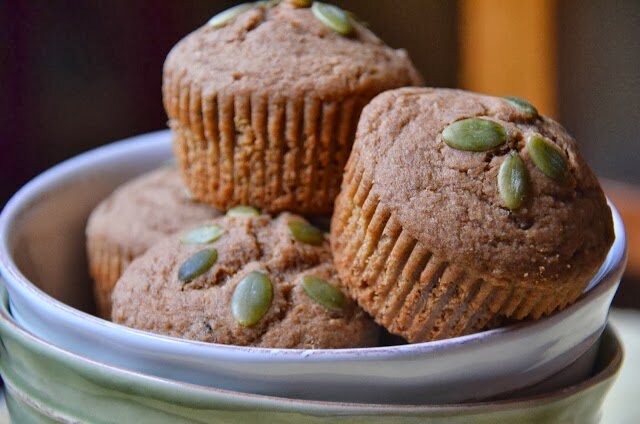
Ingredients:
wet
-2 eggs room temperature
-1/2 cup pumpkin puree room temperature
-3/4 cup ripe banana
-1/2 cup coconut sugar
-1/2 cup melted coconut oil
-1/4 cup applesauce
-3 tablespoons full fat coconut milk
-1 teaspoon vanilla
-10 drops stevia
dry
-100 grams sorghum flour (3/4 cup + 2 tablespoons)
-100 grams brown rice flour (3/4 cup)
-60 grams tapioca flour (1/2 cup)
-1 tablespoon cinnamon
-1 teaspoon ground ginger
-1 teaspoon baking powder
-1/2 teaspoon baking soda
-1/4 teaspoon xanthan gum or 1/2 teaspoon psyllium husk
-1/2 cup dried cranberries
How To:
Notes:
*For wet ingredients use a 1 cup glass Pyrex for measuring.
*For dry, use metal measuring cups. And when measuring flours, spoon the flours into the measuring cup, then level off with a knife. Never pack in the flour.
*The muffins will stay moist for 3 or 4 full days at room temp in a container.
*I use these large baking muffin cups.


Zucchini Chai Spiced Muffins (gluten free, dairy free, cane-sugar free)
Notes:
*Try homemade non-dairy milks for great results: Almond, Walnut, Hazelnut, Macadamia, Hemp.
*For baking, I suggest following the weight of the ingredients exactly. This might mean investing in a small kitchen scale. I cannot guarantee results if the recipe is not followed as specified and measurements are not accurate…just sayin’.
*For wet ingredients use only a 1 cup glass Pyrex for measuring. *For dry, use metal measuring cups. And when measuring flours, spoon the flours into the measuring cup, then level off with a knife. Never pack in the flour.
*The muffins will stay moist for 3 or 4 full days at room temp in a container.
*Oh, and I use these large baking muffin cups.

Here are my other baking recipes
(all gluten free, dairy free, cane-sugar free)
And stayed tuned for these chocolate cupcakes comin’ atcha soon

Shared on: Fat Tuesdays, Slightly Indulgent Tuesdays, Allergy Free Wednesdays, My Meatless Monday,
Raw Strawberry Chocolate Cereal (nut free, grain free, vegan)


 And be sure to enjoy your homemade cereal with homemade nut or seed milk:
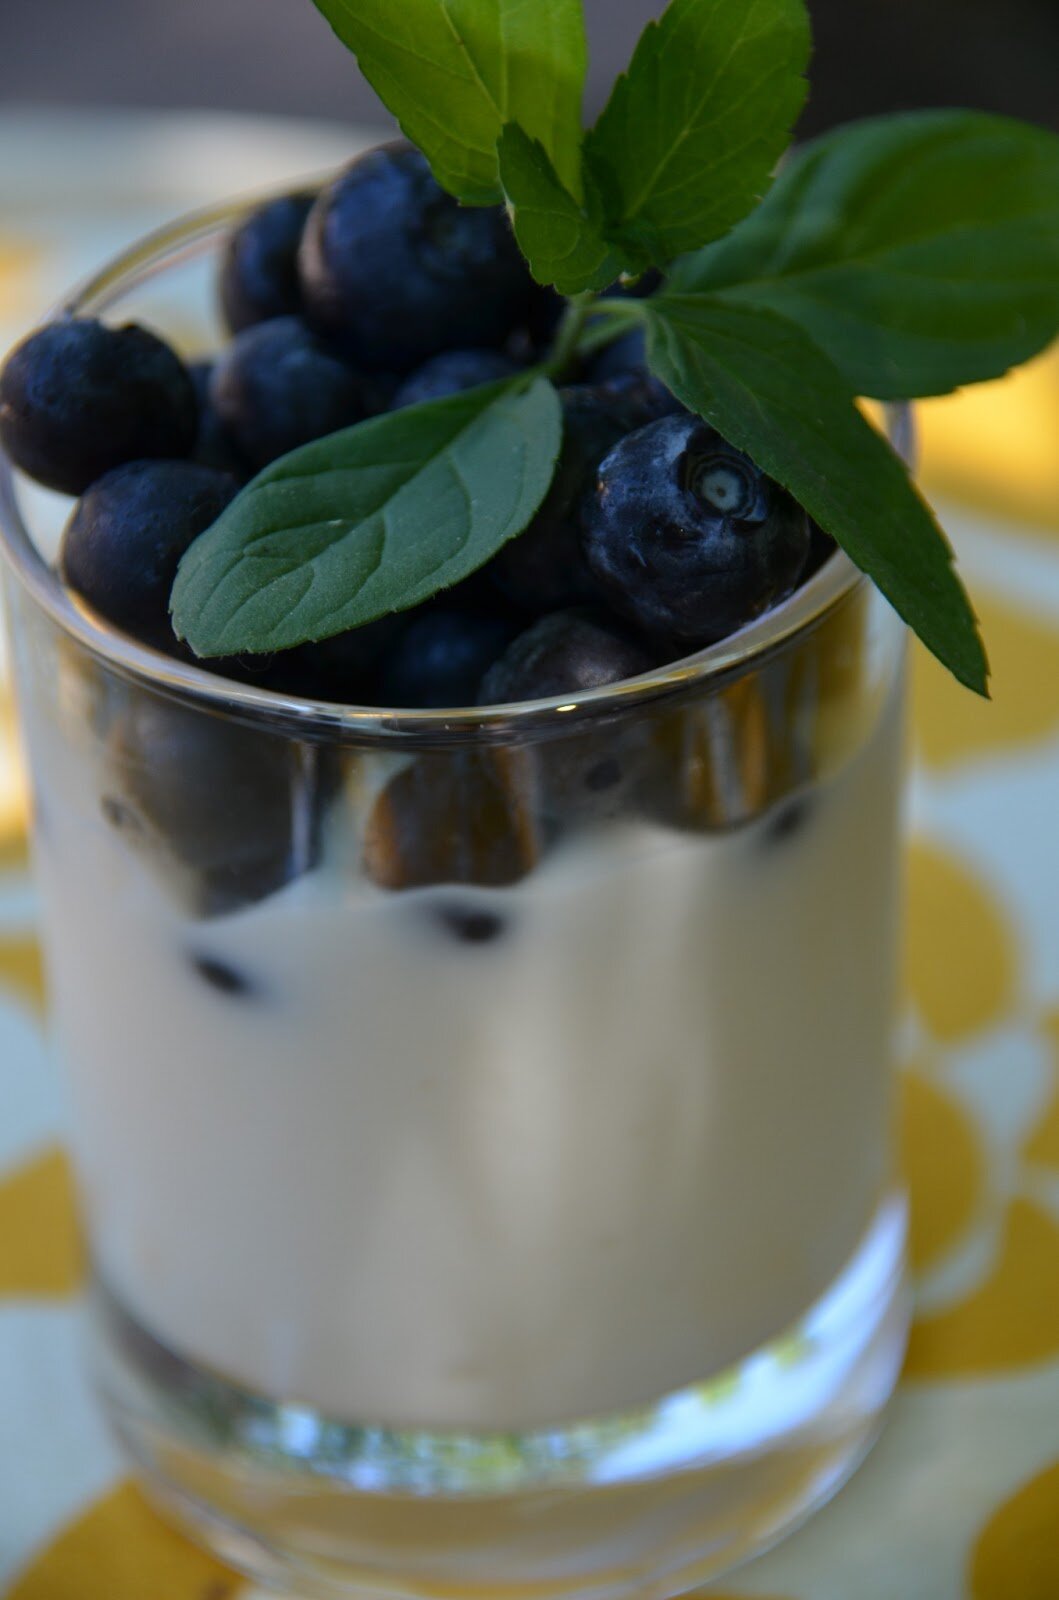
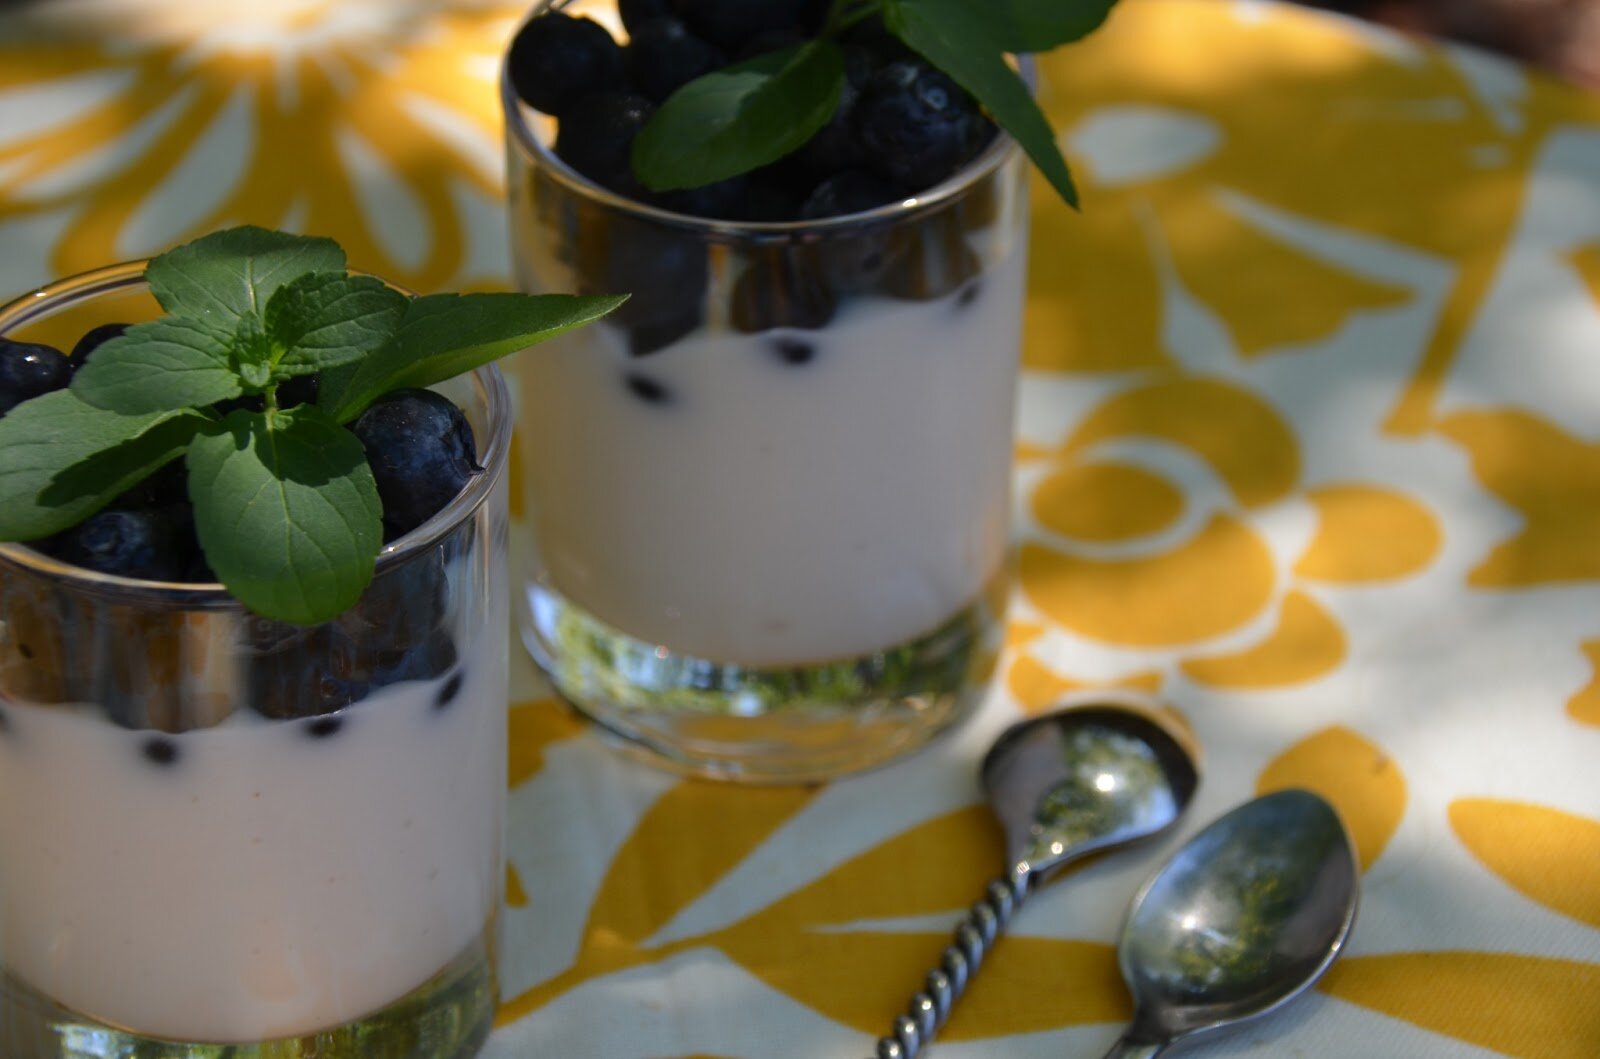
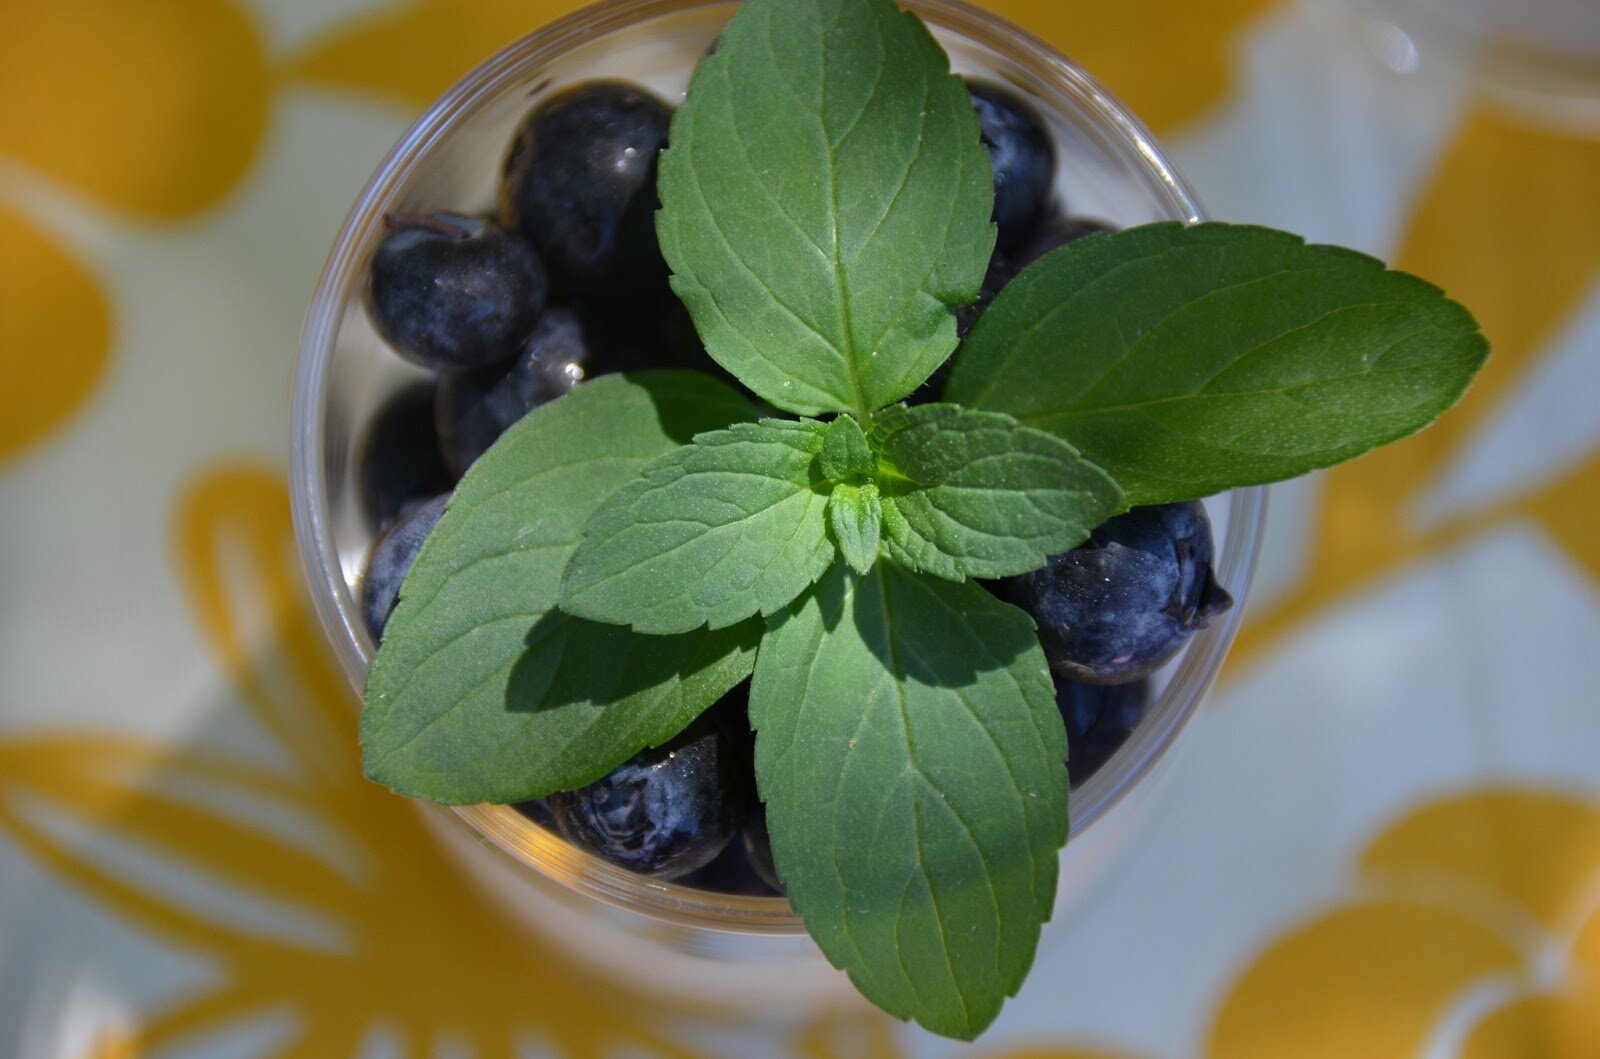
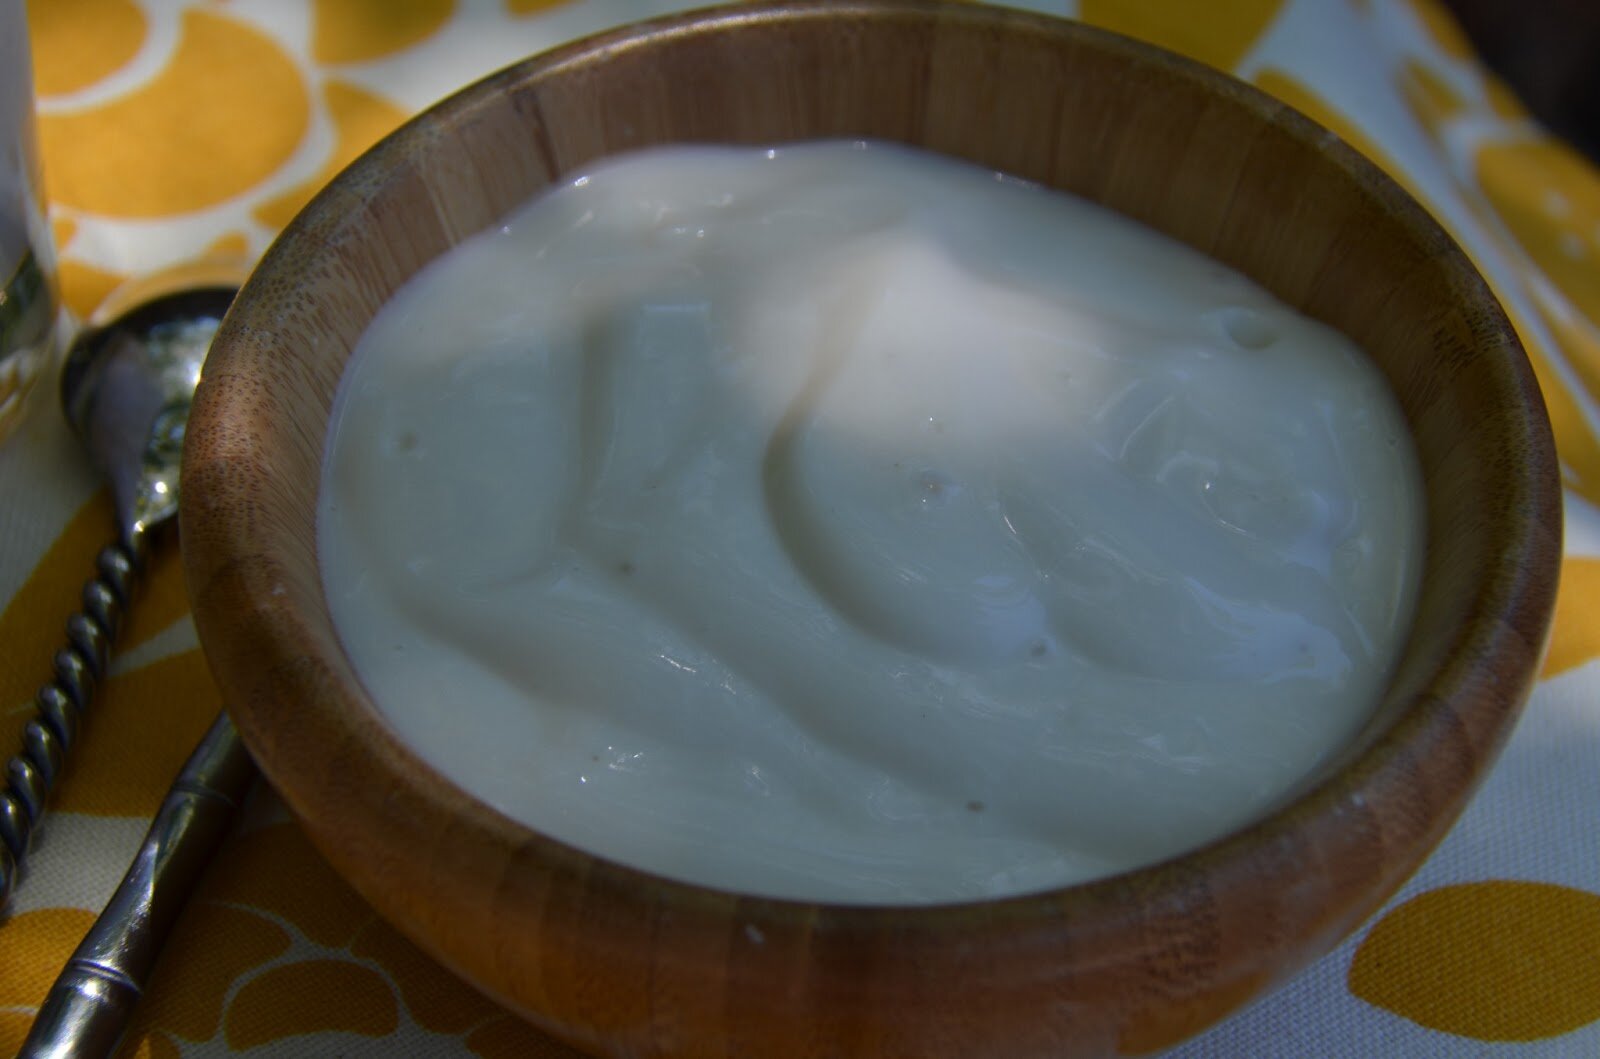
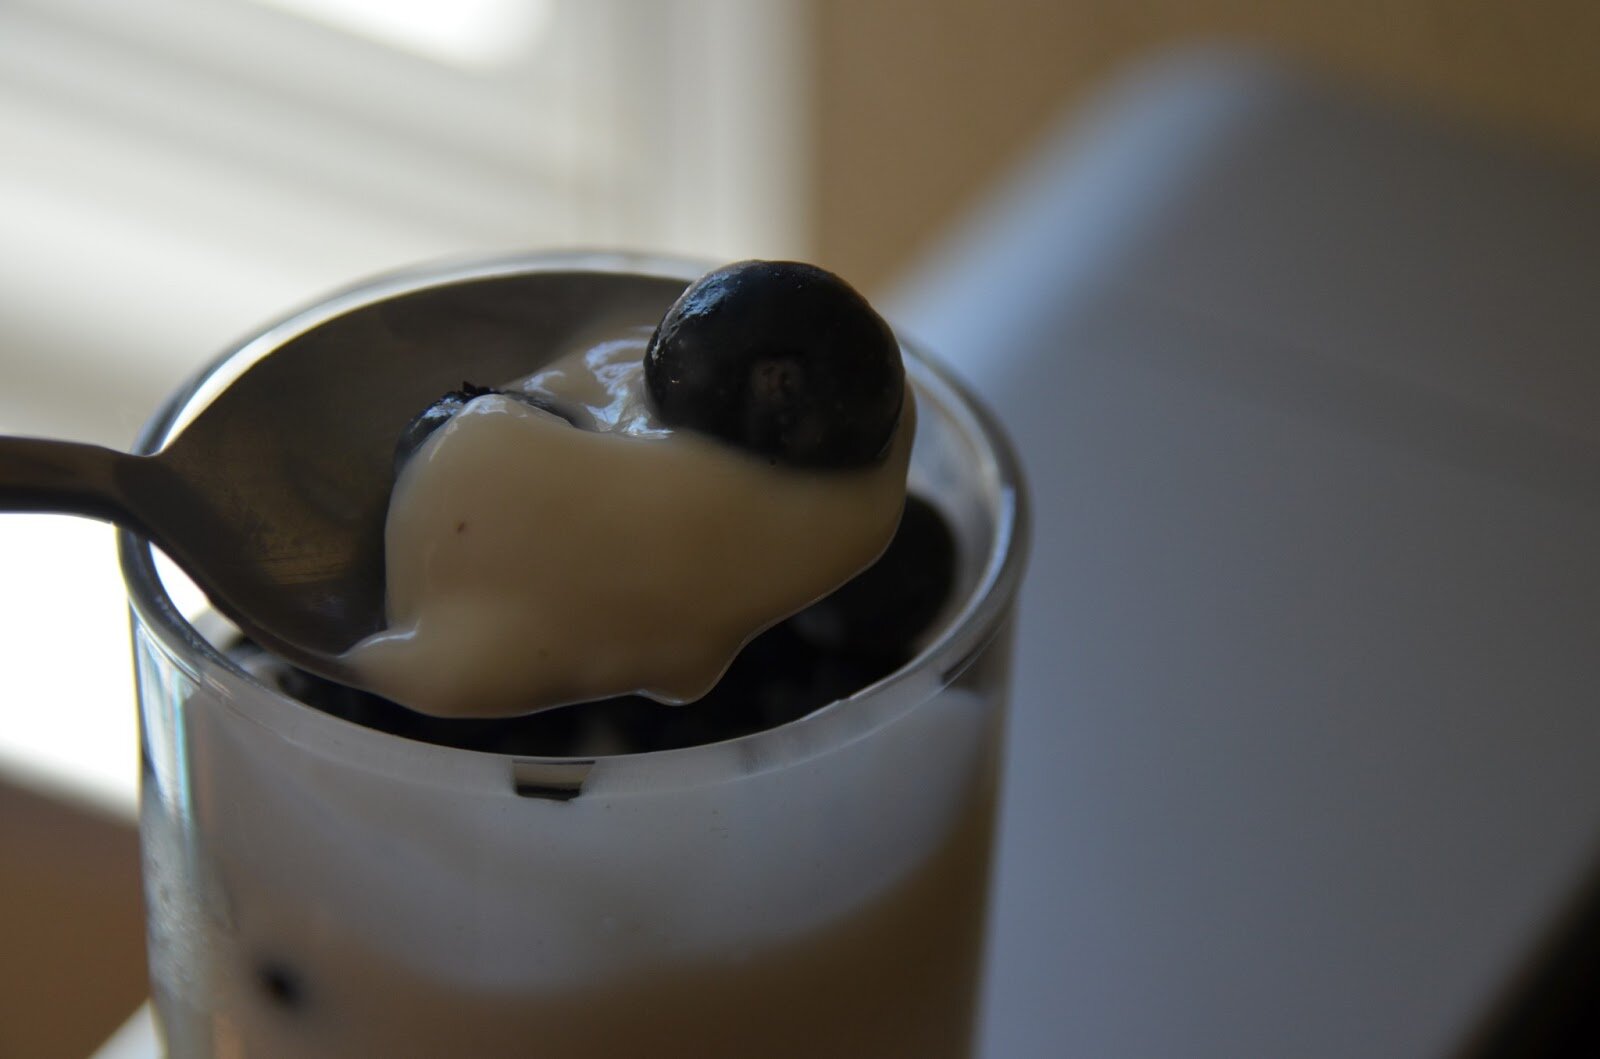
Homemade Coconut-Cashew SCD Yogurt (dairy free, paleo, cane-sugar free, gum free w/ vegan option)
Recipe Modified and Inspired by Kelly @ The Spunky Coconut
Ingredients:
-2 cups cashew milk
-2 cups coconut milk this or this
-2 tablespoons honey
-1 tablespoon vanilla extract
-2 teaspoons pure gelatin (plus 1/4 cup room temp water)
-5 capsules of probiotics
How to Make Cashew Milk:
-Soak 1 cup of raw cashews over night (8 hours is great). Strain and rinse. Blend with 4 cups of filtered water for 45 seconds. Let sit for 15 minutes. Scoop off any excess foam. Stir and use 2 cups for the yogurt. Save the other 2 cups for a thousand different uses. Cashew milk/cream rocks!
Directions:
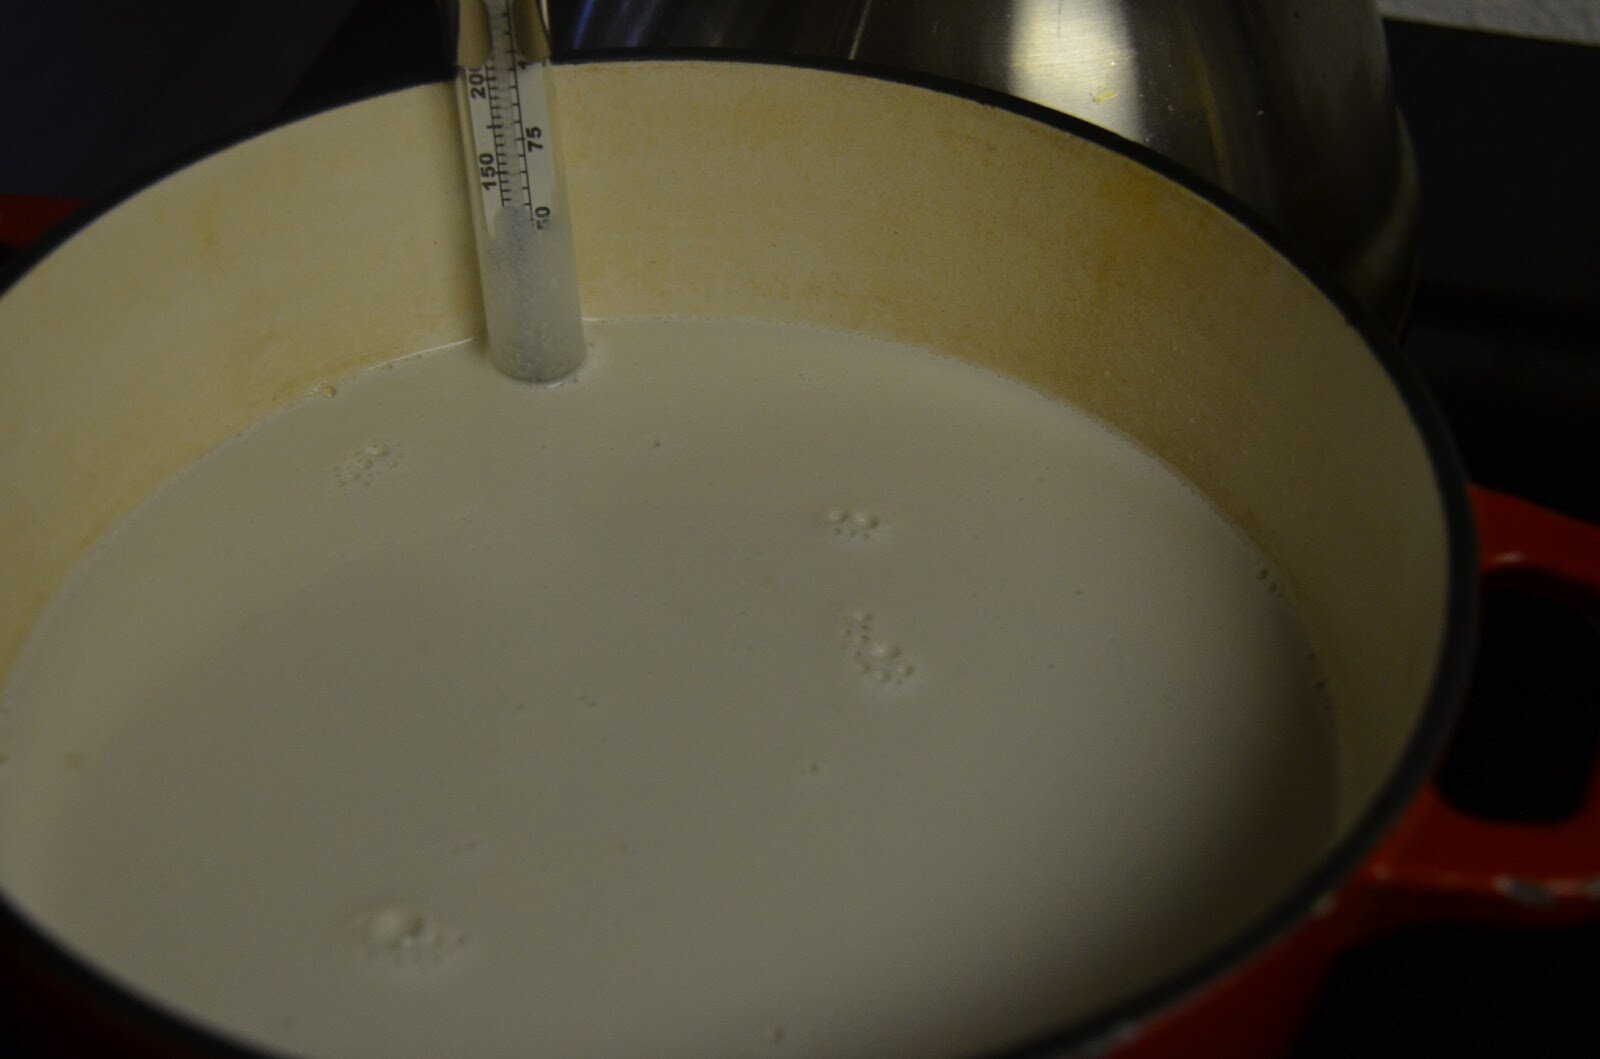
1. Add the milks, honey, and vanilla to a large, heavy pot and heat until 185 degrees. Stirring often, taking care that the milk does NOT burn on the bottom. A very gentle, slight simmer is fine. I like to use (and thus recommend) a dutch oven to heat the milk.
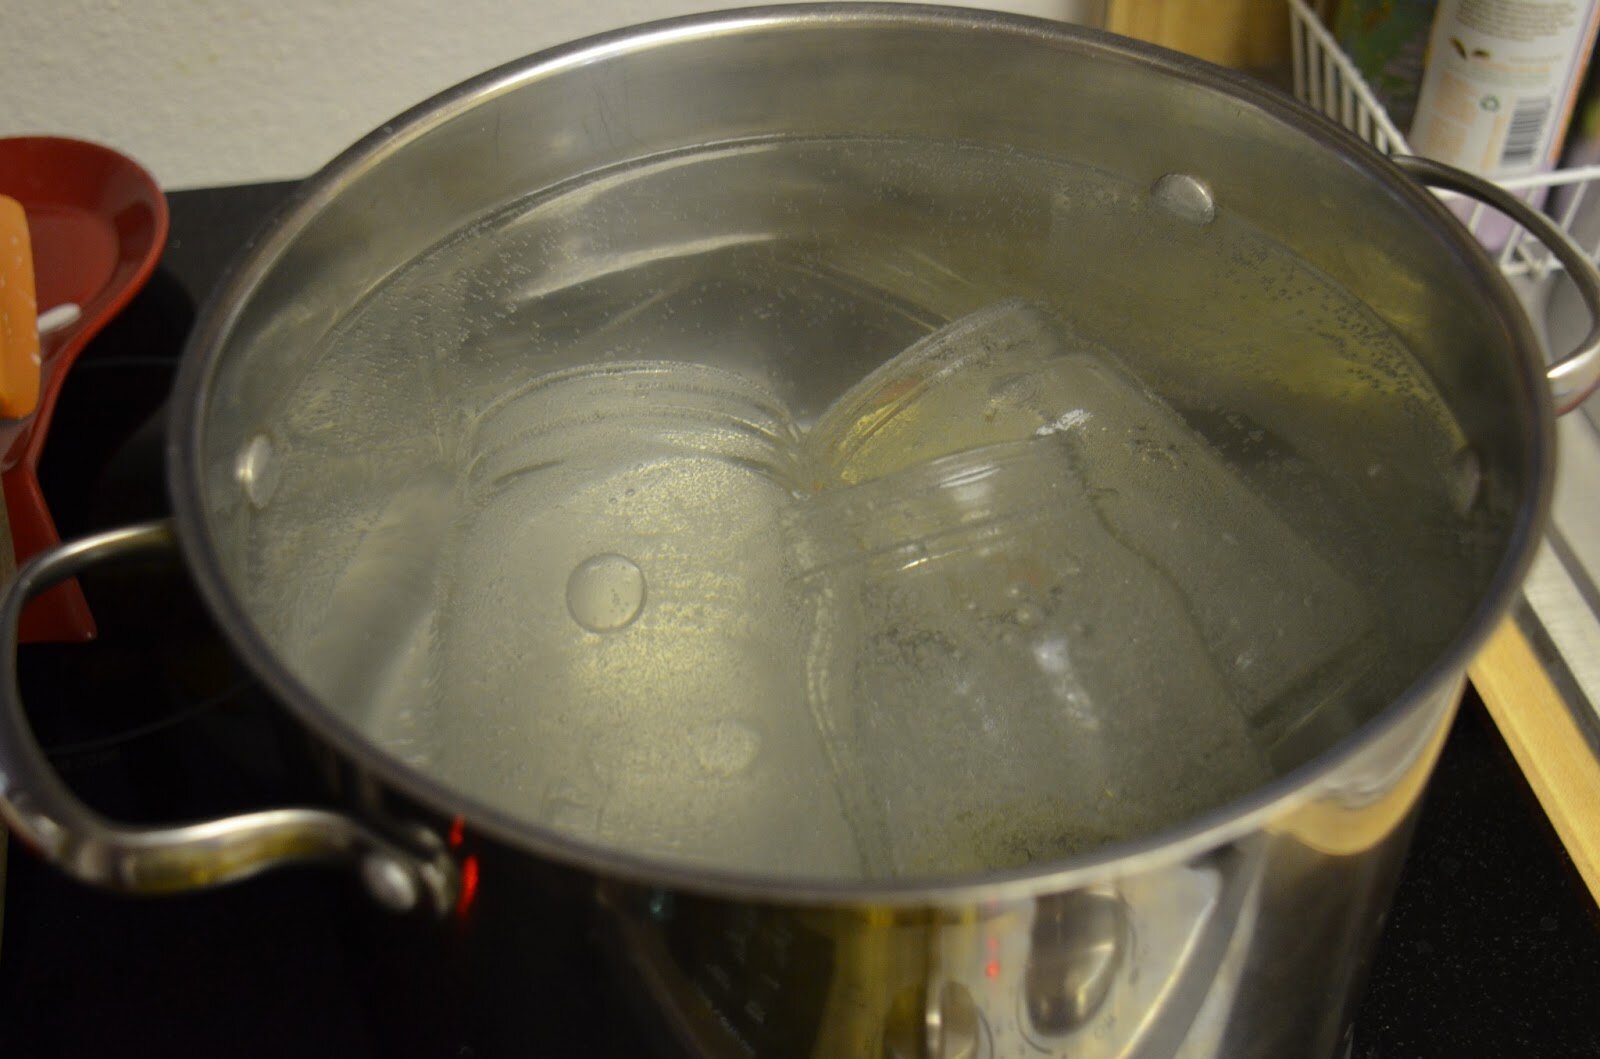
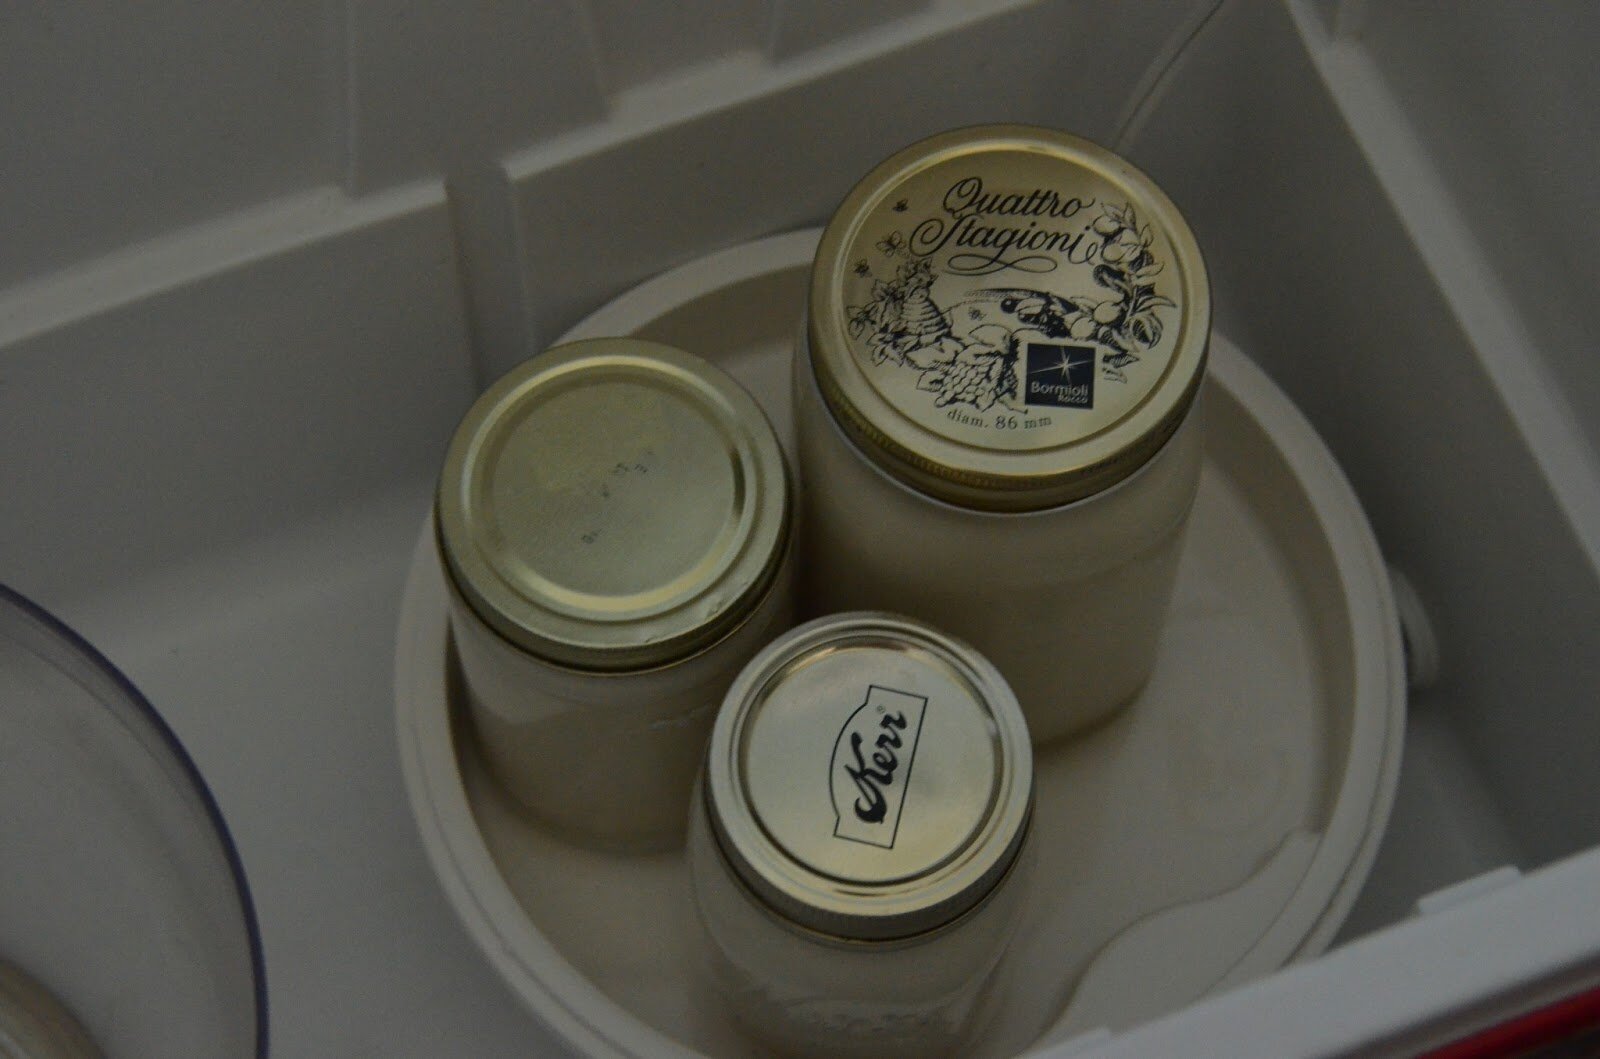
2. In another large pot, add your jars and lids, water to cover, and bring to a boil. Simmer jars and lids for 10 – 15 minutes. Set a clean towel on the counter somewhere and carefully remove the jars to cool when they have been properly sterilized.
3. After the milk comes up to 185 degrees, remove from the heat and allow to cool. To speed up the process, I pour the milk into a 4-cup glass Pyrex and line my crock pot with ice packs and put the Pyrex with the ice.
4. In a small bowl, add 1/4 cup ROOM TEMP water and mix in the 2 teaspoons of gelatin. Then add it to your milk, use immersion blender to incorporate the gelatin. I usually add the gelatin between 110 – 120 degrees.
5. When the temp drops to 100 degrees, give the milk another good spin with the immersion blender. Break open the 5 probiotics and add them to the milk. Use the immersion blender again to fully incorporate the probiotics.
6. Transfer the milk into a sterilized 4-cup glass container (or 2 smaller containers), or bunch of little yogurt containers. Place in your yogurt maker for at least 12 hours. Do not shake, move, or disturb in any way while the milk cultures. Please see below for how I use my yogurt maker for this process.
7. After culturing for 12 hours, remove the jars from yogurt maker and give the jars a good shake. My jars always have a liquid in the bottom, so give it a good shake. Let them cool for about an hour before you place in the fridge. Refrigerate at least 8 – 10 hours to allow the gelatin to set up and thicken the yogurt.
Notes:
*Gelatin contains many health benefits. See HERE
*I cannot offer any milk subs here. Cashews are great in that they thicken naturally, so I’m not sure how this would work with, say, just almond milk. You would need to increase the gelatin, but not sure by how much.
*Vegans use maple syrup instead of honey and 1/2 teaspoon agar agar. After the milk hits 185 degrees, remove a 1/4 cup of the milk and stir in the 1/2 teaspoon agar agar. Then add it back in the milk and whisk until well incorporated. When the temp drops to 100 degrees, add in the 5 capsules of probiotics. Proceed as suggested above. The agar agar yogurt will be thick after culturing. Place in fridge until cool. Vegans might also want to experiment with pectin or sunflower lecithin as thickeners. I personally stay away from seaweed based thickeners (such as agar agar), as it can exacerbate IBD symptoms and cause inflammation in the intestines. I stopped ingesting carageenan long ago for this reason (it’s actually why I started making homemade nut milk 5 years ago).


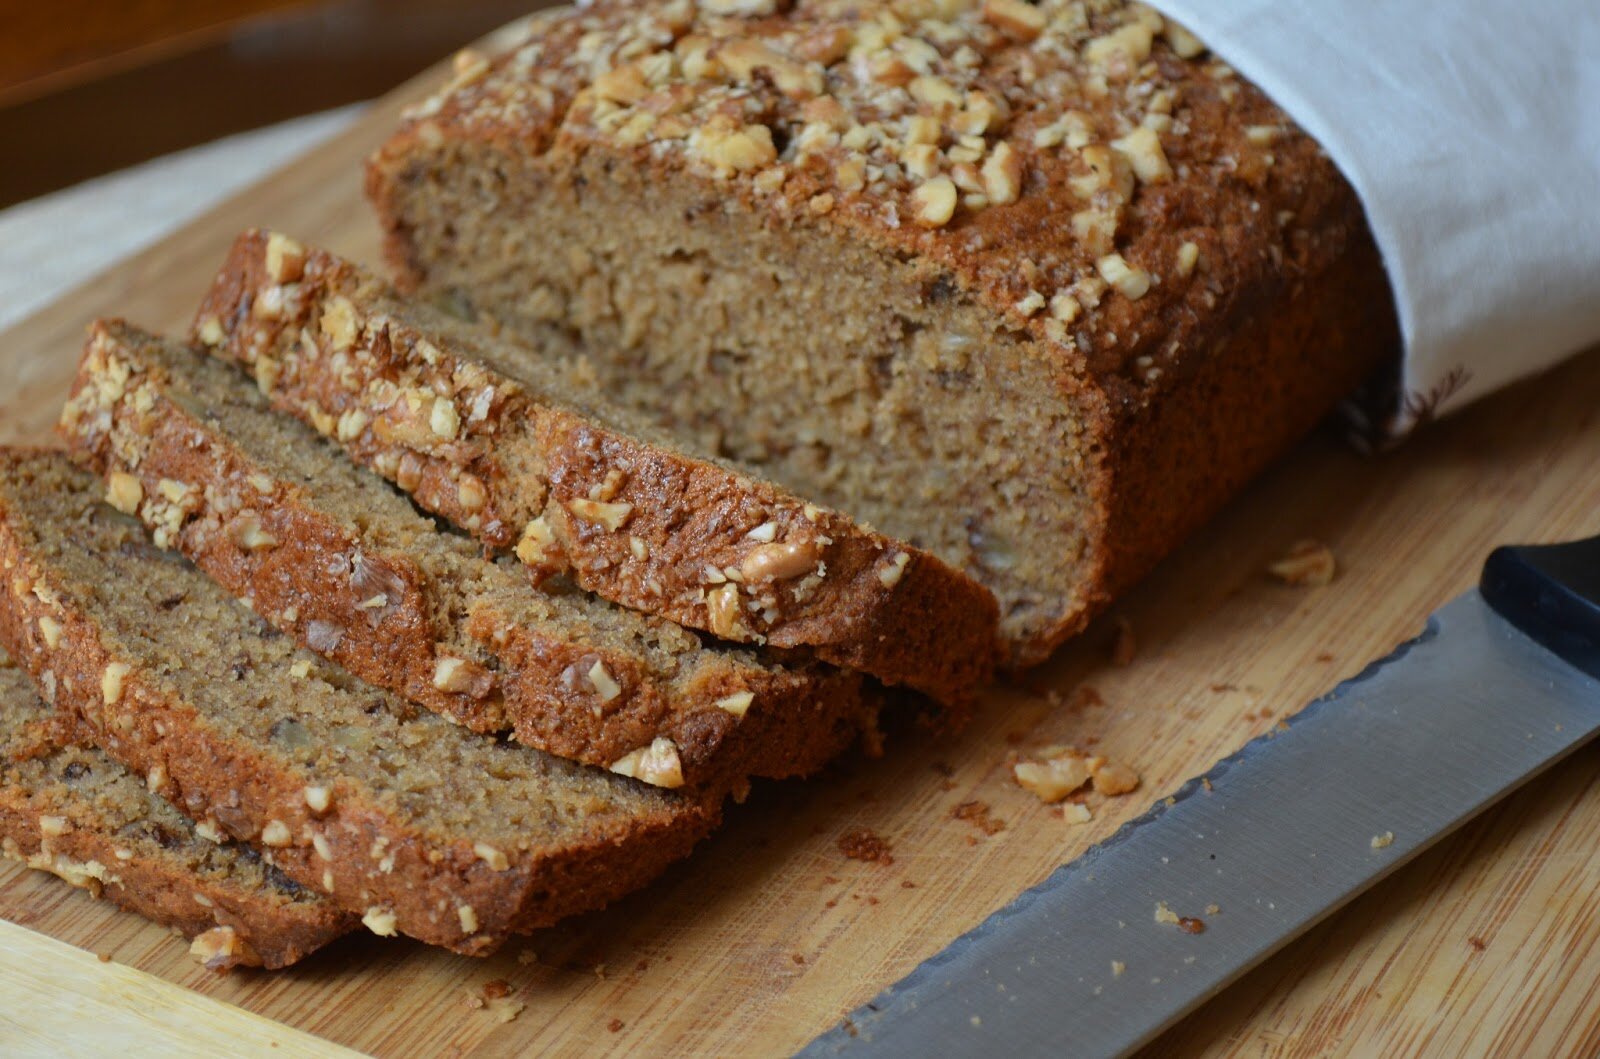
Gluten Free Banana Walnut Bread (dairy free, cane-sugar free)

Ingredients:
Wet
-10 ounces of peeled banana (about 3 largish bananas)
-1/2 cup coconut sugar (3.0 ounces)
-2 room temp eggs (weighing 4.5 ounces with shell)
-3 tablespoons full fat canned room temp. coconut milk
-1/2 cup melted coconut oil
-1 teaspoon vanilla
-1/2 teaspoon liquid stevia
Dry
-80 grams sorogum flour (3/4 cup)
-100 grams brown rice flour (3/4 cup)
-60 grams tapioca starch (1/2 cup)
-1 teaspoon baking power
-1/2 teaspoon baking soda
-1/4 teaspoon xanthan gum (if you can’t use xanthan gum, try 1 teaspoon of psyllium husk instead).
-1 tablespoon cinnamon (or more if you like)
-1/4 teaspoon salt
-1 cup chopped walnuts (small pieces)
How To:
Preheat oven to 350 degrees
1. In a bowl add in the banana and mash it around for a bit with a fork until it’s a wet mixture. Then add in all the other wet ingredients and mix everything with a hand mixer (or stand mixer) for 45 seconds on medium speed.
2. In another bowl, add in the dry ingredients (except the walnuts) and whisk everything together until everything is well incorporated.
3. In small batches, add in the dry ingredients to the wet ingredients and continue mixing with the hand mixer. Mix until everything is well incorporated.
4. Add in the walnuts and stir by hand.
5. Fill the bread pan with batter and top with chopped walnuts and coconut sugar
6. Bake for 50 – 55 minutes on the middle rack (use the knife test to check the middle). I baked mine for 55 minutes.
7. Allow the bread to cool for about 15 minutes, then carefully turn it out and allow it to continue to cool on a rack.
-Store in airtight container at room temp for 3 days.
Notes:
*When baking, I suggest following the weight of the ingredients exactly (even the banana). This might mean investing in a small kitchen scale. I cannot guarantee results if the recipe is not followed as specified and measurements are not accurate…just sayin’.
*For wet ingredients use only a 1 cup glass Pyrex for measuring. *For dry, use metal measuring cups. And when measuring flours, spoon the flours into the measuring cup, then level off with a knife. Never pack in the flour.
*I use a 5 x 9 inch glass bread pan. I also line the bottom with some parchment paper.


Labels: breakfast, cane sugar free, dairy free, dessert, gluten free.
Leave a Reply
Raw Apple Cinnamon Cereal (nut free, grain free, dairy free, cane-sugar free, vegan) For Go Ahead Honey


Labels: breakfast, cane sugar free, dairy free, grain free, raw, snacks.
Leave a Reply
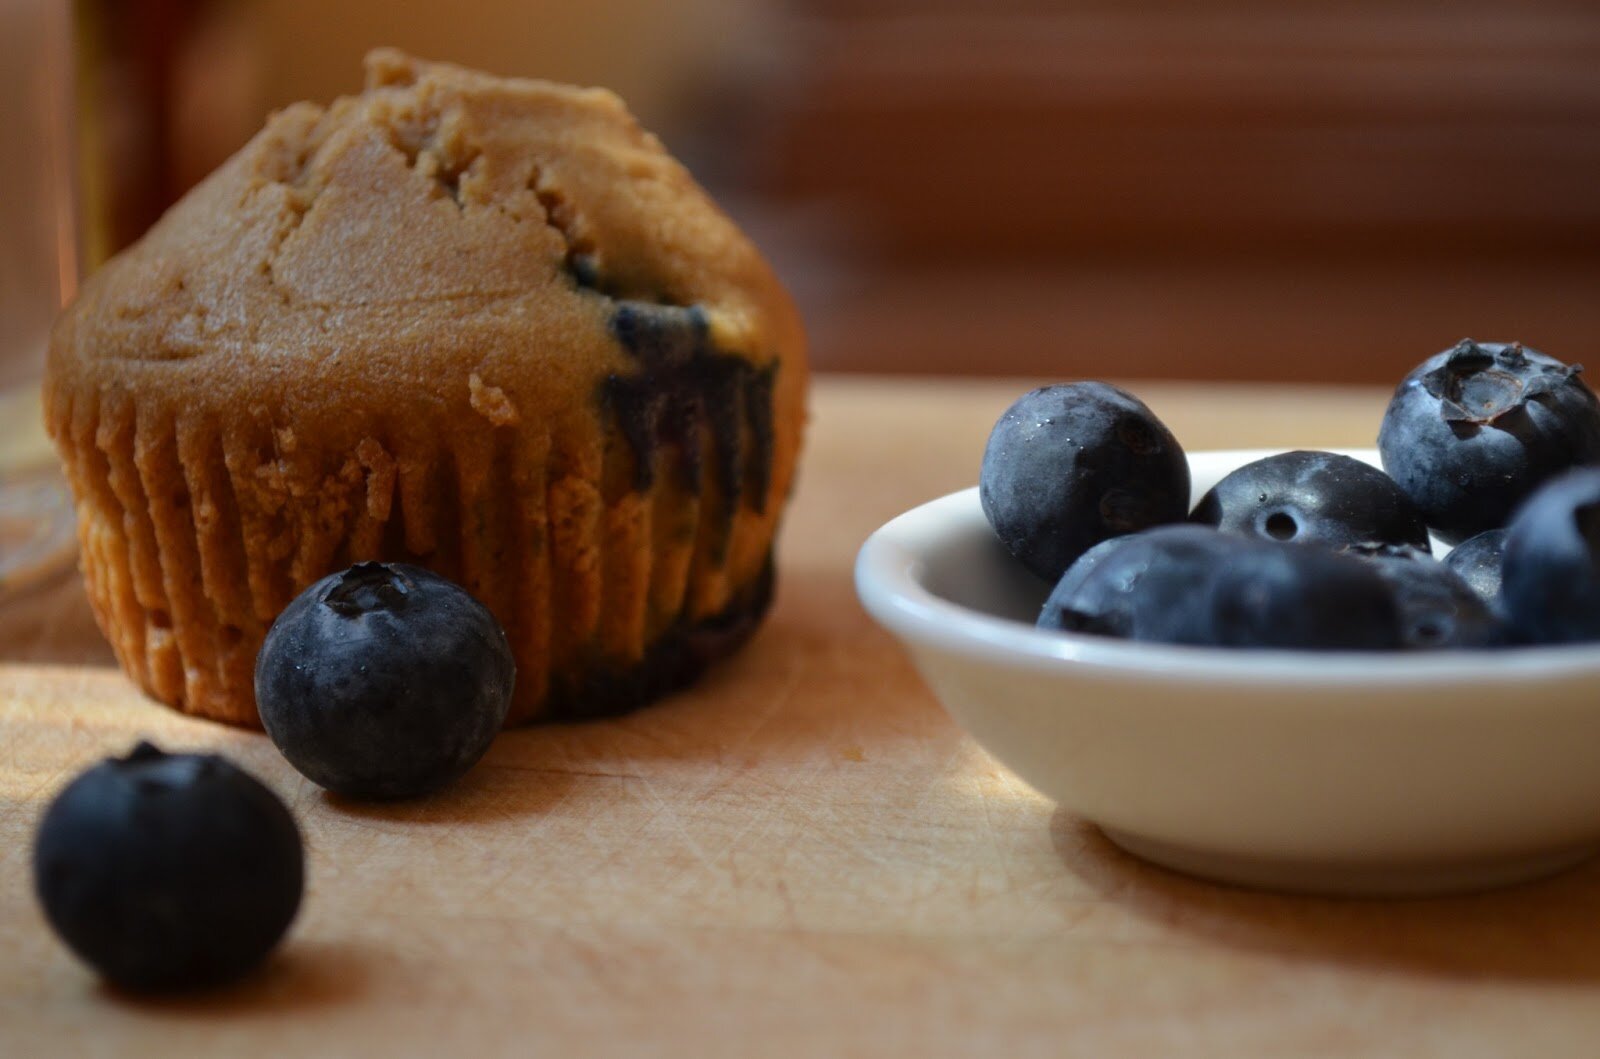
Just Right Coconut Blueberry Muffins (gluten free, dairy free, nut free, cane-sugar free)


Notes:
*Due to the high coconut content in these muffins, they will stay moist at room temperature, but if they get cold, they will become stiff. It’s warm here in my neck of the woods (high 80s to mid-90s).
*When baking, I suggest following the weight of the ingredients exactly. This might mean investing in a small kitchen scale. I cannot guarantee results if the recipe is not followed as specified and measurements are not accurate…just sayin’.
*For wet ingredients use only a 1 cup glass Pyrex for measuring. *For dry, use metal measuring cups. And when measuring flours, spoon the flours into the measuring cup, then level off with a knife. Never pack in the flour.
*The muffins will stay moist for 3 or 4 full days at room temp in a container.
*Oh, and I only use these large baking muffin cups.


Labels: allergy-friendly, breakfast, cane sugar free, dairy free, dessert, gluten free, nut free, snacks.
Leave a Reply


Hi Amber
Your site looks wonderful!!!! SO fresh. I had to visit to see if it was up and running. These muffins are so adorable!
Vicky xoxo
Hi Vicky,
Tanks for your nice comment! Great to hear from you. The site hasn’t officially launched, but I wanted to follow through on my commitment with Shirley for March Muffin Madness. I hope to have the site all up and running this week – still a few kinks to work out.
Hugs,
–Amber
Love your new site, Amber! It looks so clean, spacious, and bright! 🙂 Thanks so much for the pointer post and for sharing these absolutely adorable muffins!
xo,
Shirley
it’s up and running!! yay! I love the look, and agree it looks very clean and fresh! hope you are well my friend, looking fwd to having you back!