Category Archives: nut free

Saturday, March 22, 2014

I love You Cinnamon Apple Muffins

I-Love-You-Cinnamon-Apple-Muffins-Single-The-Tasty-Alternative

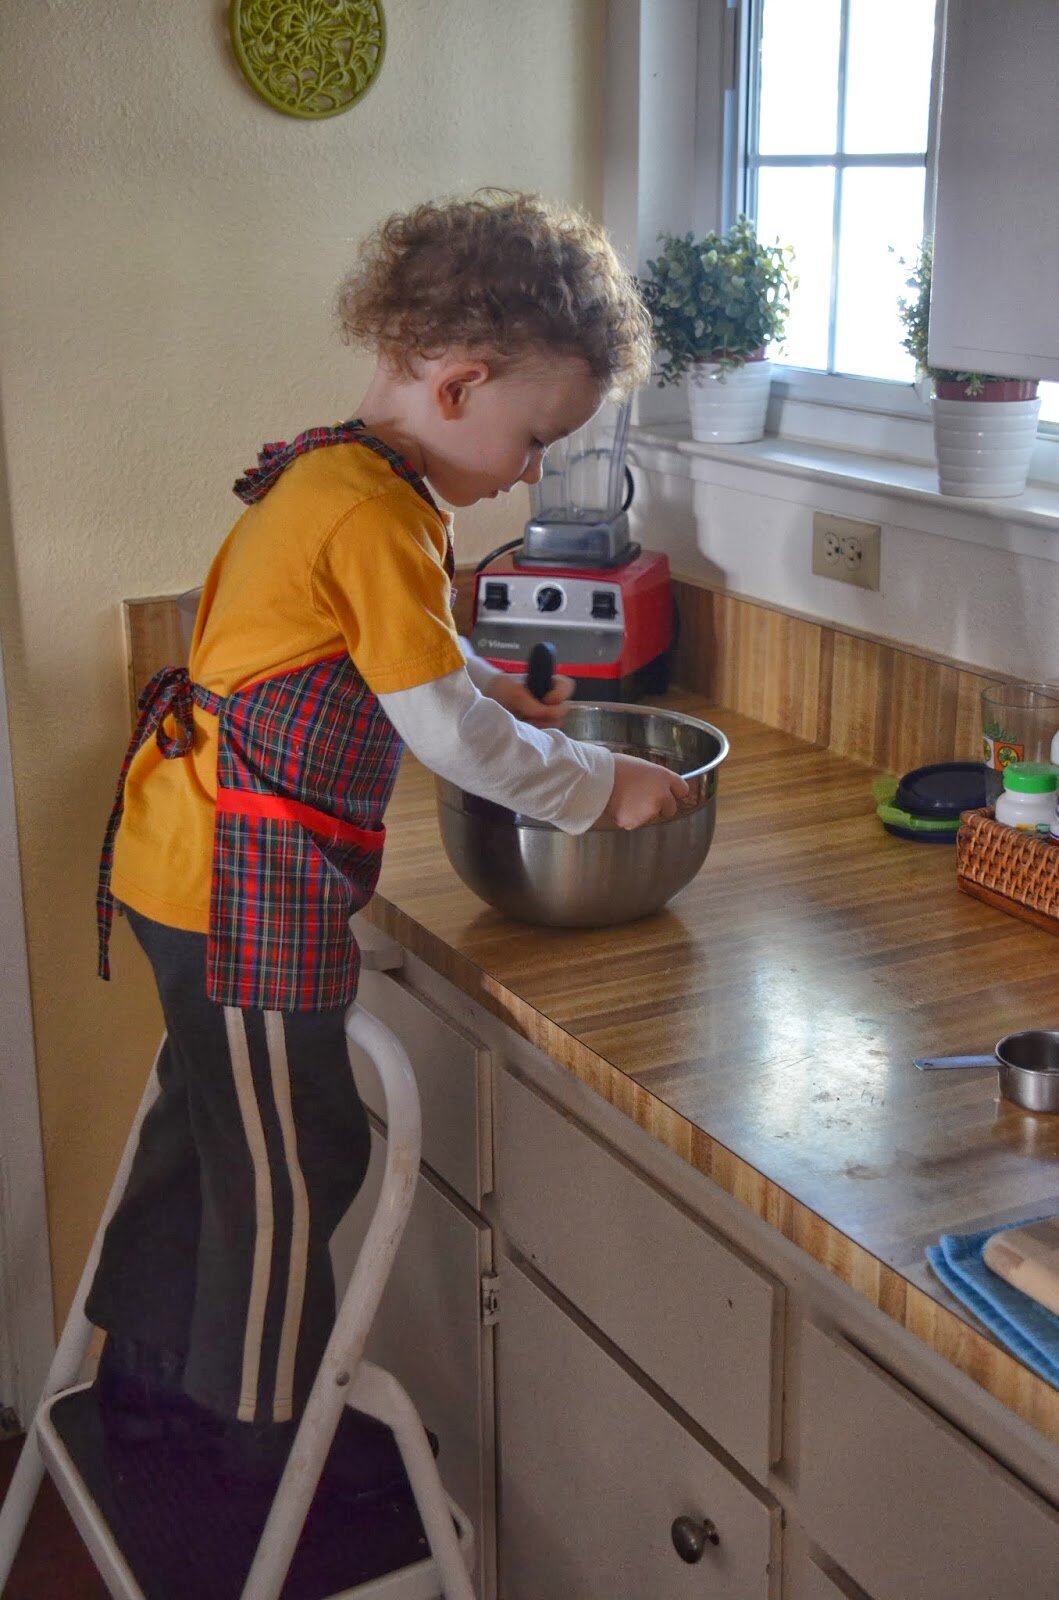
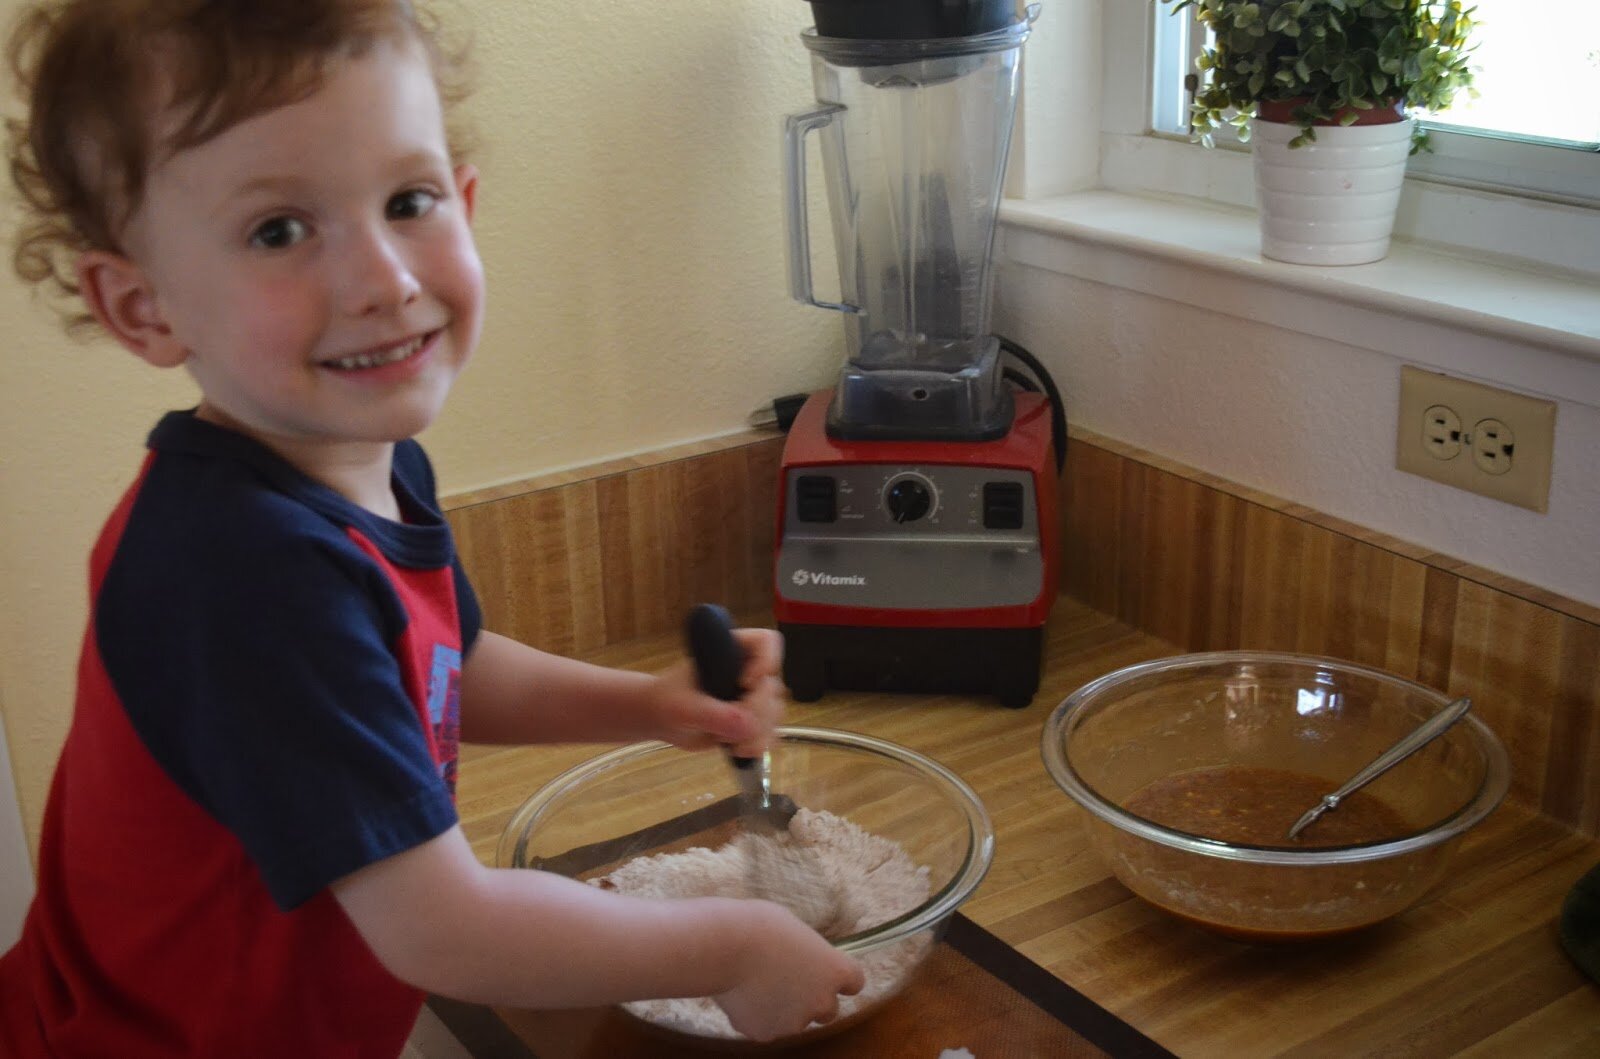
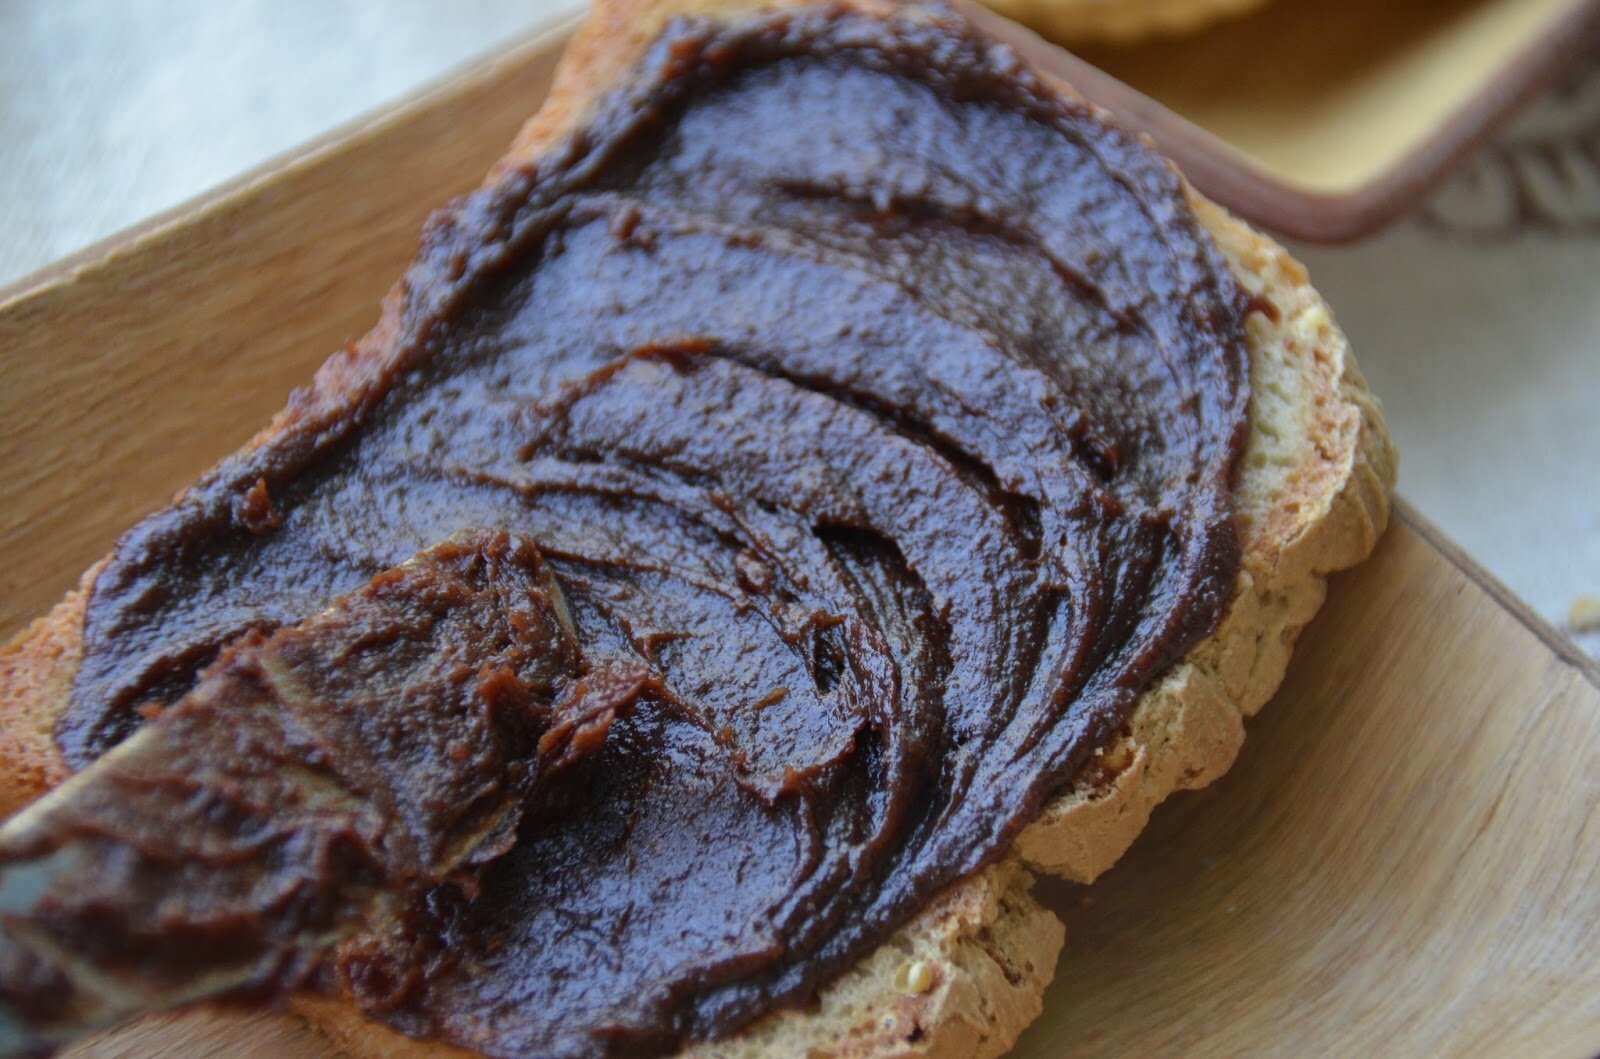
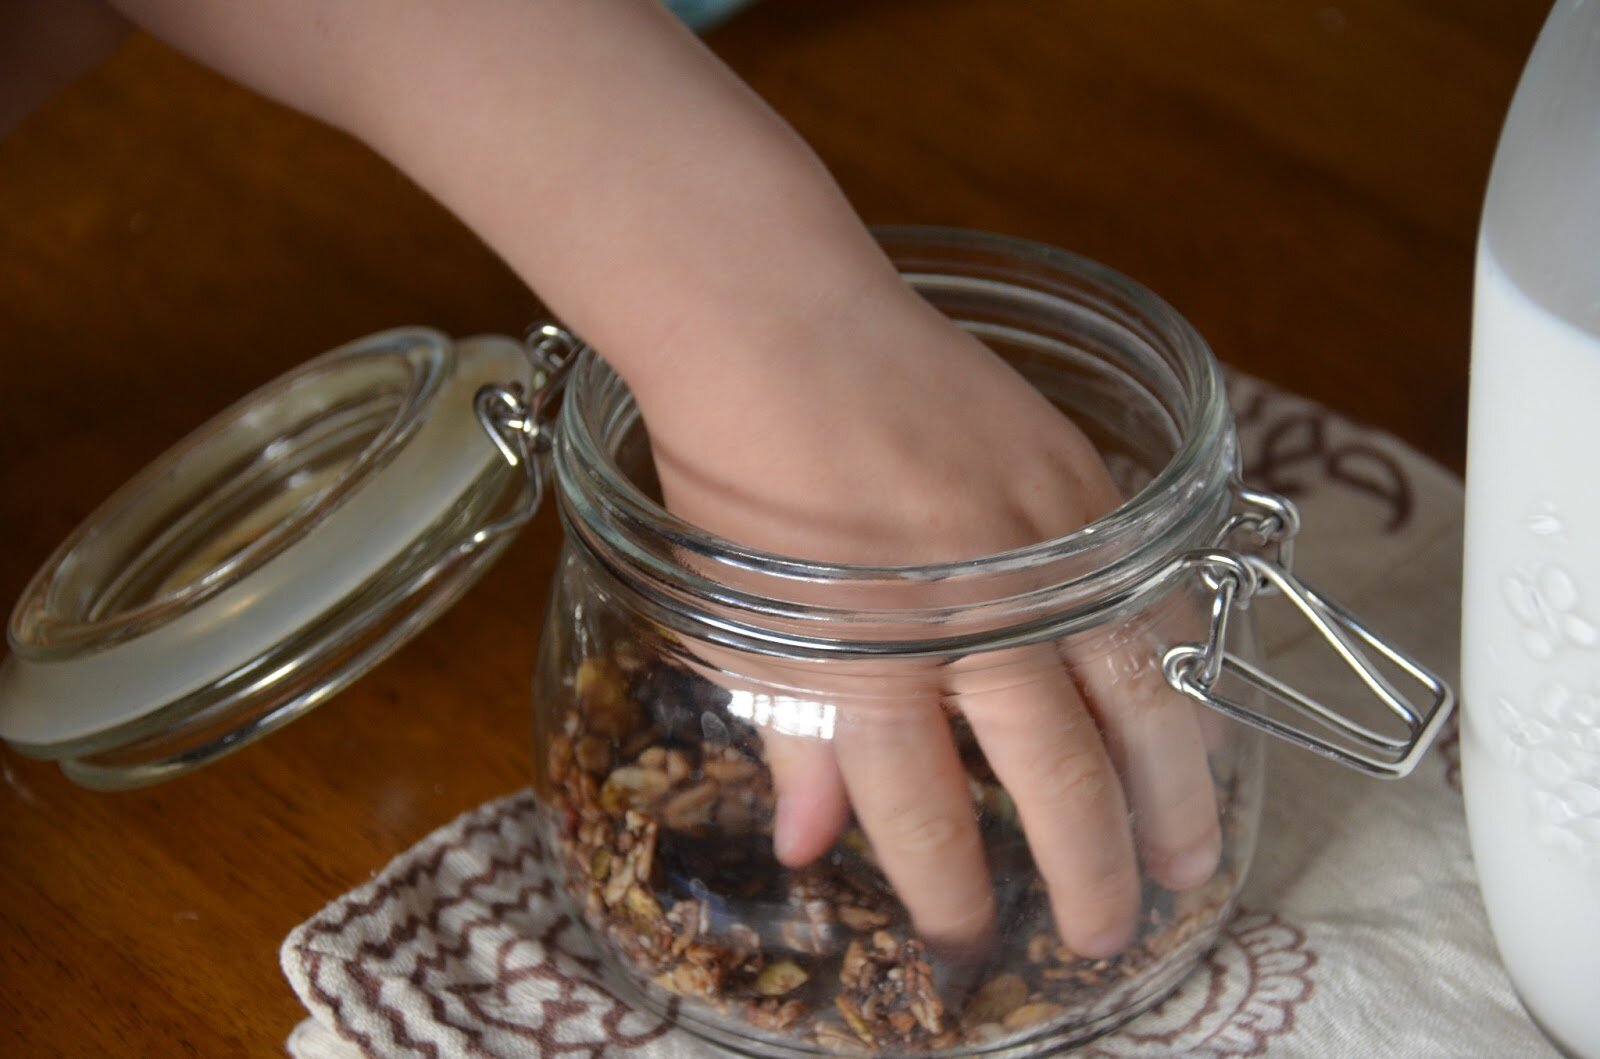
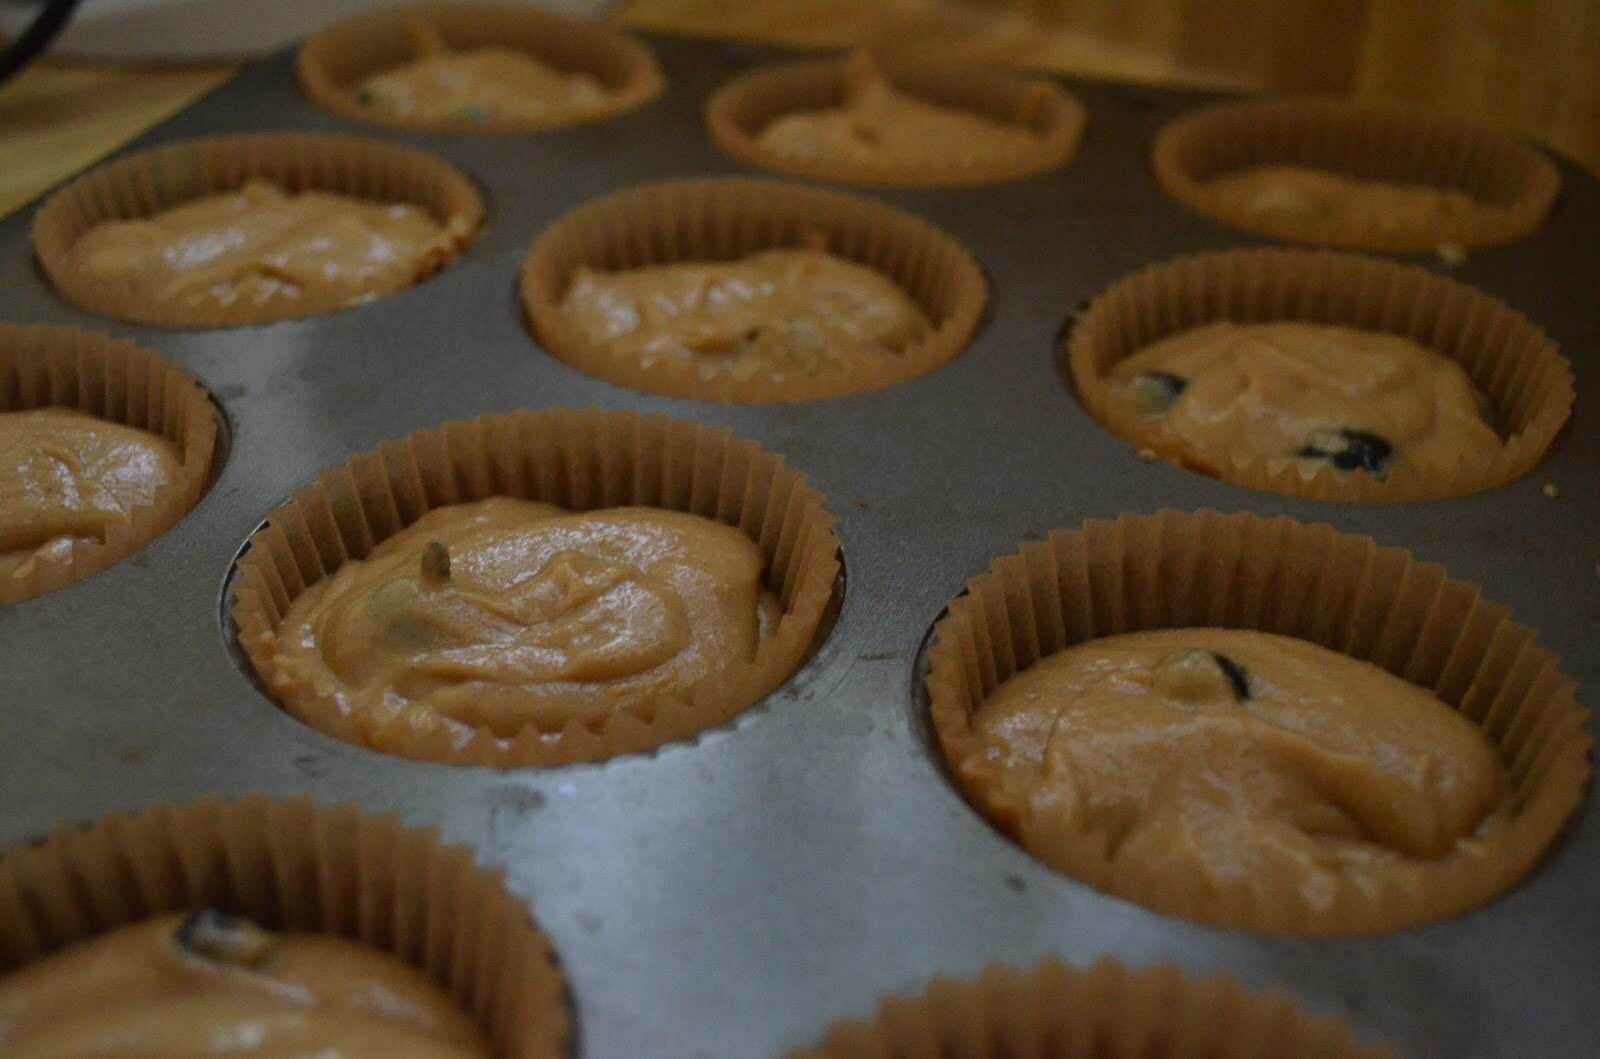
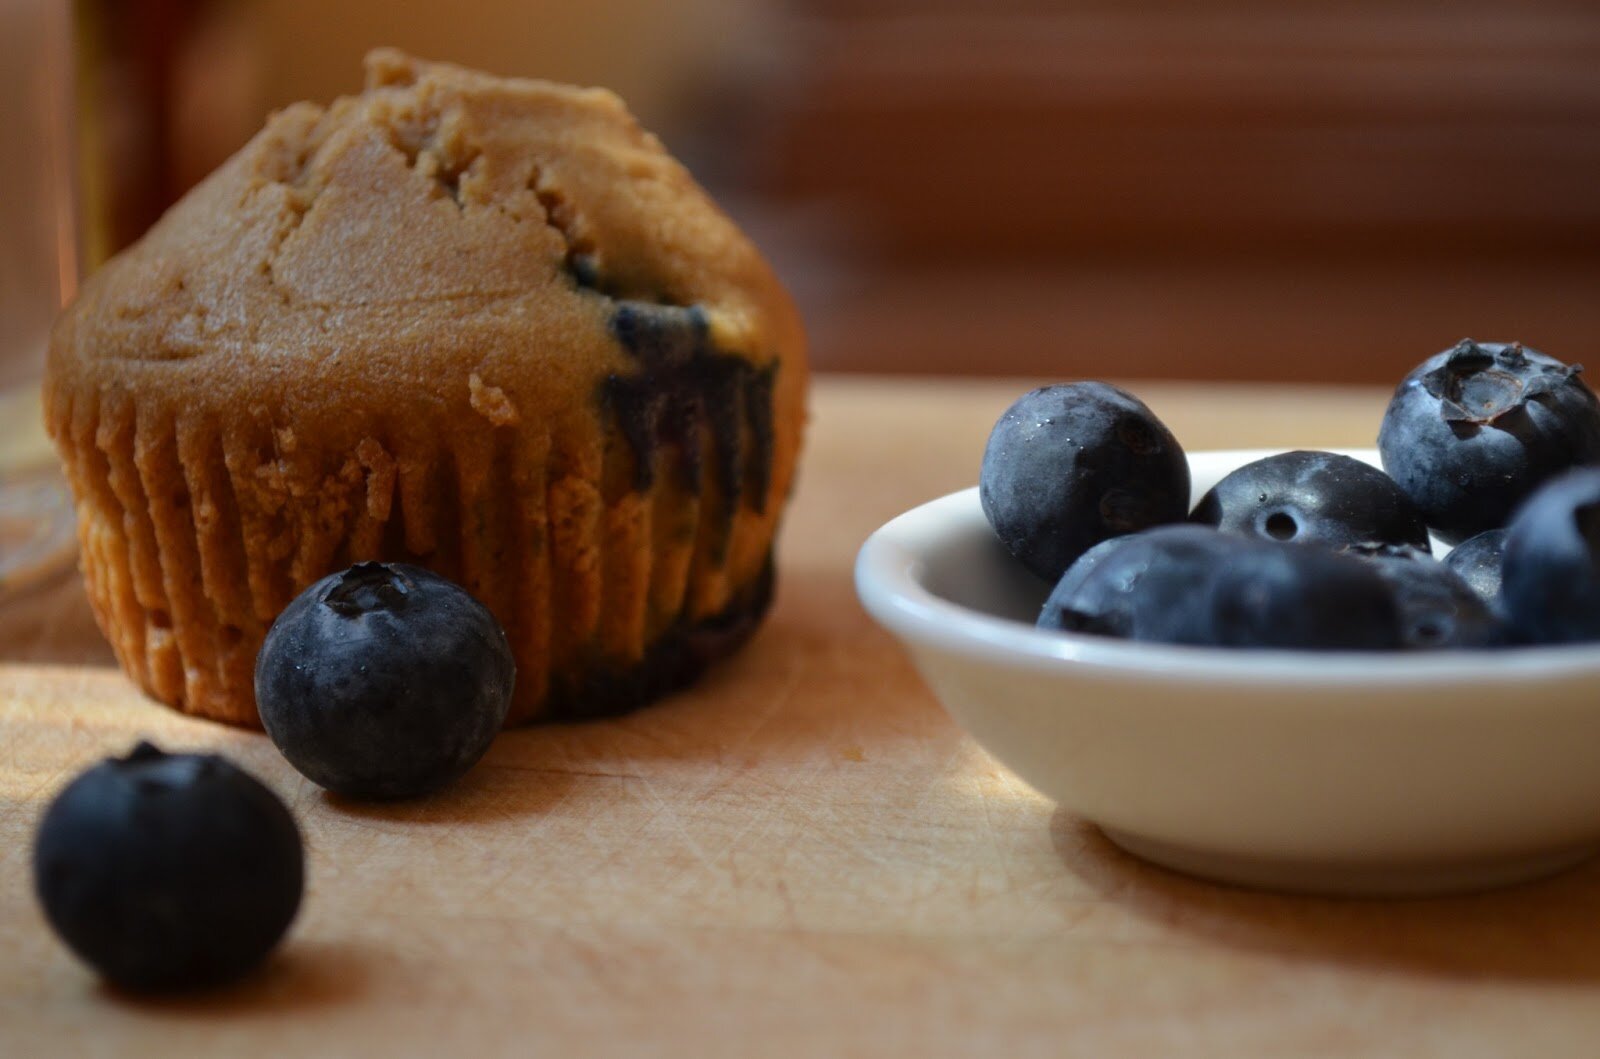
I call these “I Love You Cinnamon Apple Muffins” because I make them especially for my children (Daddy gets a few too of course).  My kids LOVE these muffins—and they love to make them with me (it’s just a big ole’ love-fest).  I’ve included a few pictures of my son, Ethan, helping me one morning before preschool.  These muffins are moist, yet fluffy and have such a nice cinnamon apple flavor.  They make excellent snacks or can be part of a healthy breakfast.  I hope your family enjoys these muffins as much as we do.  Join me over at Gluten Free Easily for my gluten free Cinnamon Apple Muffin Recipe (gluten free, dairy free, cane-sugar free, nut free). I shared these muffins last month on March Muffin Madness over at my friend Shirley’s Blog, Gluten Free Easily.  You can check out the guest post here.  

Continue reading

Posted by Amber at

Labels: breakfast, dessert, muffins, nut free, Uncategorized.

4 Comments

Leave a Reply

Your email address will not be published. Required fields are marked *

Rate this recipe:  

Monday, February 3, 2014

Gluten Free Chocolate Chip Cookies (dairy free, cane-sugar free, nut free)

This chocolate chip cookie is a grand baking success for me!  Woot-woot.  I’ve been trying to capture that traditional chocolate chip cookie flavor in tasty alternative form for years.  Finally, last week, I did it.  If you’re gluten free, or new to gluten free, this is must recipe in your repertoire.  
Enjoy my friends, enjoy!
Posted by Amber at

Labels: allergy-friendly, chocolate, cookies, dessert, nut free, snacks.

8 Comments

Leave a Reply

Your email address will not be published. Required fields are marked *

Thursday, November 28, 2013

Dairy and Cane-Sugar Free Pumpkin Pie (SCD, GAPS, Paleo)

I adore am obsessed with pumpkin pie! I can easily eat it for breakfast, lunch, or dinner.  My recipe uses sugar (from dates and honey), so you can feel good about eating it at any time of the day. I’ve been making this pumpkin pie recipe for a few years now and I think it’s quite delicious.  My family loves it too.  It’s a tasty alternative to traditional pumpkin pie, but trust me, you won’t miss that condensed milk and all that cane-sugar. My favorite squash to use for pumpkin pie is the kabocha squash.  Kabocha is a hearty squash with a thick creamy meat and is VERY sweet (and take a sniff of the raw flesh next time you buy oneit smells JUST like a cucumberI kid you not).  Kabocha creates such a substantial pie filling.  Give it a try if you can – they are found next to the other squash.  Wishing everyone a very happy Thanksgiving – see ya in December.
Dairy and Cane-Sugar Free Pumpkin Pie (SCD, GAPS, Paleo)
 
Author:
Ingredients
  • 1¾ cups fresh baked pumpkin or 1 can of pumpkin puree
  • cream from 1 can of full fat coconut milk
  • ¼ cup honey
  • 2 eggs
  • 7 large soft Medjool dates (optional)
  • 1 teaspoon vanilla extract
  • 2 teaspoons ground cinnamon
  • ¾ teaspoon ground ginger
  • ¼ teaspoon ground nutmeg
  • ¼ teaspoon ground cloves
  • 1 extra egg for crust (this is an optional step)
Instructions
  1. Soak dates in warm water for at least 2 hours before making this recipe.
  2. Preheat oven to 400 degrees
  3. To a blender, add in all the above ingredients (except the extra egg) and blend until well incorporated (about 15 seconds), then pour the mixture into a pie crust.
  4. Beat the extra egg in a small bowl and brush the egg onto the entire exposed crust. I like to cover the crust with this silicone crust shield (it's awesome and my crust never burns).
  5. Place the pie onto a baking sheet (to catch overflow) and bake for 15 minutes. Then turn the oven temperature down to 350 and bake an additional 35 minutes. When the middle poofs up, your pie is ready. The middle will be jiggly, and that's okay. It will thicken as it cools.
  6. Remove pie from baking sheet and allow to cool on a cooling rack.
Notes
-If you don't want to make fresh baked squash, this is a great organic brand and can be found at any store.
-I like to use dates in pumpkin pie because it adds a natural sweetness and helps thicken the mixture. If you don't want to use dates, just add additional sweetener (another 2 or 3 tablespoons).
-Maple syrup or coconut nectar is a nice substitute for the honey.
- I generally bake my pumpkin pie the night before and let it sit out at room temperature. When ready to serve, top with vanilla bean coconut whipped cream.
 .
Vanilla Bean Coconut Whipped Cream Topping
 
Author:
Ingredients
  • Cream from 1 can of full fat coconut milk
  • ½ cup cashews soaked for 4 to 6 hours (for a thicker whipped cream as shown in the picture, use 1 cup of soaked cashews)
  • 3 tablespoons honey
  • 1 teaspoon vanilla, maple syrup,or coconut nectar.
  • 1 vanilla bean cut in half and scraped out
Instructions
  1. In a blender (high speed preferably) add all the above ingredients and blend until smooth.
  2. Transfer to a bowl and refrigerate for 2 to 4 hours.
  3. Mix well before serving.
Notes
To get the coconut cream, place the canned coconut milk in the fridge 3 to 5 days before opening. Open the can and scoop out all the coconut cream. Do not add in the water found at the bottom of the can.
 
 
Pie Crust Options:
1.  Paleo Pie Crust 
2.  Coconut Flour Pie Crust 
3.  Gluten Free Whole Grain Pie Crust 
4.  Gluten Free Vegan Pie Crust (this is the pie crust pictured in this post)   
{affiliate links in post}
This recipe was shared on the following link parties:  Allergy-Free Wednesdays, 
Posted by Amber at

Labels: dessert, fall cuisine, GAPS, nut free, Paleo, SCD, Thanksgiving.

6 Comments

Leave a Reply

Your email address will not be published. Required fields are marked *

Rate this recipe:  

Thursday, October 24, 2013

Pumpkin, Banana, Cranberry Muffins (gluten free, dairy free, cane-sugar free, nut free)

I’ve been thoroughly enjoying all this baking.  My house always smells awesome.  No longer relying on store bought baked goods, we always have a muffin recipe on the ready for breakfast, snack, dessertanytime.  I’ve been learning a lot about gluten free, dairy free, cane-sugar free baking along the way.  I’ve limited myself to just a few gluten free flours to make things easy (brown rice, millet, and sorghum) and using only tapioca for the starch.  I have learned that psylum husk is a good sub for xanthan gum, and that coconut milk and applesauce keep egg-based baked good nice and moist.  There are so many gluten free flours to explore.  This is the fun of it – if think about it, compared to gluten baking, there are so many MORE possibilities with gluten free.  I have one more muffin recipe to share (chocolate of course), then I will start my vegan baking adventure.  Lastly, I will spend some time with grain-free, egg baking, then grain-free vegan baking.  
I hope you enjoy this fall inspired muffin recipe.  
Pumpkin, Banana, Cranberry Muffins


Ingredients:

wet
-2 eggs room temperature 

-1/2 cup pumpkin puree room temperature
-3/4 cup ripe banana
-1/2 cup coconut sugar
-1/2 cup melted coconut oil 
-1/4 cup applesauce 
-3 tablespoons full fat coconut milk 
-1 teaspoon vanilla
-10 drops stevia

dry
-100 grams sorghum flour (3/4 cup + 2 tablespoons) 
-100 grams brown rice flour (3/4 cup) 
-60 grams tapioca flour (1/2 cup)
-1 tablespoon cinnamon
-1 teaspoon ground ginger
-1 teaspoon baking powder
-1/2 teaspoon baking soda
-1/4 teaspoon xanthan gum or 1/2 teaspoon psyllium husk
-1/2 cup dried cranberries

How To:

Preheat oven to 350 degrees 
1. In a medium bowl, mix together all the dry ingredients (except the cranberries).  
2. Next, in a large bowl, add in the eggs, banana, pumpkin, coconut sugar, coconut oil, coconut milk, applesauce, vanilla, and stevia.  Beat on medium with a hand mixer for 30 seconds.  
3.  Add in the dry ingredients.  Mix gently to incorporate then beat on medium with hand mixer for 15 seconds.  Hand mix in the cranberries.
4.  Fill batter to near the top of the muffin cups, add little pumpkin seeds for garnish.    
5.  Bake for 16 minutes.  
6.  Remove muffins from tin and cool on rack.  
Makes 12 muffins

Notes:
*For wet ingredients use a 1 cup glass Pyrex for measuring. 
*For dry, use metal measuring cups.  And when measuring flours, spoon the flours into the measuring cup, then level off with a knife.  Never pack in the flour. 
*The muffins will stay moist for 3 or 4 full days at room temp in a container.  
*I use these large baking muffin cups.

 Ethan just LOVES to help mommy bake!! 
*
And lastly on my list here to share before I move on to vegan baking are these chocolate cupcakes
Here is a recap of my gluten free/dairy free/cane-sugar free recipes: 

___________________________________
Shared on: Whole Food Fridays, Lunchbox Love, My Meatless Mondays, Fat Tuesdays, Slightly Indulgent Tuesdays 
Posted by Amber at

Labels: breakfast, fall cuisine, muffins, nut free, snacks.

5 Comments

Leave a Reply

Your email address will not be published. Required fields are marked *

Saturday, September 14, 2013

Melt In Your Mouth Carob Sunbutter Fudge – and pictures of gorgeous sunflower fields

This carob fudge came about when I was experimenting with my nut-free nutella.  One batch became very fudge-like after a few hours in the fridge.  I shared a little teaser about this recipe on Facebook last week.  I don’t know about you, but I don’t do a lot of chocolate for my kiddos.  It’s highly stimulating.  For us, chocolate is really a once in a while treat.  But carobcarob we eat often.  And I like that I can give a “chocolate” treat after dinner for dessert.  This recipe really does melt in your mouth and actually tastes (I kid you not) like chocolate.  Give it a try and let me know what you think.

  Melt In Your Mouth Carob Sunbutter Fudge 

Ingredients
-1/2 cup room temp homemade sunflower seed butter
-1/4 melted cup coconut oil
-1 teaspoon vanilla extract
-2 tablespoons honey (vegans use grade B maple syrup)
-5 drops stevia
-3 tablespoons raw carob poweder  
-Pinch of salt 

How To:
1.  To a food processor add the sunflower seed butter, coconut oil, vanilla extract, honey, stevia and blend until smooth.  Add in the carob and blend until well incorporated.  
2.  Set some wax paper into an 8×8 Pytex dish and spoon the mixture in.  Don’t spread it around to all sides too thin, just give it little smooth over.  Refrigerate for at least 2 hours.
3.  Cut into pieces and enjoy.  Store in fridge.  

I freaking LOVE sunflowers.  Love, love, LOVE them.  I love them so much, I had one tattooed on my back!  Sunflowers are my happy place.  They are my go-to calming visual.  I wanted to share these gorgeous pictures with you.  I took them back in June (on Father’s Day actually) after a trip from those there hills you see in the background (went for a hike with the kiddos).  We are surrounded by sunflower fields here in Davis.  This field pictured below is like two miles from my house.  If you’re not familiar with whereabouts we are located, we are roughly 15 minutes west of Sacramento (the capital of California), and about an hour away from San Francisco.  Even though we are only 15 minutes from Sacramento, we are quite isolated here in Davis and surrounded by agriculture.  It’s sorta nice.  Like best of both worlds.  When I want to meet up with my girlfriends for some city action, they are just a few minutes away.  Anyway, very rural here in our smallish town.  It may be rural, but proudly liberal/progressive (thankfully), and houses one of the finest Universities in the State (UC Davis).  And might I add, we are surrounded by some of the best organic farms around.  Damn, I am such a Northern California snob,  My husband and I worked so, SO very hard to land here in this wonderful town, so yes, I am proud.  And I could not be happier with all these comforting, warm and lovely sunflower fields embracing me every summer.  
Swoon.  
Shared on:  Allergy Free Wednesdays, Wellness Weekend, Allergy Free Alaska, Healthy Vegan Fridays, 
Posted by Amber at

Labels: allergy-friendly, dessert, nut free, snacks.

14 Comments

Leave a Reply

Your email address will not be published. Required fields are marked *

Saturday, August 24, 2013

Homemade NUT-Free Nutella

 
The Nutella you’ll find in the store is made up of 55% refined sugar.  Yep.  There’s dairy in there too, along with soy and yes a few hazelnuts   I wouldn’t call this a health food…or even a healthy choice for breakfast (or any time of the day).  Okay, let’s put this into perspective…eating Nutella is like eating a milk chocolate bar for, what some would agree, is the most important meal of the day.  Now if that’s your thing, than you go for it, but you know how I feel about cane-sugar, so I say boo to Nutella.  They were actually sued for mislabeling as a “health food.”  Ha ha, I think they considered it healthy because it had a few hazelnuts in there.  I love indulgences as much as the next gal, but I try REALLY hard to make good choices when it comes to food, especially when it comes to my kiddos.  If something can be made at home, I give it a go.  Now Nutella, what is the appeal here really?  It’s the CHOCOLATE! It spreads.  It’s sweet.  It’s different…okay, so it’s clearly appealing.  Agreed.  I mean, it’s chocolate in a jar!  So I’ve created a chocolaty, sweet, spreadable, and nut free version that is quite a tasty alternative.  I actually use carob when I make this, as it’s better for our inflammatory issues.  Whether you use carob or chocolate, it’s fun to mix it up for snack time.  Give it a go and let me know what you think.  
Homemade NUT-Free Nutella 
Ingredients:
-6 large dates
-2 tablespoons melted coconut oil
-1/3 cup homemade sunflower seed butter or this brand is good too.
-3 tablespoons raw cacao powder  or carob powder.
-2 tablespoons honey (vegans use grade B maple syrup, coconut nectar, or yacon syrup)
-2 teaspoons vanilla extract 
-Tiny pinch of salt
How To:
1.  Seed the dates and soak them in water for 2 to 3 hours.
2.  Drain the dates (save the date water for smoothies) and add the dates to a food processor with all the other above ingredients.
3.  Blend until well incorporated.
4.  Store spread in fridge.  Allow it to sit at room temperature for a bit so it softens up.  Makes it easier to spread.
Notes:
*This recipe is also fabulous with carob powder (instead of the cacao)
*Can’t do dates?  Try the same amount of figs or 1 cup of raisins – soak as you would the dates.
Here is a date free version I tried that’s not as creamy, but still delicious and spreadable:
-1/4 cup coconut oil, liquid state
-1/2 cup homemade sunflower seed butter or cashew butter
-3 tablespoons raw cacao
-2 tablespoons honey (vegans use grade B maple syrup, coconut nectar, or yacon syrup)
-2 teaspoons vanilla extract
-Tiny pinch of salt
(Blend everything in a food processor)
Here is a picture of this date-free version at room temp.
It gets really firm in the fridge – sort of tastes like fudge!
*
Shared on: My Meatless Monday, Fat Tuesdays, Slightly Indulgent Tuesdays. Allergy-Free Wednesdays, Wellness Weekend, 
Posted by Amber at

Labels: allergy-friendly, dessert, dips and spreads, nut free, Paleo, snacks.

21 Comments

Leave a Reply

Your email address will not be published. Required fields are marked *

Friday, July 19, 2013

Raw Strawberry Chocolate Cereal (nut free, grain free, vegan)

Breakfast can be sort of difficult when on a grain free diet (and/or a nut free diet).  Ever try purchasing a cereal that’s grain free, nut free, cane-sugar free, and vegan.  Ha ha.  Good luck.  If one exists is’t probably off-the-charts expensive (or comes in a 4 ounce bag).  Over the years I’ve adopted the motto: If you can’t find it, make it, which has served me well.  I said good-bye to store bought cereals a while ago for several reasons.  But now I have only two reasons: it’s cheaper and healthier to make at home.  That’s really the bottom line.  I hope you give this cereal a try.  You can add just about anything to the base of seed mixture, so get creative.  I also must mention that my kids LOVE this recipe, as well as the apple cinnamon recipe, for breakfast or snack.  They literally squeal when they get up and see this breakfast waiting for them at the table.  Now that’s a great way to start the day! 
Raw Strawberry Chocolate Cereal 
nut free, grain free, dairy free, cane-sugar free, vegan
Ingredients:
-2 cups organic raw sunflower seeds
-1 cup organic raw pumpkin seeds
-1 cup shredded coconut 
-1/4 cup raw hemp seeds
-3/4 cup coconut sugar
-2 1/2 cups fresh strawberries (small chop)
-1/4 cup + 2 tablespoons raw cacao powder 
-3 tablespoons chia seeds 
-1 teaspoon liquid stevia 
-1 teaspoon ground chia 
-1 teaspoon psyllium husk
-1/4 teaspoon salt 

How To:
1.  In a large bowl add the sunflower seeds and pumpkin seeds and cover with filtered water (about 2 inches over) and soak for at least 8 hours.  I like to soak mine as long as I can, so I gave mine about 15 hours. 
2.  After they have soaked, drain and rinse (do not pat dry or try to dry the seeds, you need the moisture).
3.   To a large bowl, add the wet seed mixture and all the other ingredients and mix well with your hands.  This is the really best way to incorporate all the ingredients. Here is the dehydrator  I use. 4.  I spread the mixture onto these screens (which come with the dehydrator). I do not use these fruit roll sheets. 
Make sure the seed mixture is in a nice thin layer so it dehydrates evenly and thoroughly.  
5.  I set my dehydrator between 110 – 115 degrees, put in the laundry room and let it rock.  After about 18 hours I check for the crisp level.  I dehydrate longer until that perfectly crisp texture is achieved.  
6.  The final mixture will be very stiff and pop out in a sheet.  Break into pieces and store in an air tight container.  This will keep for weeks.  But it never lasts that long.  
Here is what the cereal looks like when finished.  
It’s very crispy and brittle.  
This batch makes a nice amount.   
I store in glass containers in the cupboard.  
*
Interested in another raw cereal?
See HERE for a Raw Apple Cinnamon version

And be sure to enjoy your homemade cereal with homemade nut or seed milk:

____________________________________________
Shared on: Fat Tuesday, Slightly Indulgent Tuesdays, Raw Foods Thursday, Whole Food Fridays, Wellness Weekend, Allergy-Free Wednesdays,
Posted by Amber at

Labels: breakfast, nut free, raw, snacks, vegan.

17 Comments

Leave a Reply

Your email address will not be published. Required fields are marked *

Saturday, May 18, 2013

Just Right Coconut Blueberry Muffins (gluten free, dairy free, nut free, cane-sugar free)

You might remember last month I shared my kitchen epiphany regarding baking.  Well, I’ve been having a grand ole’ time here in the kitchen BAKING and loving it, yes, Amber the “I am soooo not a baker” loves to bake.  Why the change of heart?  Well, things are working out.  Things are happening.  Things are not tasting like dirt and cardboard.  Things are delicious.  

YEAH! 

I’m starting off here with basic gluten-free baking (using eggs)vegan gluten-free baking will be my next conquest.  Last month I shared my banana chocolate chip muffins (that I’ve also made into a banana walnut breadsharing soon).  I have to tell you, a couple of my friends have made my banana chocolate chips muffins and like them very much.  My friend Jen tells me she makes a double batch every week. How great is that!  I love it when my recipes are enjoyed by others.  So nice.  

Okay, so these muffins (that really taste like cupcakes) were my latest baking adventure.  I played around with the recipe about four times before I found the PERFECT moist factor.  Last night’s batch was the winning batch.  Yeah.  When I took that first bite, I thought, “ahhh, just right.”  These muffins are so moist, I just can’t get enough.  They are moist, yet light and fluffy.  The sweetness is right-on for me.  BUT, you know I’m not a huge sweet tooth, so make them once yourself and adjust the sweetness as needed the next time.  I think they’re fantastic.  I’m super proud of this recipe.  I hope you try it soon, and perhaps enjoy with a glass of non-dairy milk, such as: almond, hemp, walnut, or macadamia.  
Cheers.  
Just Right Coconut Blueberry Muffins 
(gluten free, dairy free, nut free, cane-sugar free)

Ingredients:
Wet
-2 eggs room temperature (weighing 4.5 ounces in the shell)
-1/2 cup coconut sugar
-1 cup canned full-fat coconut milk (room temperature)
-1/2 cup melted coconut oil
-1 teaspoon vanilla extract
-1/2 teaspoon vanilla or plain stevia
-3/4 cup fresh blueberries 

Dry
-100 grams sorghum flour (3/4 cup + 2 level tablespoons)
-100 grams brown rice flour (3/4 cup)
-60 grams tapioca starch/flour (1/2 cup)
-1 teaspoon baking powder 
-1/2 teaspoon baking soda
-1/4 teaspoon xanthan gum 
-1/2 teaspoon salt 

How To:
Preheat oven to 350 degrees 
1. In a medium bowl, mix together all your dry ingredients.  
2. Next, in a large bowl, add in the eggs, coconut sugar, coconut milk, vanilla, and stevia (please make sure everything is room temperature).  Beat on medium with a hand mixer for 30 seconds.  Drizzle in your coconut oil with the beaters running on low.  Beat on medium for 15 seconds.  
3.  Add in the dry ingredients.  Mix gently until incorporated   Then beat with mixers on medium for 15 seconds.  
4.  Fold in the blueberries.  
5.  Fill batter to the top of the muffin cups.  
6.  Bake for 18 minutes.  
7.  Remove muffin from tin and cool on rack.  
Makes 12 muffins

Notes:
*Due to the high coconut content in these muffins, they will stay moist at room temperature, but if they get cold, they will become stiff.  It’s warm here in my neck of the woods (high 80s to mid-90s).
*When baking, I suggest following the weight of the ingredients exactly. This might mean investing in a small kitchen scale.  I cannot guarantee results if the recipe is not followed as specified and measurements are not accuratejust sayin’.
*For wet ingredients use only a 1 cup glass Pyrex for measuring.  *For dry, use metal measuring cups.  And when measuring flours, spoon the flours into the measuring cup, then level off with a knife.  Never pack in the flour. 
*The muffins will stay moist for 3 or 4 full days at room temp in a container.  
*Oh, and I only use these large baking muffin cups.

Shared on: Melt in your Mouth Mondays, Motivate Me Mondays, My Meatless Monday, On The Menu Monday, Mealtime Monday, Fat Tuesdays, Slightly Indulgent Tuesdays, Allergy-Friendly Lunchbox Love
Posted by Amber at

Labels: allergy-friendly, breakfast, cane sugar free, dairy free, dessert, gluten free, nut free, snacks.

10 Comments

Leave a Reply

Your email address will not be published. Required fields are marked *

Wednesday, April 10, 2013

3-Ingredient Grain Free Banana Pancakes

DSC_0018
This week on Facebook I shared three videos (1, 2, & 3) featuring Elaine Gottchall speaking about gut health and the Specific Carbohydrate Diet (SCD).  Elaine is the author of the popular and ground breaking book, Breaking the Vicious Cycle.  Her book delineates the SCD and her research and science behind the nutrition, the mind/gut connection, and why it’s important to avoid certain foods when healing a compromised digestion.  Here is more about this inspiring lady.  I highly recommend this book to anyone looking into healing their gut and immune system.  Personally, I’ve been on a healing journey since diagnosed with Crohn’s disease nine years ago, and just discovered this diet last year, crazy!  

I learn more and more about my body each year.  For example, it has become quite apparent that I am unable to digest nuts (even nuts that have been soaked and dehydrated).  As you know, nut flour is a staple in the grain free diet.  However, I eat nut flours very sparingly.  Since I don’t use a lot of almond flour, I rely on coconut flour, which is one of the three ingredients in this recipe.  These banana pancakes are 100% inspired by Elaine and her recipe suggestion in this video.  
I just HAD to give it a try.  

 
DSC_0019


3-Ingredient Grain Free Banana Pancakes
 
The recipe is Paleo, SCD, and GAPS friendly.
Author:
Ingredients
  • 8 ounces ripe peeled banana (a little more than 2 medium - please weigh the banana for accuracy)
  • 2 large whole eggs + 1 egg white (my eggs weigh around 2.0 - 2.2 ounces each)
  • 3 tablespoons + 1 teaspoon coconut flour*
  • 2 to 3 teaspoons coconut oil (for cooking/frying)
Instructions
  1. Smash the bananas in a bowl with a fork until the mixture is wet and smooth.
  2. Add in the two whole eggs and the one egg white and whip with a fork until well incorporated.
  3. Add in the coconut flour and mix thoroughly. Allow to rest for 3 to 5 minutes.
  4. While the batter is resting, heat the coconut oil in a non-stick pan or cast iron skillet.
  5. Mix the batter again and add to the skillet in small scoops (I like doing two tablespoons at a time). Remember to cook on a low heat so the inside cooks through without burning the outside. Cook on each side for about 3 minutes. Cooking in oil like this takes a little skill. It's new to me, so it took me a few tries to get the heat right and to know when to flip. The less batter you use obviously, the easier they are to manage.
  6. Transfer to a plate and drizzle with honey!
Notes
*When measuring coconut flour: (1) scoop (2) level off.

Smaller scoops are easier to manage (about 2 heaping tablespoons of batter each)

Untitled4collage

DSC_0010

DSC_0021
A drizzle of honey tops these puppies off perfectly
DSC_0017
Shared on: Gluten Free Wednesdays, Real Food Wednesdays, Whole Foods Wednesdays, Whole Food Fridays, Fat Tuesday, Slightly Indulgent Tuesdays, 
Posted by Amber at

Labels: breakfast, GAPS, grain free, nut free, Paleo, SCD, snacks.

26 Comments

Leave a Reply

Your email address will not be published. Required fields are marked *

Rate this recipe:  

Monday, April 30, 2012

Raw-licious Lemon Cookies (SCD Friendly)

After I made my raw carrot cake cookies (inspired by these), one of my readers inquired about the lemon cookies.  I’m not sure if you’re familiar with these raw cookies, but you can check them out here.  They popped up in my Coop a few months ago.  I tried the carrot cake cookies first and was shocked by their deliciousness,  but the price tag is rather discouraging ($6 per bag – and it’s a tiny bag folks).  I was successful in making the carrot cookies at home.  Naturally, the lemon cookies have been on my mind.  So a few weeks ago I made a batch and they were outrageously good, the perfect burst of lemon with all the benefits of a raw, live food.  These differ in one respect from the store bought variety, they aren’t a crunchy cookie.  They are soft, but equally wonderful.  I like them both ways, and I have to tell you, the flavor is spot on.  So if you’ve tried these, and love them, try making them at home (this batch yields 60-70 cookies depending on how big or small you make them)!  And you might be able to get that crunch if you dehydrate longer.  I made both cookies and balls with this batch.  And by the way, my kidsLOVE these.  What a super healthy snack.  I’m making these next!
Ingredients 

-14 dates, pitted and soaked in filtered water until soft (the soaking time will depend on how soft or hard your dates are to begin with.  I usually soak mine for 6 hours or until super soft)
-4.5 ounces unsweetened shredded coconut (1 cup)
-1 cup sesame seeds (soaked for 10 hours)
-1/2 teaspoon lemon flavor (or to taste, start with 1/4 tsp)
-1 teaspoon lemon zest

How To
1.  In food processor fitted with the s-blade, add dates and blend into a paste. Add in lemon flavor, blend.   
2.  In another bowl, add coconut, well drained sesame seeds, and lemon zest.  Mix well. 
3.  Add date mixture to coconut, sesame seeds, and lemon zest and with clean hands, mix well. 
4.  Form into little cookies or balls.
5.  Place in your dehydrator (on a mesh fitting) and dehydrate at 105 degrees for 24 hours (or more).  Crank it up to 135 degrees for the last hour. I know this sounds like a long time, but this low temperature really preserves all the beneficial nutrients.  I have no idea how these would work in the oven, but please let me know if you try.  

Notes:

*I put my dehydrator in the laundry room and just forget about it.  
*If making the balls, dehydrate 105 degrees for 12-15 hours.  They will be soft and chewy.  


Shared on: Just Another Meatless Monday, Melt in your Mouth Mondays, Monday Mania, Ruth’s Real Food 101 (Mondays), Slightly Indulgent Tuesdays, Traditional Tuesdays, Fat Tuesdays, Kids in the Kitchen, Real Food Wednesdays, Allergy-Free Wednesdays, Gluten Free Wednesdays, Whole Food Wednesdays, Full Plate Thursday, Pennywise Platter, Simple Lives Thursday, It’s a Keeper Thursday, Wellness Weekend, Raw Foods Thursday, Fresh Bites Friday, Freaky Friday, Fight Back Friday, Friday Food, Lunch Box Love Fridays,  Feed Your Soul Friday, Allergy Friendly Friday, Superfood Sunday 

Posted by Amber at

Labels: cane sugar free, cookies, dairy free, dessert, gluten free, grain free, nut free, raw, SCD, vegan, vegetarian.

38 Comments

Leave a Reply

Your email address will not be published. Required fields are marked *