Monday, October 31, 2011

Lemon Walnut Stuffed Avocados (SCD Friendly)

I simply adore avocados.  So today I decided to not smoosh my beautiful green healthy friend and serve her whole in all her glory.  
These would make such cute appetizers.  You could obviously add anything in there, I chose some seasonably appropriate walnuts with a little added kick.  

Ingredients
2 avocados, firm but soft
For the filling: 
-1/2 cup chopped walnuts (soak and dehydrate for better digestion)
-1/4 cup apple, peeled and small chop
-1/4 cup red onion, small chop
-1/4 cup fresh squeezed lemon juice
-1/4 cup walnut oil
-1/2 teaspoon dried basil
-1/4 teaspoon garlic granules
-1/4 teaspoon sea salt (or to taste)

How To
1.  In a small bowl, mix lemon, oil, basil, garlic, and salt
2.  Add walnuts, onions, and apple
3.  Let flavors mingle for a few hours before serving (the longer the better)
4.  Add to avocado 
5.  Drizzle a little oil on the top before serving

In other news
It has been simply gorgeous and warm here in Northern California – around 80 degrees yesterday.  My winter garden is loving all this sun and the little sprouts are singing.  We are all, however, anxiously waiting for the rain here in the valley and snow to drop up in Tahoe so we can hit the slopes! 
Playing with my daughter in the backyard

I enjoy our time together while Ethan naps. 

These leaves will all be gone soon!
Soaking up their green while we can.
Shared on: Wellness Weekend 
Print Friendly
Posted by Amber at

Labels: appetizer, fall cuisine, GAPS, Paleo, SCD, vegan.

Sunday, October 30, 2011

Monthly Round-Up (October 2011)

Is it me, or did October FLY by?  It’s sad for mommies to feel time going by so fast.  I looked at my 5 year old daughter the other day and couldn’t believe how big she appeared to me.  It’s exciting to see them grow, develop and learn new skills, but also sad to say goodbye to each passing year of their childhoodit’s such a special, precious time.  And my son!  He’s 2 going on 5 trying to keep up with his big sister.

This month was filled with some pretty exciting recipes.  Here are my favorites this month (some I have tried, some I look forward to trying).

Do it yourself: Raw coconut butter
{How easy and amazing does this look?  Can’t wait to try this}.

And how about raw pumpkin ginger and cranberry parfaits? 
{I have no words.  Okay, I have a few.  
This looks so super easy and SO super healthy!   
This one is on my to-make ASAP list!}

Blueberry honey pie with coconut whipped cream
{Made it, love it!}

Gluten & Grain free crab cakes
{I can’t wait to try these!  I am in love with the ingredients}.

Do it yourself: sweet curry powder
&
Do it yourself: pumpkin pie spice

And

How cute are these zombie eyeball cupcakes
{looking forward to making these}
  
Spicy Pumpkin Hummus
{This looks so fantastic!  Can’t wait to try it}.
Gluten-free vegan banana cranberry spice muffins
{made these but didn’t have any cranberries on hand.  Still delicious}

Green kids
{from one of the most beautiful food sites out there}
See you in November.
AndHappy Halloween!
Print Friendly
Posted by Amber at

Labels: Monthly Round-Up.

Friday, October 28, 2011

Paleo Pumpkin Pie Bites with Maple Coconut Whipped Cream (free of: grains, dairy, cane-sugar)

(grain free, gluten free, dairy free, cane-sugar free, egg free, soy free, gum freebut oh so flavor-FULL)

The other day I was really wanting some pumpkin pie and thought, could I possibly make something a little easier that would satisfy this pumpkin pie craving?  
And yes I did, and yes it did! 
These little cookies taste just like pumpkin pie.  The ingredients include crust and puree, so I mixed the best of both pumpkin pie worlds.  These are my 2-years old son’s new favorite snack

Ingredients
Dry
-1 cup pecans (refrigerated nuts work best, as you can blend a little longer without releasing the oils too quickly) 
-1/2 cup almonds (same as above) (or 65 grams of Bob’s Almond Flour) 
-1/2 cup coconut flour (65 grams)
-1/2 teaspoon ground ginger
-1/4 teaspoon salt
-1/2 teaspoon pumpkin pie spice 
Wet
-1/4 cup maple syrup (honey would be great too)  – please measure out in a 1 cup glass Pyrex.
-1/8 teaspoon liquid stevia 
-2 tablespoons of walnut oil 
-1 teaspoon vanilla 
For topping, try: Maple Coconut Whipped Cream

How To:
In food processor

1.  Grind almonds first in food processor until coarse 
2.  Add pecans and blend with almonds until nuts release a bit of their oil (see picture below) 
3.  Add coconut flour, ginger and salt: blend until incorporated

Please note:
(If using Bob’s AF (or another almond flour), add the pecans to the food processor first, and process until they are completely ground, but do not grind too long, as they will turn into pecan butter.  After you grind the pecans, add in the almond flour (pulse a few times), then the rest of the dry ingredients and pulse together until well incorporated).  

In a separate bowl (wet ingredients)
1.  Mix pumpkin puree with maple syrup, vanilla, stevia, and oil
2  Add the dry ingredients into the wet and mix with hands – play with your food – it’s fun!
3.  This mixture will be thick AND sticky – don’t be afraid – this is not a fail.  The final product will be yummy and moist.. 
4.  With semi-oiled hands, roll out small balls and smoosh down into little cookies
5.  Bake 375 degrees for 12 – 15 minutes (or slightly brown on bottom, check at the 12 minute mark)

Notes:
*If you use coconut oil it will change the texture of the dough, color of the cookies and final texture of the cookie.  See below for pictures of the cookies used with coconut oil. They will be slightly moist in the middle, which is what you want, but firmer than if you used just regular oil (such as grapeseed). 
*These are wonderful warm right out of the oven and firm up pretty quick as they cool.  
*Ah, these are so good!  My new favorite snack on the go.
Grind the almonds first until fine, pulsing works best and cold almonds work best (I use whole almonds – with skins)
This is what the mixture looks like after you grind with the pecans:
You will be able to make a ball with the almond/pecan mixture:
After you add the coconut flour, salt, ground ginger, and pumpkin pie spice, and pulse a few times, it should become very light and fluffy:
This is what the cookie will look like if you use coconut oil.  Here I mixed melted coconut oil into the other wet ingredients but the maple syrup was cold and it made the overall liquid mixture very thick and therefore the dough was thicker.  I recommend using room temperature maple syrup.  Also, I used a sugar pie pumpkin.  With the cookies pictured above, I believe I used a Cinderella pumpkin (pumpkin meat is much darker).  

Shared on Gluten Free Holiday 2011, Just Another Meatless Monday, Melt in your Mouth Mondays, Monday Mania, Ruth’s Real Food 101 (Mondays), 
Print Friendly
Posted by Amber at

Labels: cookies, dessert, fall cuisine, Paleo.

Thursday, October 27, 2011

Ditch The Can: How to Make Delicious Pumpkin Puree

Making your own pumpkin puree is easy as….pie?  Okay it had to be said.  How about Sunday Morning?  Easy Peasy?  Let’s stick with pie.  It’s truly easy, fun and very satisfying.  As is anything you can do from scratch and without packaging.  A few years ago I bought a bag of almond meal/flour on-line.  It was my first and last time for that.  I immediately started grinding my own organic almonds here at home for recipes.  Simple, fresh, organic, no packaging  – no waste. 

What was I talking about?

Oh, yes, bad puns.

Okay so first you need a pumpkin.  

I just throw mine right in the oven. 
 Lazy?  Perhaps.
Easy?  Yes!
Maybe it’s just me, but sometimes I feel like I’m wresting with the raw pumpkin – it’s aggravating.  I love the way the knife slips into the tender meat when it’s all hot and roasted.  

Step 1: roast a pumpkin
{400 degrees for 70 minutes for a 4 or 5 lb pumpkin, roast longer and until soft for heavier pumpkins}
Step 2: allow to cool and then remove skin and seeds
Step 3: chop- chop OR scoop out into a food processor 
Not ALL pumpkins will cube like this, it depends on the variety.  
Step 4: Add to food processor 
Step 5: add 1 teaspoon pumpkin spice mix to 1 cup of pumpkin puree.  I usually have about 4 cups of pumpkin (so 4 teaspoons spice mix).  Blend in food processor until incorporated. 
Here is a groovy recipe for pumpkin pie spice mix if you are so inclined to make your own.  

Now you’re ready to make something tasty.  
Print Friendly
Posted by Amber at

Labels: fall cuisine, how to.

Tuesday, October 25, 2011

New Grist Gluten Free Beer

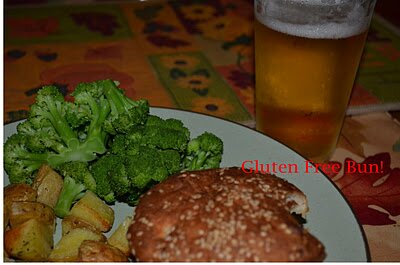
Who says Monday night dinners are boring?  Not I says the girl who just made the most delicious veggie turkey burgers – EVER!  Oh, and did I mention the gluten free beer.  So here is an excellent example of living and eating without sacrifice, without regret, without leaving anything behind (ahem, except a bloated gut).

Okay so about the beer.  My local Coop has a nice selection of gluten free beers.  Thought it would be fun to pick some up.  My preference has always been dark beer, the darker the better.  Guinness is my favorite.  Particular is the word to describe my preference: when it comes to beer, I turn down the light variety faster than a poor college kid can down a warm can of Natural Ice (ouch, bringing back some memories here).  But alas that delicious Guinness does not love me.  I don’t know if it’s the Crohn’s Disease or just age, but a bottle of Guinness can tare me up pretty quick.  I’ve had about 5 glasses in the last 6 years.  No can do in the Guinness department, but I was determined to enjoy a glass of beer with burger night.  

Let me share my husband’s response to the gluten free beer.  Keep in mind that he does not discriminate when it comes to beer.  He likes imports, but he will drink Coors light just the same (gag).  
Okay, he said, “Wow, this beer is really good, I like it. It has a caramel taste to it.  It reminds me of a Pacifico. Yeah, good stuff.  You can’t tell it’s not a wheat beer.  The carbonation is a little different.  Overall I like it, it goes down smooth, it’s great {and I love this part} I feel way less bloated!”

My response to his critique, “I didn’t know you experienced bloat from beer?!” Learned something new tonight about the man I’ve loved for nearly 13 years – he gets bloated too (I am apparently way too boisterous about my bloat).  
Back to the review.  I noticed something different about this beer right off the bat: I didn’t hiccup when I took a drink.  Regular beer never failed to induce an instant hiccup at first sip; and overall I despise carbonation for this gas factor and also because it’s weird (hence my love of Guinness).  So no hiccup and no nasty light beer after taste.  Come to think of it, no remarkable after taste at all.  Like Scott said, it’s very smooth.  It’s light of course, but flavorful.  I experienced zero bloat.  It was a strange sensation at first.  I’m so used to immediately unbuttoning my pants shortly after that first sip.  
I like it, I will buy it again, I will bring it to parties (if we ever get to one) and I will trick my friends and lay the gluten free factor down like “What, gluten free is awesome and fun.”  

CHEERS!   
Print Friendly
Posted by Amber at

Labels: beverages, Product Review.

Monday, October 24, 2011

Pumpkin Spiced Teff Pancakes with Maple Coconut Whipped Cream and Toasted Pecans

I know this looks like a breakfast, and in theory it is, but can I tell you that it tastes like dessert!  And why shouldn’t one start the day on such a sweet note?  Sweet and healthy that is.  My two and a half year old son, Ethan, thought I gave him cake this morning.  We were all laughing as he declared, “More cake please Mommy!”  

Ingredients

Pancake:
-This teff pancake recipe (sans the banana – and plus 2 Tbsp of water) 
-1/2 cup fresh, plain pumpkin puree (how to make pumpkin puree)
-1/2 teaspoon pumpkin pie spice mixed with the 1/2 cup pumpkin puree 

How To
1.  Mix dry ingredients in a bowl
2.  Mix wet ingredient with pumpkin puree and additional water
3.  I would take caution with adding any additional sweetener to the batter. The dish becomes very sweet with the maple coconut whipped cream.  The pancakes are meant to compliment, rather than overpower the other flavors

Ingredients

Maple Coconut Whipped Cream:
-1 can cold Thai Kitchen coconut milk – you may need this brand due to this issue with coconut milk
-2 teaspoons vanilla 

-3 tablespoons maple syrup, or to taste (we love grade B)
-1/2 teaspoon thickener of choice (if the coconut cream is too runny, you just never know from can to can).  I like to use xanthan gum to thicken.  Works great.

How To
1.  Refrigerate the can of coconut milk for at least 3 days prior to use (I usually leave it in there for a week or more).  In fact, I store about 5 cans of coconut milk in the fridge and use them as needed.  
2.  Scoop out the cream into a bowl, not the coconut water (which you will see at the bottom of the can; save that for another day and recipe).
3.  
Add vanilla and maple syrup to coconut cream and blend with a hand mixer.  Add in thickener if needed. 
4.  Store remaining cream in refrigerator.  It will also thicken quite a bit in the fridge, so this is a good idea to make the day before! 

Oh, and don’t forget to lightly toast those pecans!

*
Shared on: Freaky Friday, Fresh Bites Fridays, Lunch Box Love Fridays, Fight Back Friday, Friday Food, Make It Gluten Free Tuesdays
Print Friendly
Posted by Amber at

Labels: breakfast, fall cuisine.

Friday, October 21, 2011

Homemade Jojoba Shea Butter Lotion: for dry skin and eczema

When my son Ethan was 5 months old he developed eczema all over his body.  It wasn’t entirely a surprise.  My husband develops terrible eczema on his hands during the summer/winter months.  So when it started showing up on Ethan it was all about holistic healing and comfort…and time.   
 
I started with food. I was nursing Ethan so I would systematically cut out foods from my diet that I suspected might be aggravating his skin.  Food didn’t seem to change his skin much.  Already 100% dairy free, sugar free, soy free, etc, I cut out eggs for a while.  I also experimented with wheat and nuts.  We noticed that during the cold months his skin was dry and susceptible and during the hot months his skin was dry and susceptible.  I would say that staying on a allergy free diet helped his skin from becoming worse than it already was, and allowed time and other natural remedies to work and heal the inflammation. 
 
Our pediatrician, like most pediatricians, suggested the steroid cream.  Scott never had much success with this sort of cream and he also didn’t particularly like the ingredients – very intense stuff.  So we both knew this just wasn’t an option…or for us a very last resort option.  For the most part Ethan was smiley, happy and easy going.  He appeared comfortable.  He wasn’t distressed or preoccupied with itching his skin.  So that being said, we continued with holistic/homeopathic remedies including:
 
1.  Keeping his nails trimmed 
2.  Always covering the weepy patches of skin, but also allowing the skin time to breathe now and then
3.  Dressing in only 100% cotton or organic cotton clothes
4.  Gentle soap (like Dr. Bronner’s) to wash his clothes
5.  We did not bathe him every night
6.  During baths I would often put chamomile tea in with his bath water (steap about 8 cups of water with 8 tablespoons loose chamomile flowers )
7.  Moisturize, moisturize and moisturize!  We kept his skin very lubricated, especially during the winter months.
Side note: I’m not kidding when I tell you we used just about every organic, natural cream on the market.  We found these at our local Coop and I also found products on-line from small organic companies (this is a great blog for such a purpose).  I was very picky about what I put on his skin, obviously.  We did not use lotions filled with preservatives, parabens, SLS, phthalates, glycols, petroleum, artificial fragrances, PEGS, PGG, MEA, TEA, DEA, etc…the list goes on and on…and so the list of what you can use gets smaller and smaller.
 
I didn’t think about making my own lotion at the time.  I wish I had because we all know those organic creams are EXPENSIVE!  
In time his eczema decreased, starting with his face.  By his first birthday his face looked great.  Next his arms improved to zero areas of inflammation much like his face, his back and stomach followed.  His legs improved greatly but this is still the area of concern.
 
Last summer I purchased my last store-bought cream/oil.  I was determined to make my own dry skin/eczema remedy and found three ingredients that target inflammation 
(and ingredients I frequently saw in the store-bought brands):
1.  Jojoba Oil
2.  Chamomile Flowers
3.  Organic Raw Shea Butter
So here is what I did…
 
1: Purchased 16 oz. of raw, organic shea butter ($10).
2: Purchased 8 oz. of organic jojoba oil 
(from bulk at our Coop – $5)
 
3: Purchased 1/2 cup dried chamomile flowers 
(from bulk at our Coop – $1.50)
 
4: Infused jojoba with chamomile for 2 weeks
5: Strained through cheese cloth and TADA…chamomile infused jojoba oil! 
6: Raw shea butter is super hard so I placed it in a glass bowl and let it sit in the sun for a few hours to soften.  Worked great.  Above picture is a few hand stirs with a spoon after the sun bath
 
7: I added the strained oil to the shea butter and whipped with a hand mixer until well incorporated
Notes:
1.  This lotion is oily.  Take caution when applying it around fabric you love, as oil may transfer
2.  It soaks into skin after a bit and should be noted it’s much less oily than just applying straight oil
2.  This would be a terrific hand treatment at night with cotton gloves
3.  Apply immediately after shower/bath to affected areas
4.  This mixture of ingredients has a fantastic shelf life
5.  Experiment with other healing herbs/oil 
 
Here are some pictures of Ethan’s skin.  I never took any of his body because it was usually covered.  I look back at these and smile ear to ear.  He was such a chubby little thing! To give you an idea, he weighed 17 lbs. at 4 months old! And I’m not kidding when I tell you he was a happy little thing too – always a smile on that red little face.  Mommy kept him very comfortable!
Overall, his legs were the worst.  He had many patches of skin that were weepy, he also had these patches on his arms.  Keeping these patches covered prevented itching and aided in healing.
And, here he is in 2010:
This face looks so much better.  His cheeks healed with time, as did his arms, back and stomach.  We are happy about declining the steroid cream.  This this was a personal choice and every parent should decide what will be best for their child and what they are comfortable administering.  I would say he outgrew the worst of it. Keeping him on an allergy-free diet is very important despite the little change we noticed in his symptoms early on.  He is currently dairy free, gluten free, sugar free, soy free, chocolate free and nightshade free.  And we keep that skin super-duper moisturized with our awesome new lotion.  


Still a very smiley little guy!!  

See HERE for a list of all my homemade lotions 
Print Friendly
Posted by Amber at

Labels: beauty, eczema, Holistic healing, homemade remedies, how to.

Wednesday, October 19, 2011

Pasta with Delicata Squash Sauce

I simply adore delicata squash.  I also adore pasta.  I thought these two should meet.  Over the years I’ve made a variety of cheese-less pasta sauces, generally made with various types of squash, and of course nuts, but I have to say, this is my favorite.  I kept the sauce very simple – like a base so it’s very easy to add different ingredients/seasonings.  Stay tuned for more delicata love: chicken and delicata squash enchiladas with vegan sour cream!  

Ingredients:
-4 delicata squash, peeled, seeds removed and chopped 
-1/2 yellow onion, chopped
-Oil of choice for roasting 
-2 teaspoons + 1 tablespoon garlic granules
-1/2 teaspoon salt (or to taste)
-Pepper to taste
-Water for boiling 
-3 cups chopped mushrooms (of choice) I used portobello
-1/2 bag frozen peas, steamed 
-4 1/2 cups gluten free pasta (I used Tinkiada spirals- so lucky they have these in bulk at my Coop)

How To:
1.  Add chopped squash, onions, and 2 teaspoons garlic granules with a drizzle of oil to favorite roasting dish and roast on 400 for about 40 minutes.  Every oven is different, so check at around 30 minutes.  Remove when tender. 
2.  Bring water to a boil and cook your pasta
3.  Add some oil to a pan and saute mushrooms until tender.  
4.  Steam the peas. 
5.  When the squash is done, place in a blender with 1 tablespoon of garlic granules, 1/2 teaspoon salt, and pepper to taste.  Blend, adding water until desired consistency.  I added quite a bit of water and it didn’t dilute the taste.  
6.  Toss some of the sauce with your pasta.  Add mushrooms, peas and combine.
7.  Freeze leftover squash for another day.

Notes:
*This makes a very sweet sauce.  It’s a fun twist on your everyday red sauce, or your pasta primavera. 
*Experiment with different varieties of squash; I’ve used butternut and kombucha.  
*Add different veggies to this dish to transform the flavor: chopped tomatoes, basil, asparagus, different mushrooms, green beans, broccoli, Brussels sprouts, etc.


Shared on: Just Another Meatless Monday, Manic Meatless Mondays, My Meatless Mondays
Print Friendly
Posted by Amber at

Labels: fall cuisine, main dish, vegan, vegetarian.

Saturday, October 15, 2011

Tasty Alternatives to Traditional Halloween Candy

 Healthy versions of some traditional Halloween treats    

Rice Crispy Chocolate Bars
(my spin on a traditional candy bar)

Ingredients
*I used this recipe for “rice crispy treats” from the Gluten
Free Goddess for the inside of the bars
*One bar of this chocolate for the coating
*Shredded coconut, if desired

How To
*I made the above rice crispy treats, smoothed the mixture out
on a silicone baking mat  – around 1 inch high.  Chilled them
in the fridge until nice and solid.  Then cut them into bars
*Melt an entire bar of chocolate on a double boiler (I fashioned
my own using a small 8″ non-stick saute pan on top of a small
sauce pan filled with some water)
*Quickly cover bars with chocolate, rolling them around
with a wooden pair of tongs.  When fully coated,
transfer immediately to a cooling rack with a baking sheet
underneath to catch the chocolate drippings
*Transfer to fridge until cooled
*These do very well sitting out at room temperature,
the chocolate does not melt.  Perfect to eat like a “candy bar”


These are so decadent.  But I love that the 

chocolate bar is only sweetened with 

filtered beet sugar.  
My husband said the 
coconut covered
ones tasted (like, but much better 
than)
a Mounds bar.


Chocolate Covered Figs
(my spin on a Tootsie Roll Pop)
Ingredients
*Fresh Figs
*One bar of this chocolate for the coating

How To
*Melt an entire bar of chocolate on a double boiler (I fashioned
my own using a small 8″ non-stick saute pan on top of a small
sauce pan  filled with some water).
*Place lollipop stick into fig.  All I had on hand when I made these was a few wooden skewers, a little too sharp on the end for children.  I found some 4″ lollipop sticks here in town the next daymuch better.
*Using a silicone spatchula, drizzle chocolate quickly over fig 
*Be sure to get some chocolate on the area between the stick and the fig, this will provide a nice hold, like a glue, ensuring the fig won’t fall off.  I missed this on a few as you can see in the above picture and these were much more precarious
*Transfer immediately to a cooling rack with a baking sheet 
underneath to catch the chocolate drippings
*Transfer to fridge until cooled
*These do very well sitting out at room temperature,
the chocolate does not melt.  Perfect to eat like a “Tootsie Roll Pop”

These fig pops are so delicious! I was very pleased with 
how they turned out.  These would make super 
cute hors d’oeuvres at a party!


Caramel Pops and Caramel Apples
(My spin on traditional caramel)

Ingredients
*5 Tablespoons brown rice syrup (or Yacon Syrup might work)
*5 Tablespoons coconut sugar
*1 Tablespoon coconut oil

How To
*Spray some oil on wax or parchment paper and strategically place lollipop sticks on paper
*Have a small space on paper sprayed with oil for the apple.  Have apple ready (with wooden skewer firmly in place) 
*In a small non-stick saute pan (same as used above but not as a double boiler) heat brown rice syrup until bubbly, always stirring quickly to avoid burning
*Add in coconut sugar and coconut oil and stir quickly 
*Keep on med/low heat with a slight bubble for about 2 minutes stirring the entire time to prevent burning
*Remove from heat and continue stirring for about 30 seconds
*With a silicone spatchula, pour a small amount of the sauce on the end of each lollipop stick. Let it sit and repeat once more, this will make it a little thicker and give the stick a little more to hold on to
*For apple, hold apple by the skewer and drizzle the sauce quickly over apple and then place on the oiled paper 
*Transfer lollipops and apples into the fridge to cool
*When the sauce has hardened, take out items and remove from paper.  You may get a little paper stuck on your treat, but it peals off pretty easy
*I suggest eating the lollipops right away, as they do get a little soft at room temperature
*Slice apple and let it sit at room temperature before eating.  The sauce turns ooey and gooey when it warms up.  So delicious with the tart apple!
*You will see in the picture below (the pops in the jar) here look a little different than the flat version described above.  For these I made another batch of the sauce and let it cool a little and then started pulling it like taffy.  It took a bit to get the texture just so, but it allowed me to make a thicker sucker
*This recipe may work with honey (instead of the brown rice syrup) or with Yacon syrup, but I didn’t test it out. 

I haven’t had “real” caramel is so long.  It was even years before I was diagnosed.  I never loved caramel, but I thought this would be a fun challenge and I am very please with how it turned out. And I am now remembering that as a young girl I was forbidden to eat caramel apples due to a mouth full of braces.  Bummer.  For fun I looked up a traditional caramel recipe and can I tell you that my stomach started hurting from just reading the ingredients

Print Friendly
Posted by Amber at

Labels: candy alternatives, dessert, Halloween, holidays.

Thursday, October 13, 2011

Homemade Sunflower Seed Butter (Sunbutter)

I am deathly allergic to peanuts.  It’s no fun to have an allergy but I’m so impressed with how far we’ve come with peanut allergy awareness.  What a difference I’ve seen.  I remember as a young child riding on an airplane and feeling so sick to my stomach at the very smell of the peanutsand hungry because I was out of luck in the snack department.  A few years later they started serving pretzels as an alternative to peanuts on flights.  I don’t even think they give out peanuts anymore, do they?  Skylar, my daughter, is not allergic to peanuts and I don’t know if my son Ethan has inherited this allergy?  At any rate, we’ve been using sunbutter for quite some time as an alternative to peanut butter.  It’s a nice change from the usual almond butter.  I like this brand but don’t love the price and don’t love the plastic container.  So I decided to make it myself.  And you know what……SUPER EASY!!! Sky couldn’t even tell the difference between my homemade version and the store bought variety.  And that’s all I needed to move into permanently making sunflower seed butter.  Hooray! 
gorgeous sunflower from my garden!

Homemade Sunflower Seed Butter 


Ingredients:
-3 cups of organic raw sunflower seeds
-Pinch of salt (optional) 

How To
1.  Toast sunflower seeds for a bit until fragrant and slightly brown.  Cool seeds.  
2.  Add the cooled seeds to a food processor and start blending; scrape down sides every minute or so for about 5 minutes.  
3.  After about 6 minutes the seeds will form a ball then become thinner as the oils in the seeds are released.  
4.  After about 8 minutes of processing you can add in a pinch of salt, but this is totally optional. It should be properly blended by this time.  Store in class container in the refrigerator.  
Yields 1 1/4 cups of sunbutter
I have a small, OLD food processor and it works great.  
Just be sure to scrape down the sides a few times so the
mixture has contact with the blades.
Speaking of Sun
It has been so gorgeous here in Northern California.  Finally, finally, cool fall weatheralthough it’s supposed to be up near 90 degrees today, there is still a soft, clean feel to the air.  I adore this time of year.  Below are some pictures from around our yard.  Wish I could just bottle up this weather.
Our neighbor’s lemon tree is showing some action!  
They let me go over there whenever I have the need and pick to 
my heart’s content.  
Our other neighbor has a nice fig tree with a sizable
bunch hanging on our side of the fence!  
So excited for these!
We still have watermelons to harvest!
We had quite the bounty this year.
Our tomato plant is out of control, but still providing 

us with sweet, gorgeous cherry tomatoes.

Shared on: Allergy-Free Wednesdays, Freaky Friday, Fresh Bites Fridays, Lunch Box Love Fridays, Fight Back Friday, Friday Food,  Potluck Party Back to School Recipes,  Raw Foods Thursdays,, Wellness Weekend 
Print Friendly
Posted by Amber at

Labels: allergy-friendly, dips and spreads, GAPS, lunch, nut free, Paleo, SCD, snacks, vegan.